Smiley face nails are one of the few nail art motifs that never really left. A yellow circle, two dots, and a curve — that is all it takes, and the result reads as both playful and intentional no matter the length or shape.
The design has roots in the 1970s counterculture smiley, cycled back hard during the Y2K revival, and fits right into the current dopamine-dressing wave. It works as a single accent nail or a full set, on short squovals and long stilettos alike.
These twelve ideas cover the full range. See y2k nails for more retro motifs and abstract nails for freeform art in a similar spirit.
From a classic yellow smiley on nude and melting drip smileys through retro daisy-eye, micro confetti, neon-on-black, French tip accent, pastel rainbow, checkered, chrome, line art, gradient, and full-face matte. Jump to the mood that matches yours.
Same motif, very different moods depending on how many smileys, what base, and what finish. Start here.
1. Classic Yellow Smiley on Nude — Good Morning
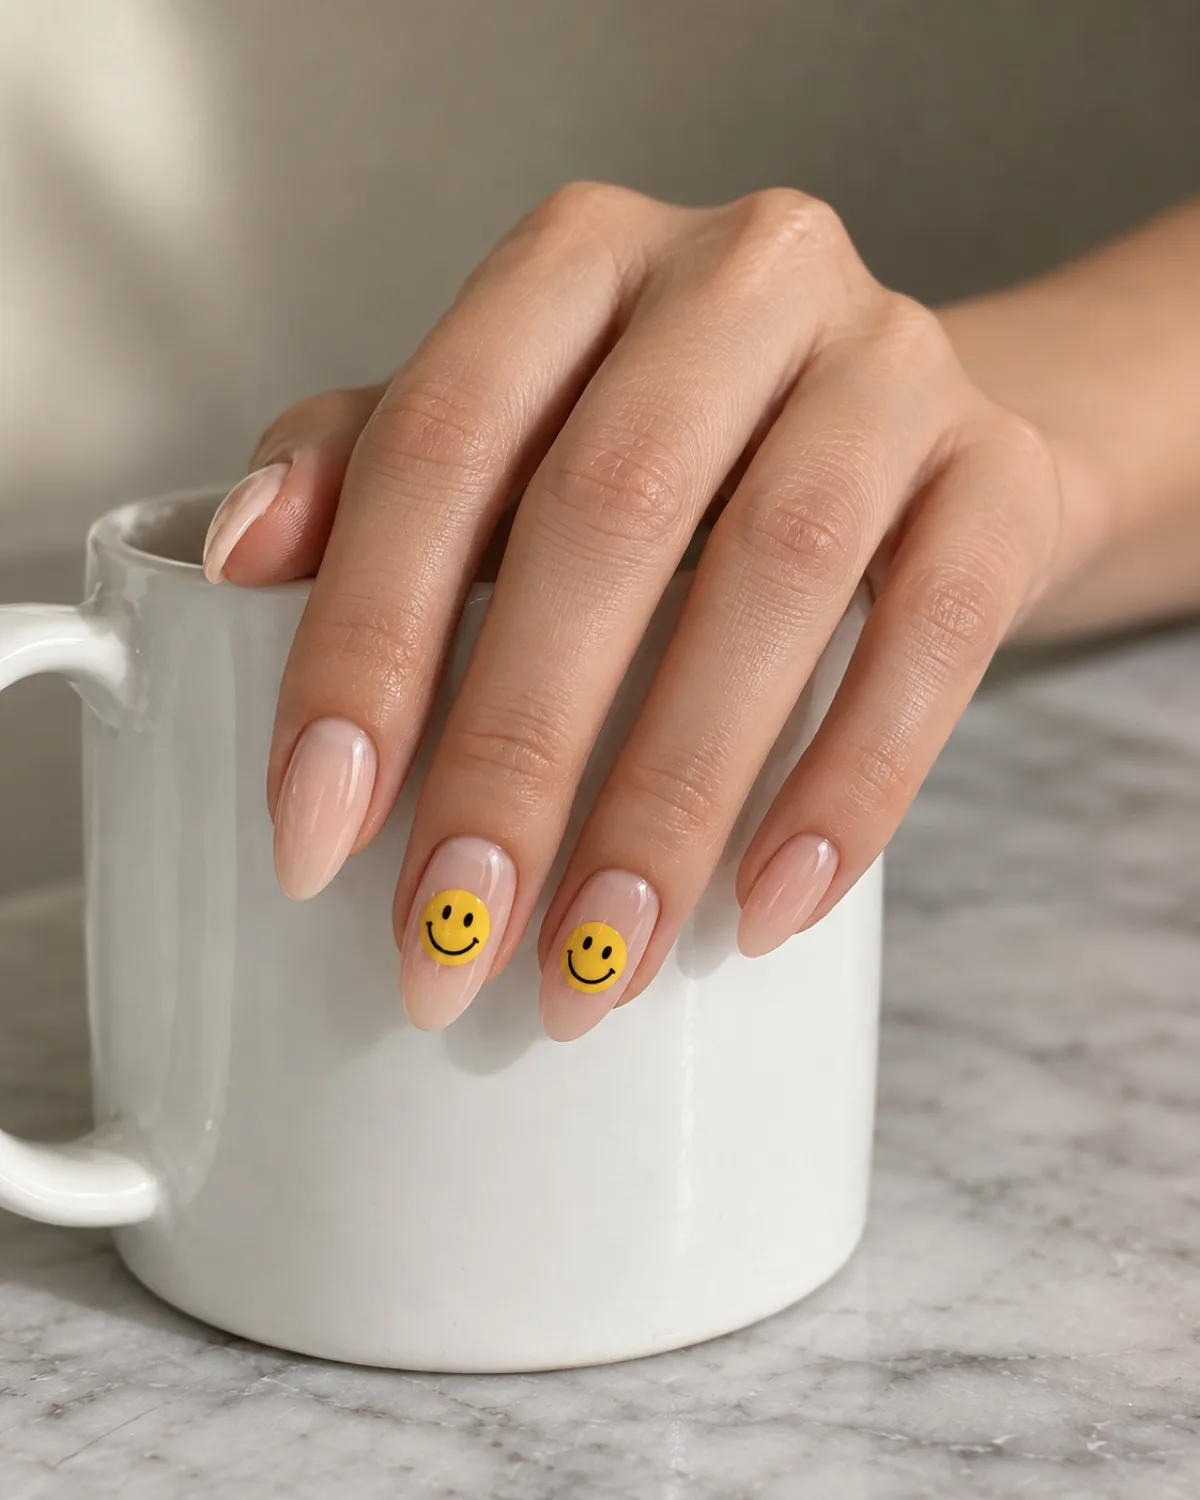
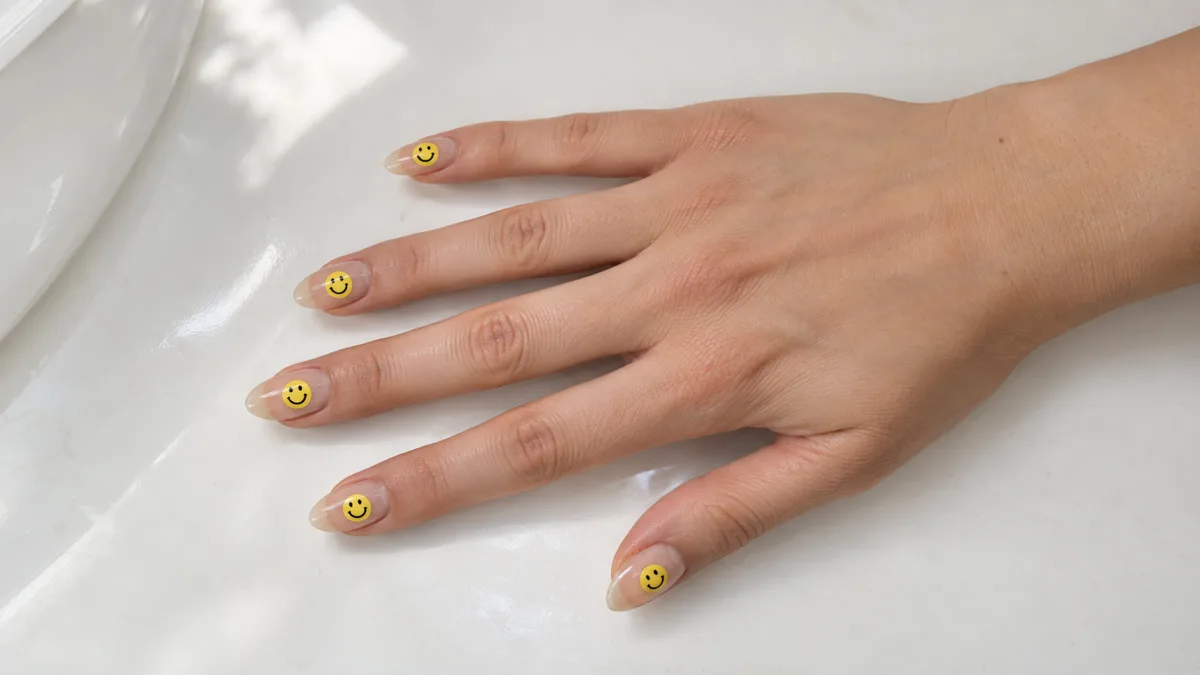
Two smileys on a nude set. Ring finger and middle finger each carry one hand-painted yellow circle with two black dot eyes and a curved mouth — the original, universally recognizable version that started every smiley face nail trend since the early 2000s.
The sheer nude base keeps the focus entirely on the motif. Almond shape gives each smiley a generous canvas without the nails dominating the hand, and the two-accent approach means the design reads as intentional rather than unfinished.
- Keep both smileys the same size: matching circles on adjacent nails reads deliberate; one large and one small looks like a mistake
- Paint the yellow circle first, let it dry completely, then add eyes and mouth with a fine dotting tool: building in layers prevents the black paint from dragging through wet yellow
- Glossy topcoat is non-negotiable: the smooth shine makes the yellow pop against nude and seals the painted detail flat so it does not chip at the face edges
The pared-back energy connects naturally to minimalist nails where less is the point.
2. Melting Smiley Drip — Liquid Happy
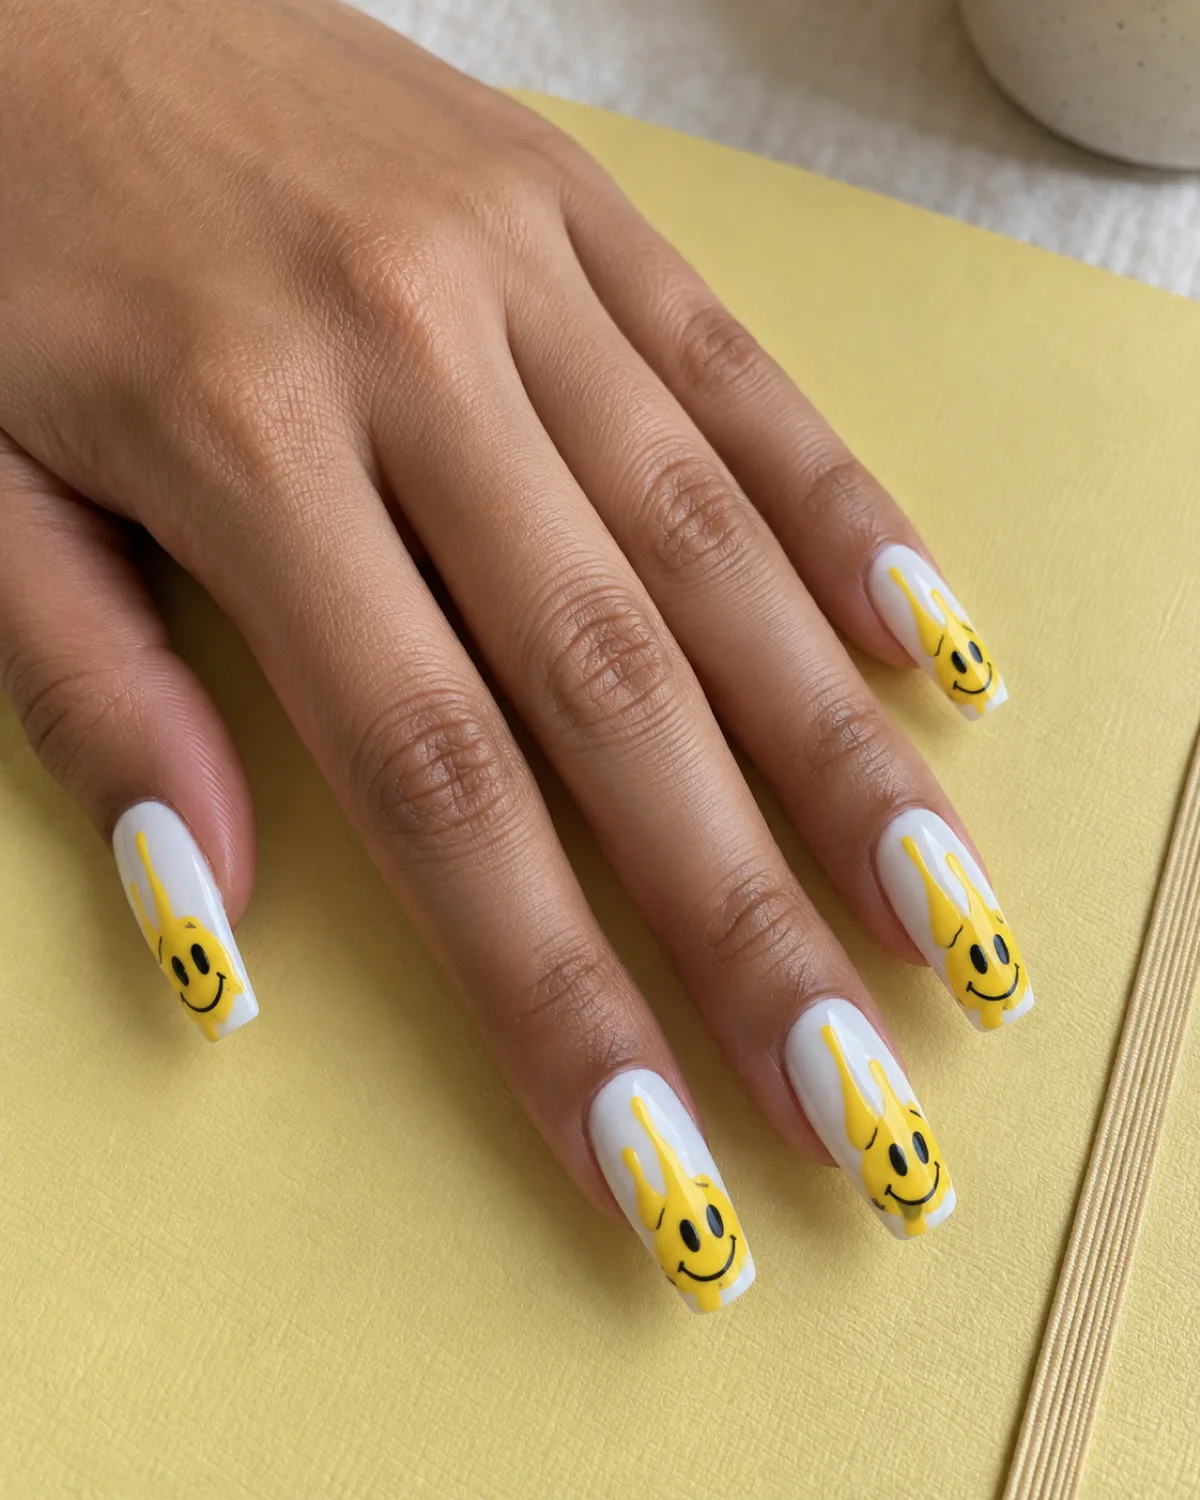
The smiley melts. A yellow face at the top of each nail drips downward toward the cuticle, pulling the eyes and mouth into a slightly warped, surrealist version of the original motif. The result sits somewhere between pop art and streetwear — playful but with an edge.
White base amplifies the drip effect. The yellow melt trails stand out sharply against the clean white, and the coffin shape stretches the canvas so the drip has room to run without crowding the nail bed.
- Paint the white base first and cure it fully: the drip detail requires a solid, non-tacky surface so the yellow trails stay sharp and do not bleed
- Drag the brush downward from the smiley circle in uneven streaks: uniform drips look mechanical; varying the length and width of each trail gives the melting effect an organic, hand-drawn quality
- Distort the eyes and mouth slightly: the whole point is that the face is liquefying — perfectly round eyes on a melting body looks like two separate designs pasted together
The surrealist edge links to the freeform world of abstract nails.
3. Retro Daisy-Eye Smiley — Flower Power
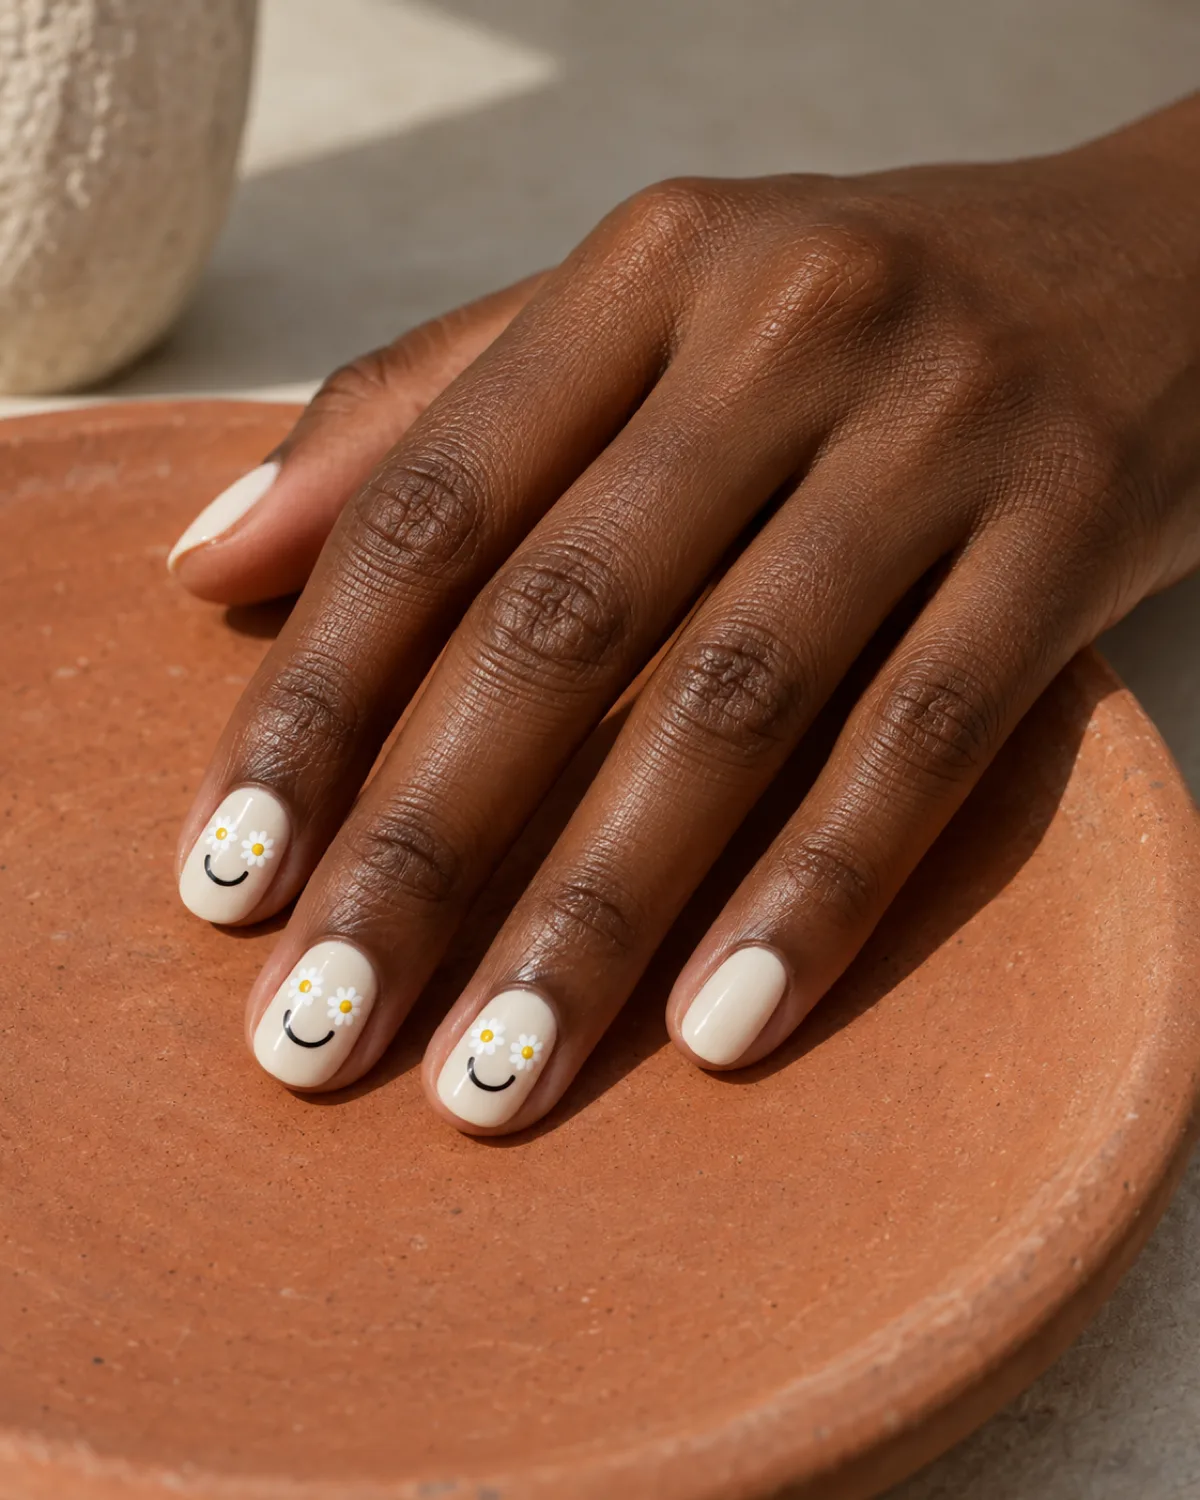
Replace the dot eyes with tiny white daisies and the smiley face jumps straight into 1970s territory. The flower-eye smiley is a specific vintage motif — it appeared on stickers, patches, and posters during the original smiley boom and reads as deliberately retro rather than generically happy.
Short round shape grounds the throwback aesthetic. The low-maintenance profile matches the casual, earthy mood of the 70s reference, and three accent nails (index, middle, ring) give the daisy-eye smiley enough repetition to register as a cohesive theme.
- Paint the daisy petals with a thin brush, not a dotting tool: five to six small white strokes radiating from a yellow center dot creates a recognizable flower at nail scale; a dotting tool gives circles, not petals
- Warm cream base instead of stark white: the slightly yellow-tinted base ties the color palette together and pushes the retro warmth; pure white under yellow smileys creates a cooler, more modern mood
- Keep the smile line wide and curved: a narrow smile reads timid; the 70s smiley had an exaggerated, ear-to-ear grin that carries the whole design
The floral element connects naturally to flower nails for more petal-forward designs.
4. Micro Smiley Scatter — Confetti Grin
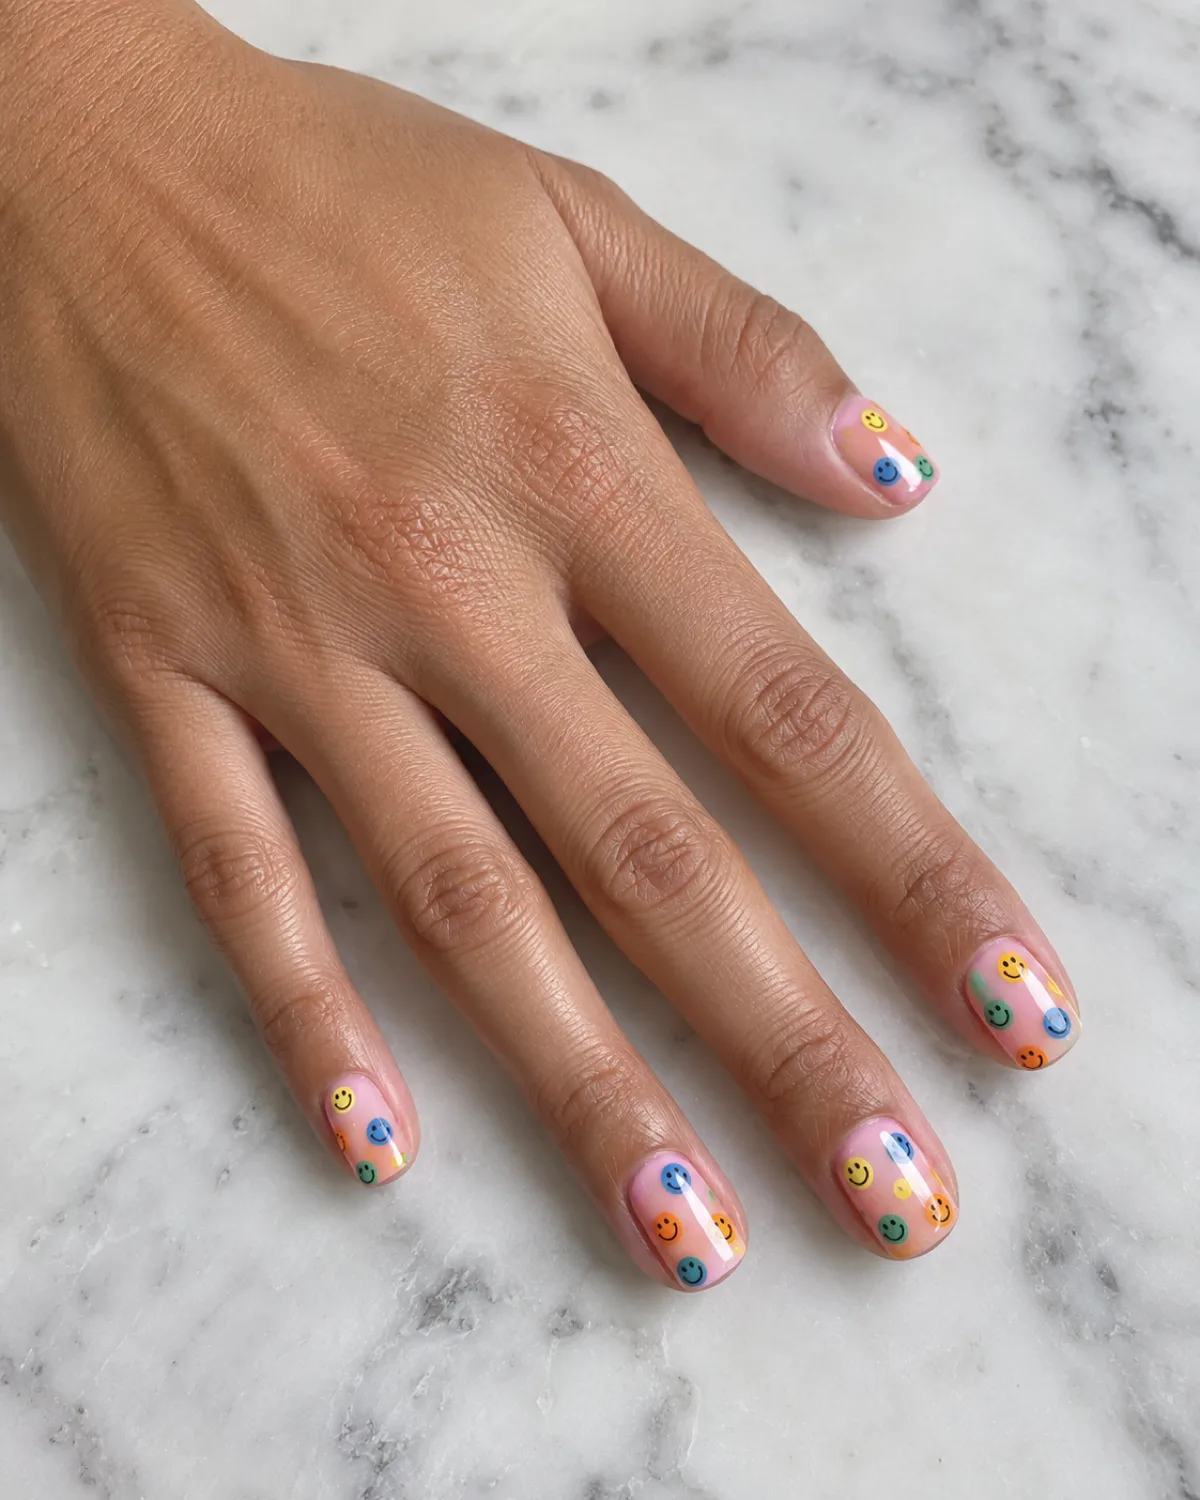
Scale the smileys down to about two millimeters each and scatter them across every nail like confetti. The individual faces are almost too small to read up close, but the overall effect is a dense, colorful pattern that catches attention in the way a print fabric does — the motif repeats without a grid.
Mixed colors push the scatter further from nail art and into textile territory. Yellow, orange, green, and blue micro smileys on a soft pink base create a palette that reads as cheerful, coordinated, and unmistakably deliberate.
- A stamping plate or decal sheet is the practical path: painting two-millimeter smileys freehand is technically possible with a 000 brush but takes significant time and steadiness; nail art stamping plates with smiley patterns exist and produce consistent results in seconds
- Keep the base color light: dark bases swallow micro patterns at this scale; light pink, white, or sheer nude gives the tiny smileys enough contrast to be visible
- Random placement is better than rows: the confetti look depends on the smileys sitting at different angles and spacings — lining them up turns the design into a grid, which reads as wallpaper, not confetti
The maximalist approach to small-scale detail connects to the density of press-on nails designs where pre-made precision is the shortcut.
5. Neon Smiley on Black — Glow Mode
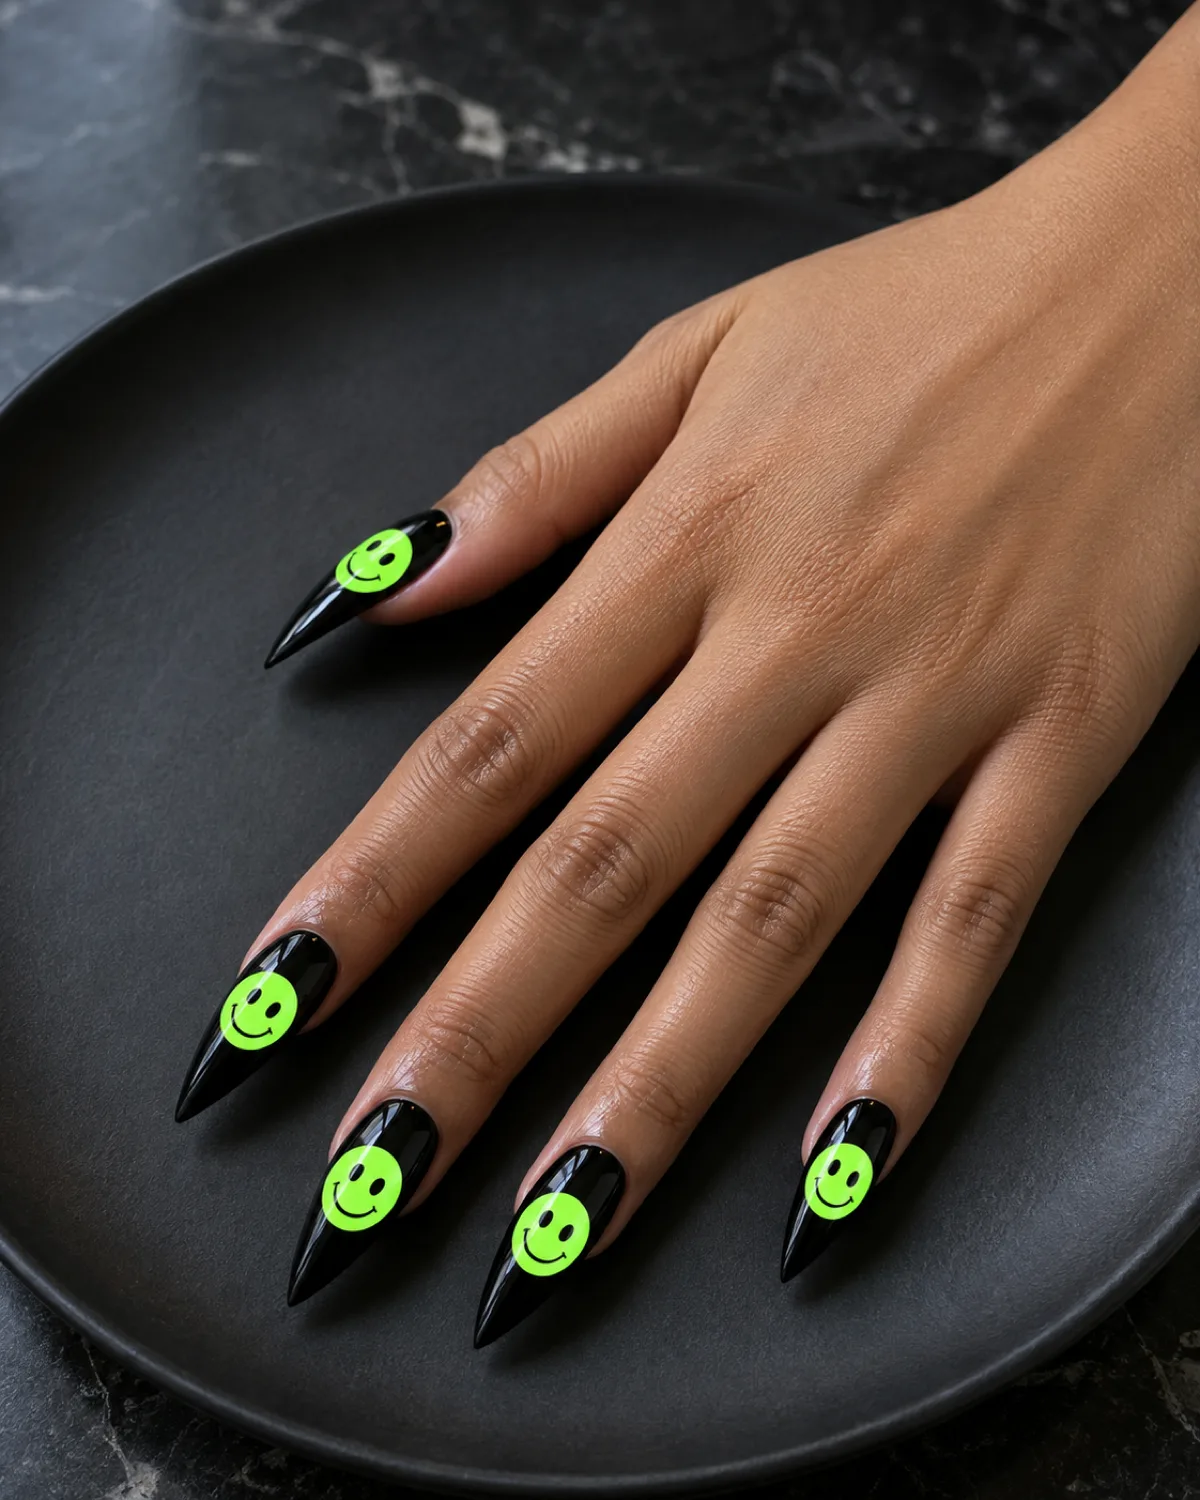
One large neon-green smiley face per nail on a jet-black base. The contrast is extreme — bright lime green against true black creates a set that glows in person, photographs with high impact, and reads as deliberately loud.
Long stiletto shape matches the aggressive energy. The sharp, pointed tip amplifies the bold color choice and gives the design a nightlife silhouette that shorter or rounder shapes would soften into something more casual.
- White base layer under the neon green: neon pigments are translucent; painting neon directly on black results in a muddy, dark green — lay down a white circle first, cure it, then paint neon green on top for maximum glow
- Black eyes and mouth must be opaque in one coat: any transparency in the facial features reveals the neon underneath and blurs the expression; use a pigmented gel paint or stamping polish
- One smiley per nail centered and large: at this scale, the face fills most of the nail bed — small smileys on a black background look like scattered dots rather than a deliberate motif
The high-energy contrast pairs naturally with the bold, retro-futuristic world of grunge nails.
6. French Tip with Smiley Accent — Tip & Wink
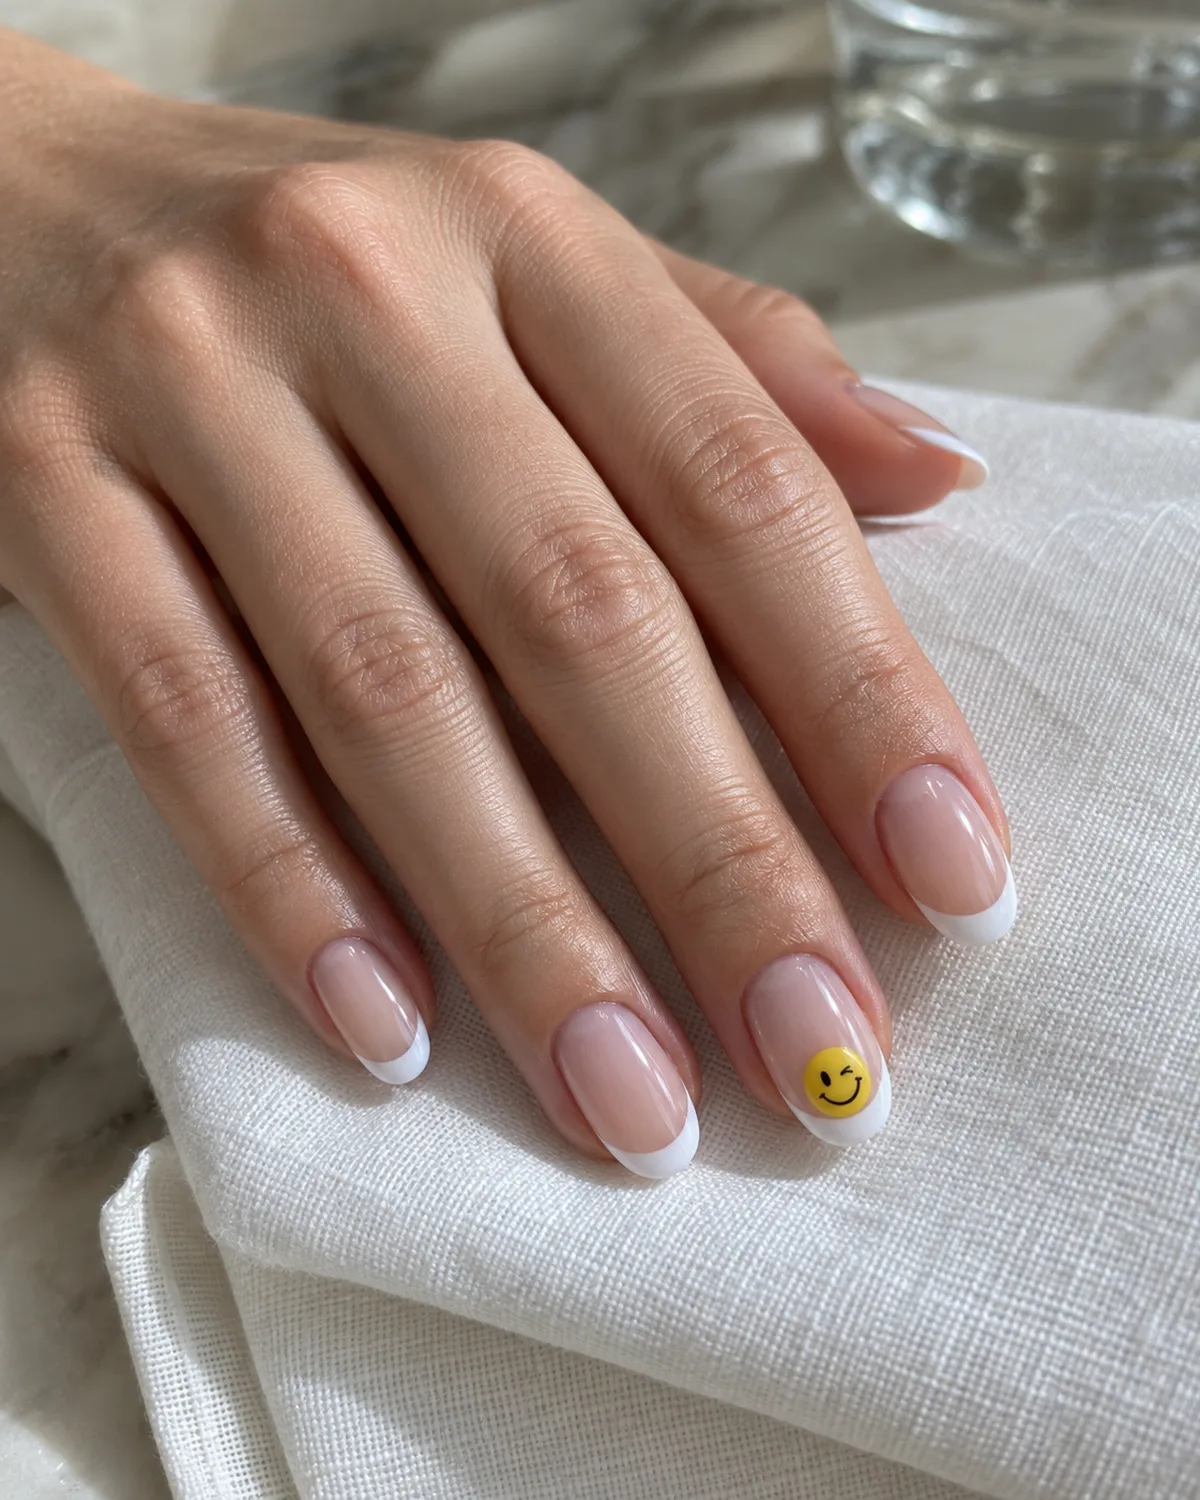
Four nails in classic white French tips, one ring finger with a yellow smiley sitting right at the free edge — half on the white tip zone, half on the sheer pink base. The smiley winks, one eye closed, which adds personality without adding complexity.
The design is a conversation between two ideas. The French manicure half says polished and traditional; the smiley half says not taking itself too seriously. Oval shape bridges the gap — rounded enough to feel classic, smooth enough to frame the winking face cleanly.
- Paint the French tips on all five nails first, then replace the ring finger tip with the smiley: starting with a uniform base means the four classic nails are already done and you only need to focus detail work on one nail
- Position the smiley so the bottom of the circle sits on the smile line: this anchors the face to the same visual boundary as the French tips, tying the accent nail to the rest of the set
- One closed eye is a single curved line: do not overthink the wink — a tiny downward curve where one dot eye would be is enough; adding lashes or thick lines overcomplicates the face
The French-tip foundation links to more pattern experiments in micro French nails.
The motif is simple — a circle, two dots, and a curve — but small errors in proportion or placement turn a grin into a grimace.
7. Pastel Rainbow Smileys — Candy Parade
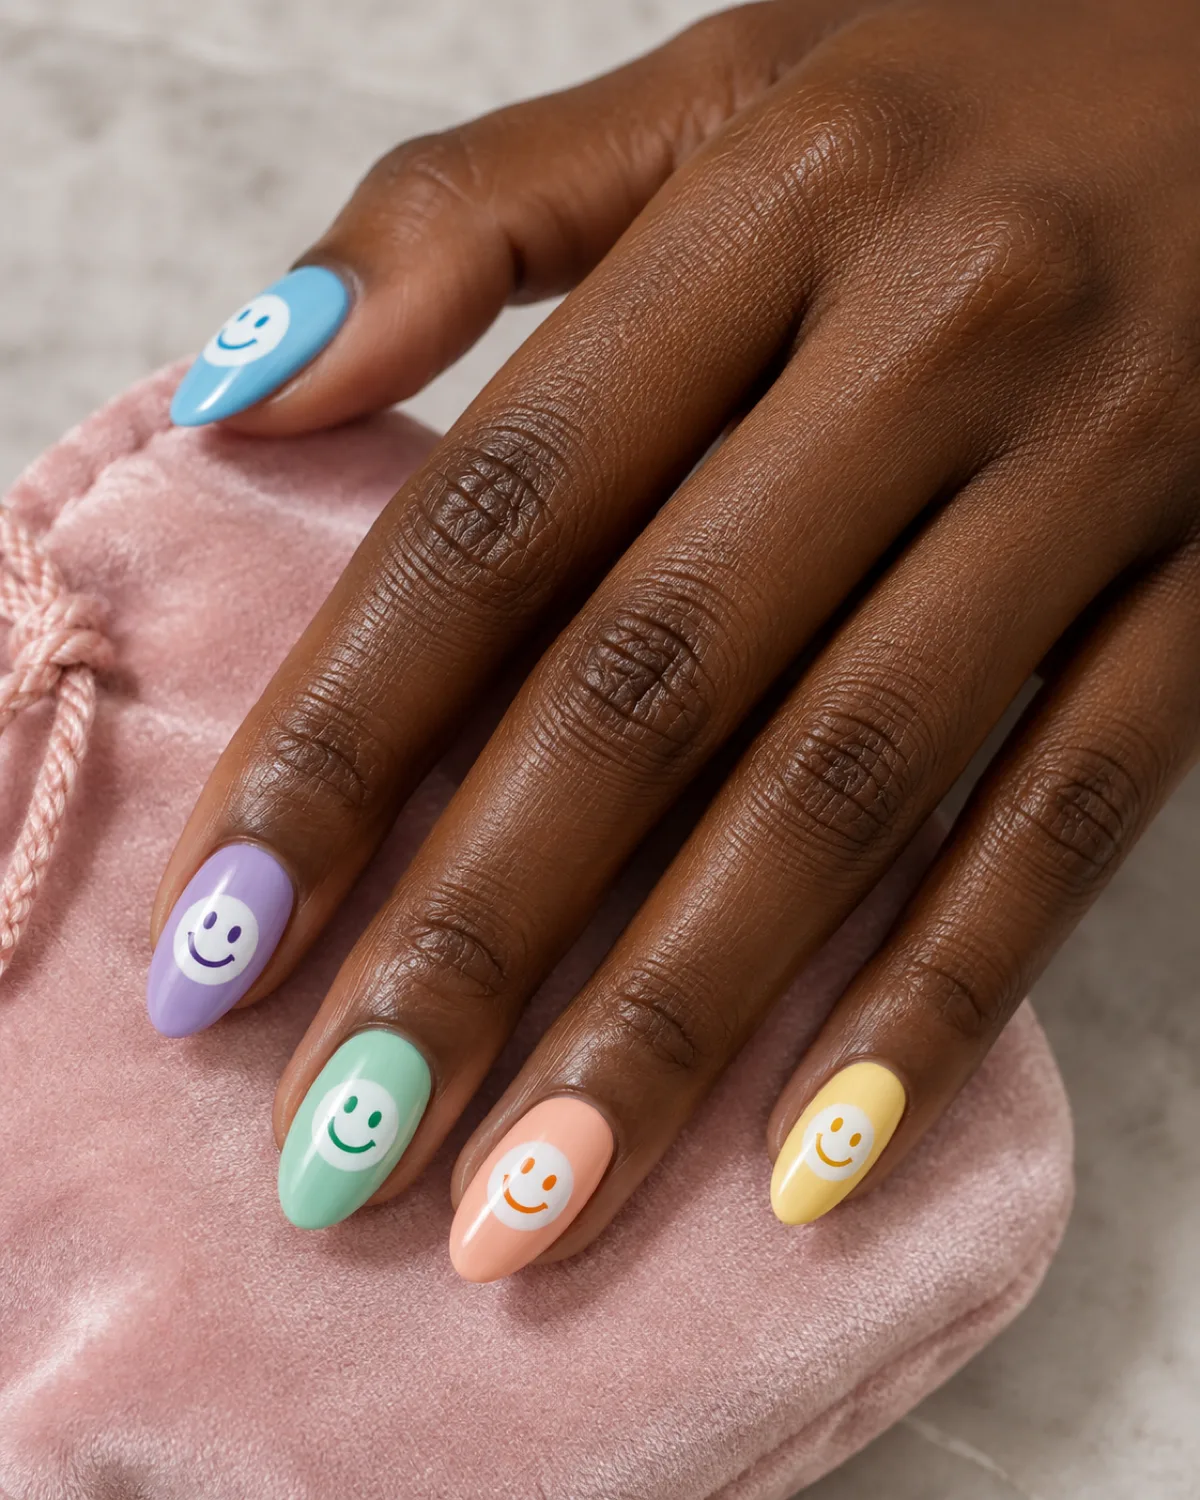
Five pastel bases — baby blue, lilac, mint, peach, butter yellow — one per nail, each carrying a white smiley face with eyes and mouth drawn in a slightly darker shade of the same base color. The result is a coordinated mismatched set where every nail is different but the whole hand reads as one palette.
Almond shape suits the soft, tonal palette. The tapered tip gives each pastel smiley a clean frame, and the medium length provides enough surface area for the face to be legible without crowding.
- Match the smiley features to the base tone: blue nail gets slightly darker blue eyes and mouth, lilac nail gets deeper purple features, and so on — this tonal approach keeps the design cohesive even with five different base colors
- The white smiley circle must be fully opaque: pastels are sheer, and a translucent white circle on a pastel base disappears — two coats of an opaque white gel paint builds the solid circle the face needs to sit on
- Consistent smiley size across all five nails: the rainbow effect depends on repetition; the smileys should be the same diameter on every nail, centered the same way, so the eye moves across the hand reading a sequence rather than a random collection
The mismatched palette connects to the broader world of mismatched nails.
8. Checkered Smiley — Skate Park
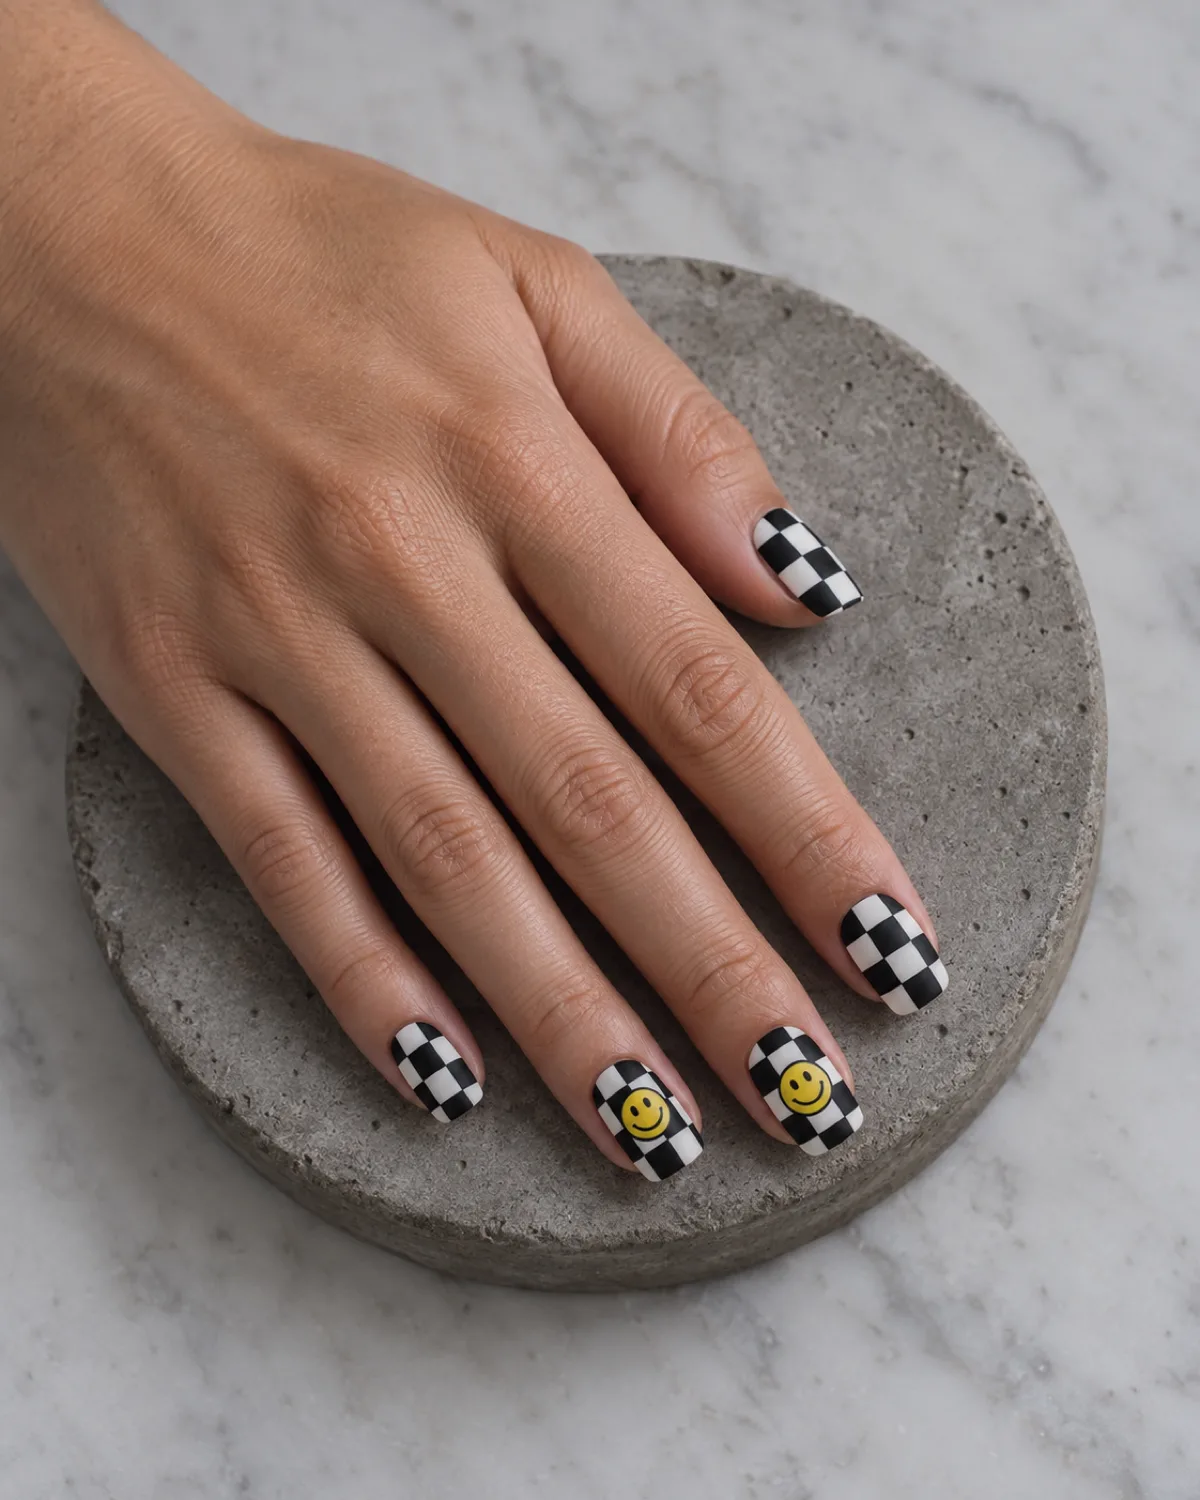
Black-and-white checkered base on every nail with a yellow smiley overlaid on the index and ring fingers. Matte finish flattens the entire design into a graphic, almost screen-printed look. The combination pulls from skate culture, where checkered patterns and smiley stickers share the same visual universe.
Square shape anchors the streetwear mood. The blunt, straight tip mirrors the grid of the checkered pattern and gives the design an angular energy that rounder shapes would soften.
- Paint the checkered base with a thin striping brush: alternate black and white squares in a 3×4 or 4×5 grid (depending on nail size); each square should be roughly equal in size for the checkerboard to read correctly
- Layer the smiley on top of the cured checkered base: the yellow circle must be opaque enough to cover both the black and white squares underneath; two coats of yellow gel paint, fully cured between coats, builds the solid circle
- Matte top coat over the entire nail, not just the smiley: the matte finish is what ties the checkered base and the smiley together into one cohesive graphic — a glossy smiley on a matte base or vice versa splits the design into two competing textures
The checkered foundation connects to the full guide on checkered nails.
9. Chrome Smiley Accent — Mirror Mood
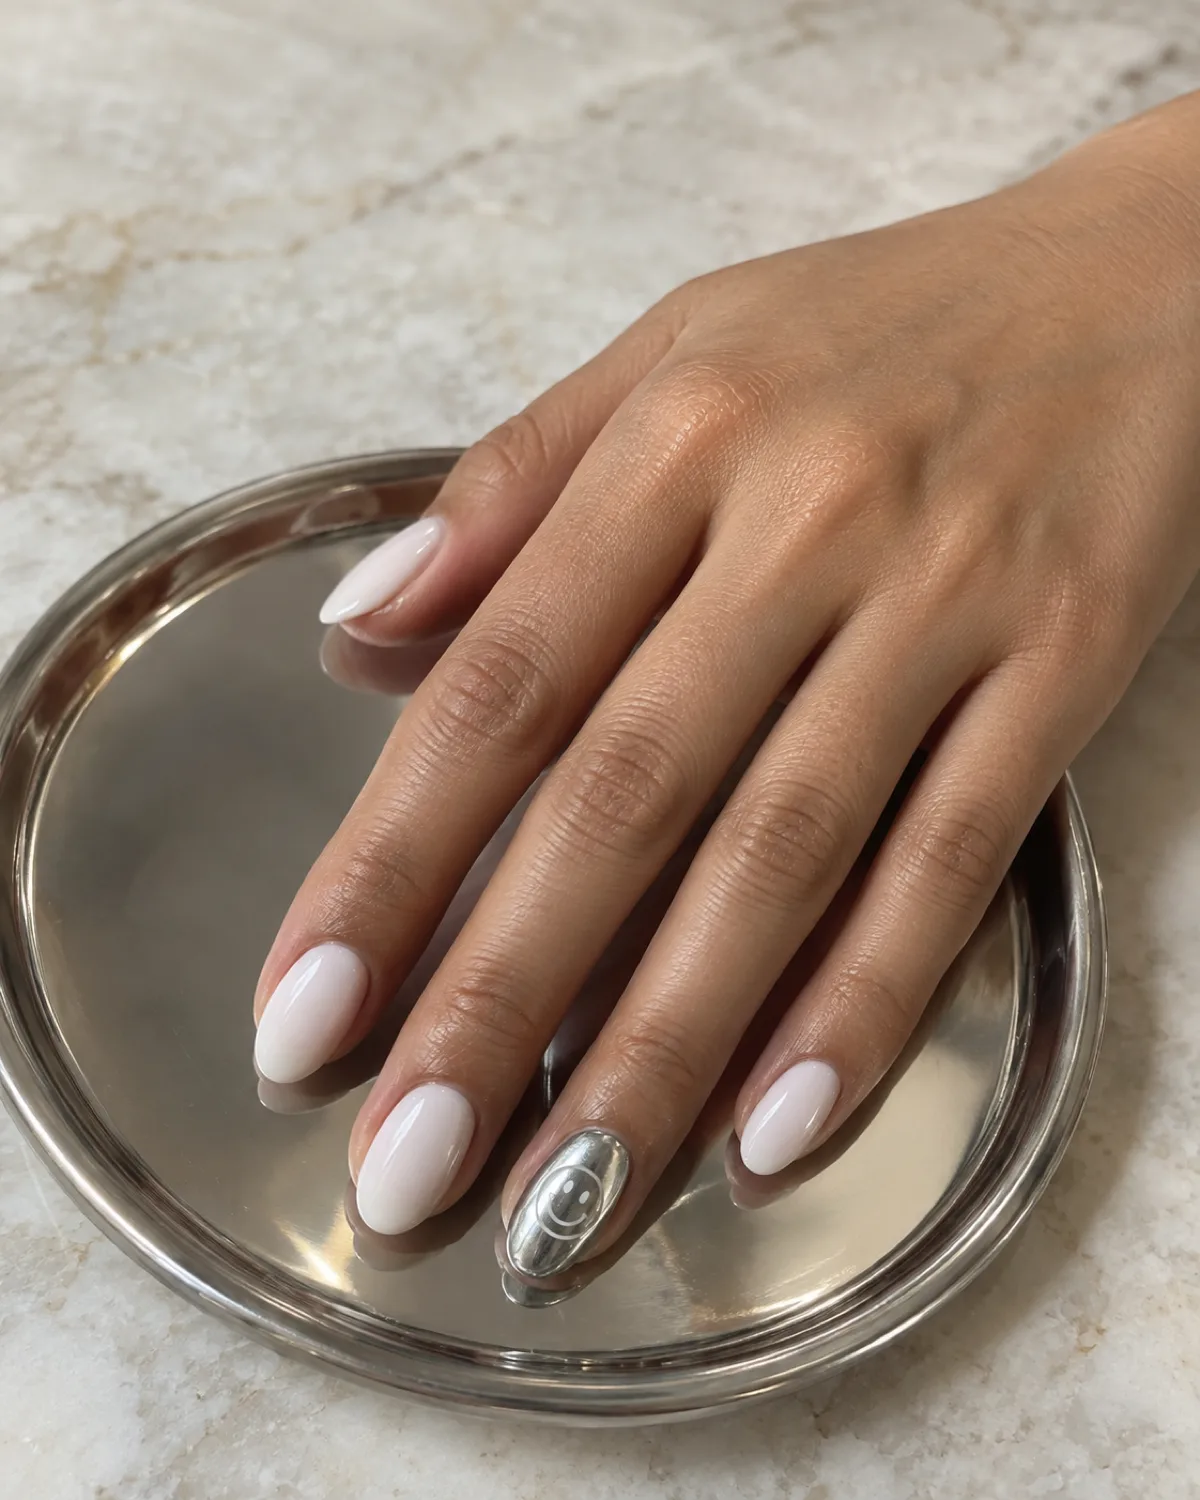
Four nails in milky white, one ring finger in full chrome silver with a smiley face embossed into the reflective surface. The eyes and mouth appear as matte-white recessed lines against the mirror-like silver — the face is there, but you have to look for it, and it shifts with the light.
Short almond shape keeps the chrome restrained. A short, tapered nail in chrome reads as jewelry rather than costume, and the milky white on the remaining four nails provides a soft, neutral frame that lets the single chrome accent do all the talking.
- Chrome powder over no-wipe gel, not regular polish: the mirror finish requires chrome powder rubbed onto a cured no-wipe gel base with a silicone applicator; regular polish cannot hold chrome powder
- Create the smiley by removing chrome in the face areas: apply chrome to the entire ring finger, then use a fine brush dipped in acetone or gel cleanser to wipe away thin lines where the eyes and mouth should be, revealing the white base underneath
- Seal with a no-wipe top coat: regular gel top coat requires wiping, which removes the chrome powder — a dedicated no-wipe formula preserves the mirror finish
The reflective accent pairs with silver nails for more chrome-finish ideas.
10. Outlined Smiley on Nude — Pen Sketch
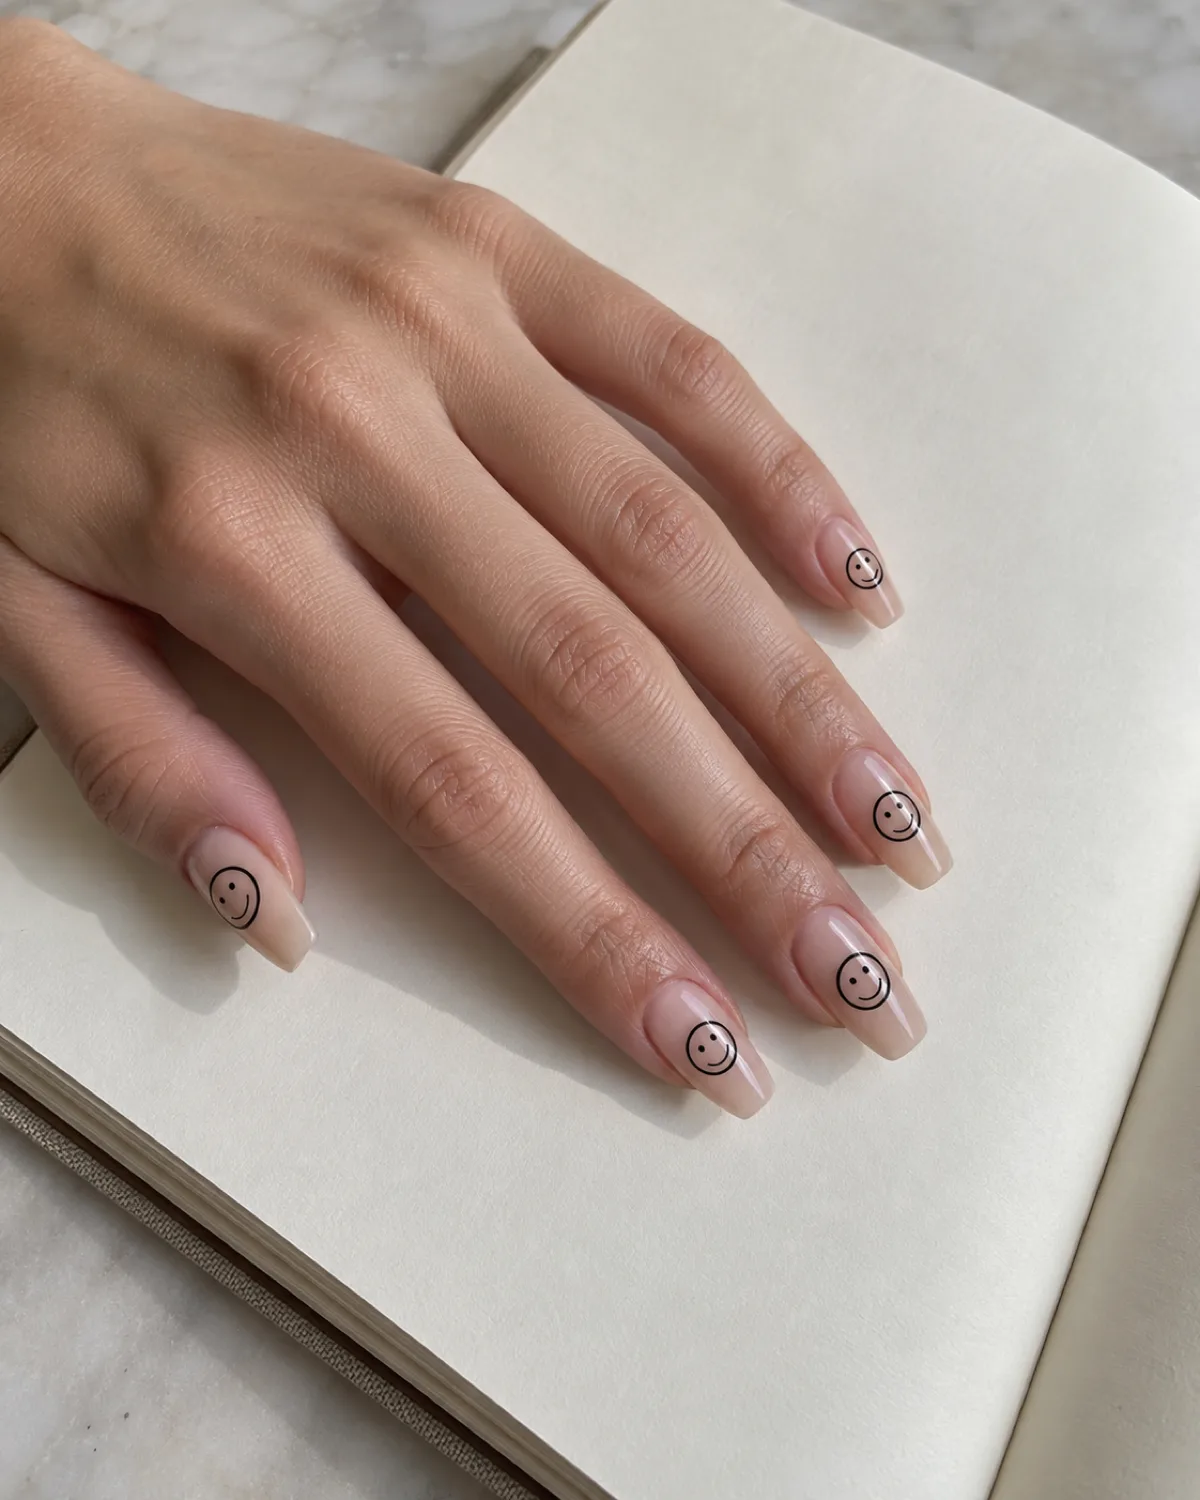
No filled yellow, no color at all — just a thin black outline of a smiley face on every nail. The circle, two dot eyes, and curved mouth are drawn as if with a fine-tip pen on a sheer nude base. The result is minimal, graphic, and reads more as illustration than traditional nail art.
Coffin shape gives the line-art faces a modern canvas. The clean, flat free edge frames each outlined smiley against a generous nail bed, and the medium length provides room for the circle to sit centered without touching the cuticle or tip.
- Use a 000 or 00 liner brush for the circle: the outline needs to be thin and consistent; a thick line kills the sketch effect and makes the design look like a cartoon rather than an illustration
- One continuous stroke for the circle if possible: breaking the circle into segments creates visible start-stop points that look messy at nail scale; practice the motion on paper first, then commit to one fluid stroke on the nail
- Skip the top coat, or use a matte top coat: high-gloss top coat over thin black lines can cause the lines to blur slightly — matte or no top coat keeps the sketch effect crisp
The stripped-back graphic approach connects to clean girl nails where restraint defines the aesthetic.
11. Smiley on Gradient Ombré — Sunrise Grin
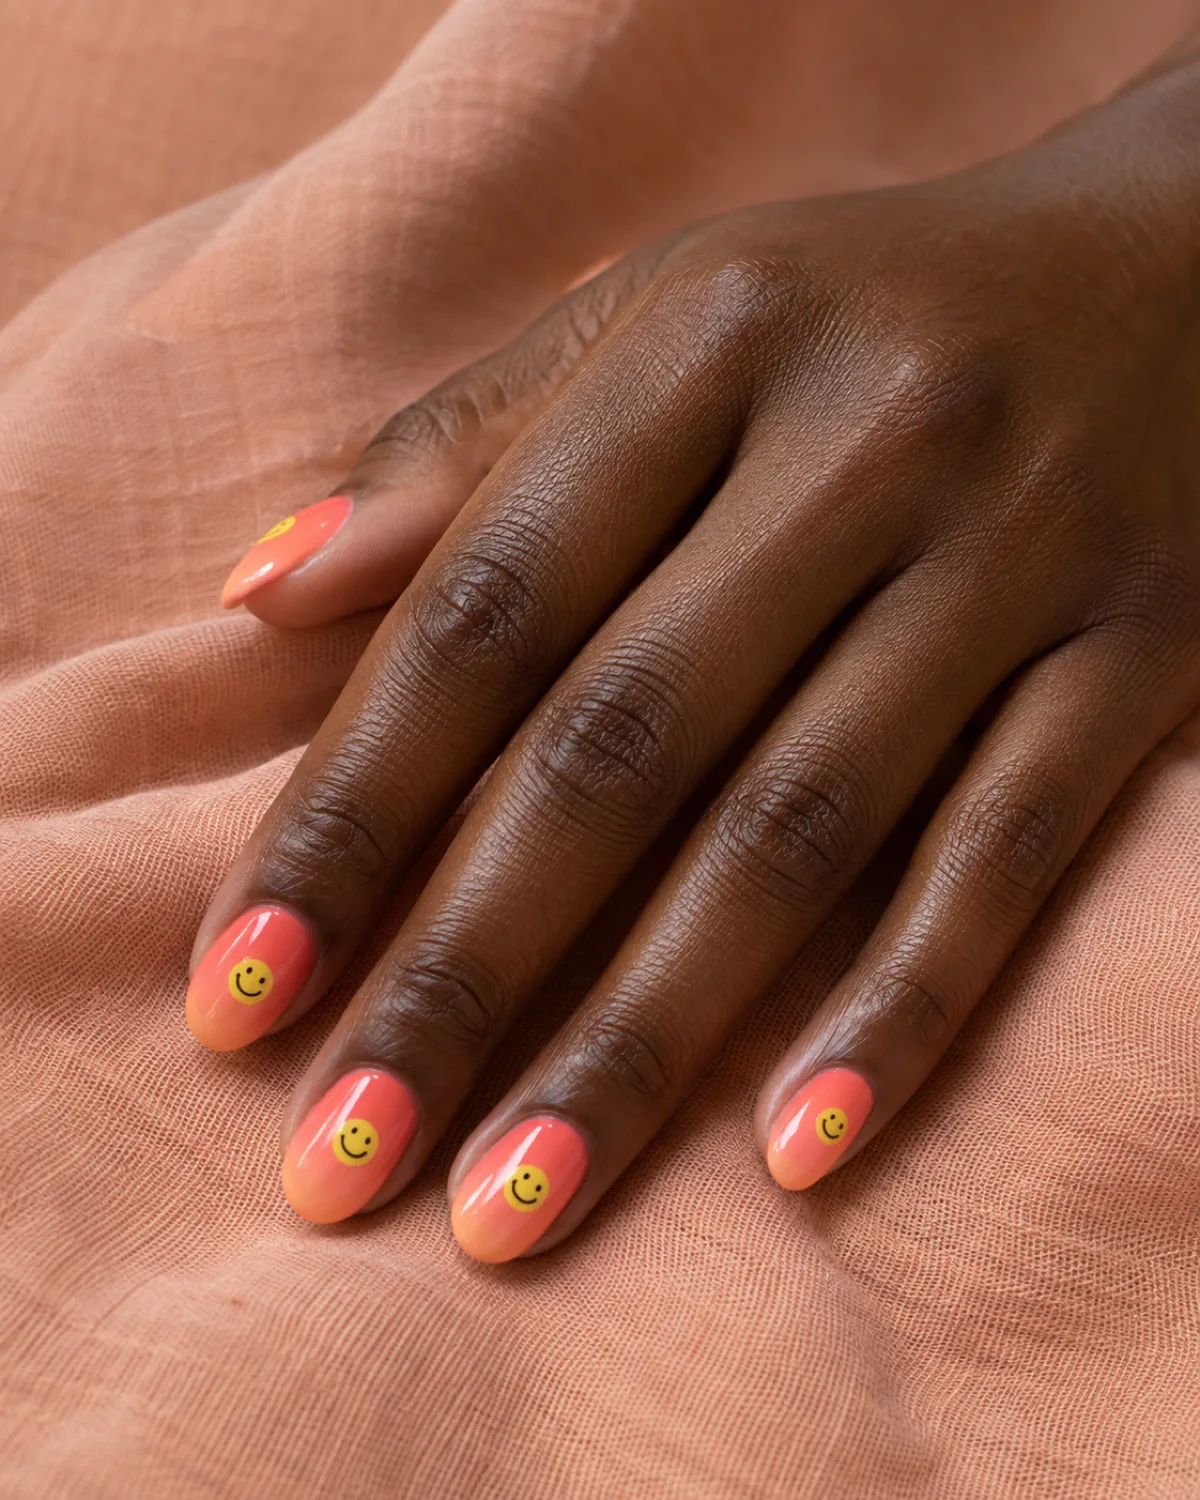
A warm gradient fading from coral at the cuticle to pale peach at the tip creates a sunset backdrop for a small yellow smiley face on each nail. The gradient adds depth and dimension that a flat single-color base cannot, and the warm tones make the yellow smiley feel like a natural part of the palette.
Round shape softens the warm gradient. The smooth, curved tip matches the organic quality of the ombré blend and gives each smiley a frame that does not compete with sharp edges or angles.
- Sponge the gradient on before painting the smiley: a cosmetic sponge dabbed with coral and peach creates the seamless blend; apply two to three thin sponge layers for opacity, cure between layers, then paint the smiley on the smooth cured surface
- Place the smiley in the transition zone between the two colors: a face sitting in the coral zone or the peach zone blends into the background; centering it where the gradient shifts gives the yellow circle maximum visibility
- Keep the smiley small relative to the nail: a large smiley on a gradient base covers too much of the ombré and defeats the purpose of the two-layer design — a face occupying about one-third of the nail bed balances motif and backdrop
The gradient foundation links to peach nails for more warm ombré ideas.
12. Matte Yellow Full-Smiley Set — All Smiles
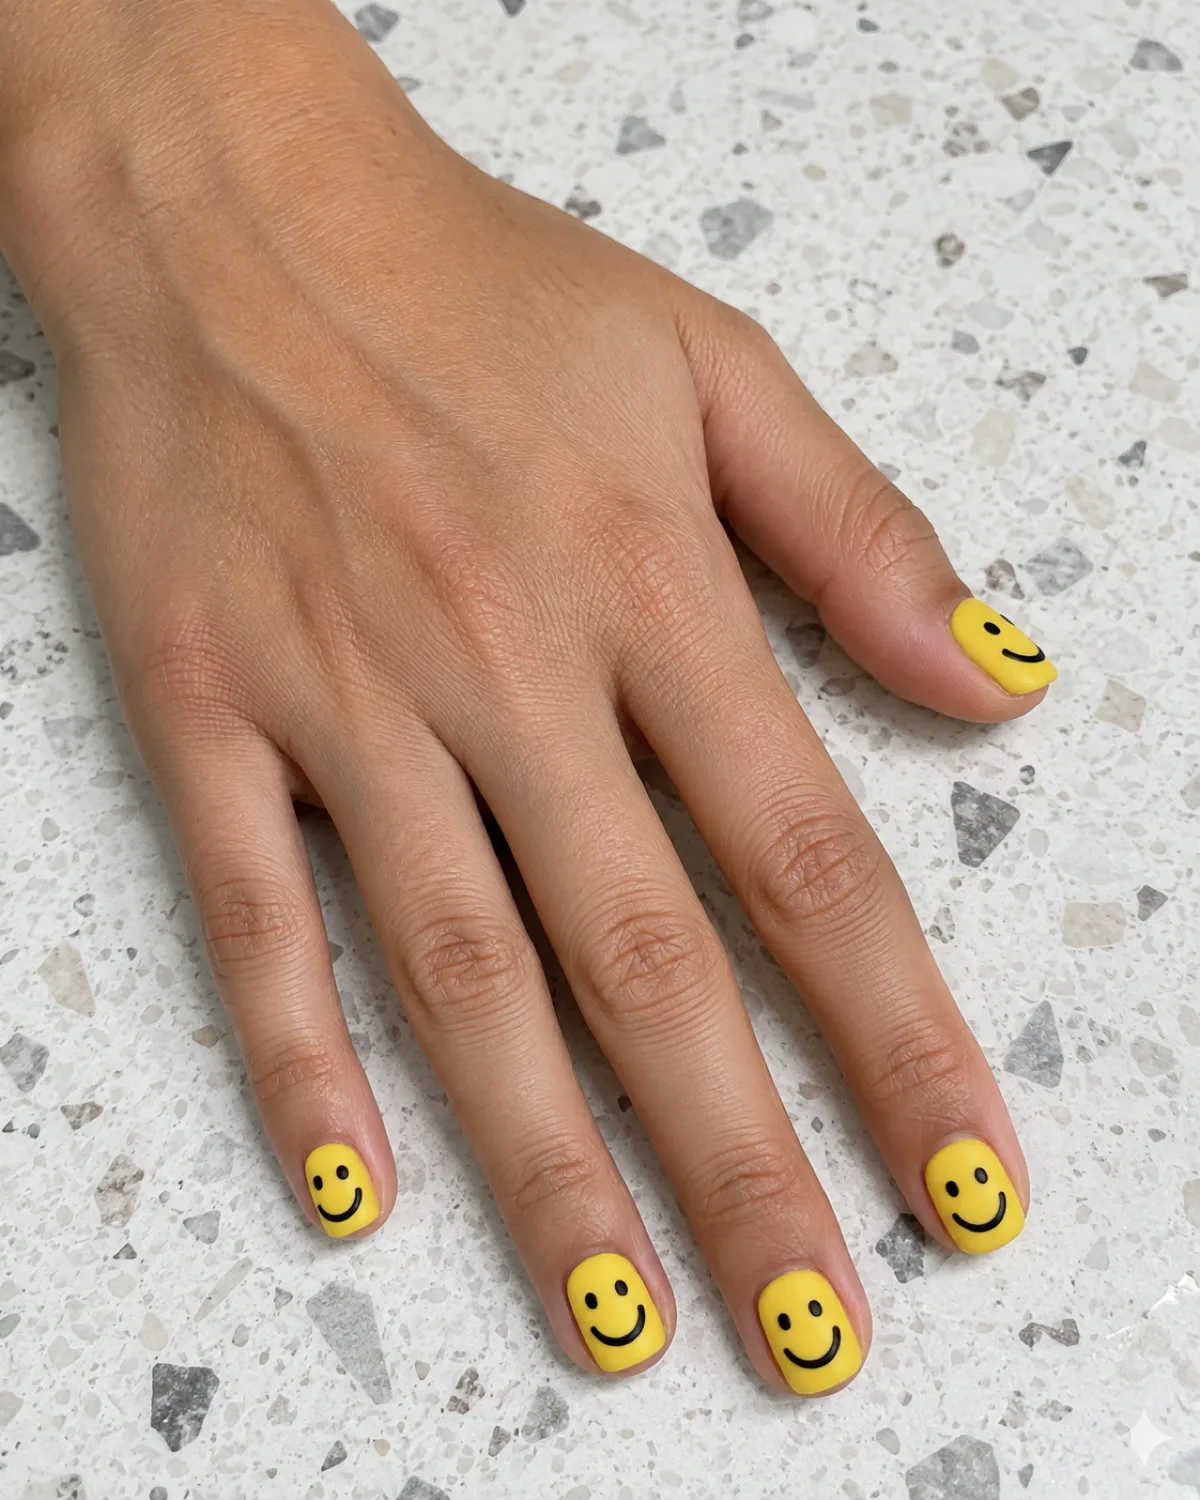
Every nail is a smiley face. Solid matte yellow on all five nails with two small black dot eyes near the cuticle and a curved black smile near the free edge — each nail becomes a miniature face rather than a canvas carrying a painted motif.
Short squoval shape is essential for the illusion. The slightly rounded square tip mimics the proportions of a classic smiley face circle, and the short length keeps the face compact enough to read as one graphic rather than a face stretched across a long canvas.
- Matte yellow requires a white base coat: yellow polish is notoriously sheer, and matte finish reveals every streak; one coat of white under two coats of yellow builds the solid, even opacity the face-as-nail concept needs
- Place the eyes closer to the cuticle than you think: the natural tendency is to center the eyes, but the smiley reads best when the eyes sit in the upper third and the mouth sits in the lower third — leaving the forehead area empty above the eyes completes the face proportions
- Do not add a nose: the classic smiley face has no nose; adding one turns the design into a different character and breaks the recognition — two dots and a curve, nothing more
The bold, committed, all-in approach connects to yellow nails for the color taken across an entire set.
12 Smiley Face Nail Ideas to Try
- 1Classic yellow smiley on nude almondTwo accent nails with the original yellow circle, dot eyes, and curved mouth on a sheer nude base.
- 2Melting smiley drip on white coffinYellow smileys melt downward in surrealist drips on a clean white base — pop art meets streetwear.
- 3Retro daisy-eye smiley on cream roundWhite daisy flowers replace the dot eyes for a 1970s flower-power mood on a warm cream base.
- 4Micro smiley scatter on pink squovalTiny multi-colored smileys scattered like confetti across every nail — dense, cheerful, and print-like.
- 5Neon smiley on black stilettoOne large neon-green smiley per nail against jet black — high contrast and impossible to miss.
- 6French tip with winking smiley accentClassic French on four nails; one ring finger smiley sits on the smile line and winks.
- 7Pastel rainbow smileys on almondFive pastel bases with tonal white smileys — coordinated mismatched set in candy colors.
- 8Checkered smiley on matte squareBlack-and-white checkerboard base with a yellow smiley overlaid — matte-flat skate culture energy.
- 9Chrome smiley accent on white almondMirror-silver ring finger with the smiley etched as matte-white lines in the chrome surface.
- 10Outlined smiley on nude coffinThin black line-art faces on sheer nude — illustration-style minimalism, no filled color.
- 11Smiley on coral-to-peach gradientA warm ombré backdrop with a small yellow smiley in the transition zone — sunset warmth meets happy face.
- 12Matte yellow full-smiley set on squovalEvery nail is the smiley — solid matte yellow with dot eyes near the cuticle and a curved smile near the tip.
styvea.com
Frequently Asked Questions About Smiley Face Nails
How do you paint smiley faces on nails at home?
The technique is simpler than most nail art because the design is just three elements:
- Paint a solid yellow circle on the nail using gel paint or regular polish and let it fully dry or cure
- Use a fine dotting tool to place two small black dots symmetrically in the upper third of the circle for the eyes
- Draw a curved line (a shallow U shape) in the lower third for the mouth using a thin liner brush, then seal everything with a top coat
A complete home-manicure walkthrough is in the at-home manicure guide.
What nail shape works best for smiley face nails?
Any shape works, but the best fit depends on the scale of the smiley:
- Short round or squoval: ideal for full-nail smiley faces where the entire nail becomes the face, because the rounded shape mimics the smiley circle
- Medium almond or oval: suits single-smiley accent designs where the face sits centered on a generous nail bed
- Long coffin or stiletto: works for melting smileys, micro patterns, or bold neon designs that benefit from extra surface area
The smiley face is scale-flexible — it works small on short nails and large on long ones.
Do smiley face nails work on short nails?
Yes — short nails are one of the strongest canvases for smiley face nail art:
- A single centered smiley fits cleanly on a short nail bed without crowding
- The full-face approach (#12) works best on short nails because the compact proportions match the round smiley shape
- Micro scatter (#4) and line art (#10) both scale down without losing legibility
Short squoval is the shape that most closely resembles the smiley's round face.
Are smiley face press-ons available?
Yes — smiley face is one of the most common nail art motifs in the press-on market:
- Pre-painted press-on sets with smiley designs are available from most nail art brands
- Nail art stickers and water-transfer decals offer smiley motifs you can apply on top of any base color on your own press-ons or natural nails
- Stamping plates with smiley patterns let you reproduce the design in any color combination at home
Press-ons are the fastest path to a multi-nail smiley set, especially for the micro-scatter or checkered designs that would take significant time to paint freehand.
How long do smiley face nails last?
Longevity depends on the method:
- Gel polish base with gel-paint smiley: two to three weeks; the gel-on-gel bond is strong and the painted detail is locked under the top coat
- Regular polish with acrylic-paint smiley: five to seven days before the painted details begin lifting at the edges of the yellow circle
- Press-on nails with pre-painted smileys: one to two weeks with adhesive tabs, up to two weeks with nail glue
Gel is the most durable medium for smiley face nails because the painted detail cures chemically rather than air-drying.

Sloane Avery edits Styvea, where she shares nail design ideas, shapes, colors, and at-home manicure how-tos for anyone who loves a good manicure. Every guide is reviewed for clarity, usefulness, image accuracy, and Pinterest-to-page alignment before publication. Visit the About page.