Polka dot nails are the most forgiving nail art there is. A dot needs no steady line and no brush skill, only a round tool and a little patience between dips.
The 11 designs below run from the classic black dots on white to navy pin dots, a single dot at the cuticle, and gold dots in mixed sizes for a party. Each lists its shape and palette.
If you want the easy version first, start with the single dot in #6 or the one accent nail in #9. Both take a few minutes and leave nothing to line up.
1. Black Dots on White, Short Round — Vintage Dress
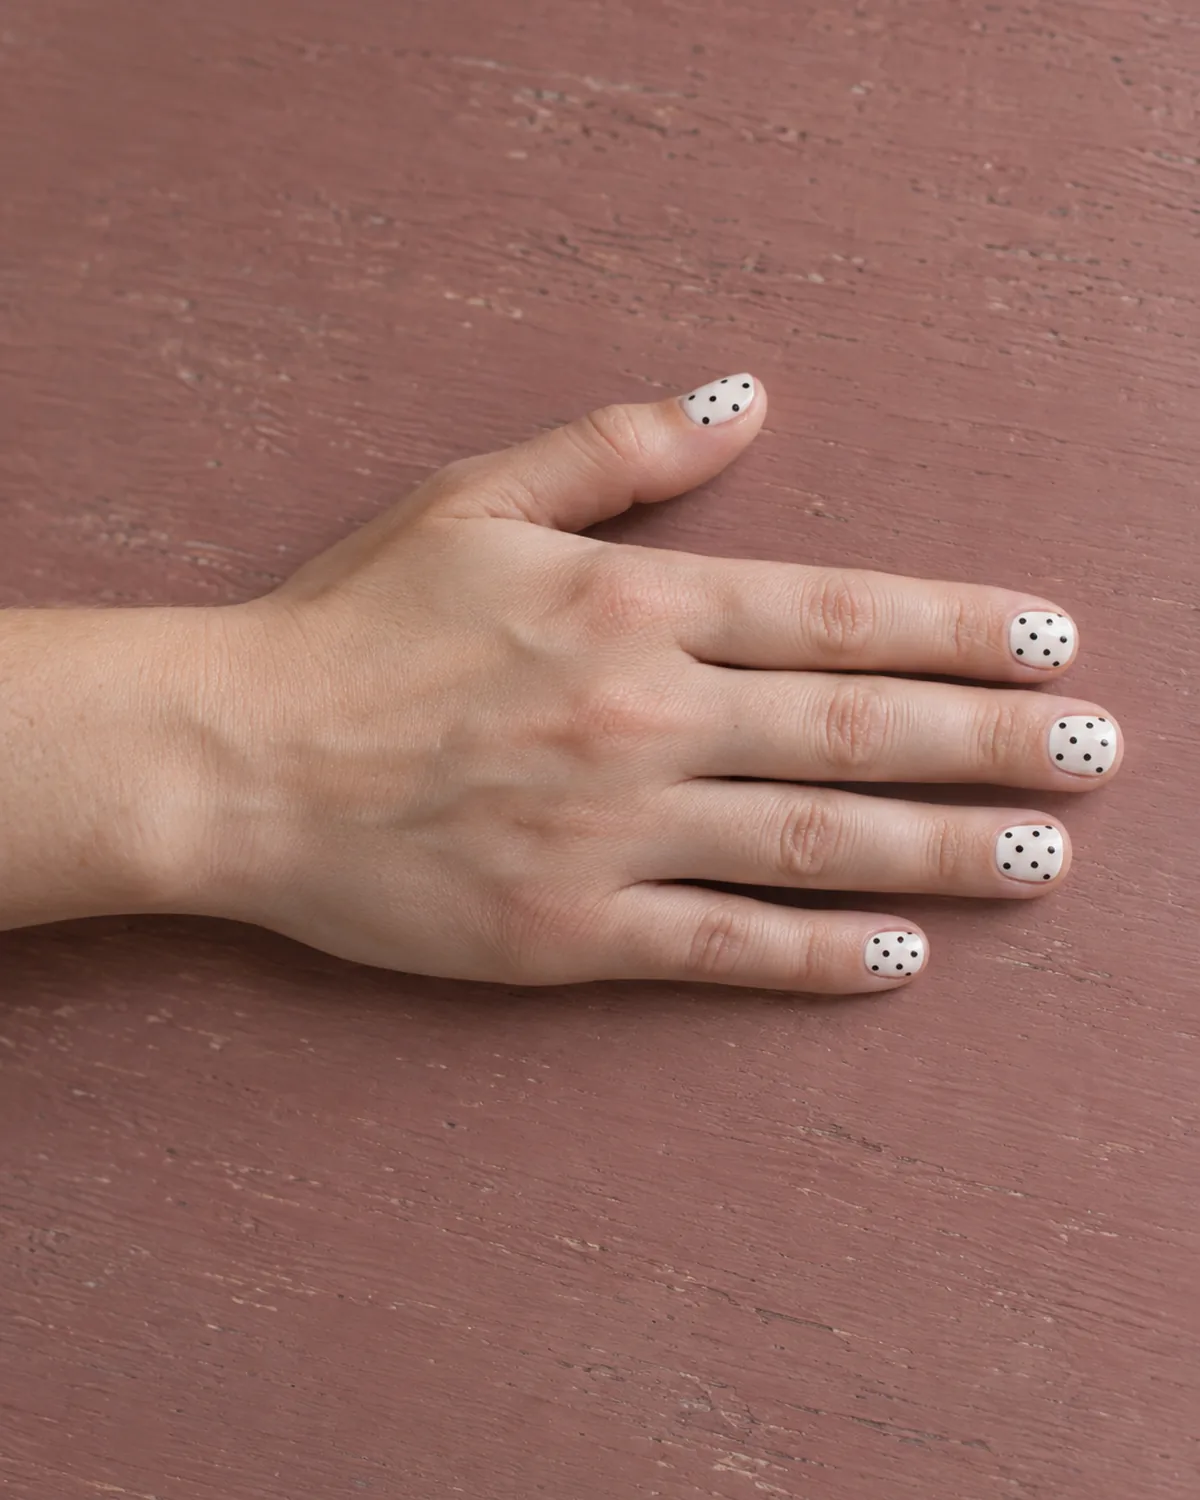
This is the polka dot every other version is measured against: an opaque white base with small black dots set in an offset grid, seven to nine per nail. It looks like a 1950s day dress and it goes with nearly everything in a closet.
Short round nails keep it neat instead of costume. Give the white two thin coats so it is fully opaque before you dot. Streaky white under black dots is the first thing the eye catches.
- Shape: short round
- Palette: opaque white, black
- Skill level: beginner-friendly — one dot size, one color
- Best for: first full set of dots, short natural nails, and a retro look that still reads clean
2. White Dots on Cherry Red Almond — Diner Red
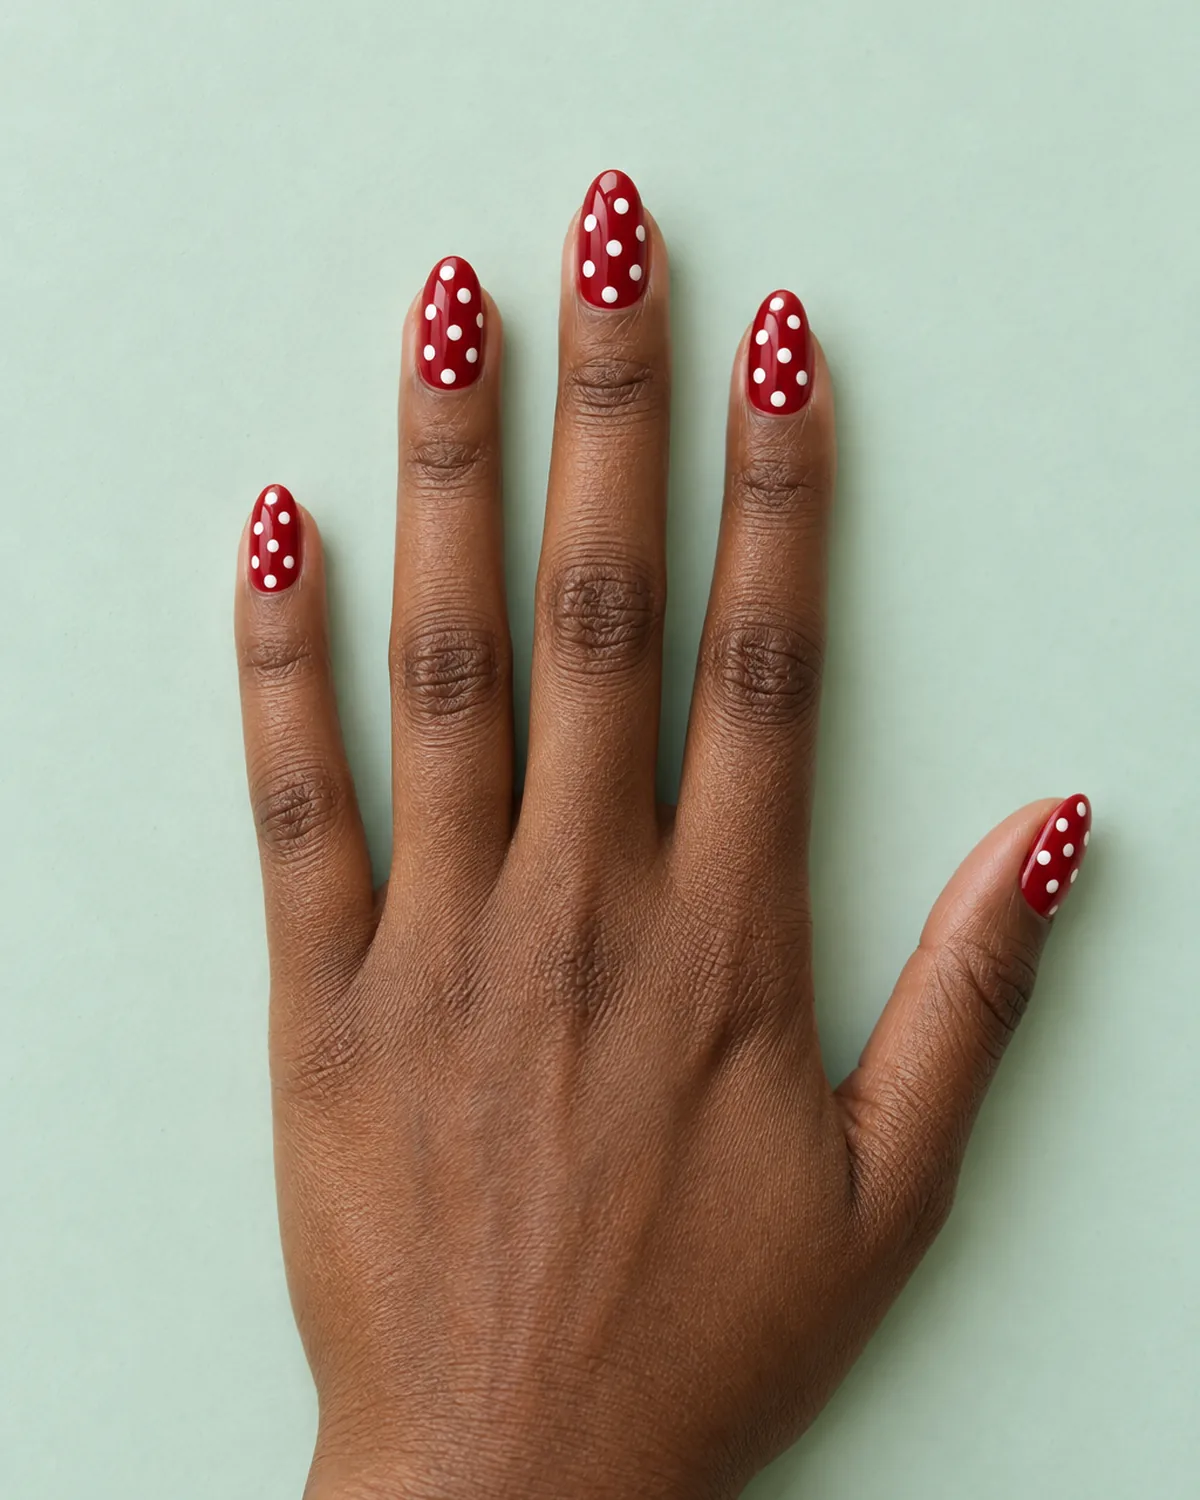
Flip the classic and it changes mood. Glossy cherry red with crisp white dots is the playful version, closer to a headscarf or a picnic dress than to a graphic print.
Medium almond tips stop a loud color from looking boxy. Pick a blue-leaning red so the white dots stay bright against it. For help choosing the shade, see our cherry red nails guide.
- Shape: medium almond
- Palette: cherry red, white
- Skill level: beginner-friendly — white shows best on a fully cured base
- Best for: summer, date nights, and anyone who already wears red polish
3. Navy with White Pin Dots on Short Square — Pin Dot Shirting
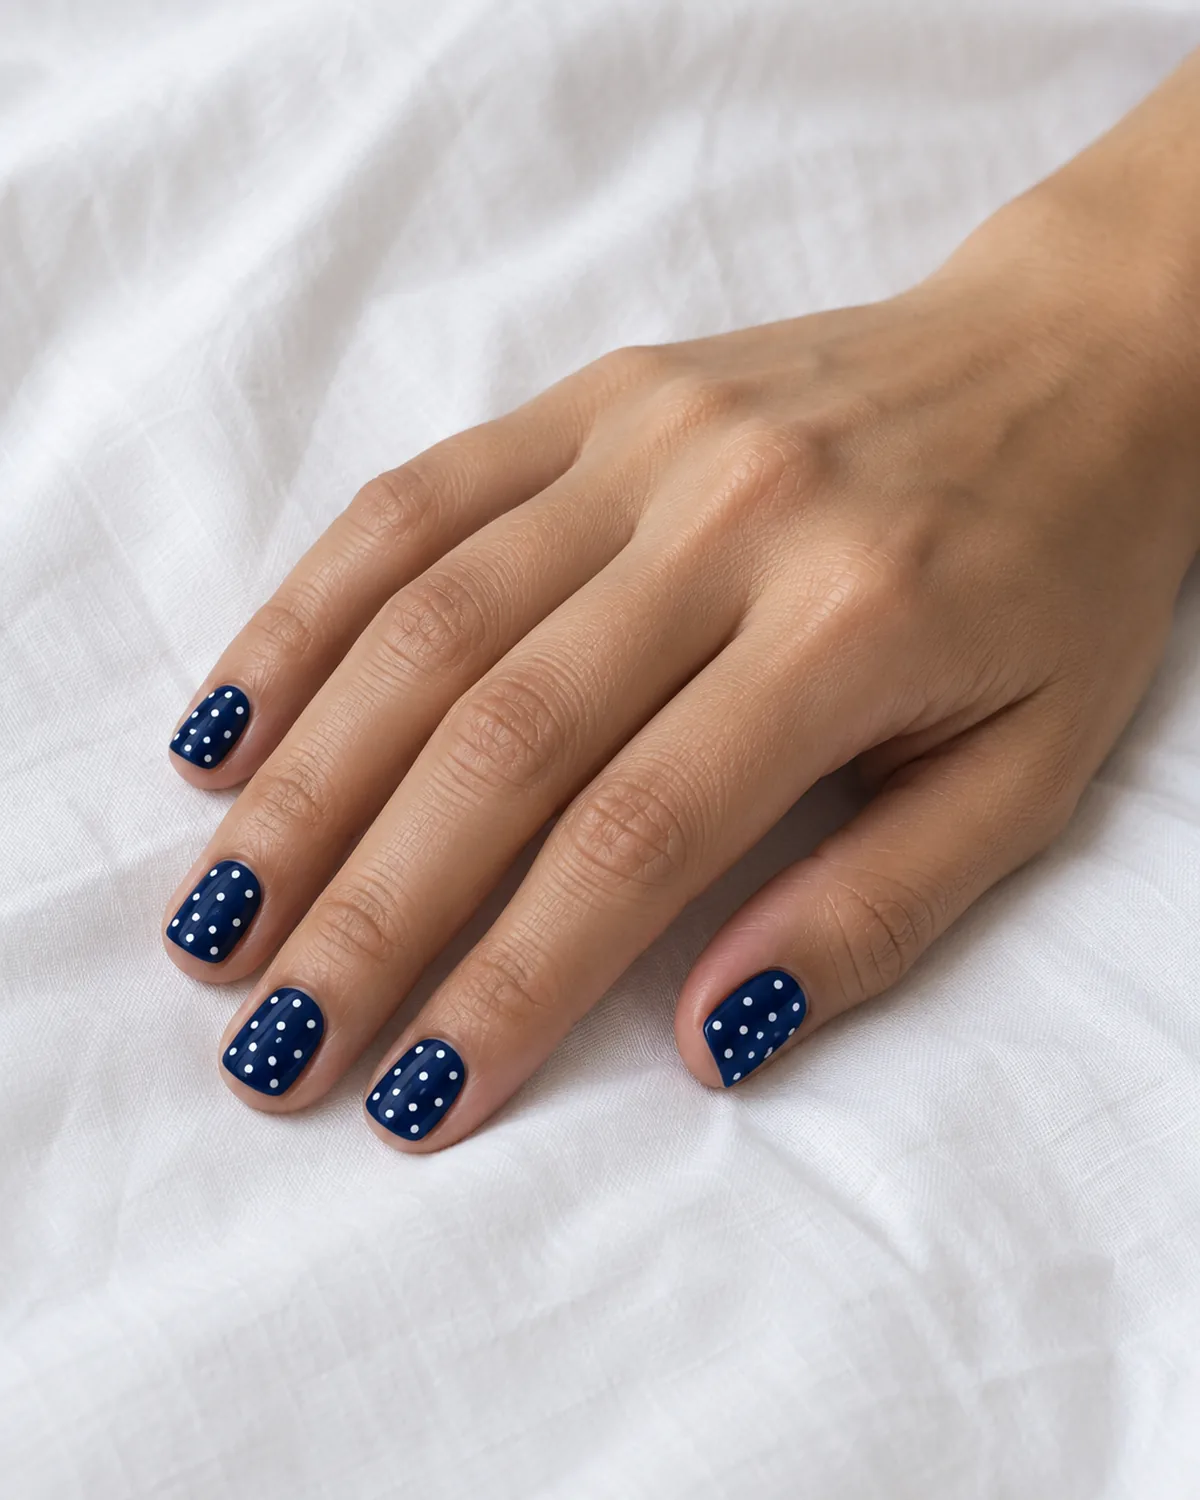
Shrink the dots to pinhead size, set them in a tight regular grid on deep navy, and the pattern starts to look like a silk tie. From arm's length it reads as a textured navy. Up close, the dots appear.
Use the smallest ball on your dotting tool, or the tip of a toothpick. Short square nails give the grid straight edges to follow, which keeps the rows from drifting.
- Shape: short square
- Palette: deep navy, white
- Skill level: intermediate — many small dots, even spacing
- Best for: office dress codes, navy wardrobes, and a dot that does not shout
4. A Curved Row of Black Dots Tracing the Smile Line, Sheer Nude Oval — Dot Arc
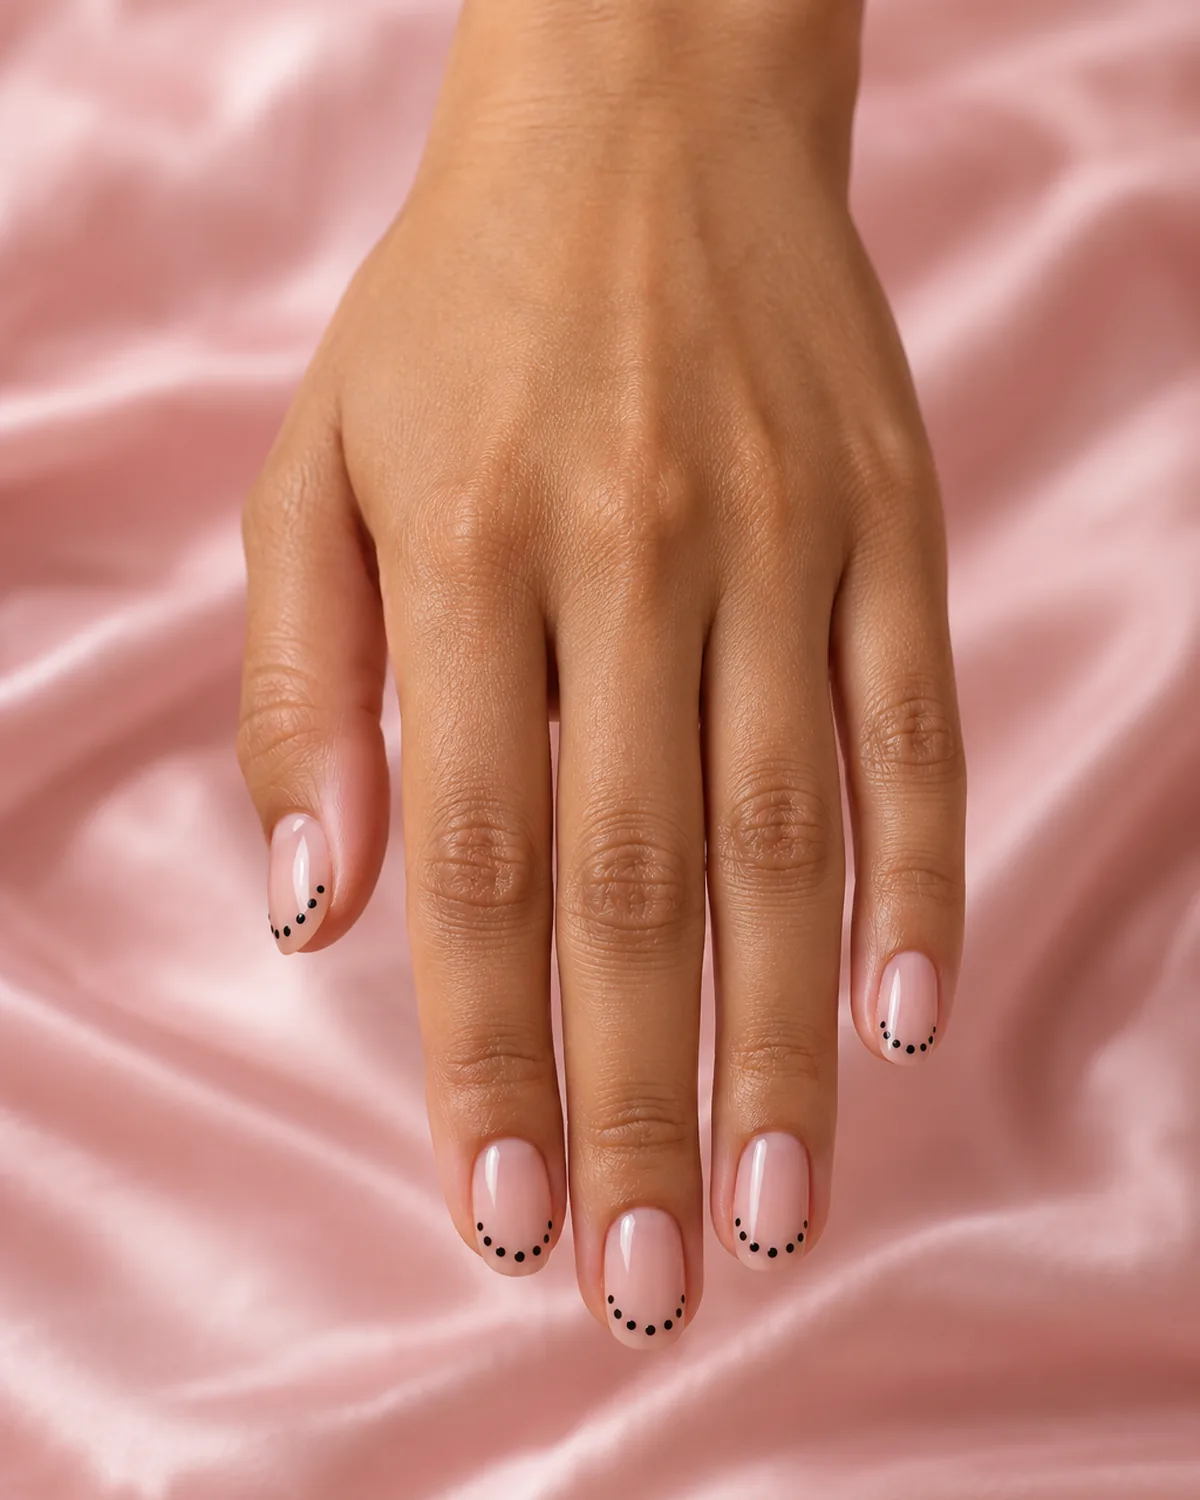
There is no painted tip here at all. A sheer nude base carries one curved row of five or six small black dots, following the line where the white of a manicure would normally start. The dots draw the arc instead of a band.
Because the cuticle half stays bare, regrowth does not show for weeks. Place the middle dot first, then work outward to each side wall so the curve stays even. Medium oval nails suit the soft arc.
- Shape: medium oval
- Palette: sheer nude pink, black
- Skill level: intermediate — the curve has to match on every nail
- Best for: long wear, minimal dressers, and anyone bored of a plain tip
5. Mismatched Pastels with White Dots on Squoval — Candy Buttons
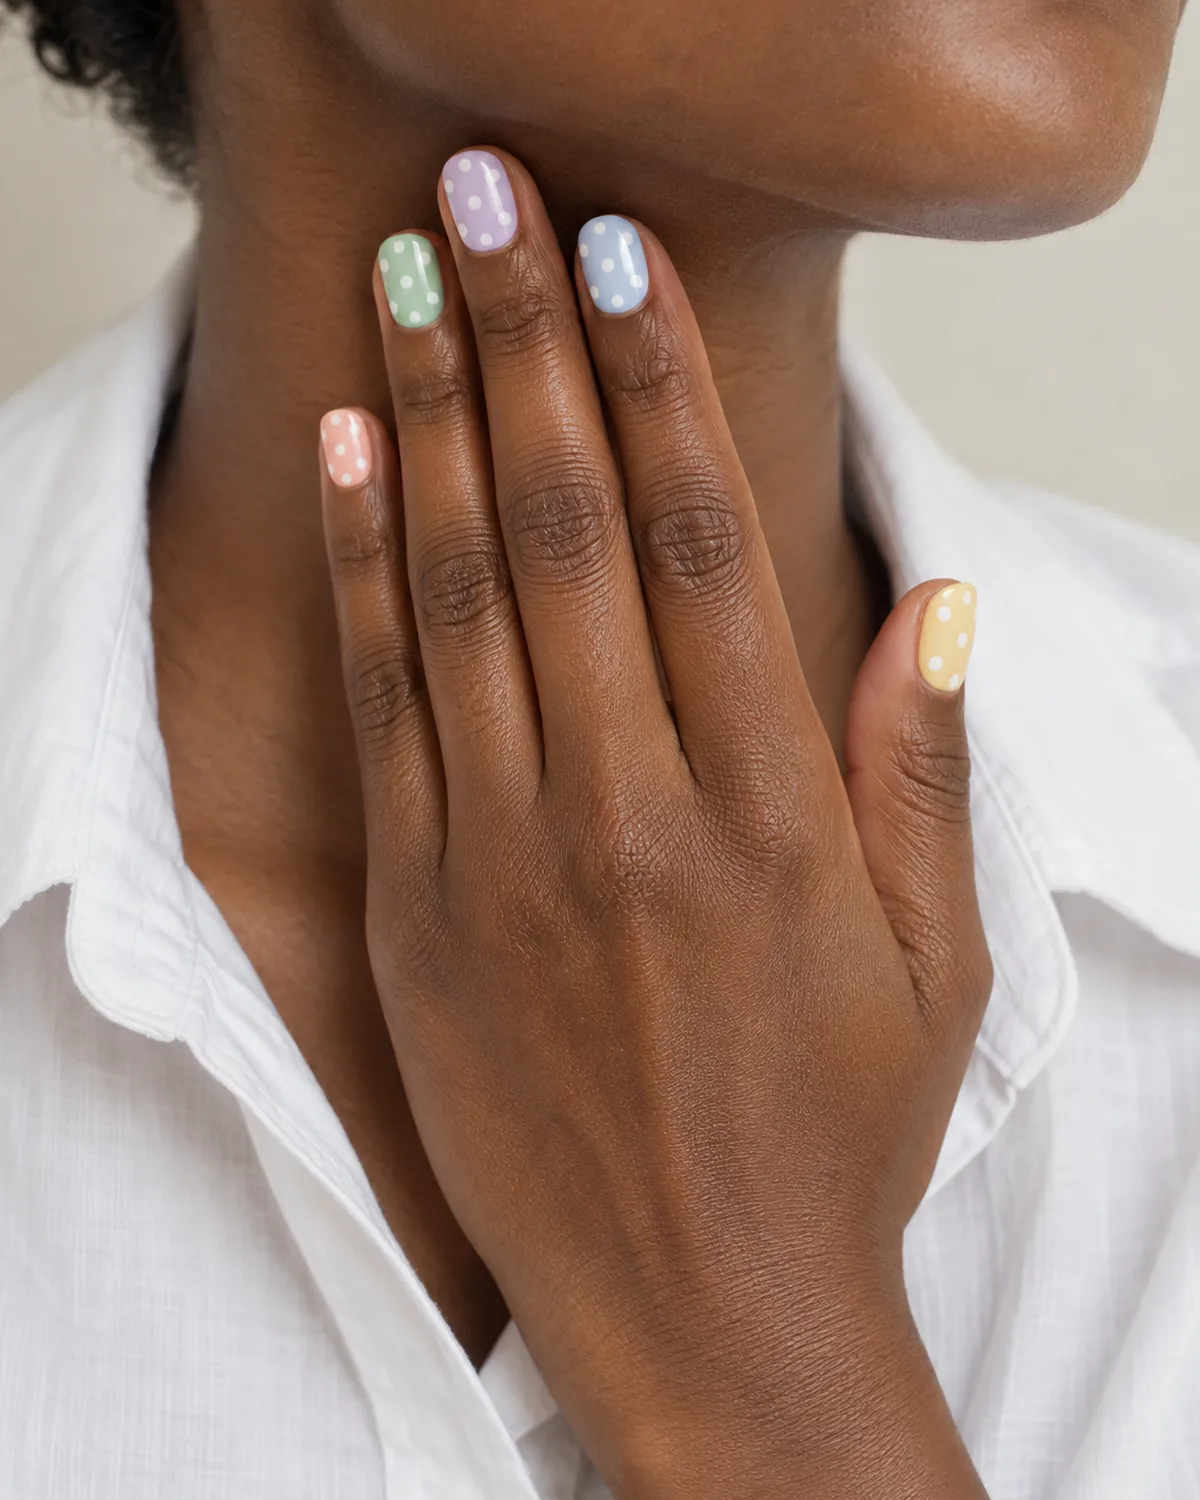
Five different pastel bases across one hand: butter yellow, baby blue, lilac, mint and peach. What ties them together is the same white dot repeated on every nail.
That repeat is the whole trick. A mismatched set looks planned when one element stays constant, and here the dot does that job. Keep the dot size and spacing identical from nail to nail.
- Shape: short squoval
- Palette: five pastels, white dots
- Skill level: beginner-friendly — pastel bases forgive uneven dots
- Best for: spring, vacations, and using up the pastel bottles you already own
6. One Dot at the Cuticle on Bare Nude — Single Dot
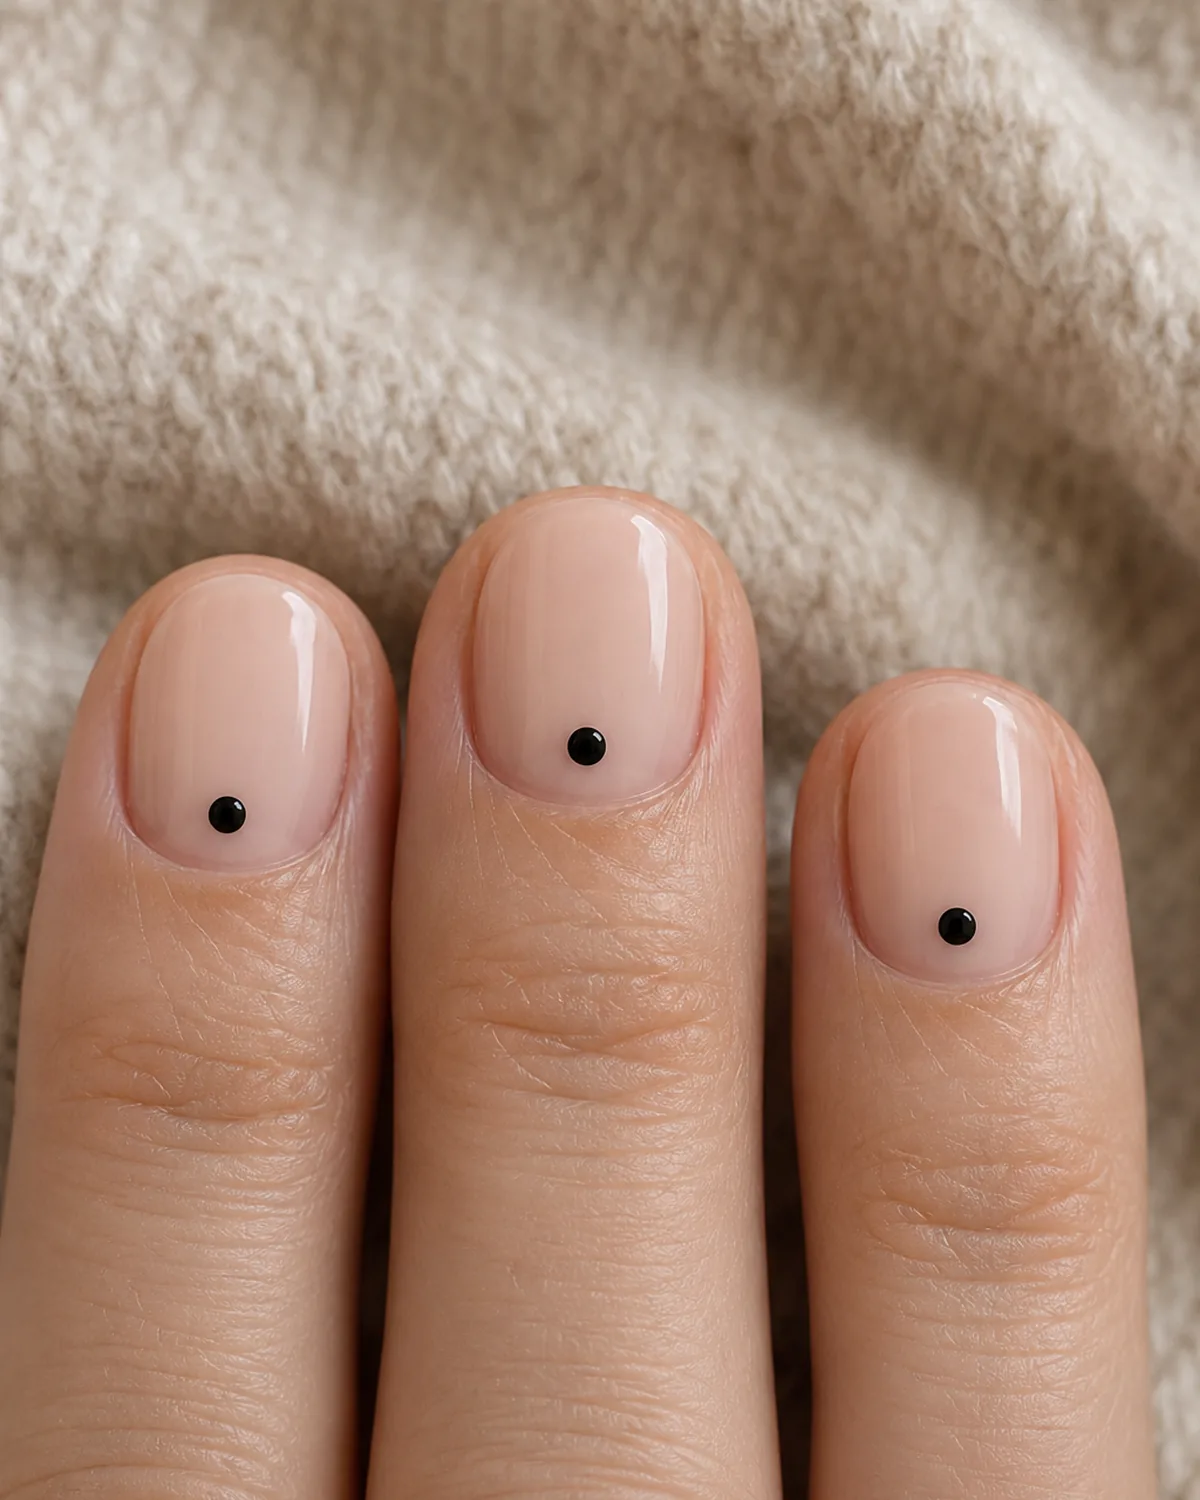
The minimal end of the trend: a sheer milky nude and one black dot centered just above each cuticle. It takes about two minutes and needs no steady hand.
Use the cuticle's lowest point as your guide so every dot sits on the same center line. This one belongs with the looks in our minimalist nails roundup, and it grows out without anyone noticing.
- Shape: short round
- Palette: sheer milky nude, black
- Skill level: beginner — ten dots total
- Best for: first-time nail art, strict dress codes, and short natural nails
7. Cascading Multicolor Dots on Milky Pink Almond — Confetti Fall
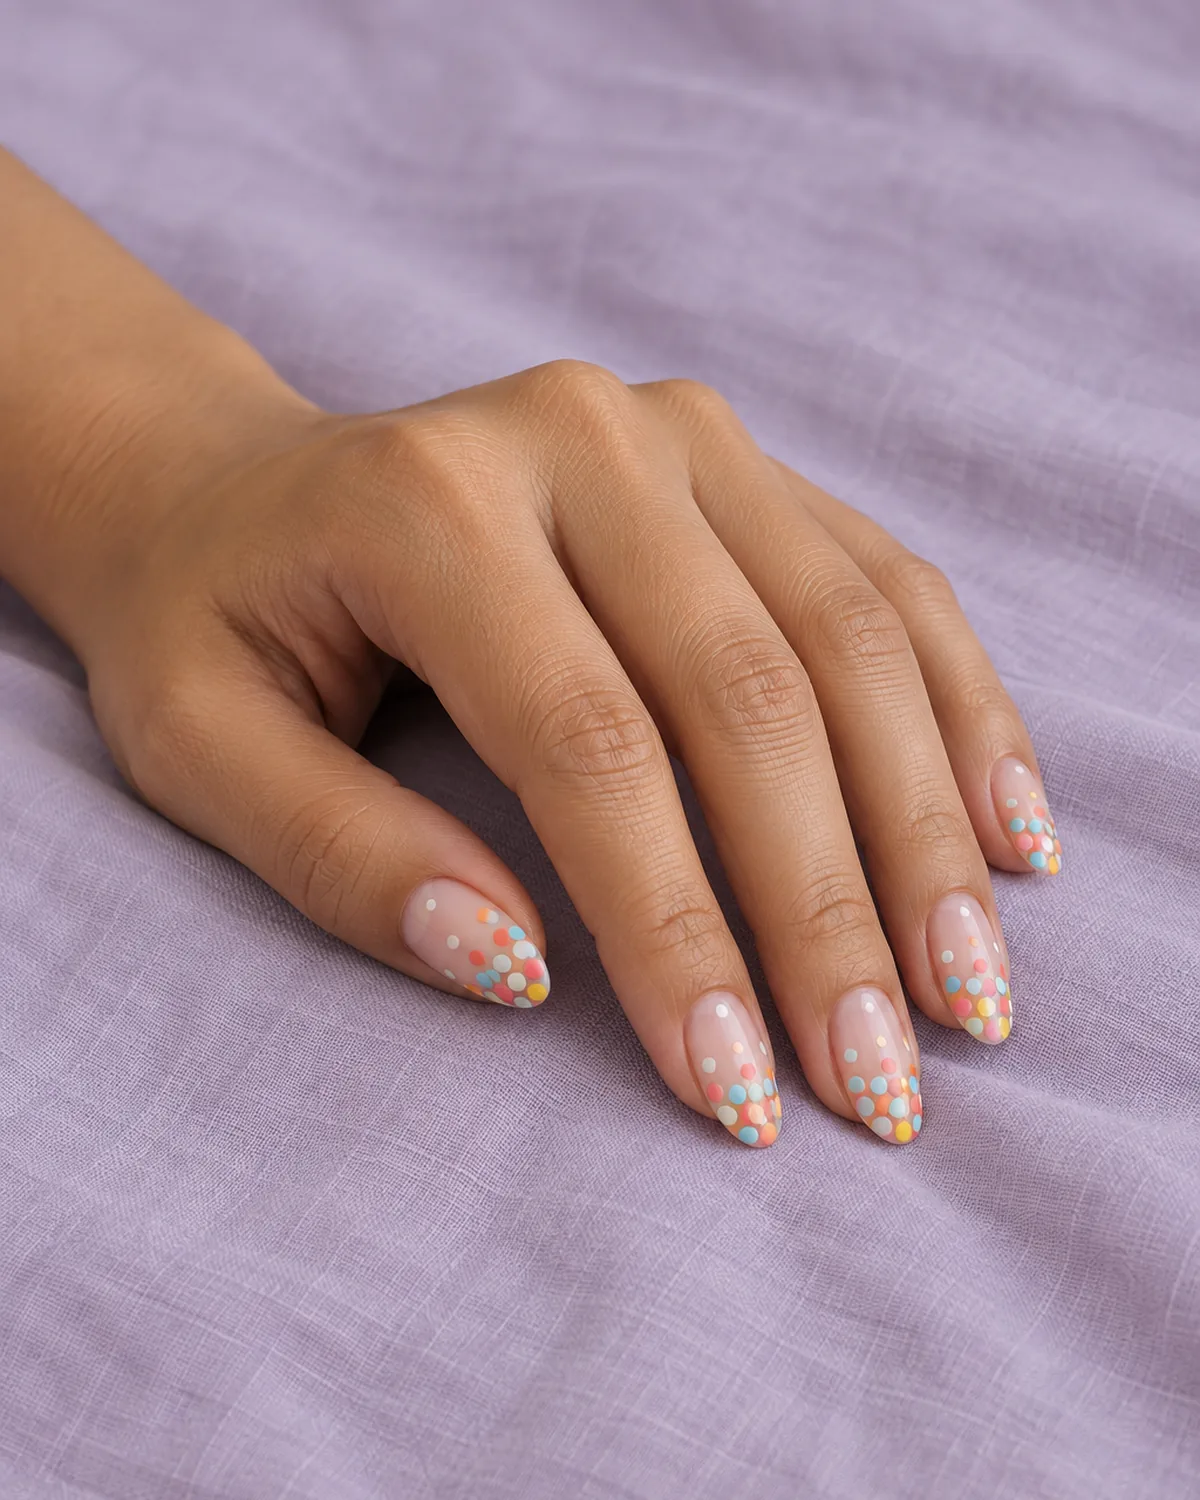
Coral, sky blue, yellow and white dots packed tightly at the free edge and thinning toward the middle of the nail, with the cuticle half left bare. It is a gradient made of dots, and it looks like confetti settling.
Start at the tip and let the dots overlap a little there. As you move down, leave more space between them and switch to a smaller ball. Three or four colors is enough; more than that turns muddy.
- Shape: medium almond
- Palette: milky pink, coral, sky blue, yellow, white
- Skill level: intermediate — random placement is harder than it looks
- Best for: birthdays, festivals, and a party set that still shows bare nail
8. Cream Dots on Chocolate Brown Square — Mocha Dot
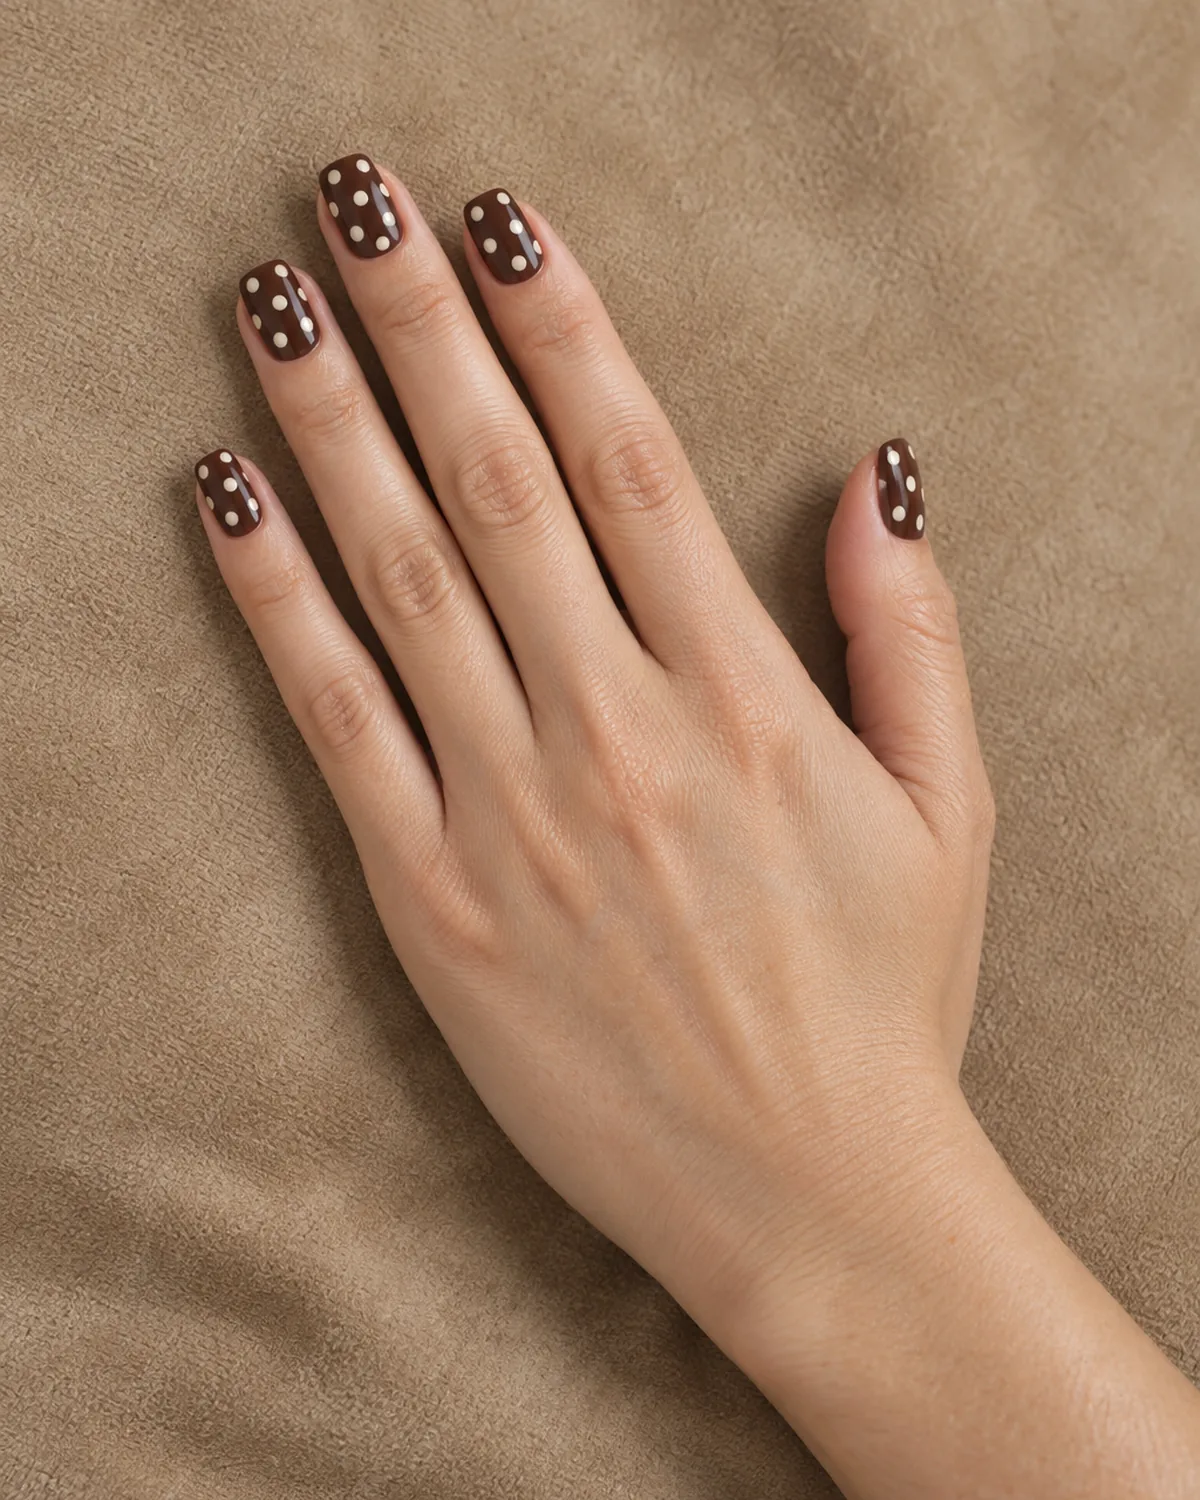
Polka dots in a fall palette. A glossy chocolate base with cream dots takes the retro edge off the pattern and makes it feel current, closer to a printed silk blouse than a diner uniform.
Cream works better than pure white here, because stark white on brown can look harsh. For more shades in this family, see our brown nails guide.
- Shape: medium square
- Palette: chocolate brown, cream
- Skill level: beginner-friendly
- Best for: fall, camel and tan wardrobes, and a dot that works with gold jewelry
9. Sage Green with One Dotted Accent Nail on Short Oval — Sage Accent
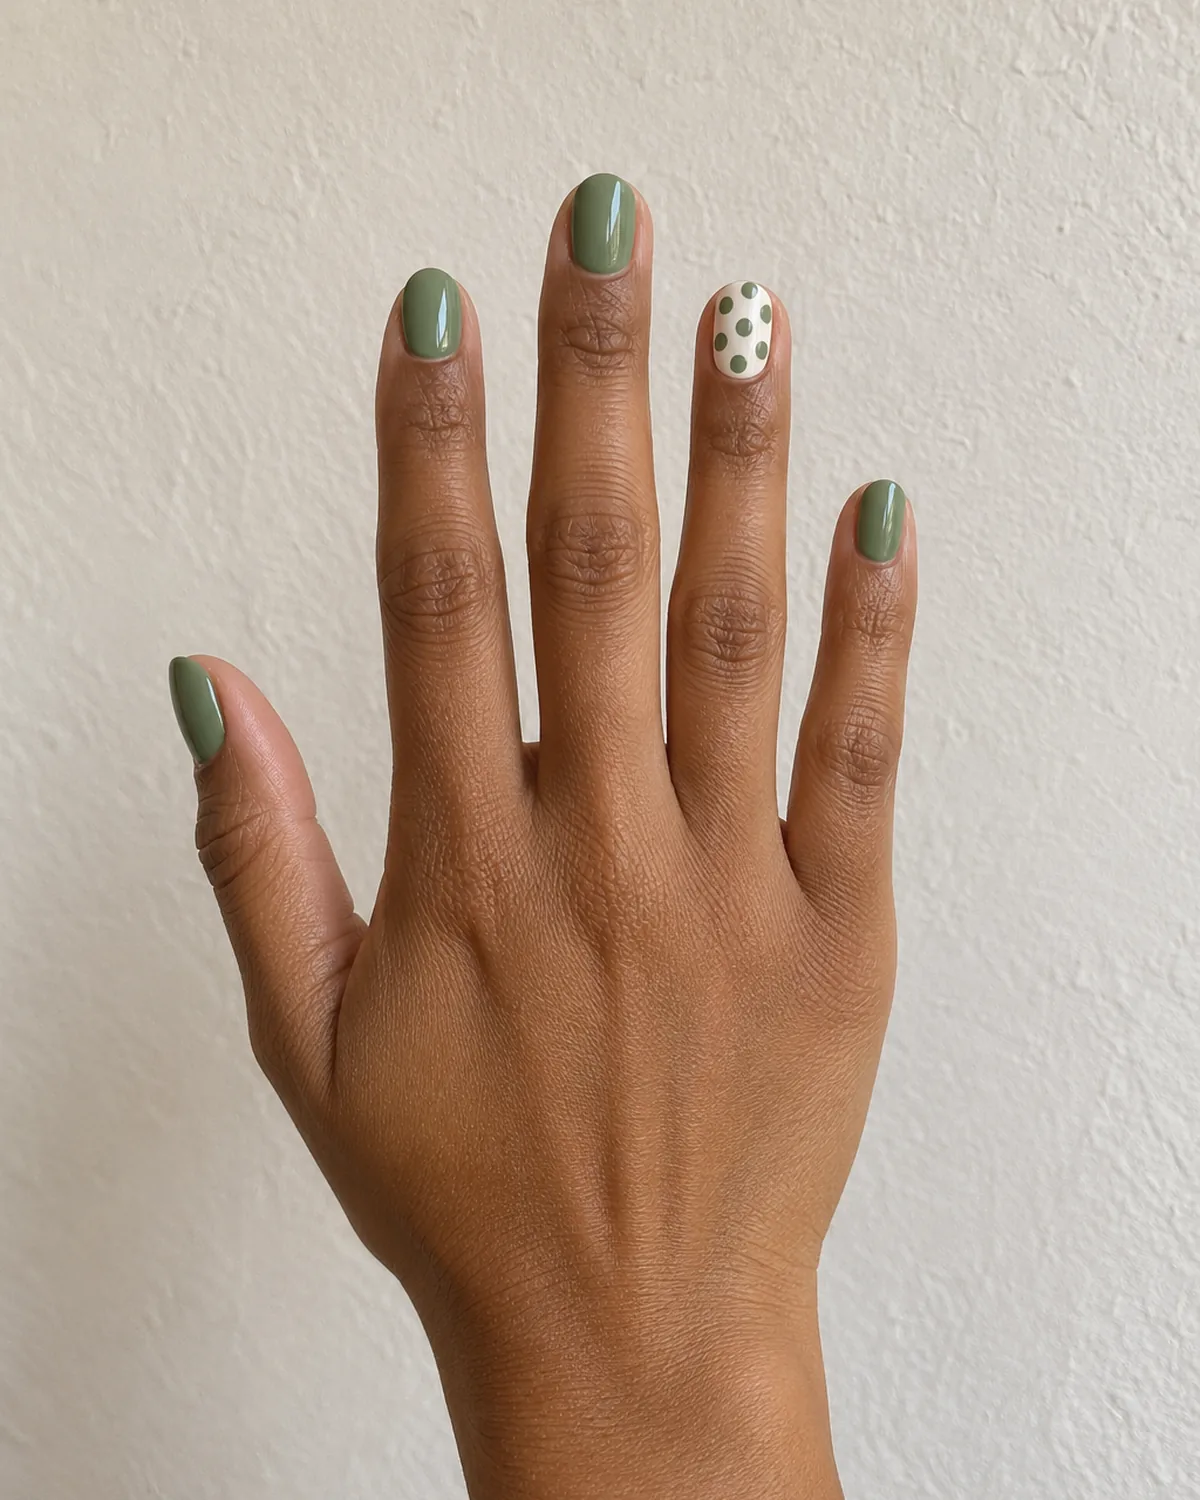
Four nails in plain glossy sage, and the ring finger flipped to a cream base with sage dots. You paint the pattern once, which makes this the easiest way to find out whether you like dots at all.
Reusing the same green for the dots keeps the accent tied to the other four nails. For more ideas in this color, browse our sage green nails collection.
- Shape: short oval
- Palette: sage green, cream
- Skill level: beginner — one patterned nail
- Best for: first-time dots, everyday wear, and soft green lovers
10. Matte Black with Glossy Black Dots on Coffin — Patent Dot
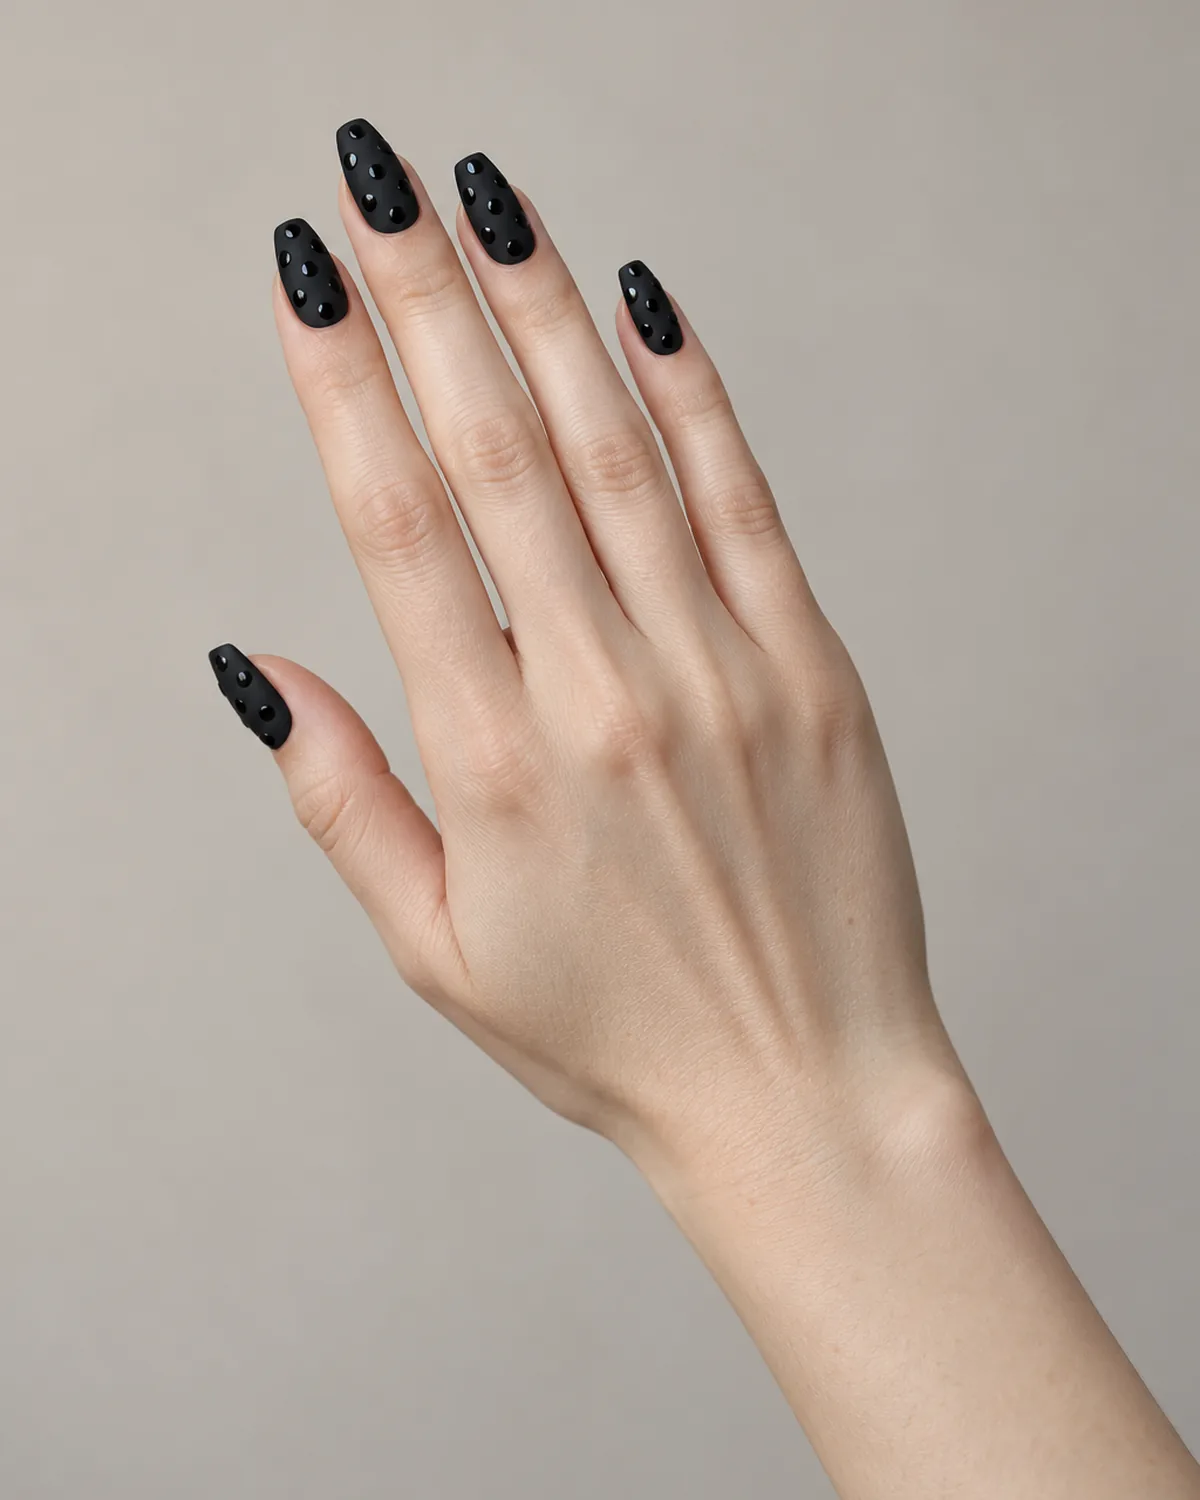
One color, two finishes. A velvet matte black base carries raised high-gloss black dots, so the pattern only shows when light catches it. This is the evening version of a polka dot.
Apply the matte top coat first and cure it. Then dot a glossy top coat on top, and do not wipe over the dots afterward. The long flat surface of coffin nails gives each dot room to catch the light.
- Shape: medium coffin
- Palette: black, in matte and gloss
- Skill level: intermediate — the order of top coats matters
- Best for: evenings, all-black outfits, and anyone who likes matte nails
11. Blush with Gold Dots in Three Sizes on Long Almond — Champagne Bubbles
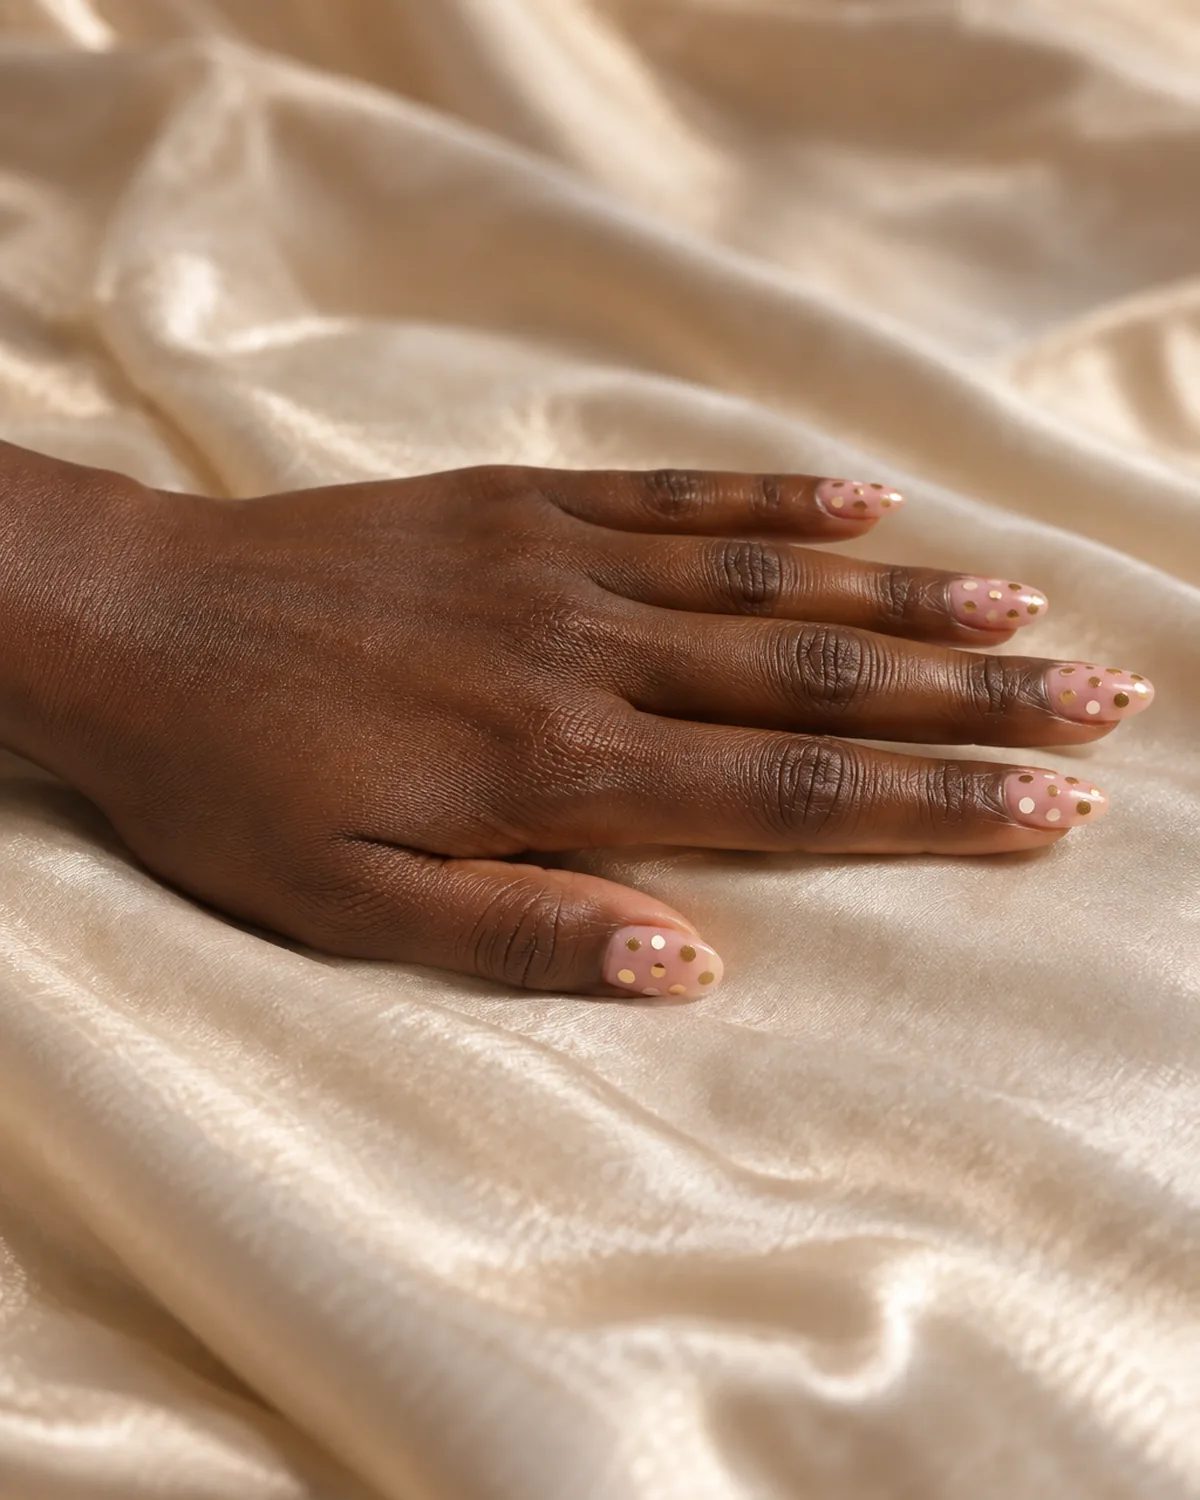
A sheer blush base with metallic gold dots in large, medium and tiny sizes, scattered loosely like bubbles rising in a glass. Mixed sizes and loose placement are what turn a polka dot into something dressy.
Place the largest dots first, two or three per nail, then fill around them with the smaller sizes. Leave real gaps. If the nail fills up, it stops looking like bubbles and starts looking like glitter.
- Shape: long almond
- Palette: sheer blush pink, metallic gold
- Skill level: intermediate — three dot sizes
- Best for: New Year's Eve, weddings, and holiday parties
11 Polka Dot Nail Ideas to Try
- 1Black dots on white, short roundOpaque white with small black dots in an offset grid. The classic everyone pictures.
- 2White dots on cherry red almondGlossy red with crisp white dots. The playful inverse of the classic.
- 3Navy with white pin dots, short squarePinhead dots in a tight grid on deep navy. The office-safe version.
- 4A dot arc on sheer nude ovalOne curved row of black dots along the smile line, no painted tip.
- 5Mismatched pastels with white dotsFive pastel bases tied together by the same white dot on every nail.
- 6One dot at the cuticleA sheer nude base and a single black dot above each cuticle. Two minutes of nail art.
- 7Cascading multicolor dotsDots packed at the tip and thinning toward the middle, like confetti settling.
- 8Cream dots on chocolate brownA fall palette that takes the retro edge off the pattern.
- 9Sage green with one dotted accentFour plain sage nails and one cream ring finger with sage dots.
- 10Matte black with glossy black dotsTone-on-tone dots made by finish alone. They show only when light hits.
- 11Blush with gold dots in three sizesMetallic gold dots in mixed sizes on sheer blush, like rising bubbles.
styvea.com
Frequently Asked Questions About Polka Dot Nails
What can I use if I do not have a dotting tool? A bobby pin, a toothpick, the end of a makeup brush handle, or a ballpoint pen that has run dry all work. Each gives a different dot size, so test on paper first and use the same tool for the whole set.
Do polka dot nails work on short nails? Yes. Short nails suit small dots best: seven to nine per nail in a grid, or a single dot at the cuticle. Our short nail designs guide has more patterns that fit a small nail.
How do I keep dots the same size?
- Pour a small puddle of polish onto foil and dip from that, not from the bottle
- Dip the tool to the same depth every time
- Touch the nail straight down and lift straight up, without dragging
- Wipe the ball clean after every three or four dots
How long should dots dry before top coat? With regular polish, wait at least five to ten minutes, because dots are thicker than a normal coat and stay soft underneath. With gel, cure the dots fully first. Then float the top coat on rather than brushing it in.

Sloane Avery edits Styvea, where she shares nail design ideas, shapes, colors, and at-home manicure how-tos for anyone who loves a good manicure. Every guide is reviewed for clarity, usefulness, image accuracy, and Pinterest-to-page alignment before publication. Visit the About page.