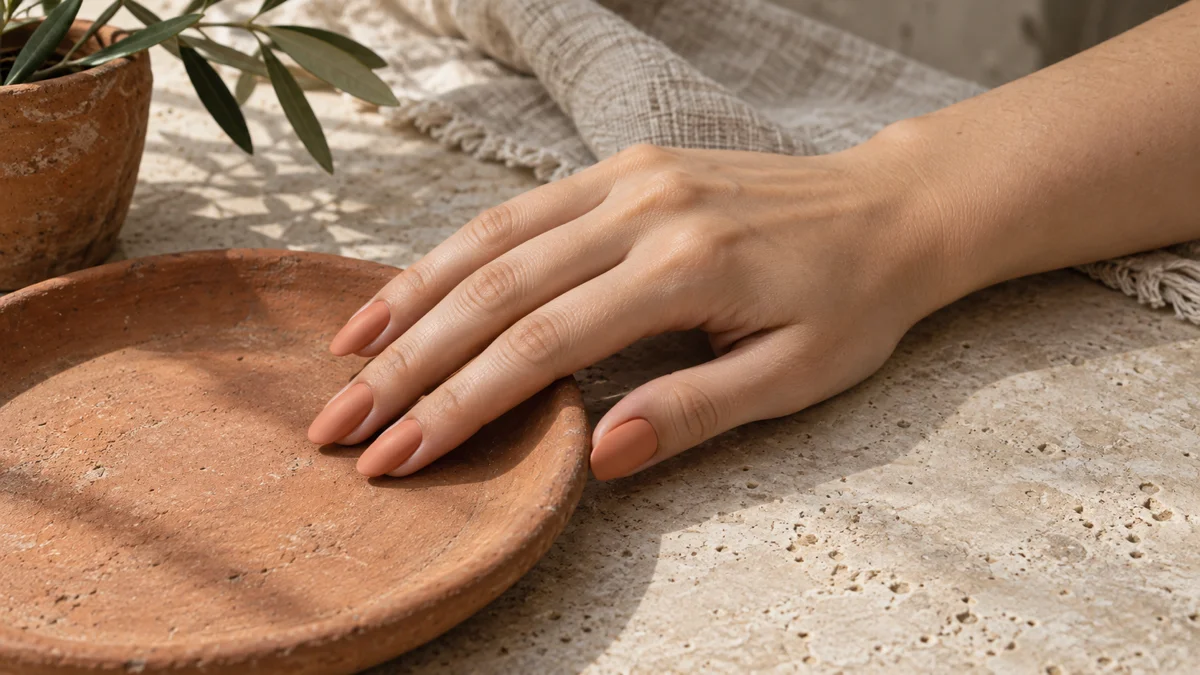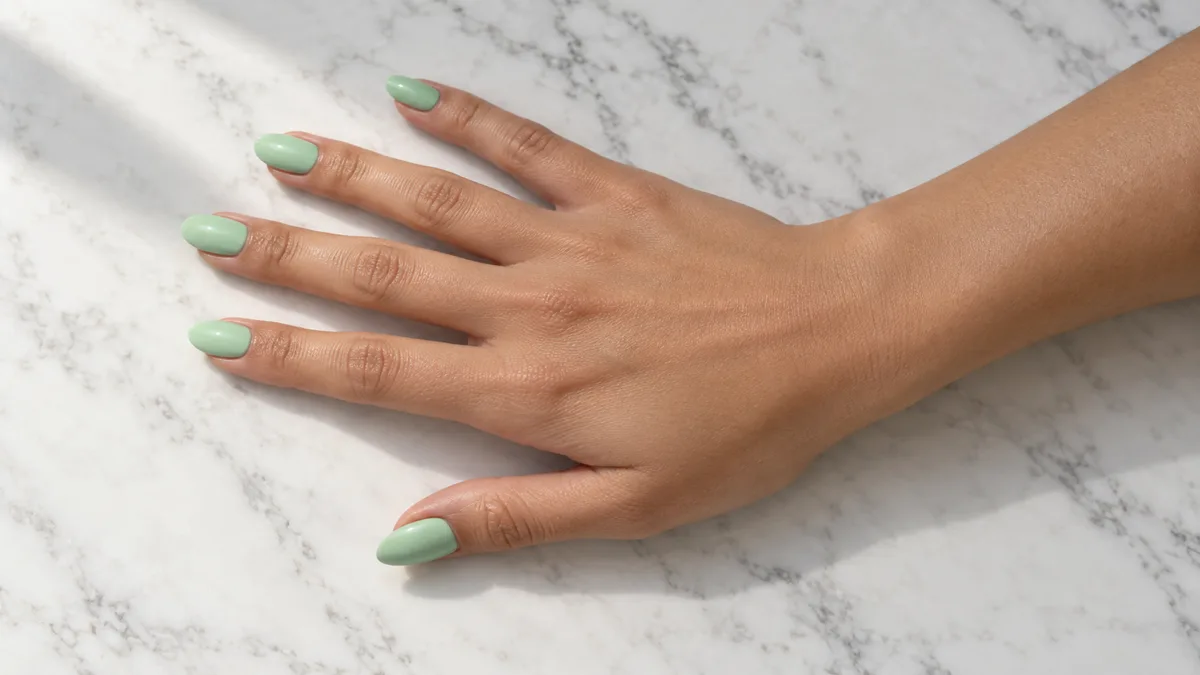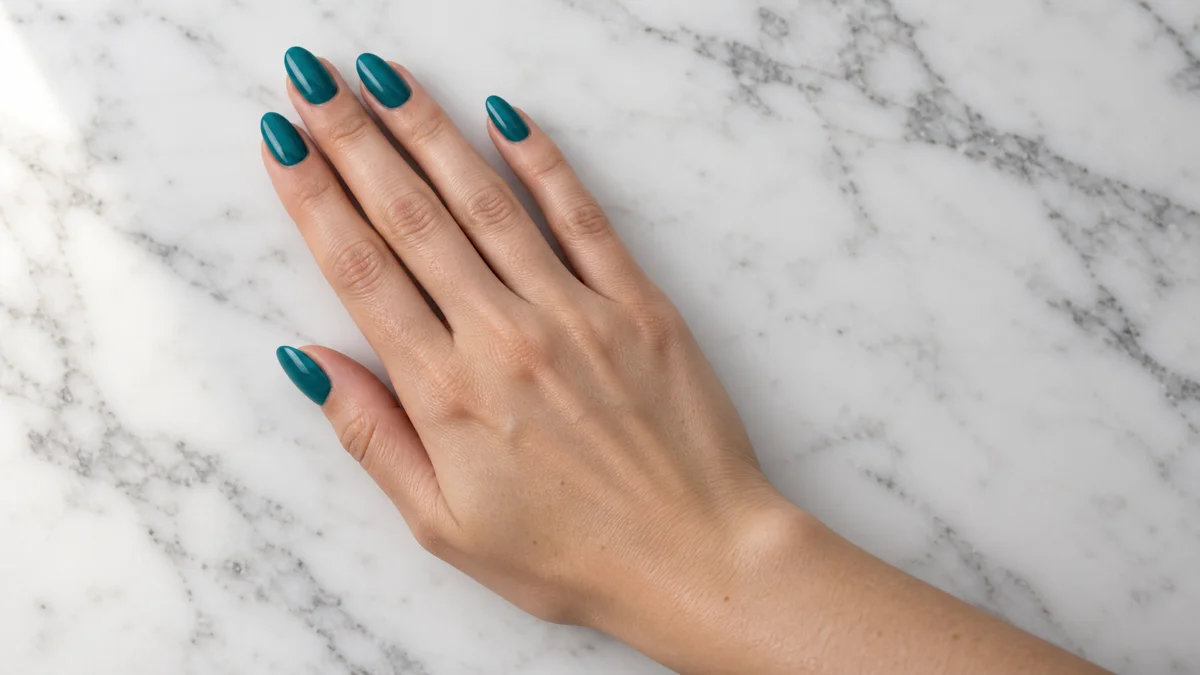
Teal sits in the narrow band where blue and green overlap. That dual identity is what makes it work on nails — it reads cool to some people and bold to others.
These 14 teal nail designs run from solid crème to chrome mirror, matte velvet, cat-eye magnetic stripes, marble veining, glitter gradients, and negative-space geometry.
What's inside
14 Teal Nail Ideas
Find your direction
Finish or Shade?
Two ways into this list. Pick a finish you already love — or pick a teal shade and let the finish follow.
Before you commit
4 Teal Nail Rules Worth Knowing
Teal is one of those colors that shifts appearance under different lighting and skin tones. A few material choices up front save a lot of disappointment at the salon.
1. Solid Teal Crème on Almond — the Jewel-Tone Anchor
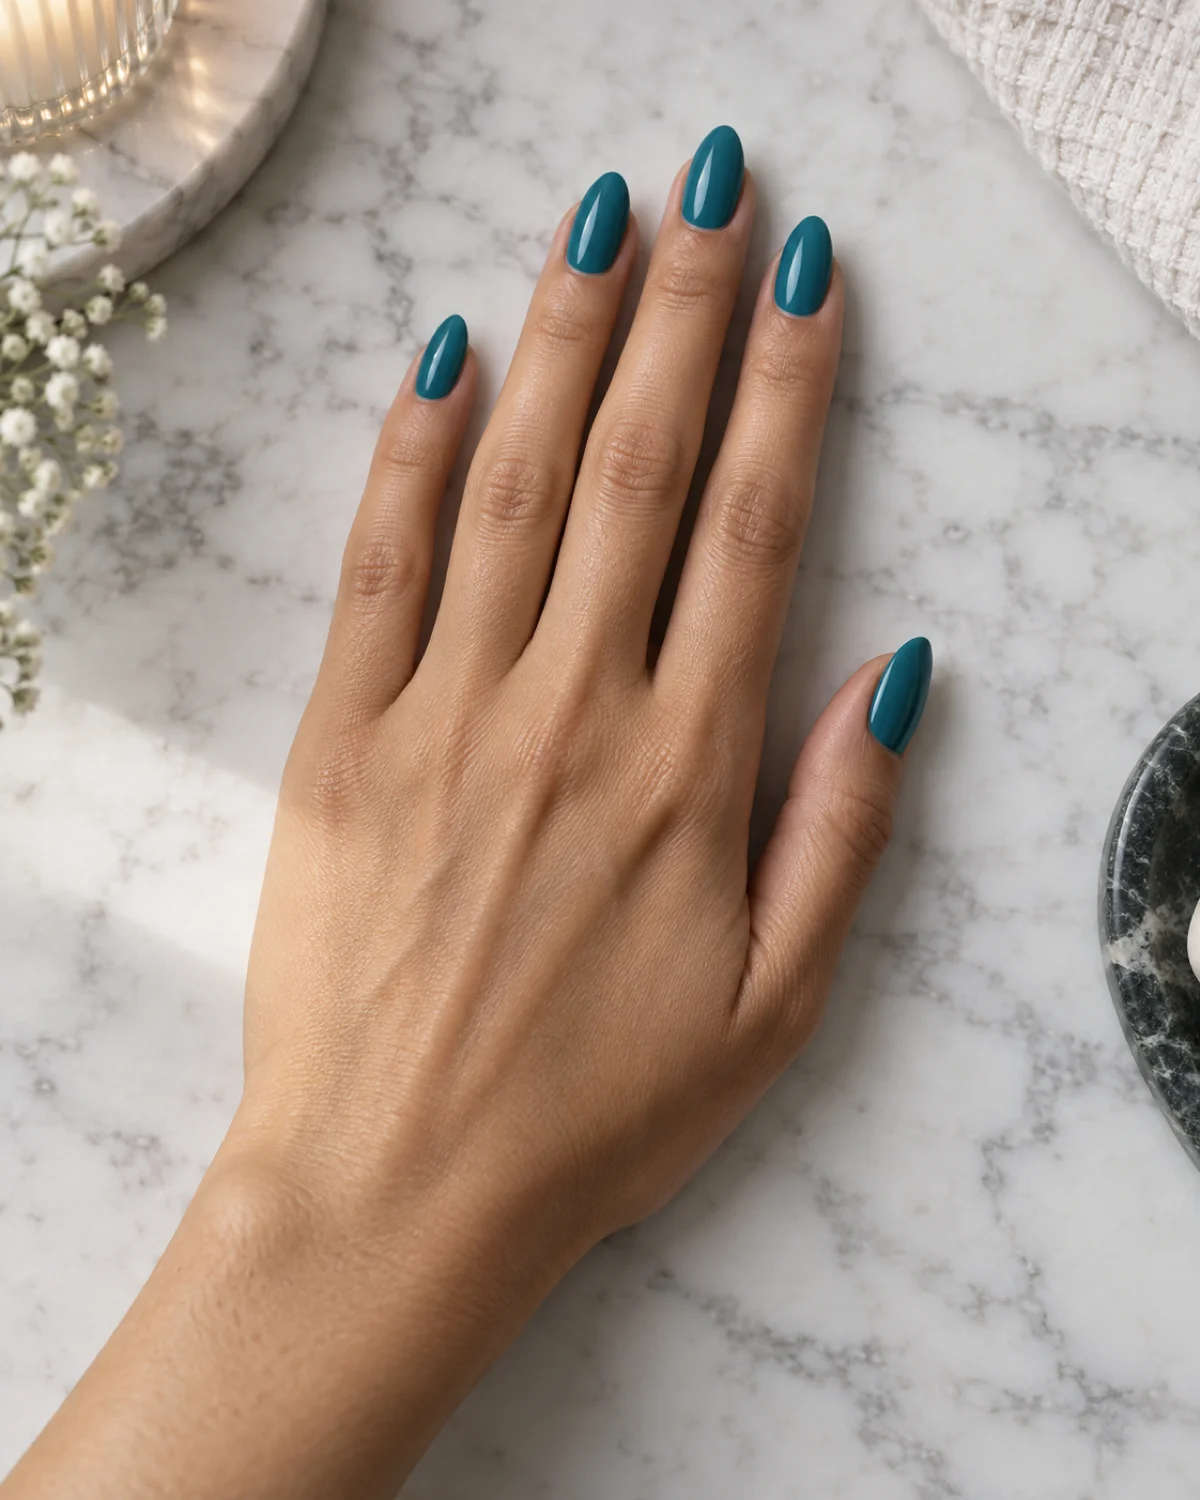
A saturated mid-teal crème with no art, no accent, no texture trick. Just the color doing the work. The blue-green sits right at the center of the teal spectrum — not leaning aqua, not leaning petrol.
Almond shape complements teal crème because the tapered tip concentrates the color into a point that catches light at the very end of the nail. Wider shapes spread the color thinner at the tip.
- Shape: Almond
- Color: Mid-teal crème (Pantone Teal Blue range)
- Finish: Glossy
- Placement: Full coverage, all nails
- Best for: A first teal set where you want the color to speak for itself
Two coats of a good teal crème formula should be fully opaque. If the first coat shows streaks, the polish is too sheer for this look — switch to a one-coat formula or plan on three thin layers.
2. Dark Teal Matte on Coffin — Velvet Depth
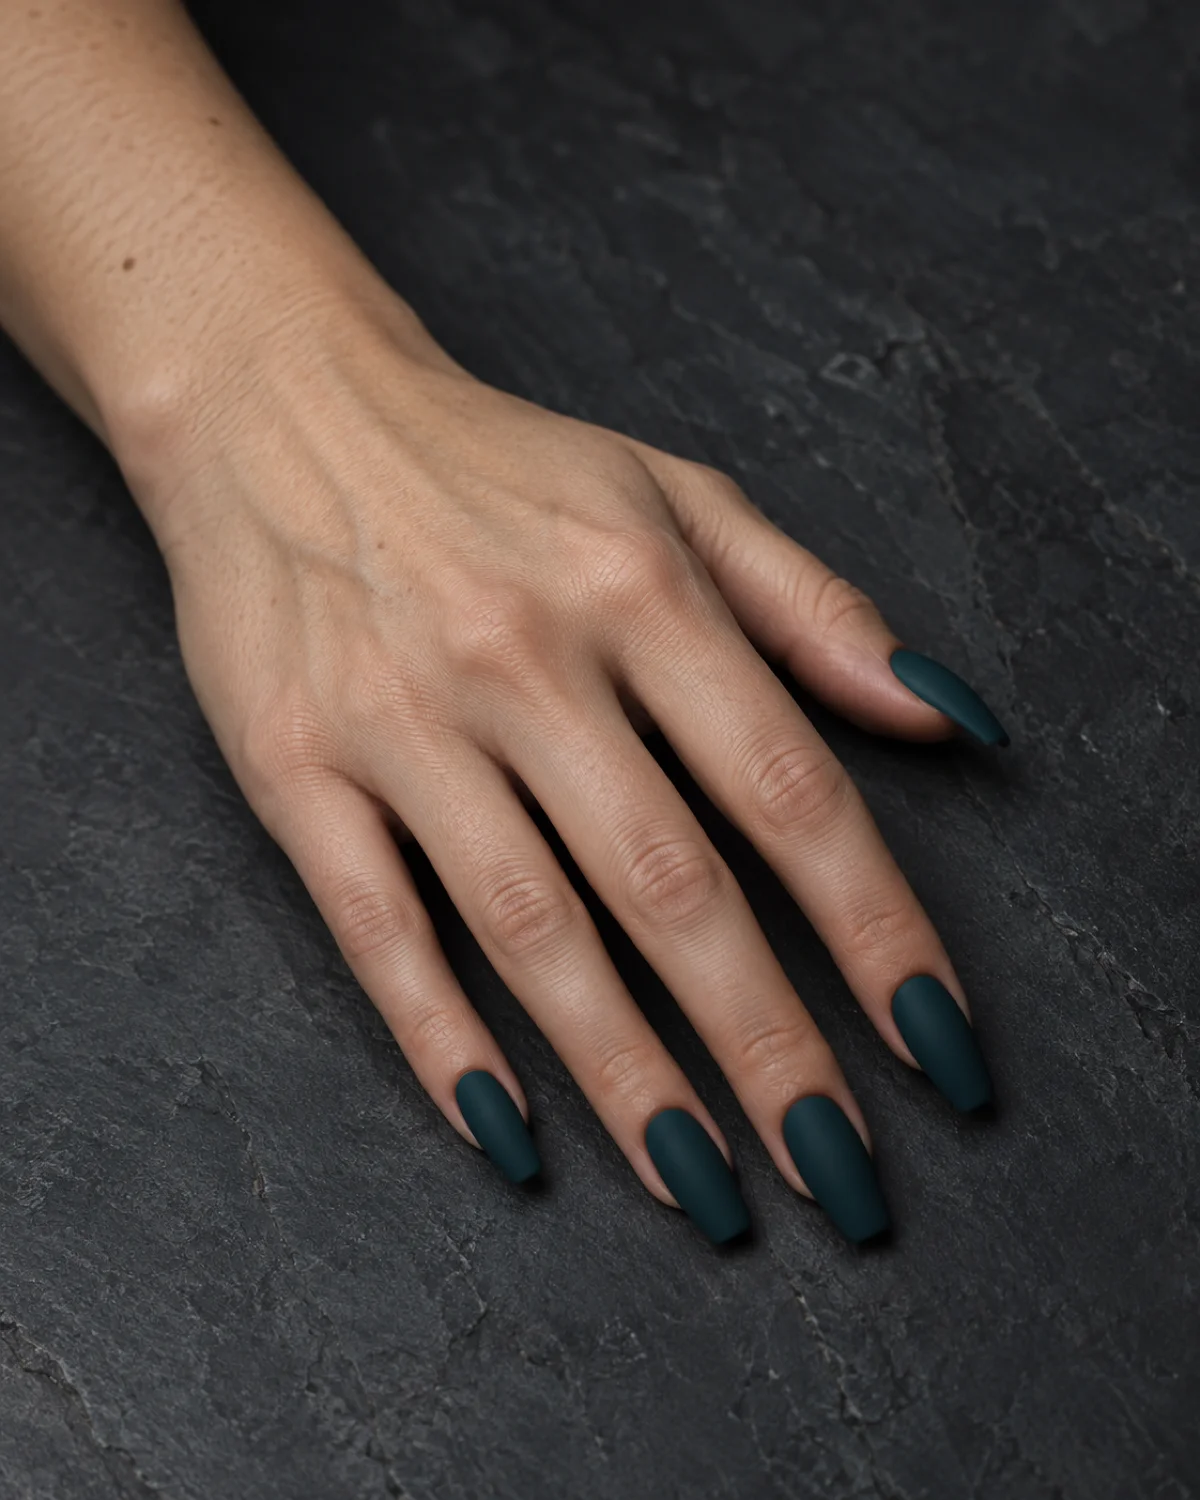
Deep dark teal, almost petrol, sealed with a matte topcoat that absorbs light instead of bouncing it. The coffin shape gives the nail a flat, wide canvas where the matte finish reads like brushed fabric.
The matte effect darkens the color by roughly one shade. What looked like a rich teal in the bottle comes out closer to midnight blue-green on the nail. Starting one shade lighter than your target compensates.
- Shape: Coffin
- Color: Deep dark teal (petrol/blue-green)
- Finish: Matte
- Placement: Full coverage, all nails
- Best for: Fall and winter sets where you want depth without black
A matte topcoat applied over fully cured or dried polish takes about 60 seconds to transform the surface. Touch with damp hands or oily fingers will leave glossy fingerprints that break the velvet illusion — let it set for five minutes after application.
3. Teal Chrome on Short Round — Liquid Metal Shift
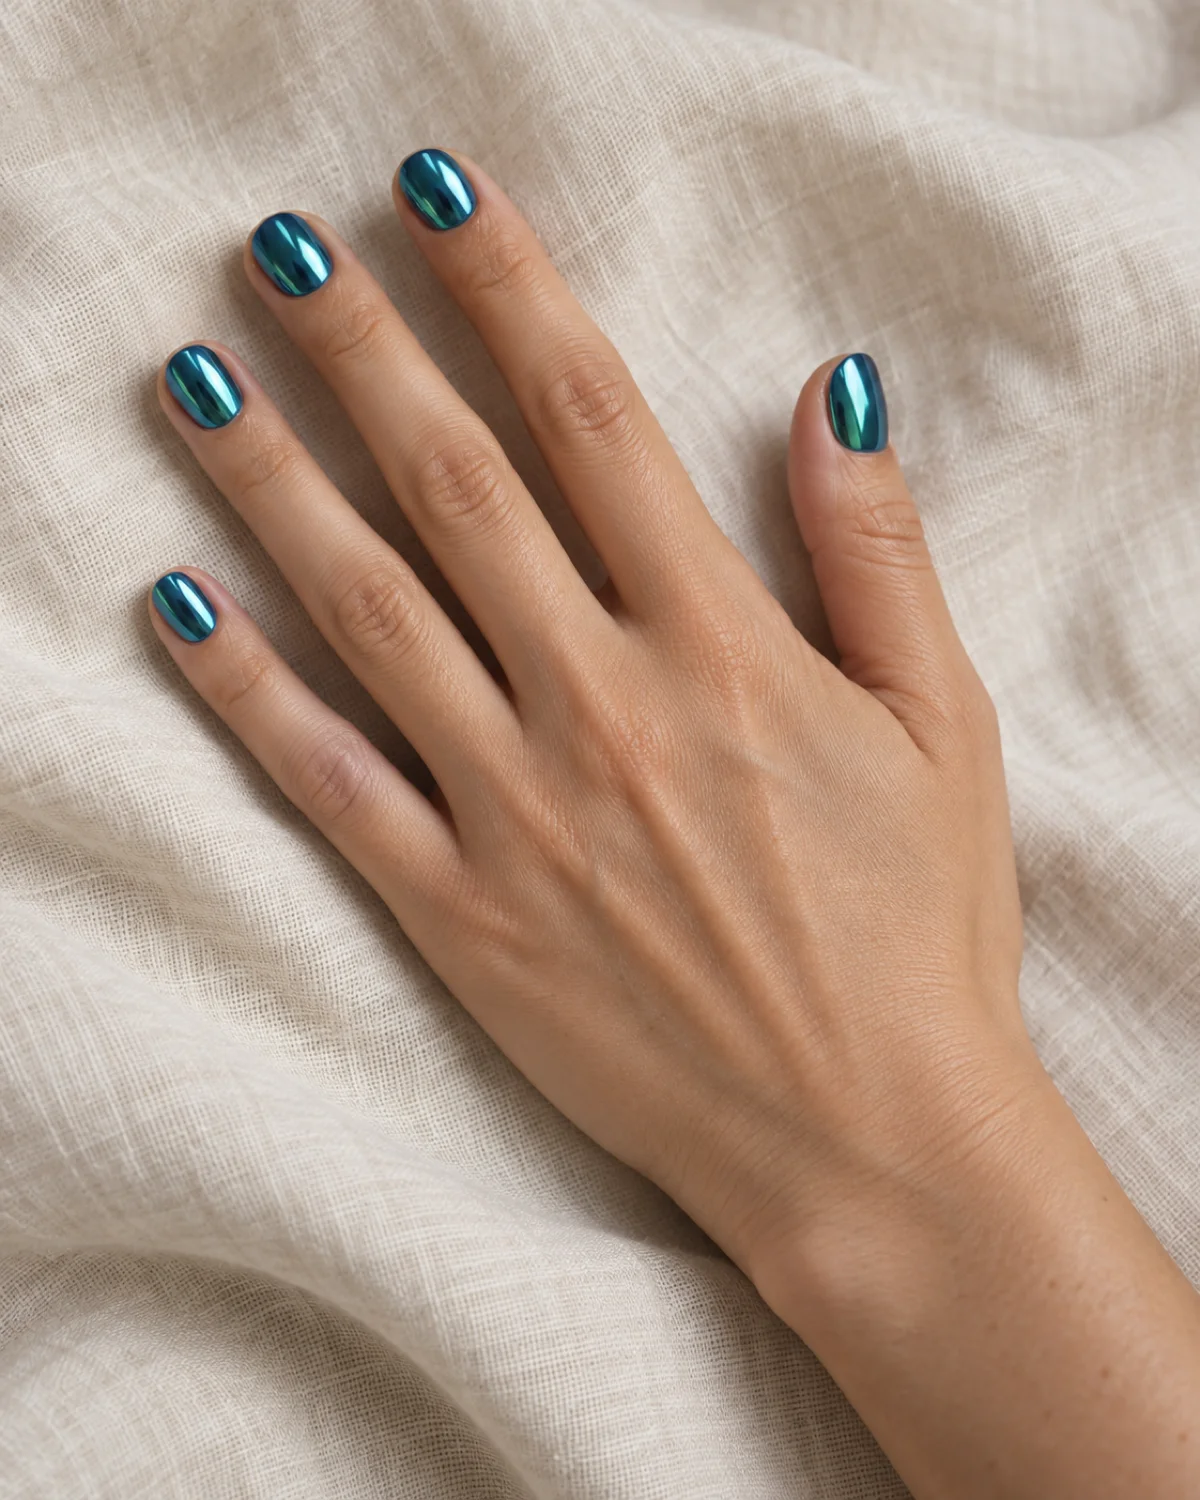
Teal chrome on short round nails shifts between blue and green as the hand moves. The mirror-like surface catches ambient light and throws it back in a different color depending on the angle.
Short round nails keep the chrome effect grounded. On longer or more dramatic shapes, chrome can look costume-like. On short rounds, it reads more like a piece of jewelry than a special effect.
- Shape: Short round
- Color: Teal chrome (blue-green metallic shift)
- Finish: Chrome / mirror
- Placement: Full coverage, all nails
- Best for: A futuristic teal that changes color when you gesture
Chrome pigment is rubbed onto a cured gel base, not brushed on like regular polish. The base needs to be jet black or very dark teal for the chrome to appear intense. Lighter bases wash the effect out.
4. Light Teal French Tips on Nude — the Color-Pop Tip
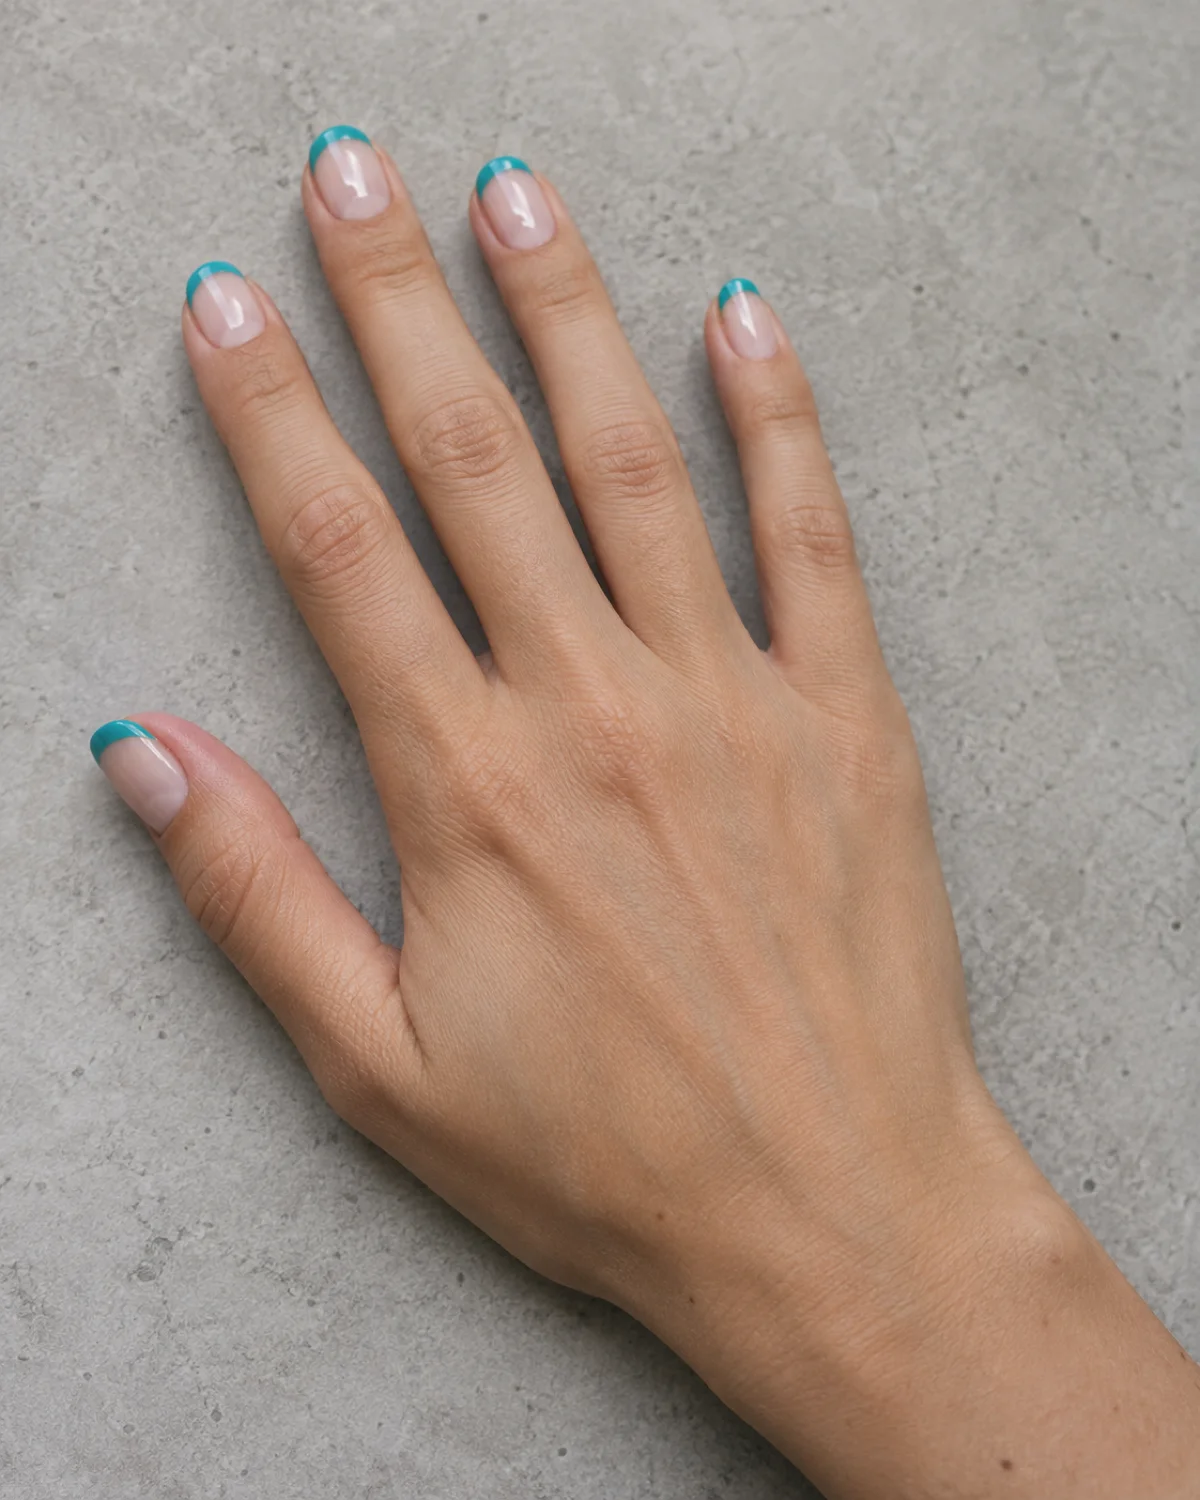
The classic white French tip replaced with a light, aqua-leaning teal. The nude base stays warm and sheer, and the teal tip does all the color work from the smile line forward.
This version of teal French tips leans toward the lighter, brighter end of the spectrum. The contrast with nude is sharper than it would be with a dark teal tip, which can read almost black from a distance.
- Shape: Any (works across shapes)
- Color: Sheer nude base, light teal tips
- Finish: Glossy
- Placement: Tips only
- Best for: A work-appropriate way to wear teal without full-coverage color
Paint the nude base first and let it dry or cure completely. Then use a thin brush to draw the smile line and fill the tip with teal. A guide strip helps if freehand lines feel unsteady.
5. Teal-to-Black Ombré on Stiletto — Midnight Gradient
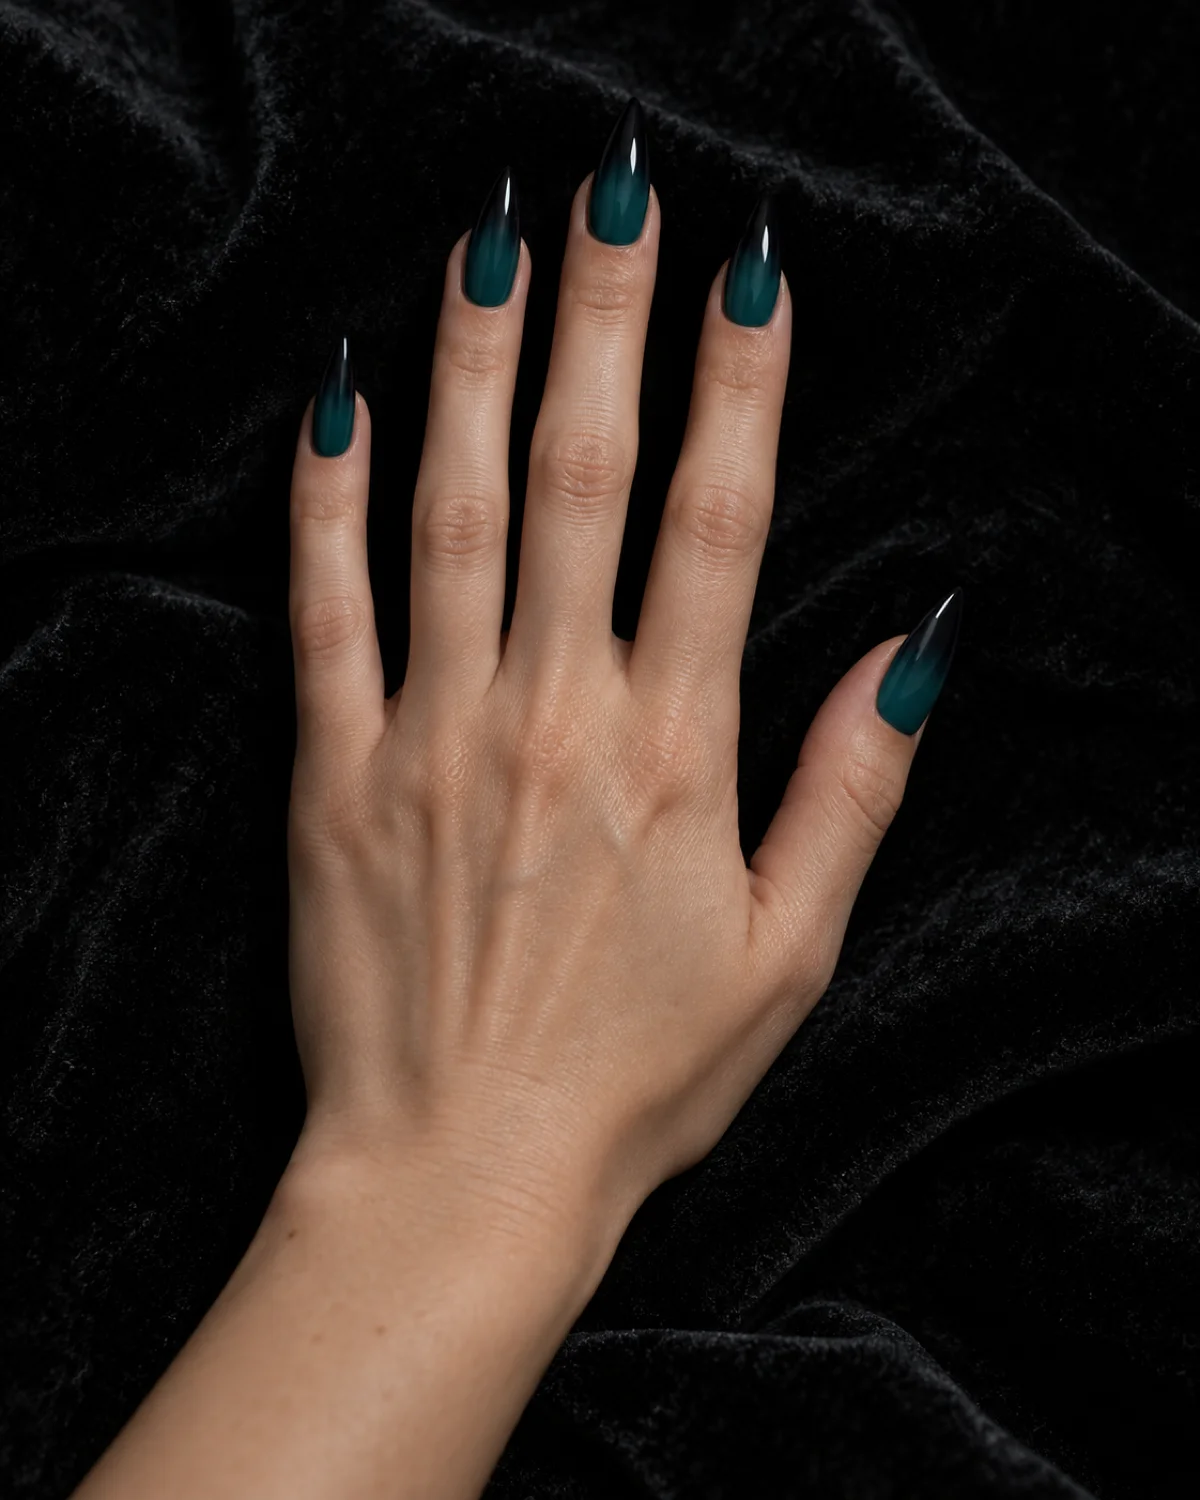
Teal at the cuticle, black at the tip, with a smooth gradient between them. The stiletto shape stretches the fade across a longer canvas, giving each zone of color more room to breathe.
The transition works because teal and black share enough darkness in common that the blend zone does not create an unwanted third color. Teal fading into white, by contrast, passes through a chalky mint stage that is harder to control.
- Shape: Stiletto
- Color: Teal base fading to black tips
- Finish: Glossy
- Placement: Full coverage, gradient on all nails
- Best for: A dramatic teal ombré that leans dark and editorial
Sponge-blend the gradient. Apply teal and black side by side on a cosmetic sponge, then dab onto the nail in 3–4 passes. Each pass builds the transition. Clean the cuticle area with a detail brush dipped in acetone before sealing.
6. Teal With Gold Foil Flecks on Oval — Sunken Treasure
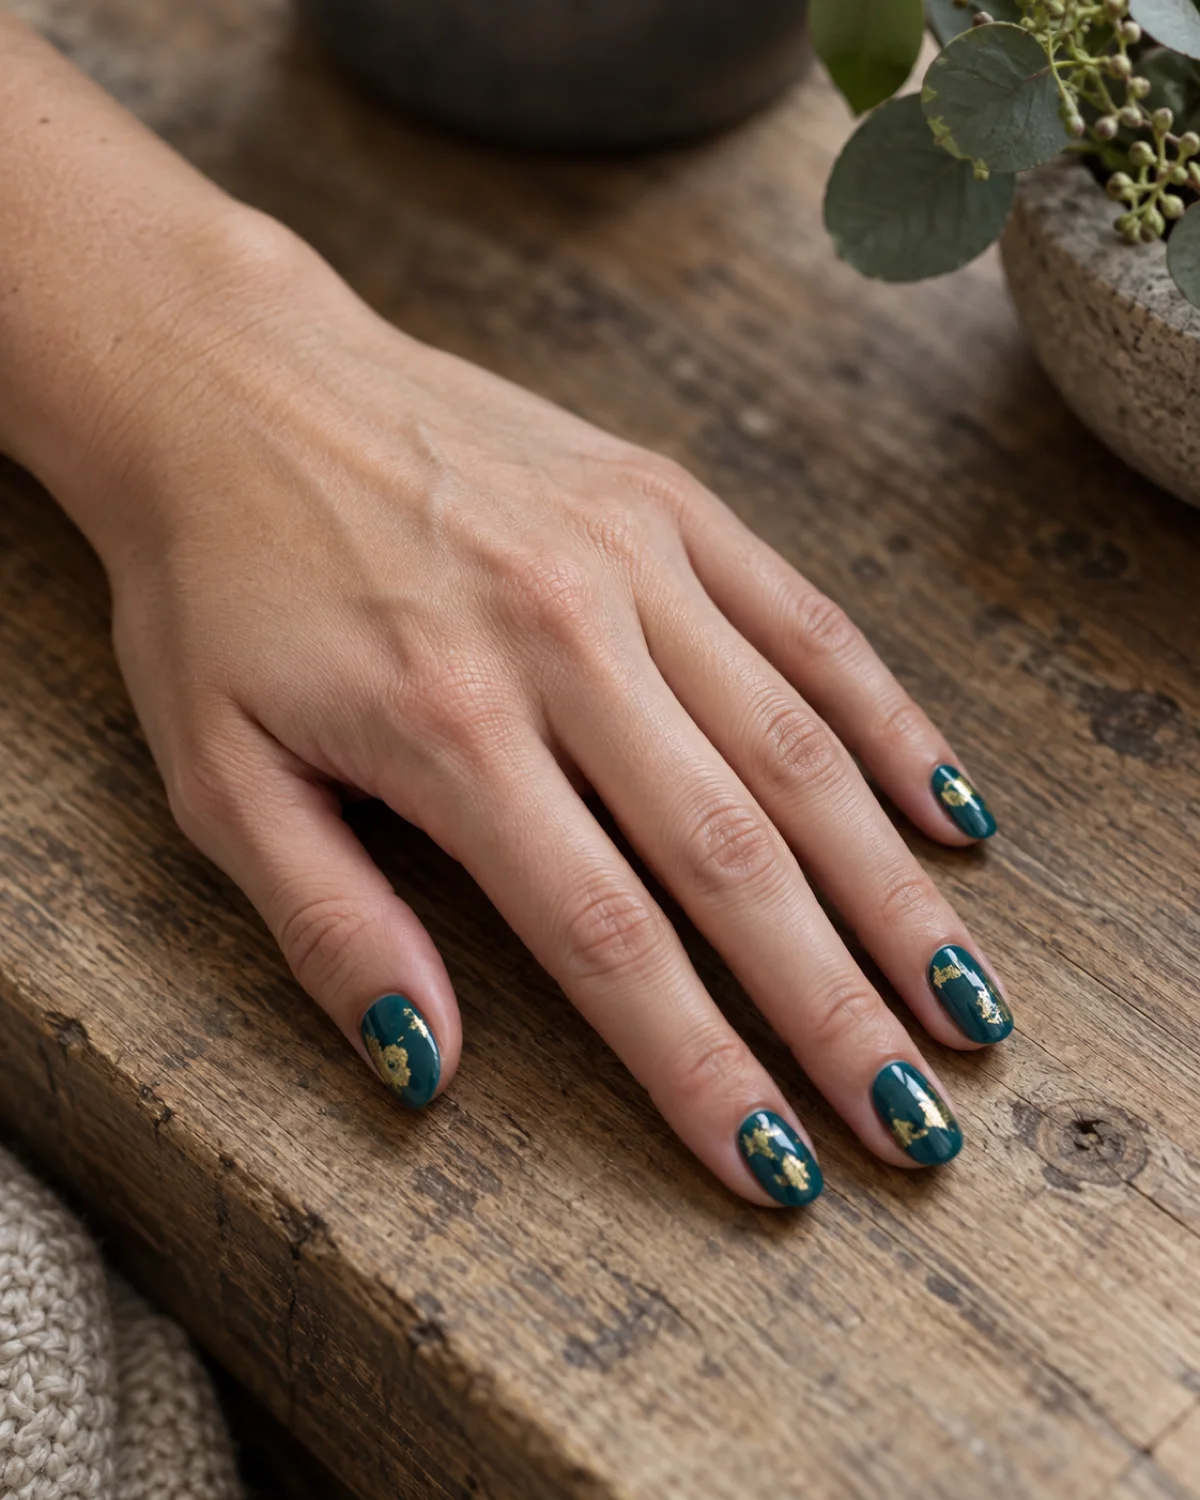
Rich teal gel with irregular gold leaf flecks pressed into the surface. The gold sits partially submerged under a clear top coat, catching light at random points like something found at the bottom of a tide pool.
The foil distribution matters more than the amount. Too many flecks and it looks like a craft project. Two or three small, irregular pieces per nail — placed at different heights and angles — keeps the gold reading as an organic accent.
- Shape: Oval
- Color: Rich teal gel base, gold leaf flecks
- Finish: Glossy (foil is metallic)
- Placement: Full coverage base, foil scattered on all nails
- Best for: An evening or occasion set that adds warmth to the cool teal
Press the gold leaf onto uncured gel with a dry brush or silicone tool. Tear the leaf into small, irregular pieces first — uniform squares look deliberate in the wrong way. Cure, then seal with a clear gel top coat.
7. Teal Marble Swirl on Square — Ocean Stone
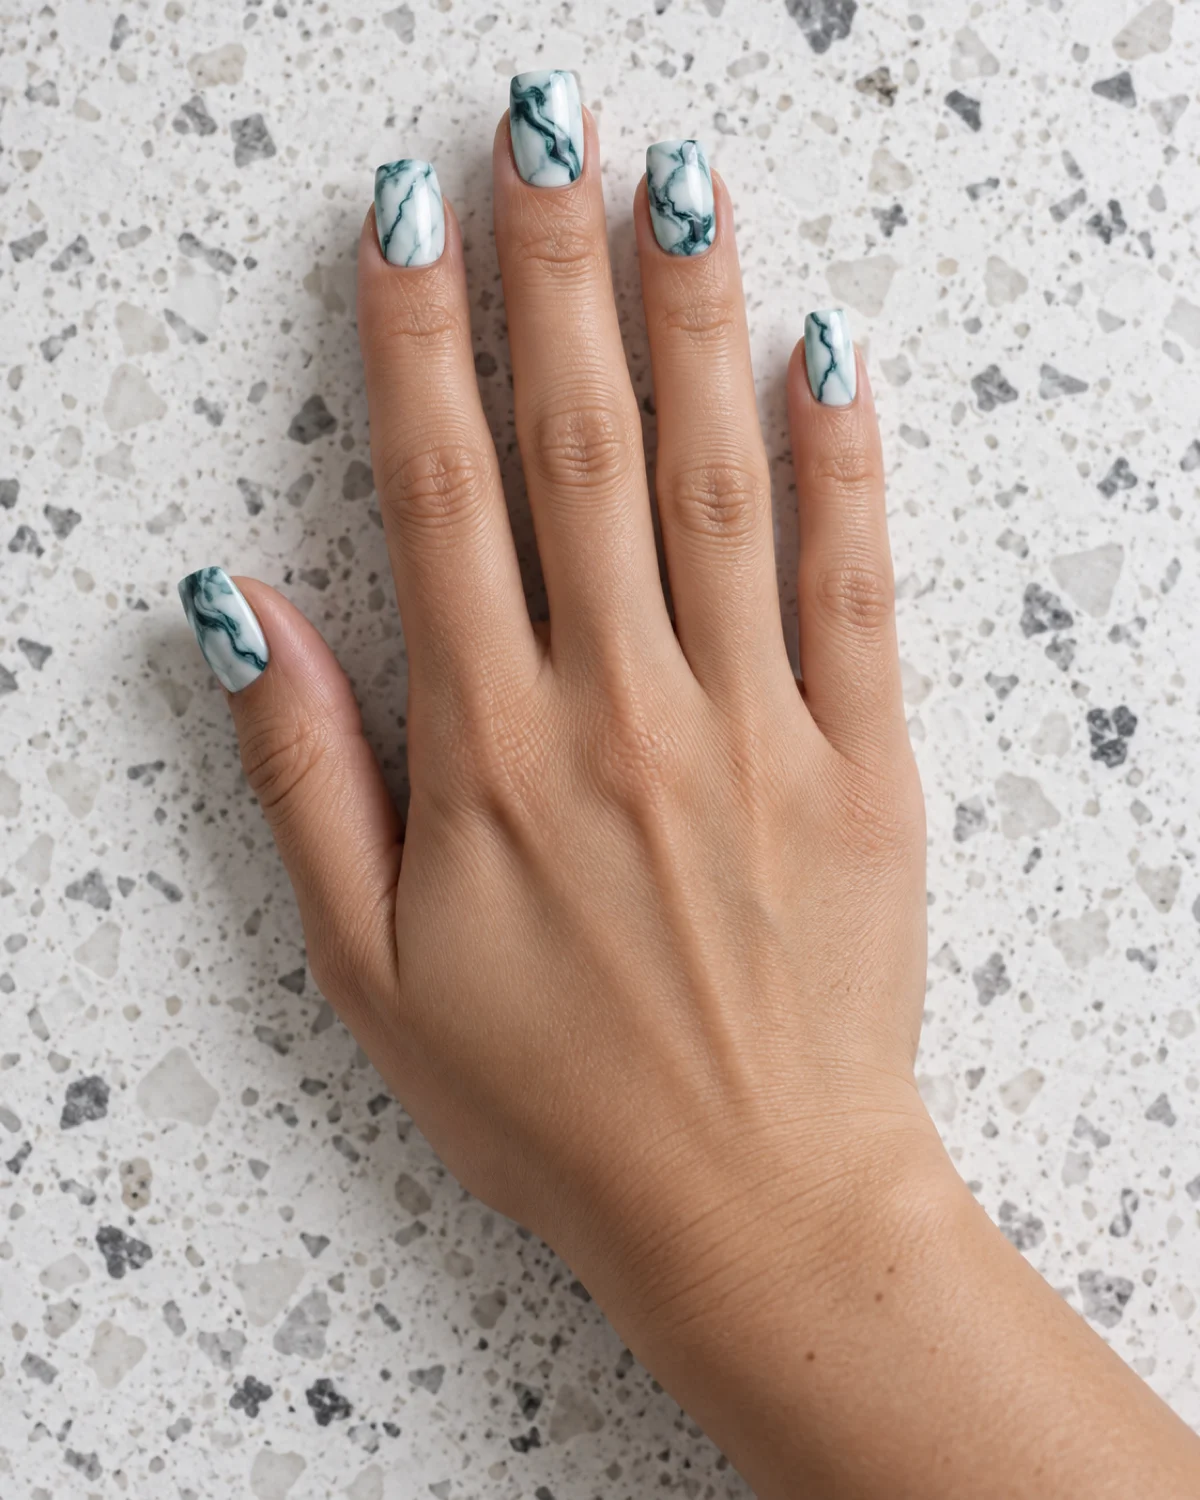
White base with teal and deep teal veining that mimics natural stone. Each nail gets a slightly different pattern, the way real marble slabs never repeat.
Square nails give this design more surface area for the veins to wander. On shorter or rounded shapes, the marble reads as two or three disconnected lines. On a wide square canvas, the veins branch and intersect the way they do in an actual stone slab.
- Shape: Square
- Color: White base, teal and deep teal veining
- Finish: Glossy
- Placement: Full coverage, marble pattern on all nails
- Best for: A nail-art version of teal that does not look like a solid color block
Drop teal and deep teal gel into a white gel base before curing. Use a thin liner brush to drag the drops into veins. The trick is to pull in one direction — jagged back-and-forth strokes look more like tie-dye than stone.
8. Teal Glitter Gradient on Almond — Scattered Sparkle
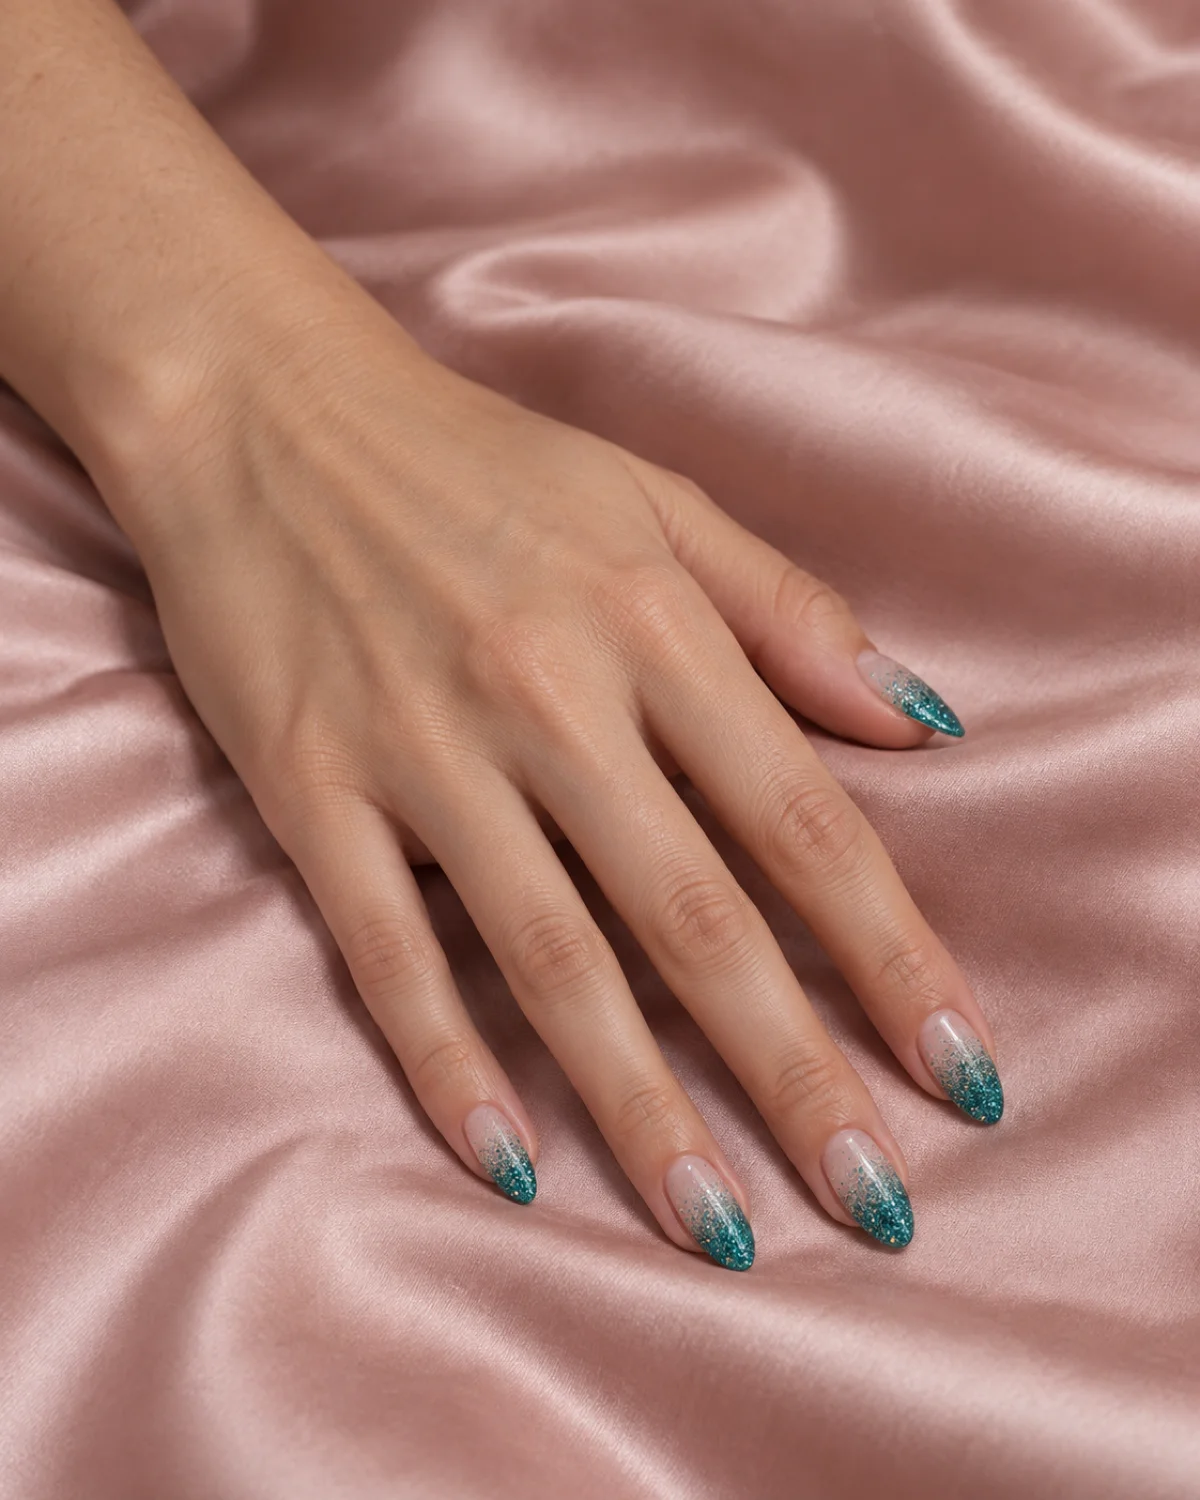
Dense teal micro-glitter packed at the tips, fading to bare nail at the cuticle. The gradient concentrates the sparkle where it catches the most light — at the end of the nail where fingers tap, type, and gesture.
Almond shape narrows the glitter field toward a single bright point at the tip. On a square shape, the glitter would spread evenly across the flat edge. The almond taper funnels it.
- Shape: Almond
- Color: Clear base, teal micro-glitter at tips
- Finish: Glitter (glossy top coat)
- Placement: Gradient from bare cuticle to dense glitter tips
- Best for: A party or event set that still shows some natural nail
Apply a clear base coat. Dab a sponge loaded with teal glitter polish onto the tip half of the nail, pressing more densely at the very tip. Two passes build enough density. Seal with a thick clear top coat to smooth the glitter texture.
9. Teal and White Half-Moon on Coffin — Retro Crescent
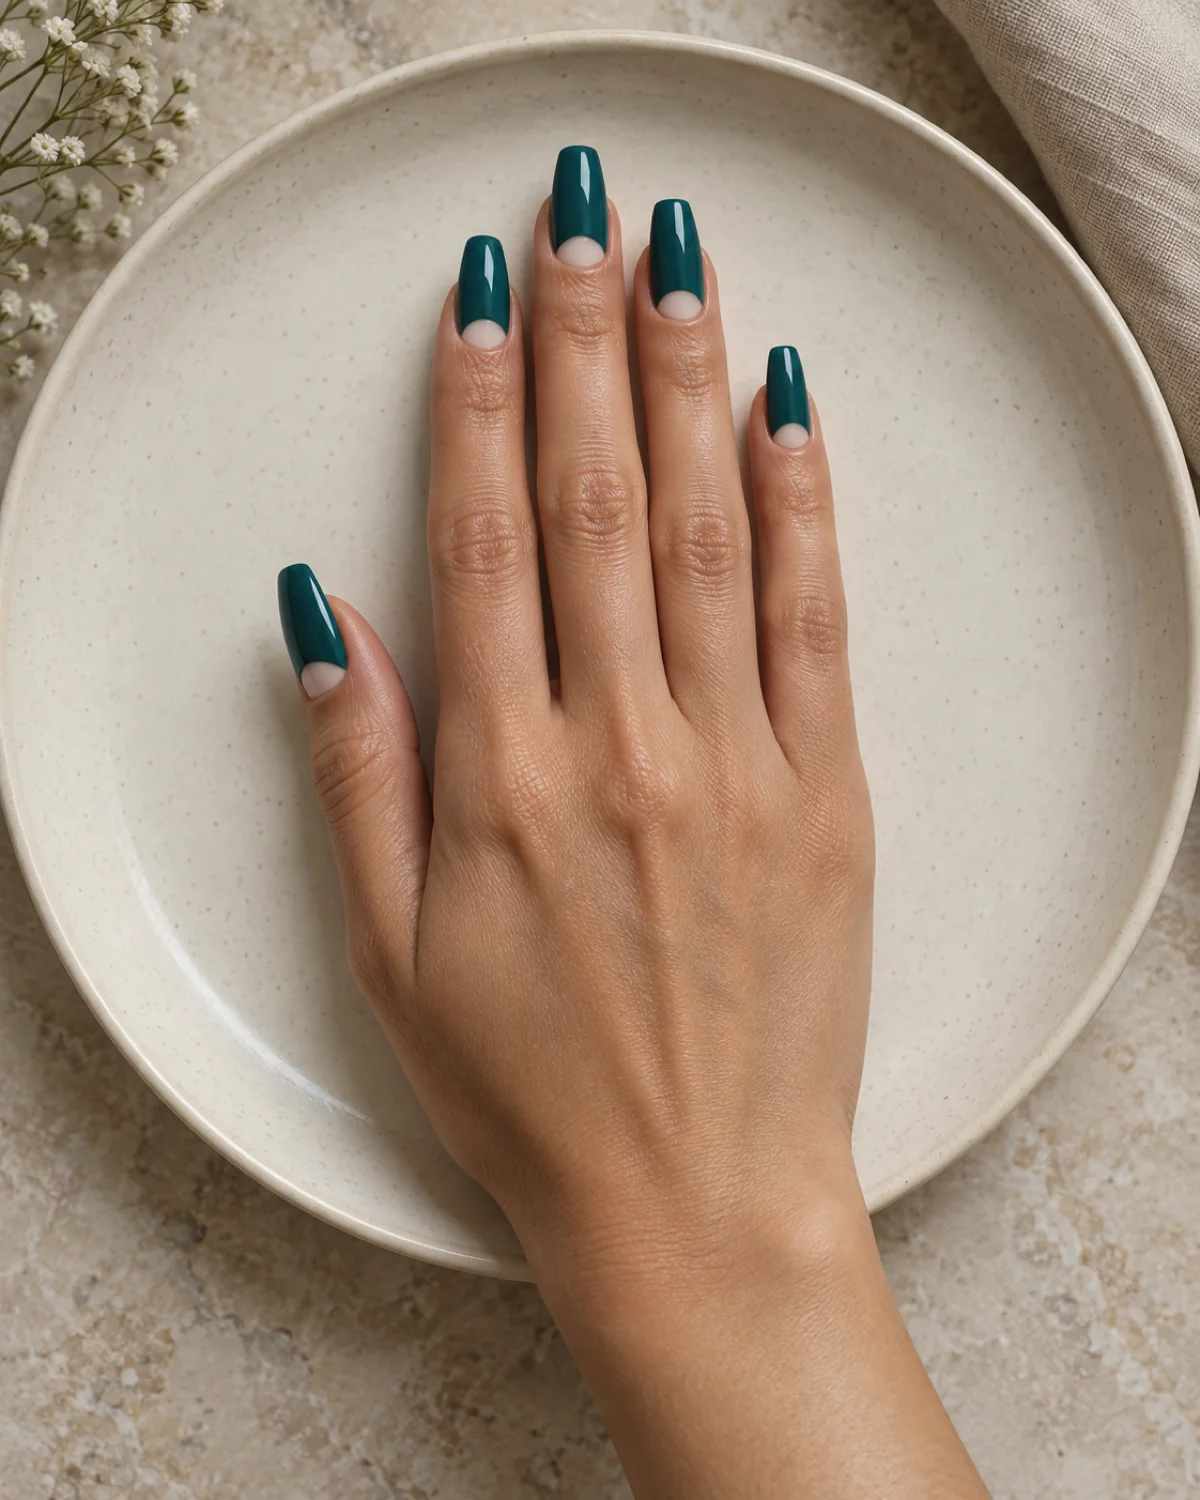
Deep teal base with a white crescent left exposed at the lunula — the half-moon at the very base of the nail. The white crescent is part of the natural nail showing through, not painted on.
This is a vintage manicure technique from the 1930s updated with a modern color. The original version used a nude crescent on red polish. Teal and white gives the same structural drama with a cooler, more contemporary palette.
- Shape: Coffin
- Color: Deep teal base, white crescent at lunula
- Finish: Glossy
- Placement: Full coverage except the crescent at the base
- Best for: A retro-modern teal look that highlights the nail's natural architecture
Place a reinforcement ring sticker (the kind used for hole-punched paper) at the base of the nail to mask the lunula. Paint teal over the exposed area. Remove the sticker while the polish is still wet for a clean curve.
10. Teal Cat Eye on Almond — Magnetic Stripe
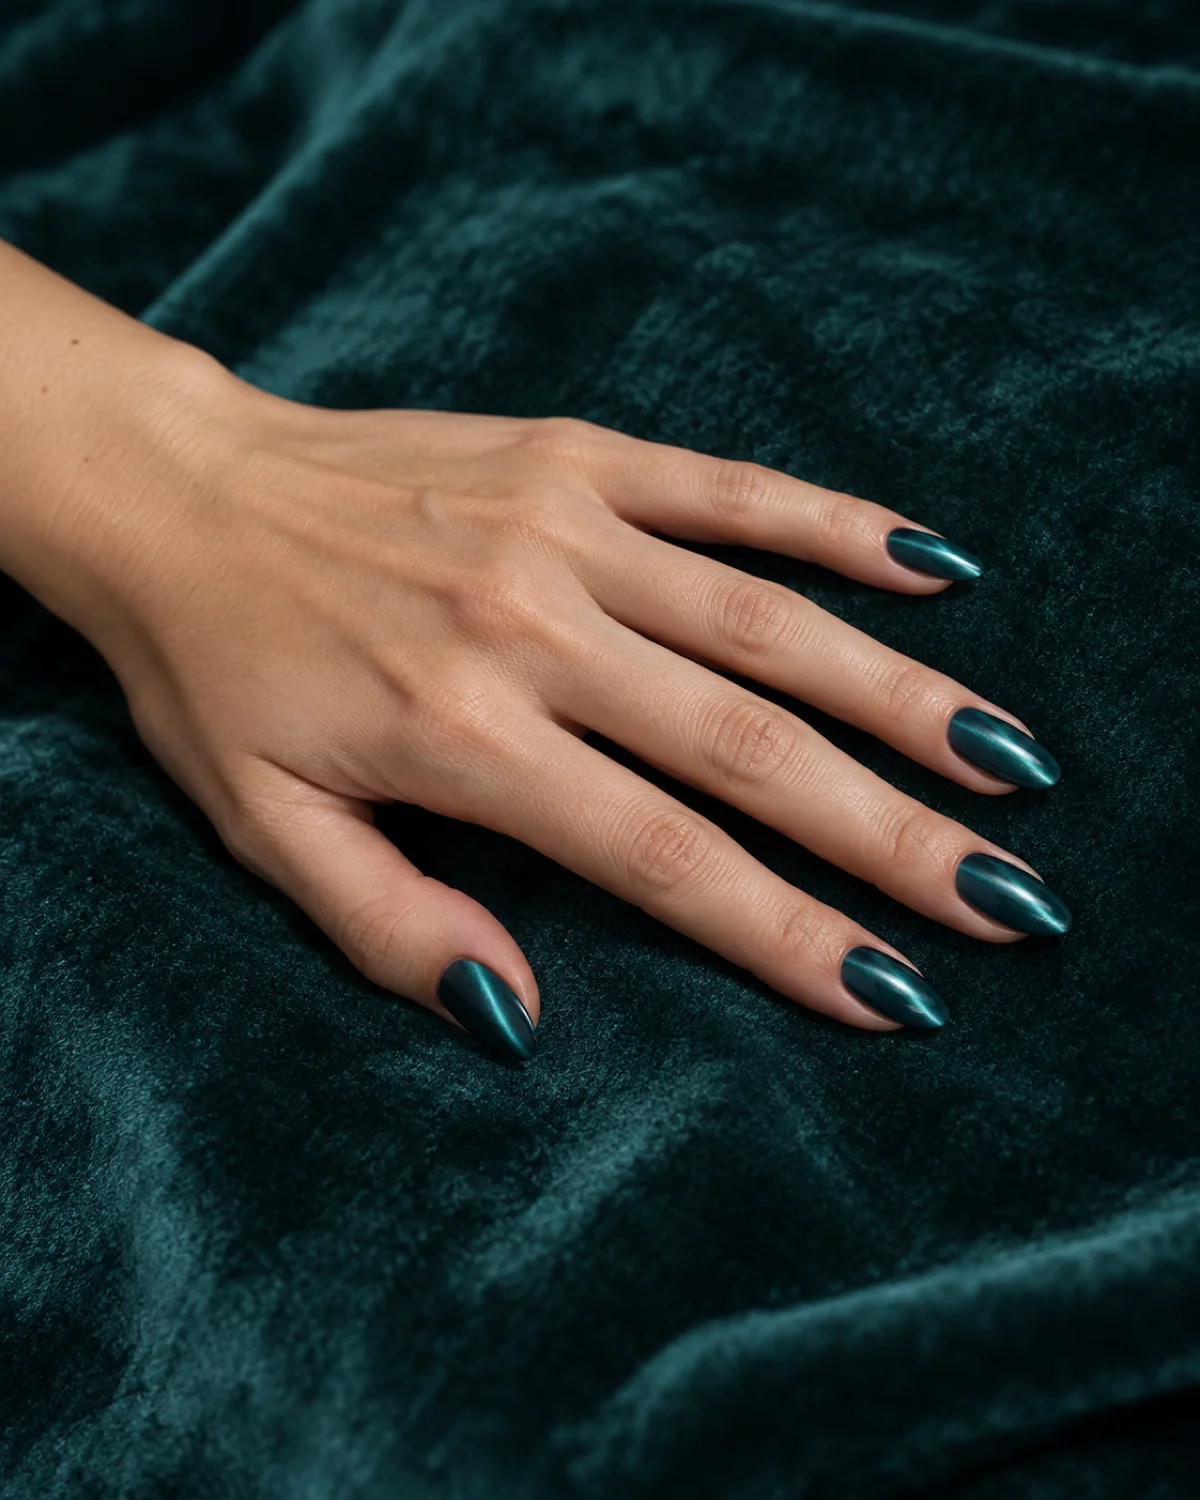
Teal cat-eye magnetic polish with a bright vertical stripe of light running down the center of each nail. The stripe shifts position when the hand moves, catching light the way a real cat's eye does.
The magnetic effect works best on darker shades of teal. Lighter versions produce a faint stripe that gets lost. The depth of dark teal gives the magnetic particles enough contrast to form a visible, sharp line of light.
- Shape: Almond
- Color: Teal cat-eye magnetic polish
- Finish: Magnetic (glossy)
- Placement: Full coverage, magnetic stripe on all nails
- Best for: A teal that has movement and depth without any hand-painted art
Apply the magnetic polish and hold a magnet directly over the nail for 10–15 seconds before curing. The magnet pulls iron particles in the polish into a line. The closer the magnet, the tighter the stripe. Cure immediately after removing the magnet to lock the pattern.
11. Teal Jelly on Short Squoval — Stained-Glass Transparency
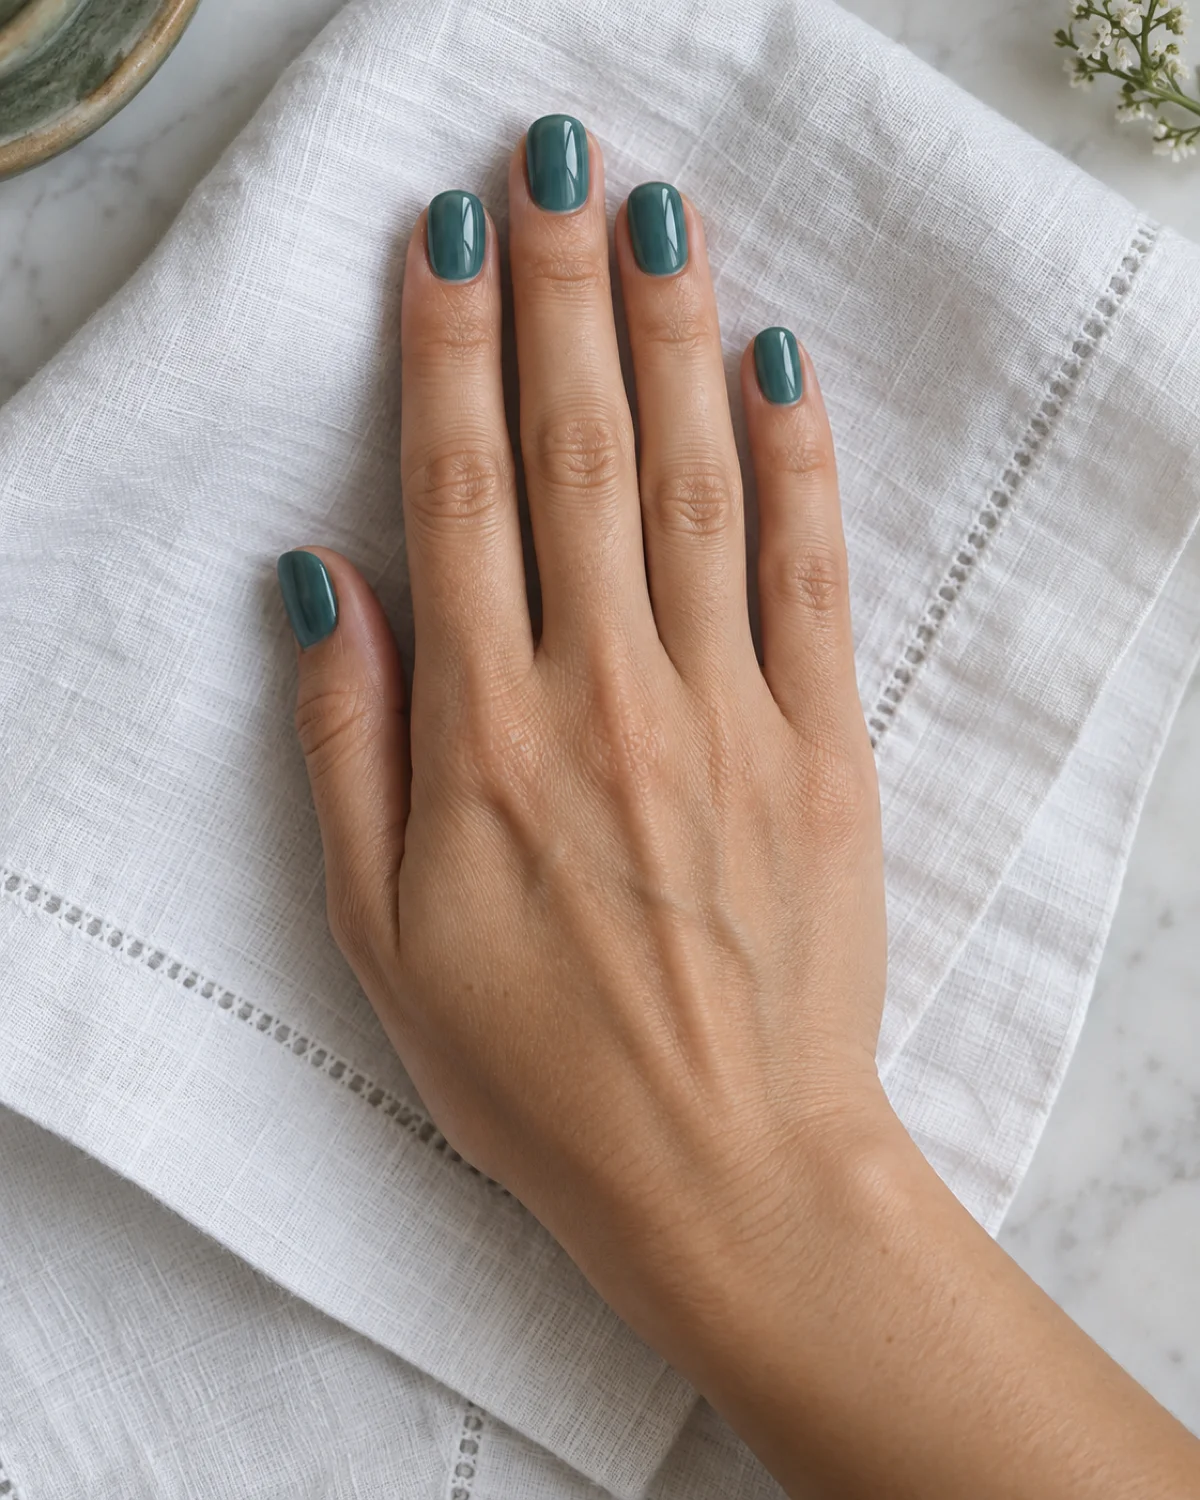
Sheer teal jelly polish that builds translucent depth over three coats. The natural nail is still faintly visible underneath, giving each nail a stained-glass quality where light passes through the color instead of bouncing off it.
Short squoval nails keep this look grounded. The jelly finish is inherently playful — translucent, candy-like, a little bit 90s revival. On longer shapes it can feel like a novelty. On short squovals it reads as a deliberate style choice.
- Shape: Short squoval
- Color: Sheer teal jelly (translucent blue-green)
- Finish: Jelly (glossy, translucent)
- Placement: Full coverage, all nails
- Best for: A light, candy-like teal for warm weather or casual wear
Three thin coats build the ideal depth. Two coats can look too sheer, and four starts to lose the transparency that defines jelly polish. Let each coat fully dry or cure before the next to prevent bubbling.
12. Teal Accent Nail on Nude Set — One-Nail Pop

Four nails in warm sheer nude. One ring finger in solid teal crème. The contrast is the whole design — no art, no pattern, just a single color swap on one nail.
The ring finger is the conventional accent nail position because it sits in the visual center of the hand. But this approach works on any single finger. The pinky gives a subtler accent. The index gives a bolder one.
- Shape: Any
- Color: Warm sheer nude base, solid teal crème accent on ring finger
- Finish: Glossy
- Placement: Single accent nail (ring finger)
- Best for: Testing teal without committing to a full set
Match the nude shade to your skin tone for the cleanest contrast. A nude that is too pink or too yellow next to teal creates an unintended warm-cool clash that muddies both colors.
13. Teal Abstract Brushstrokes on White — Artistic Freeform
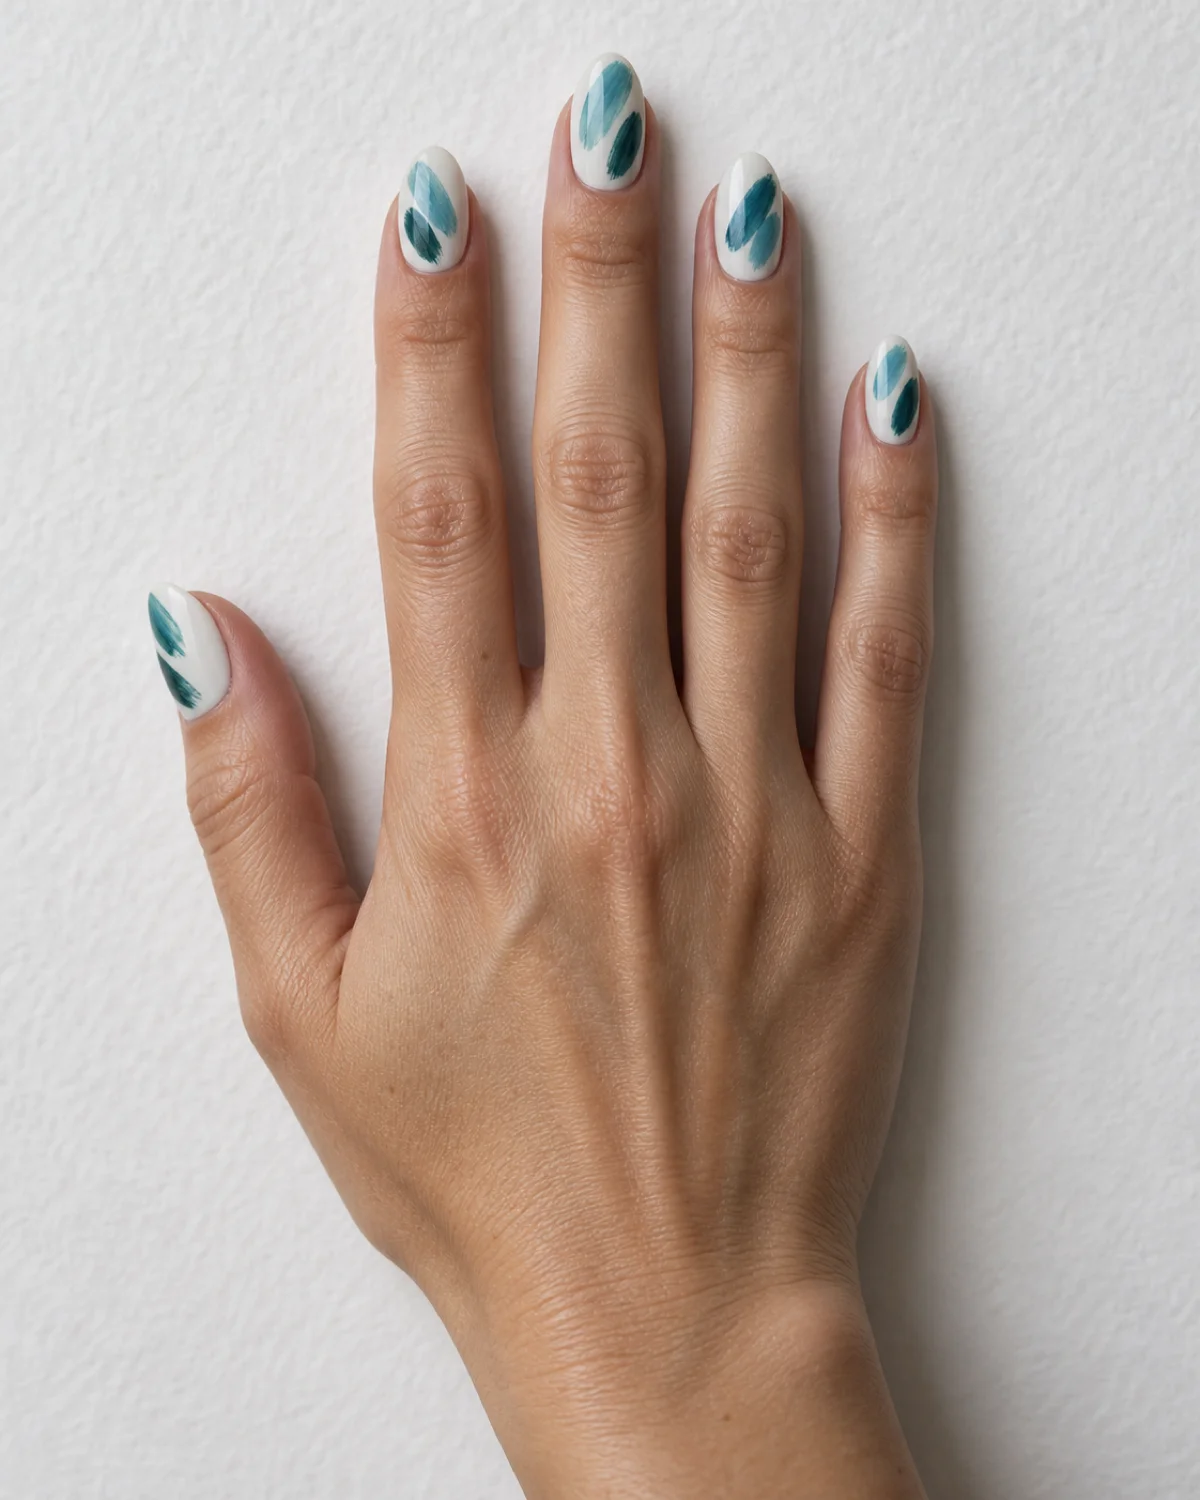
White base with two or three loose teal brushstrokes per nail, each stroke a slightly different shade. The strokes are intentionally imperfect — thick at the start, thin at the tail — like a single pass of a loaded brush on paper.
Each nail gets a different arrangement. Some strokes run diagonally, some curve, some overlap. The variation is what separates this from a pattern. Patterns repeat. These brushstrokes are individual marks.
- Shape: Oval
- Color: White base, multiple teal shades in freeform strokes
- Finish: Glossy
- Placement: Full coverage base, 2–3 brushstrokes per nail
- Best for: A painterly, gallery-art approach to teal nails
Load a flat art brush with teal polish and press it against the nail in one fluid motion. Do not go back over the stroke — the beauty is in the single pass. Vary the pressure to create thick-thin variation within each mark.
14. Teal Negative-Space Geometric on Stiletto — Sharp Lines
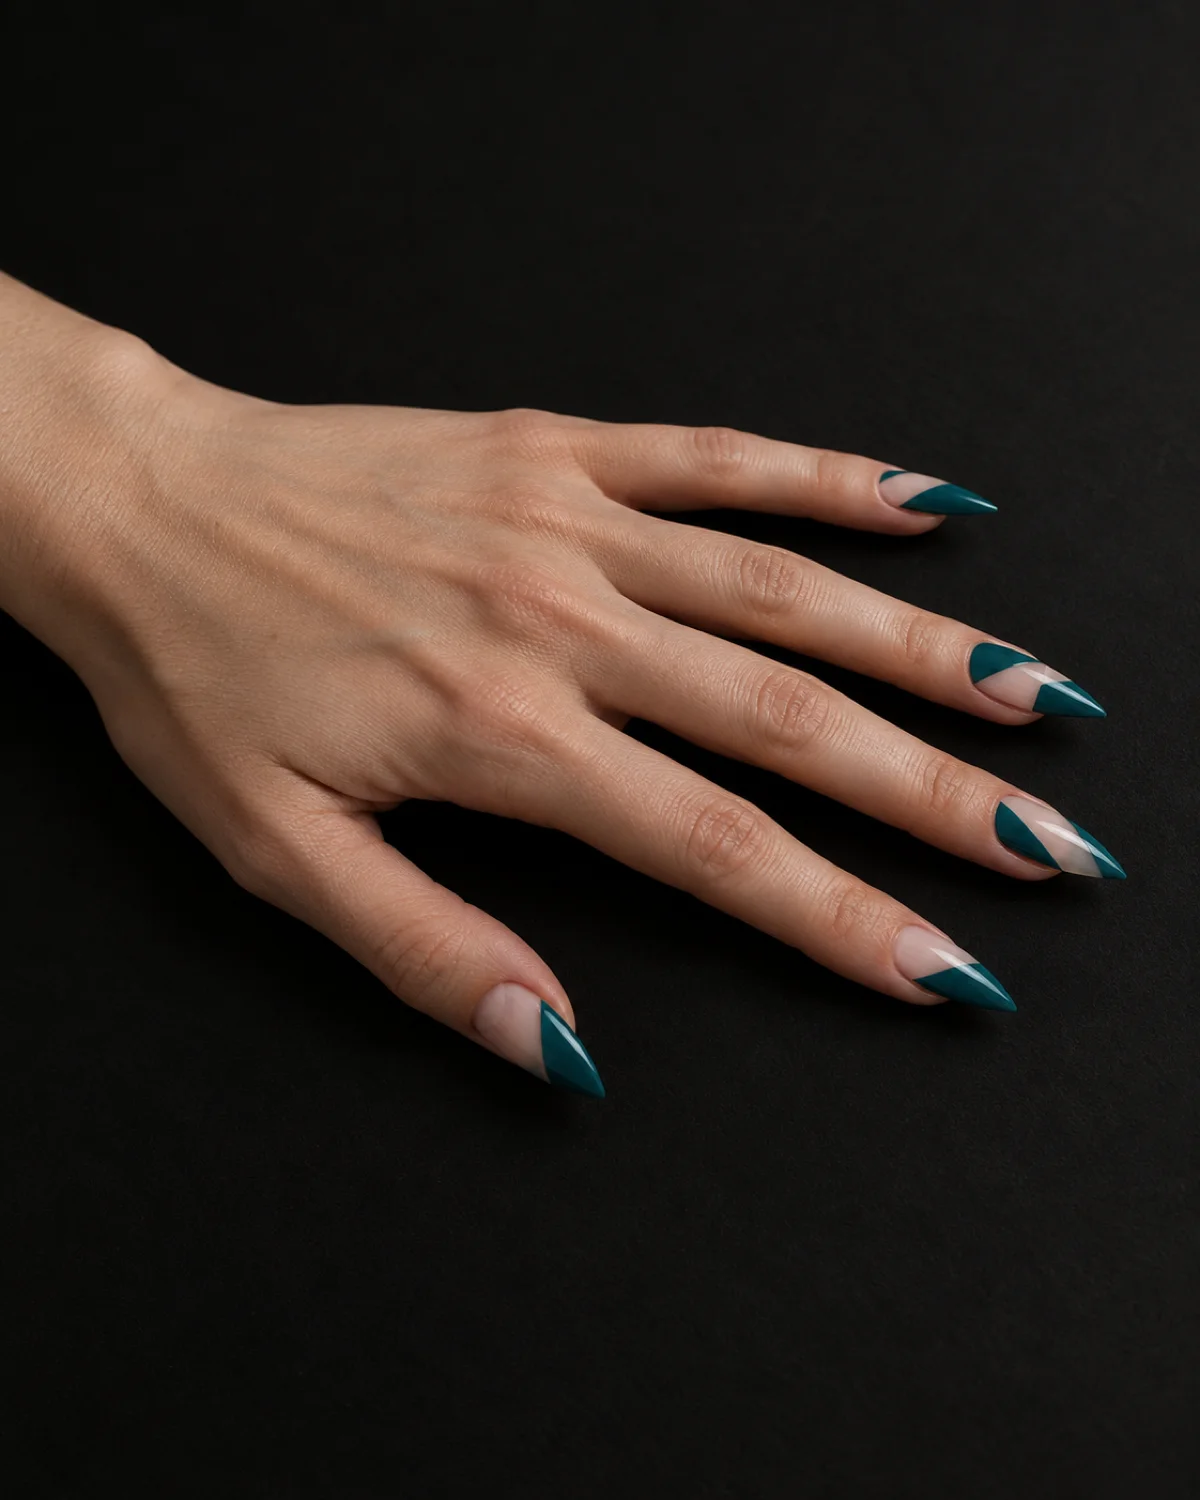
Natural base on stiletto nails with geometric blocks and triangles of teal polish leaving sections of bare nail exposed. Every edge is clean and straight, created with striping tape.
The stiletto shape adds tension to the geometry. Geometric designs on rounded shapes feel decorative. On stilettos, the sharp nail tip echoes the sharp lines of the teal blocks, and the whole thing feels more architectural.
- Shape: Stiletto
- Color: Clear/natural base, teal blocks and triangles
- Finish: Glossy (teal sections) over natural (negative space)
- Placement: Geometric sections on all nails
- Best for: A graphic, modern teal look that shows skin through the design
Apply a clear base coat first to protect the natural nail. Lay striping tape in straight lines to create the geometric sections. Paint teal in the exposed zones. Remove the tape while the polish is still slightly wet for the sharpest edges. Seal everything with a clear top coat.
14 Teal Nail Ideas to Try
- 1Solid teal crème on almondRich mid-teal crème polish in full glossy coverage on almond nails.
- 2Dark teal matte on coffinDeep petrol teal with matte topcoat for a velvet, light-absorbing finish.
- 3Teal chrome on short roundMirror-like metallic teal that shifts between blue and green with movement.
- 4Light teal French tipsAqua-leaning teal tips on a warm nude base — a modern French twist.
- 5Teal-to-black ombré on stilettoSmooth gradient from teal at the cuticle to black at the tips.
- 6Teal with gold foil flecksRich teal gel base with irregular gold leaf pieces partially submerged.
- 7Teal marble swirl on squareWhite base with organic teal veining mimicking natural stone.
- 8Teal glitter gradient on almondDense teal micro-glitter at the tips fading to bare nail at the cuticle.
- 9Teal half-moon on coffinDeep teal base with a white crescent left exposed at the lunula.
- 10Teal cat eye on almondMagnetic teal polish with a vertical light stripe down each nail center.
- 11Teal jelly on short squovalTranslucent teal jelly polish with candy-like depth over three coats.
- 12Teal accent nail on nudeWarm nude set with a single ring finger in solid teal crème.
- 13Teal abstract brushstrokesWhite base with loose freeform teal brushstrokes in varied shades.
- 14Teal negative-space geometricClear base with teal blocks and triangles leaving bare nail exposed.
styvea.com

Sloane Avery edits Styvea, where she shares nail design ideas, shapes, colors, and at-home manicure how-tos for anyone who loves a good manicure. Every guide is reviewed for clarity, usefulness, image accuracy, and Pinterest-to-page alignment before publication. Visit the About page.