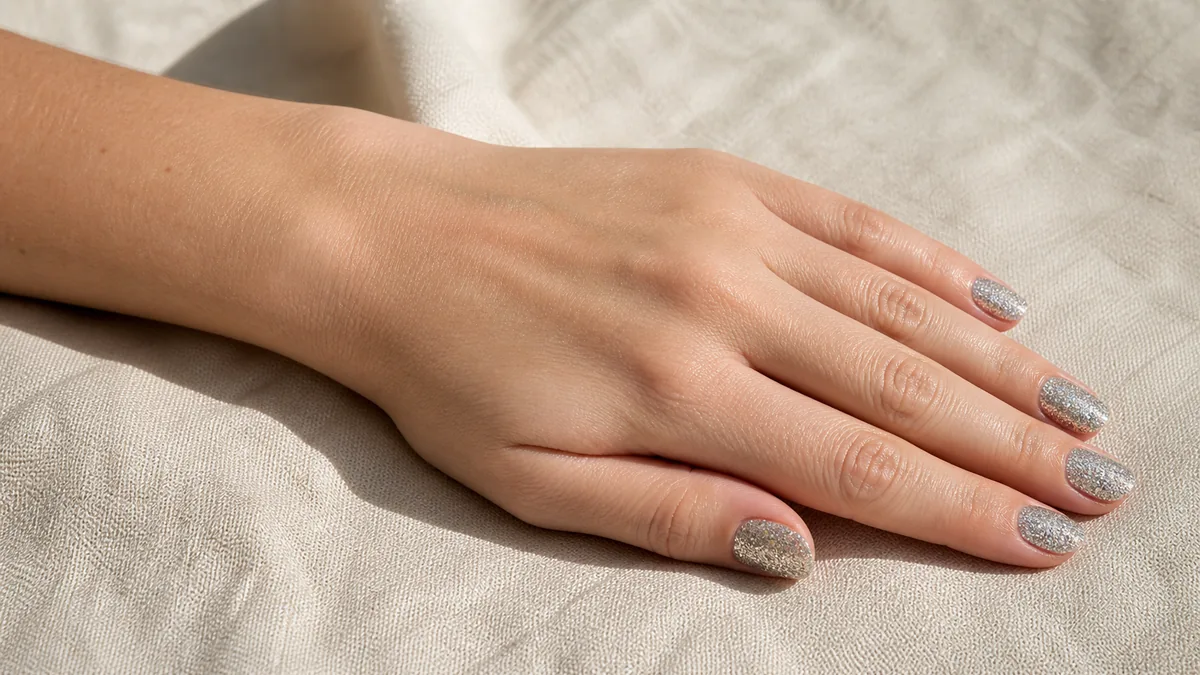
Glitter is not a trend that comes and goes. The question is which glitter, how much, and on what shape.
These thirteen looks span the full sparkle spectrum — micro-shimmer to full-coverage chunky gold — each on a different shape.
See also: chrome nails, french tip nails, and wedding nails.
From fine silver shimmer to chunky holographic to mixed-metal statement. Tap any look to jump straight to it.
1. Fine Silver Glitter on Short Almond
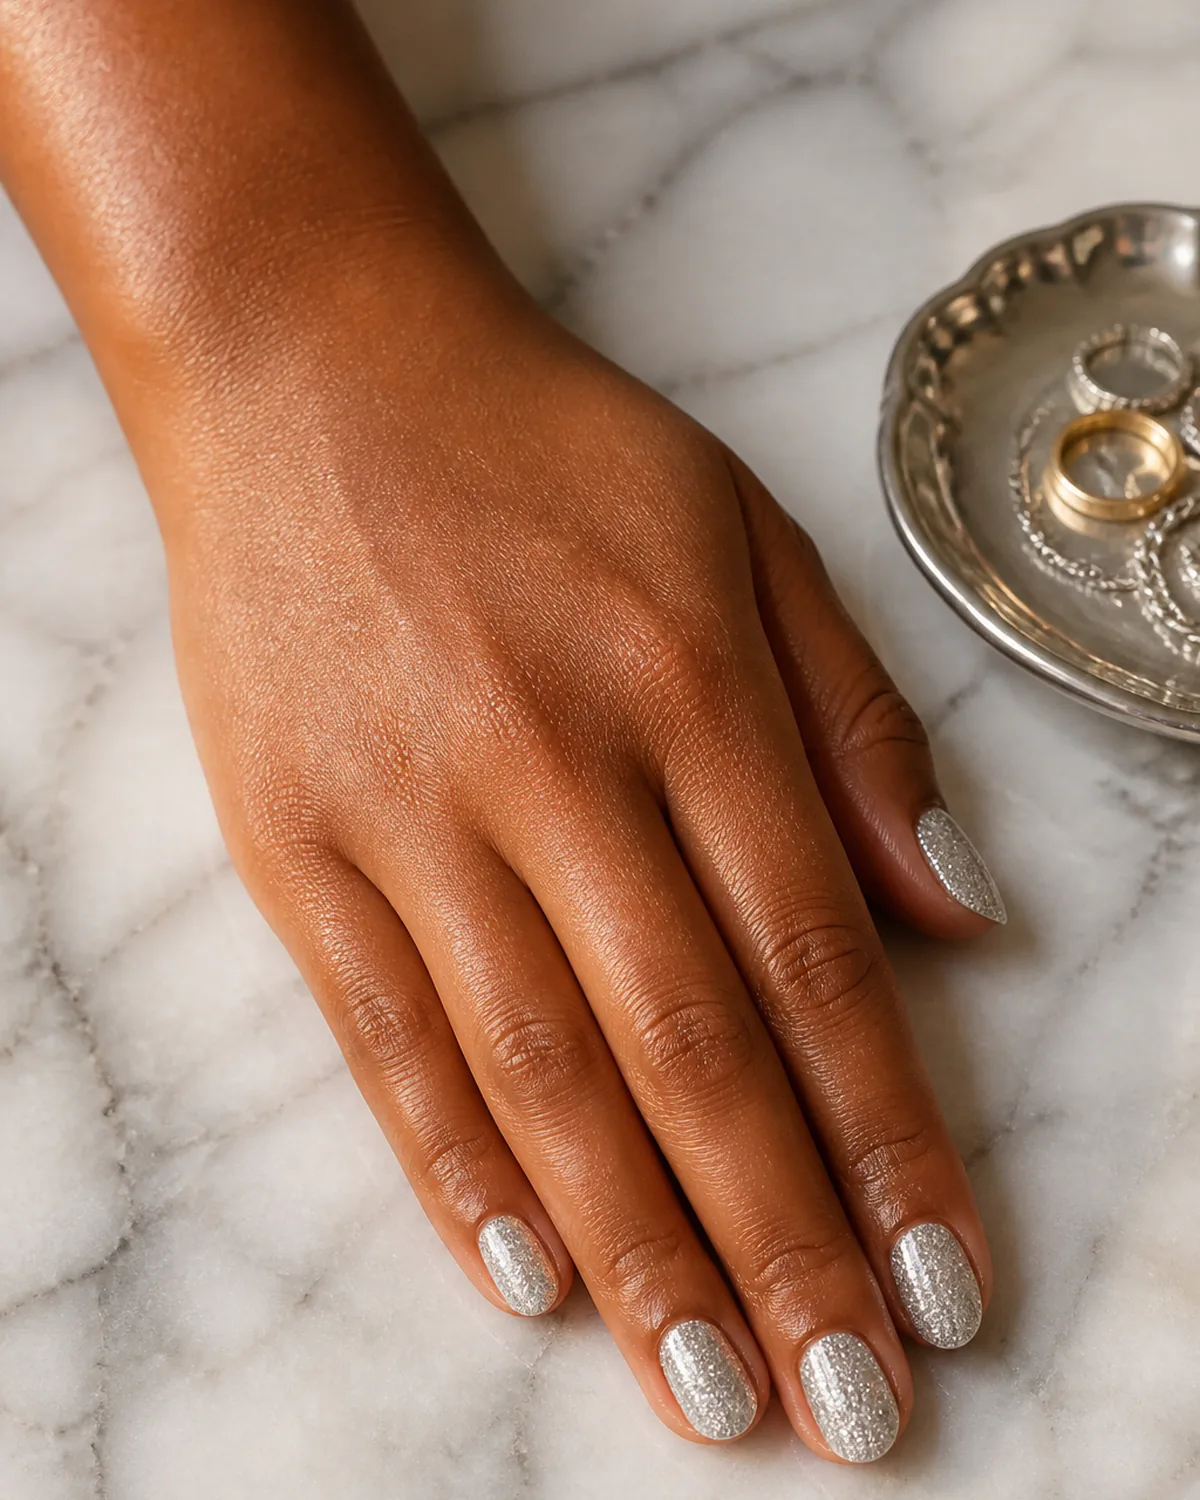
Fine silver glitter is the entry point for anyone who wants sparkle without commitment. On short almond nails, the micro-particles catch light in a way that reads more like a texture than a statement — you notice a soft twinkle when the hand moves, not a flash that demands attention.
The key to fine silver glitter is the base it sits on. A sheer nude or clear base lets the particles float individually, creating depth.
A white or gray base pushes the glitter forward and makes it look denser than it is. For a desk-safe sparkle, go sheer. Two coats of fine glitter polish build enough density without turning gritty, and a thick glossy topcoat locks the particles flat so nothing snags on fabric.
2. Chunky Gold Glitter on Medium Coffin
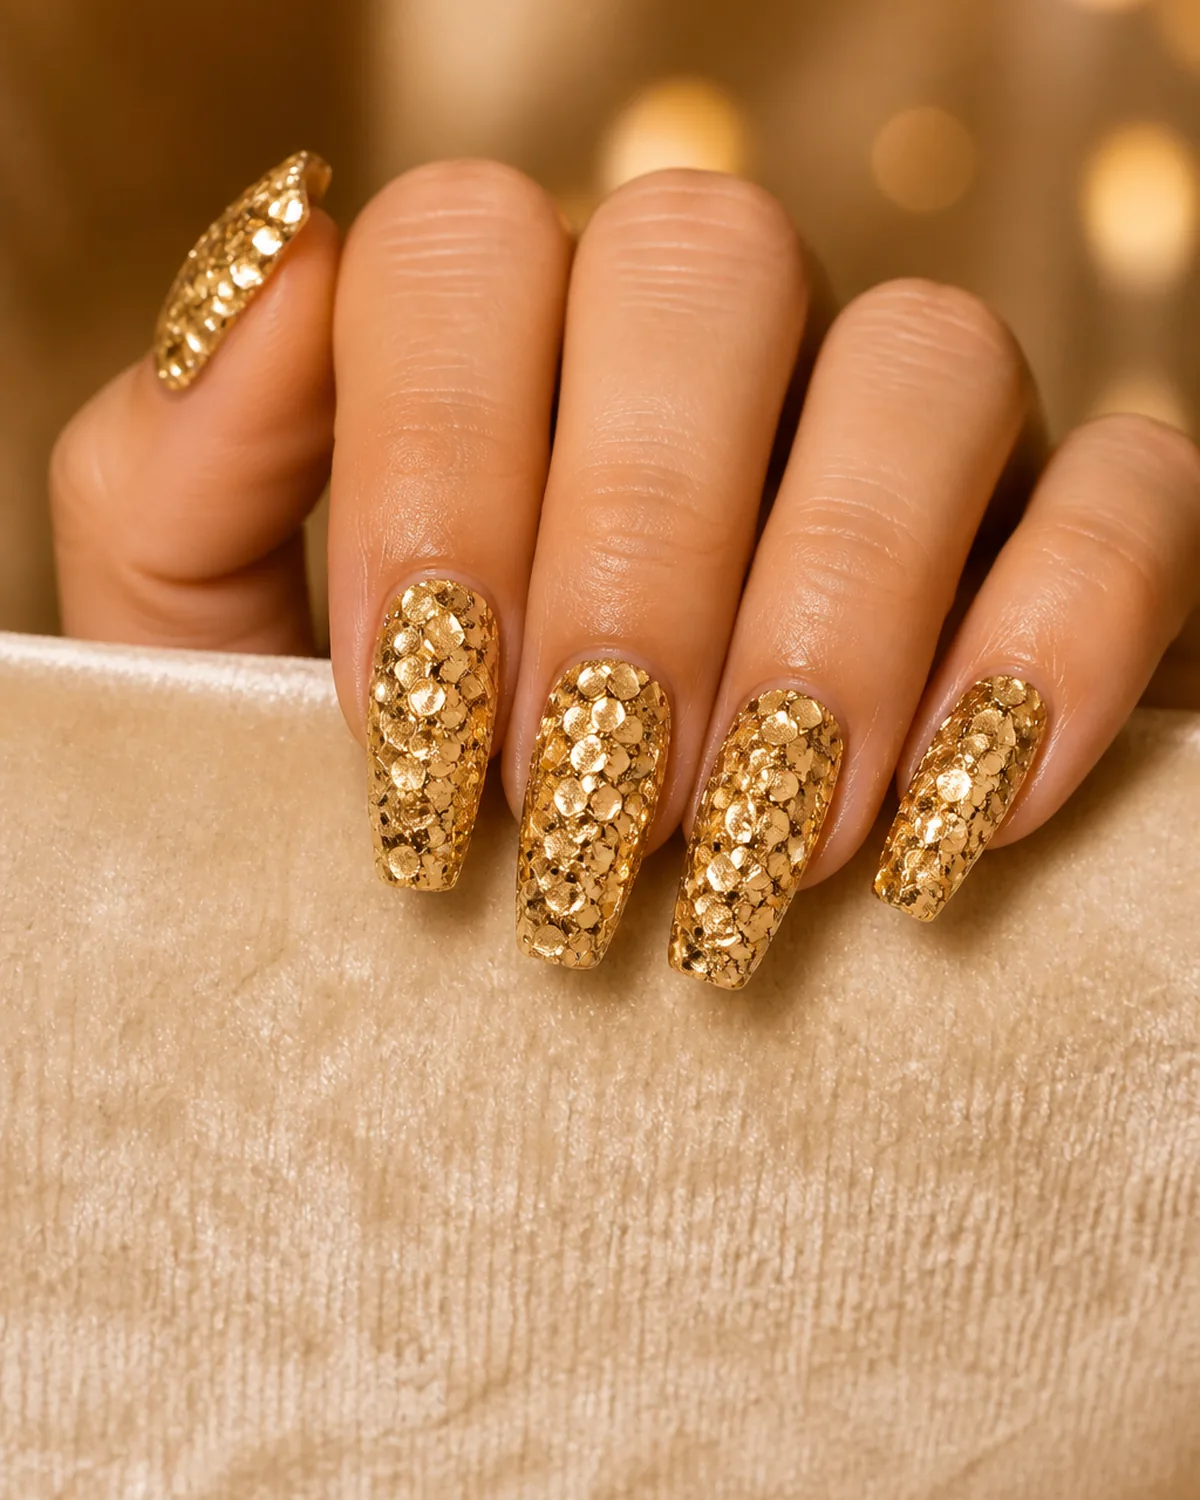
Chunky gold glitter is the opposite of subtle — large hexagonal flakes packed so dense that no base color shows through. On medium coffin nails, the flat tip gives each flake a stage, and the length means more surface area for more gold. This is the glitter for people who already know they love glitter.
Application matters more with chunky particles because they resist lying flat. A sticky base coat (literally — one designed to stay tacky) lets you press flakes into position with an orange stick or silicone tool.
Build in thin layers rather than one thick coat, pressing each layer into the one below. Seal with two coats of thick topcoat to prevent individual flakes from lifting at the edges. The result should feel smooth to the touch despite looking textured.
3. Holographic Glitter on Stiletto
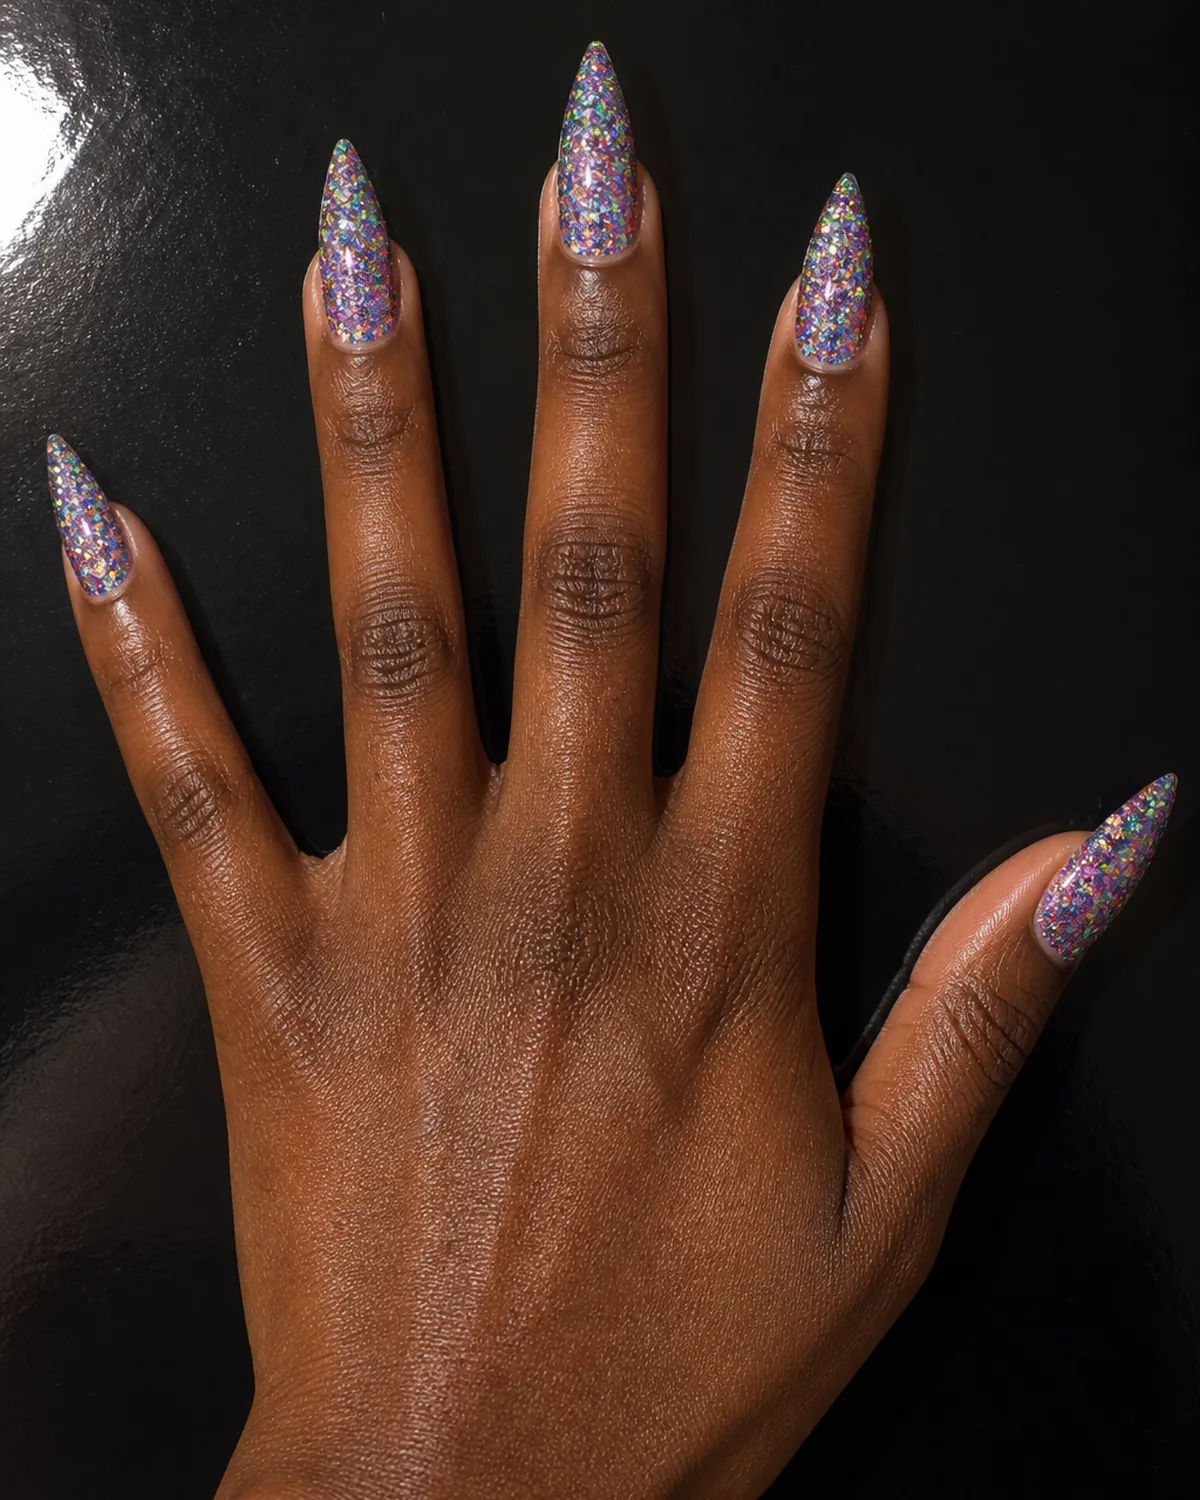
Holographic glitter shifts through the entire rainbow depending on the angle — pink from one direction, green from another, blue from a third. On stiletto nails, the pointed tip acts like a prism, concentrating the color shift into a narrow focal point that changes as the finger moves.
The black surface in the background is deliberate — holographic glitter performs best against dark backdrops because the rainbow shift needs contrast to read.
On the nail, a black or dark gray base under the holographic particles amplifies the effect dramatically compared to a clear base. One coat of black, one coat of holo glitter, one coat of clear topcoat. The topcoat should be glossy, not matte, because the holographic effect relies on smooth surface refraction.
4. Rose Gold Glitter Ombré on Oval
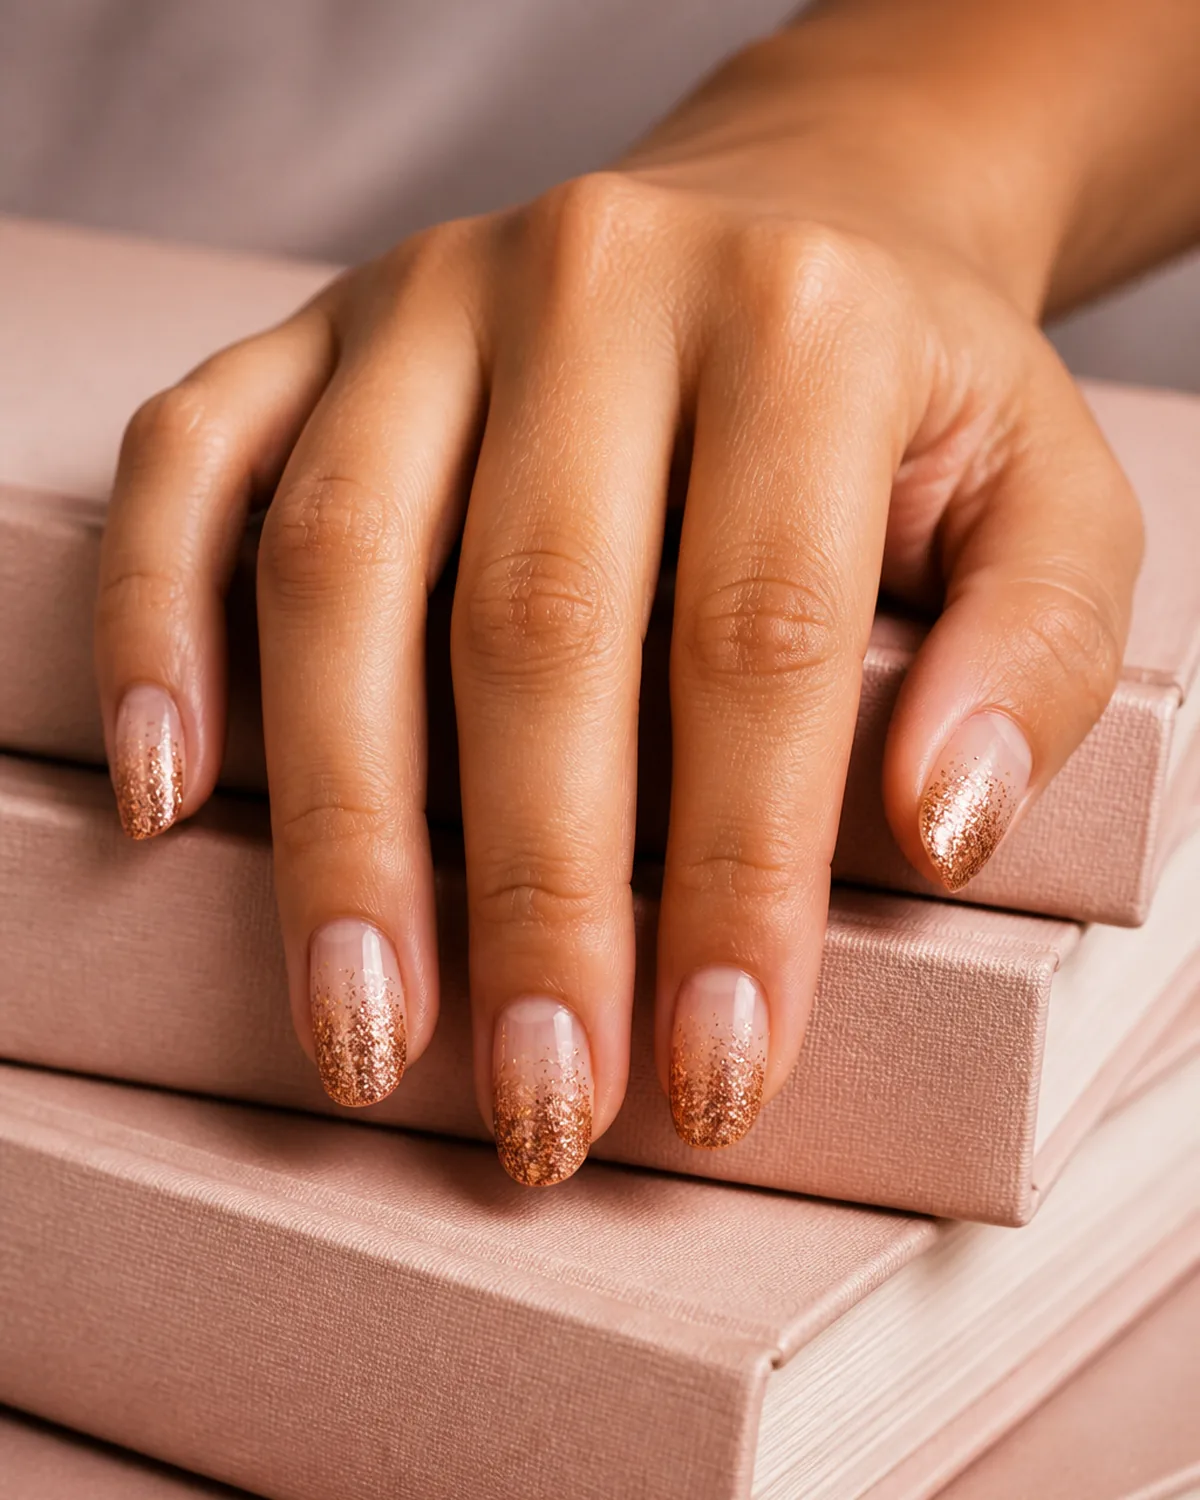
The ombré gradient — bare cuticle fading into dense glitter at the tips — is the most wearable way to do heavy glitter because the density builds gradually. On oval nails, the rounded tip softens the glitter edge so the transition from skin to sparkle reads as intentional rather than abrupt.
Rose gold sits in the warmest corner of the glitter spectrum, blending pink and copper tones that catch different lights differently.
To build the ombré, start with a clear or sheer pink base, then sponge the glitter polish from the tip upward in three passes — each pass shorter than the last, so the tip gets three layers while the mid-nail gets one. The gradient should look effortless, not geometric.
Four questions that narrow the sparkle spectrum down to one bottle.
5. Black Glitter on Short Square
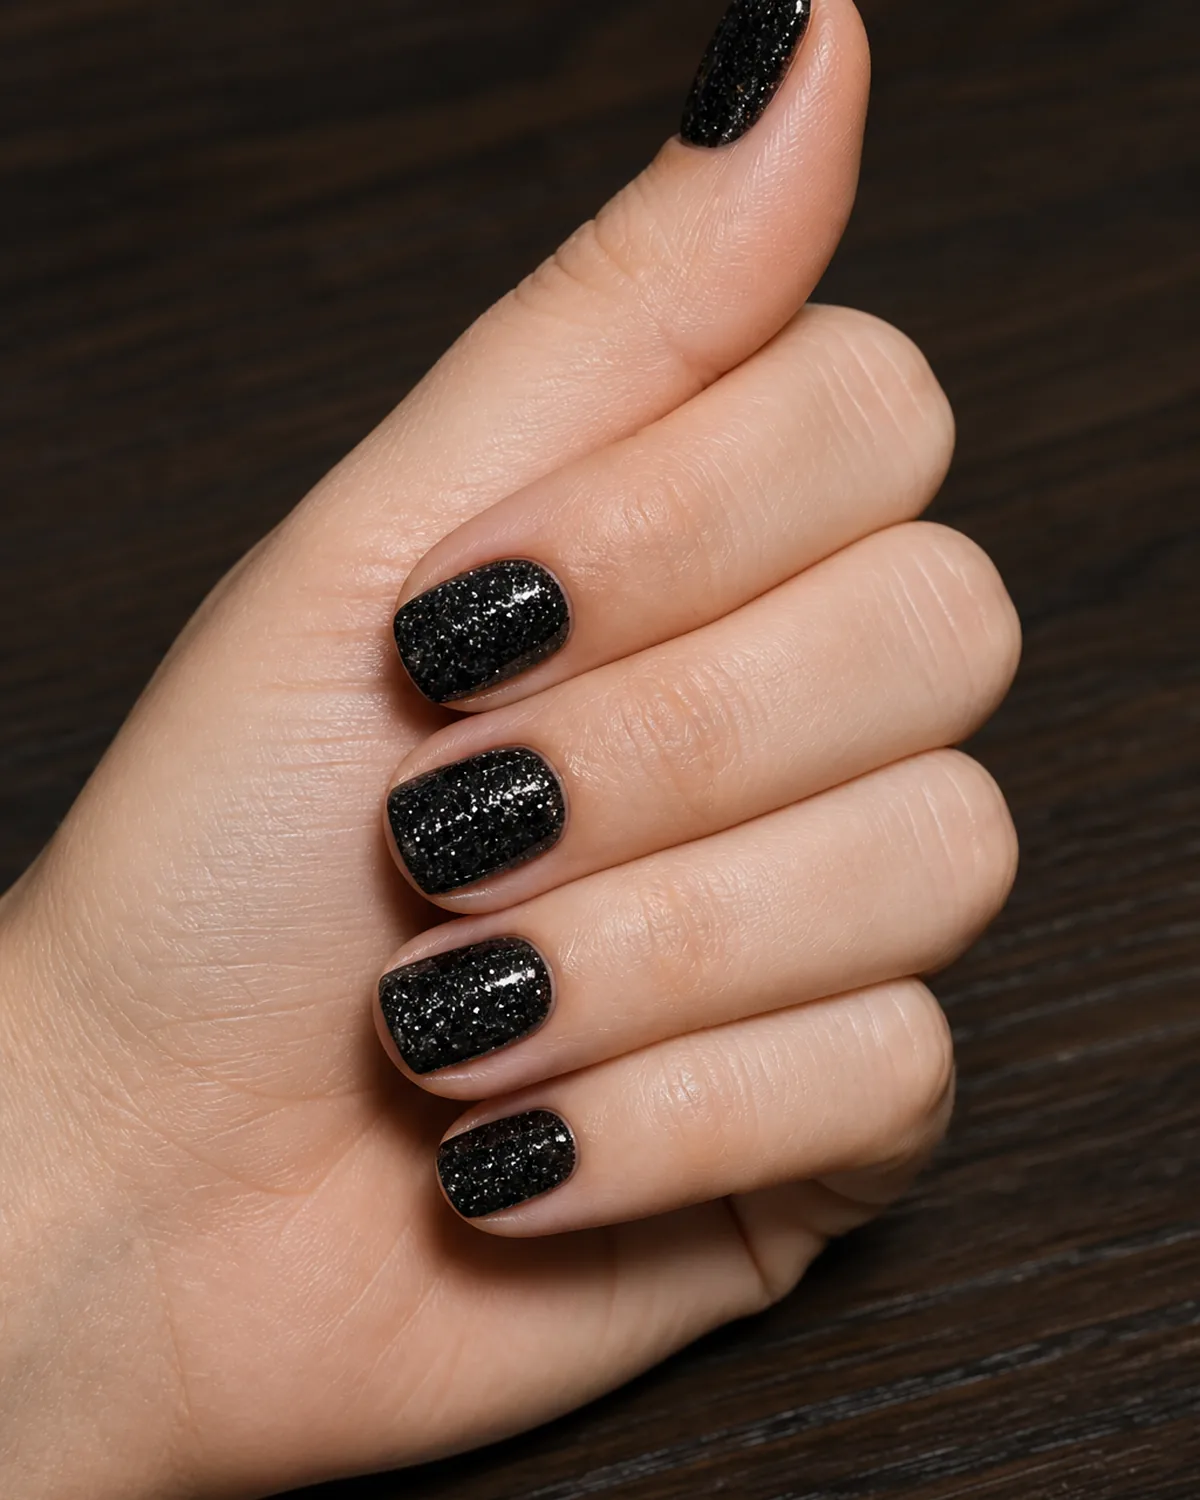
Black glitter creates a midnight-sky effect — a dark base with fine particles that spark only when direct light hits them. On short square nails, the flat edges and compact size keep the look moody rather than dramatic. This is glitter for people who do not want to look like they are wearing glitter.
The subtlety depends entirely on the glitter density. One coat of fine black glitter over a black base is nearly invisible indoors and only reveals itself in sunlight or under direct lighting.
Two coats pushes the sparkle into visible territory. The short square shape works because the straight sidewalls create clean edges that contrast with the organic scatter of the glitter particles — geometric framing around organic texture.
6. Champagne Glitter Accent Nail on Almond
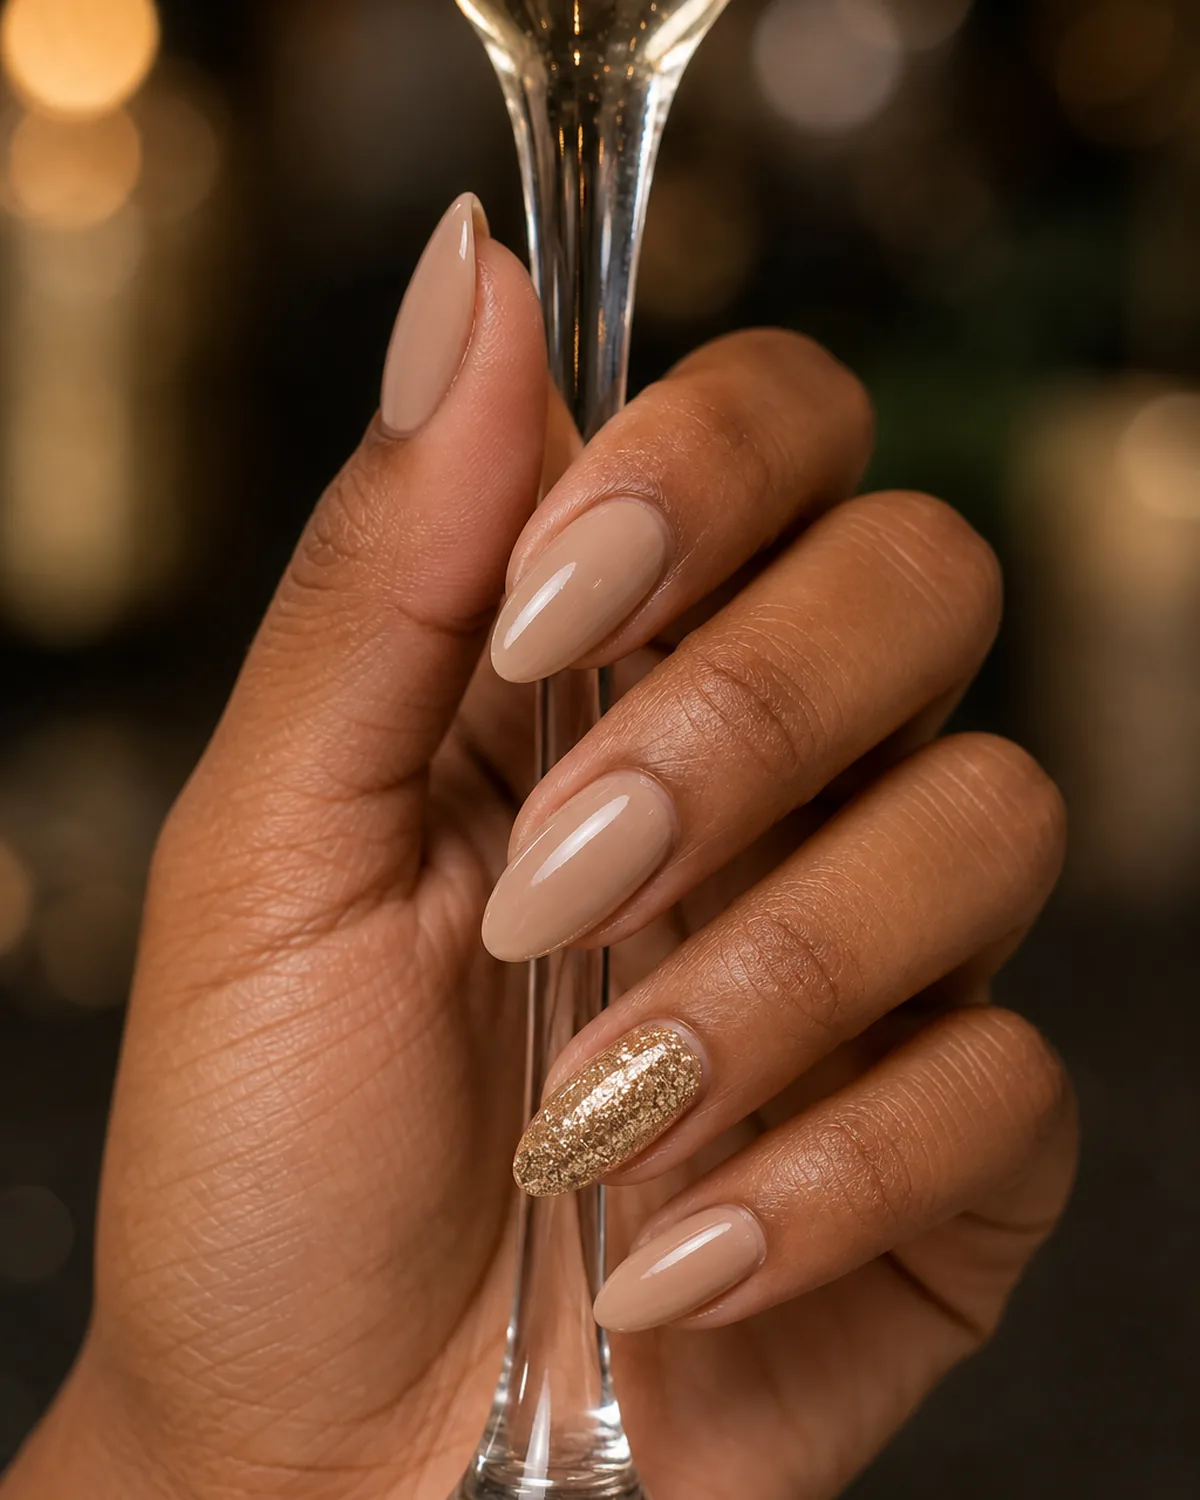
The accent nail strategy puts all the glitter on one finger — typically the ring finger — while the rest wear a clean nude polish. On almond nails, the nude base reads polished and sophisticated, and the single champagne glitter accent adds celebration without excess.
Champagne glitter has a warmer, softer tone than pure gold or silver. It picks up ambient light rather than demanding direct light, which makes it the most versatile metallic glitter for real life.
The accent nail should be dense — three coats of glitter packed tight — so it reads as intentional rather than like you ran out of nude polish on one finger. The contrast between four matte-nude nails and one sparkling accent is the entire point.
7. Glitter French Tips on Squoval
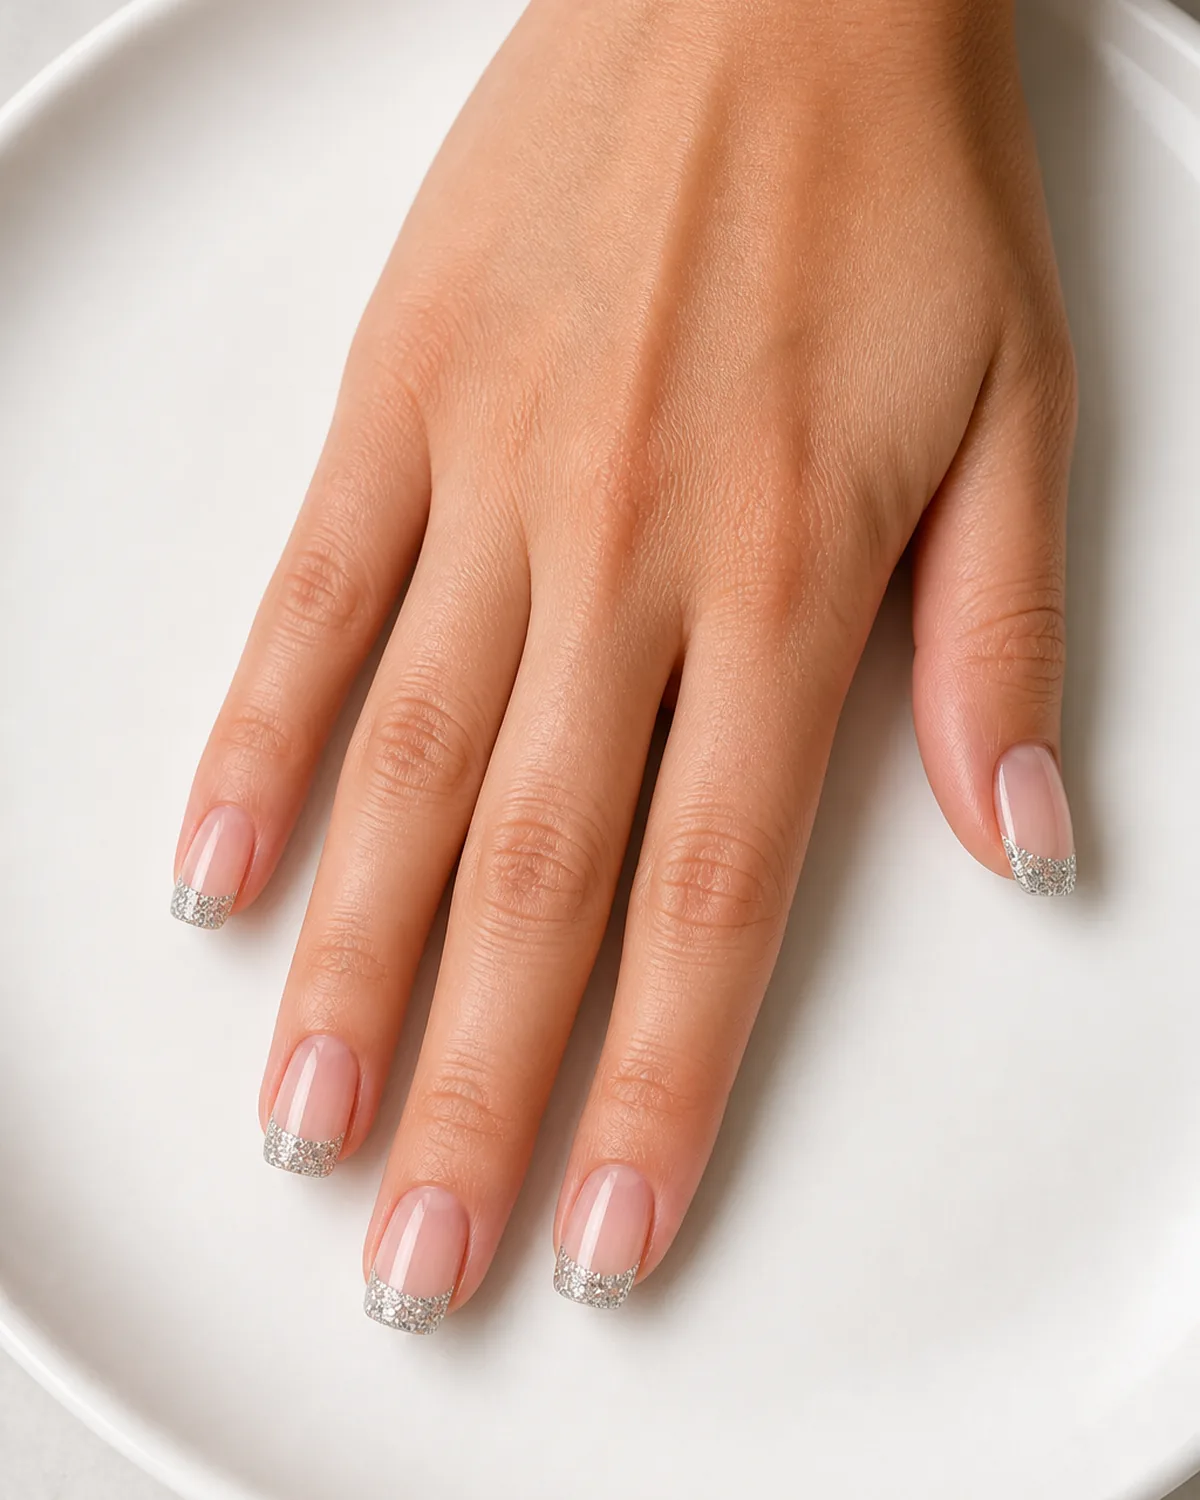
Replace the classic white French tip with silver glitter and the entire design shifts from traditional to modern without losing its structure. On squoval nails, the straight-across tip gives the glitter a clean edge that reads as deliberate rather than scattered.
The execution requires a steady hand or striping tape. Paint the clear or sheer pink base first, let it dry, then apply striping tape at the smile line. Dab glitter polish onto the exposed tip — dabbing rather than brushing prevents drag marks. Remove the tape while the glitter is still wet to get a crisp transition line. The result should look like the tip was dipped in liquid silver.
8. Emerald Green Glitter on Coffin
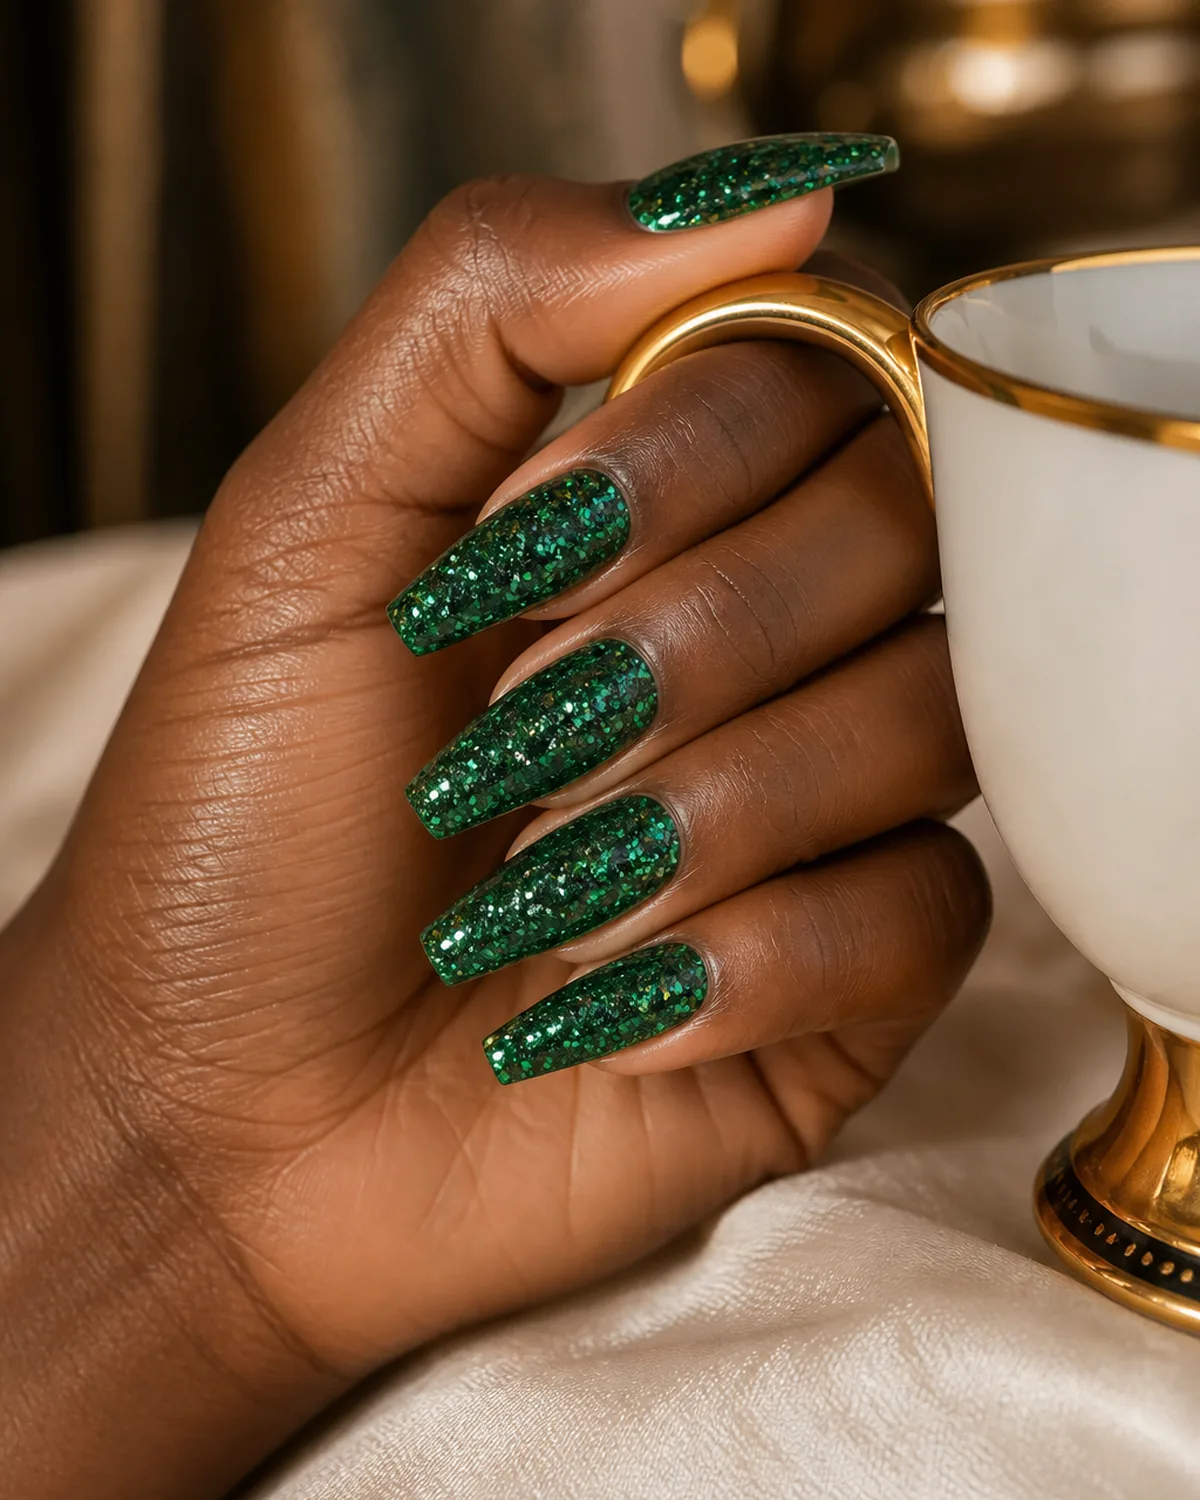
Emerald green glitter combines a deep jewel-tone base with matching green glitter particles for a monochromatic sparkle that looks richer than either element alone. On coffin nails, the length and flat tip give the color depth — the green reads almost black at the cuticle and brightens toward the tip where light hits the glitter more directly.
The gold-rimmed teacup is not an accident — green glitter and gold hardware are natural partners. This combination works for holiday looks but also stands alone in any season because the green is deep enough to avoid reading as Christmas-specific.
Two coats of emerald polish, one coat of matching green glitter, sealed with a high-gloss topcoat. See also: emerald green nails.
9. Iridescent Confetti Glitter on Round
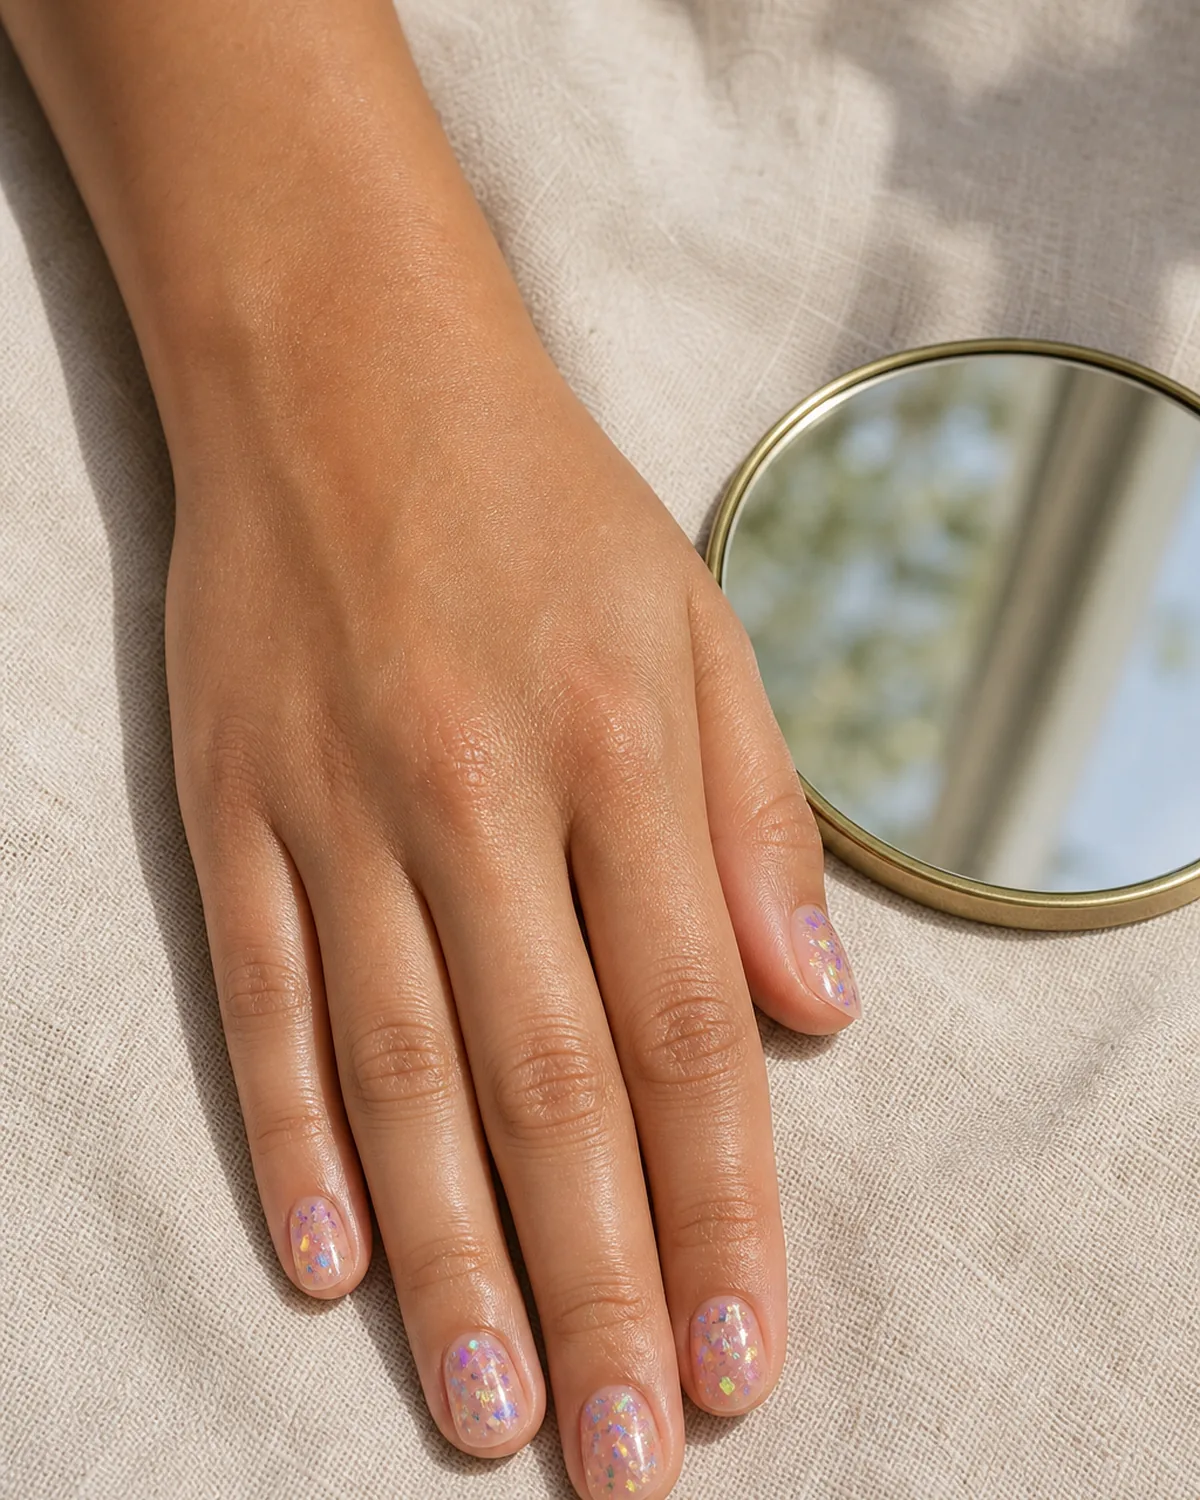
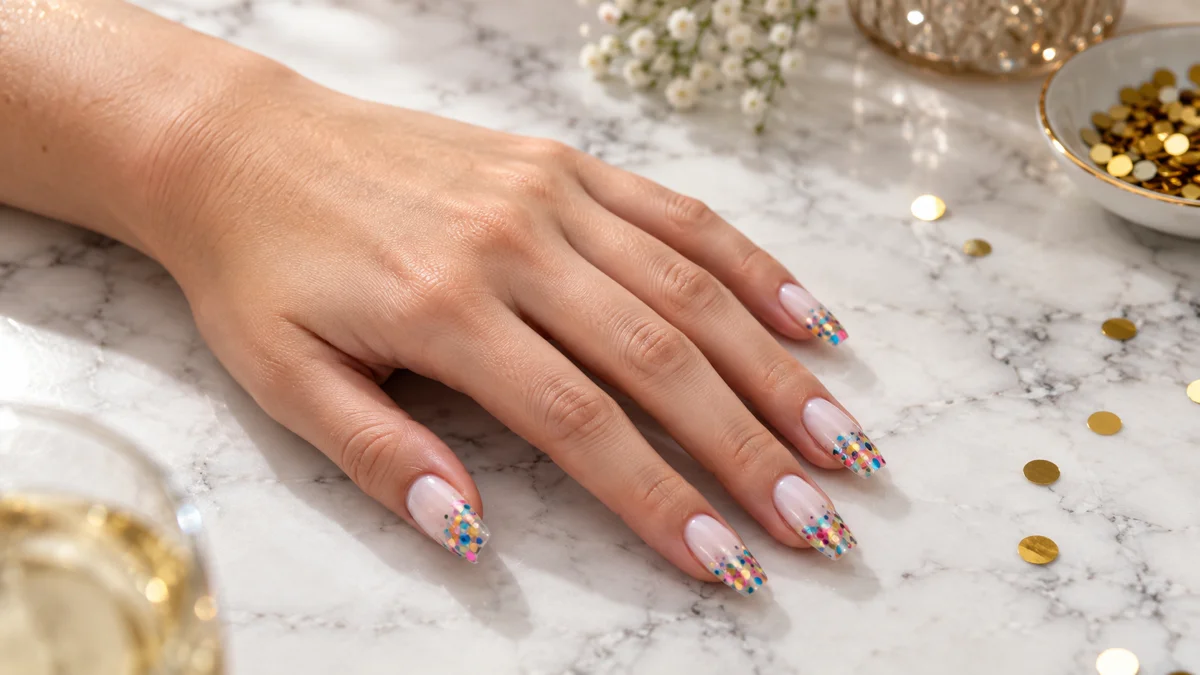
Confetti glitter uses irregular-shaped flakes — not uniform hexagons — suspended in clear gel over a sheer pink base. Each flake catches light independently, creating a scattered prismatic effect that changes with every movement. On short round nails, the organic randomness of the confetti matches the soft, no-fuss shape.
The sheer pink base matters because it lets you see each individual flake floating in the clear medium. A more opaque base would push the flakes to the surface and flatten the dimensional effect.
Application works best with gel rather than regular polish because gel holds the flakes in suspension while you position them, then locks them in place when cured. Press flakes flat with a silicone tool before curing to prevent lifting edges.
Four steps that work for every type of glitter, from fine shimmer to chunky statement.
10. Copper Glitter Gradient on Almond
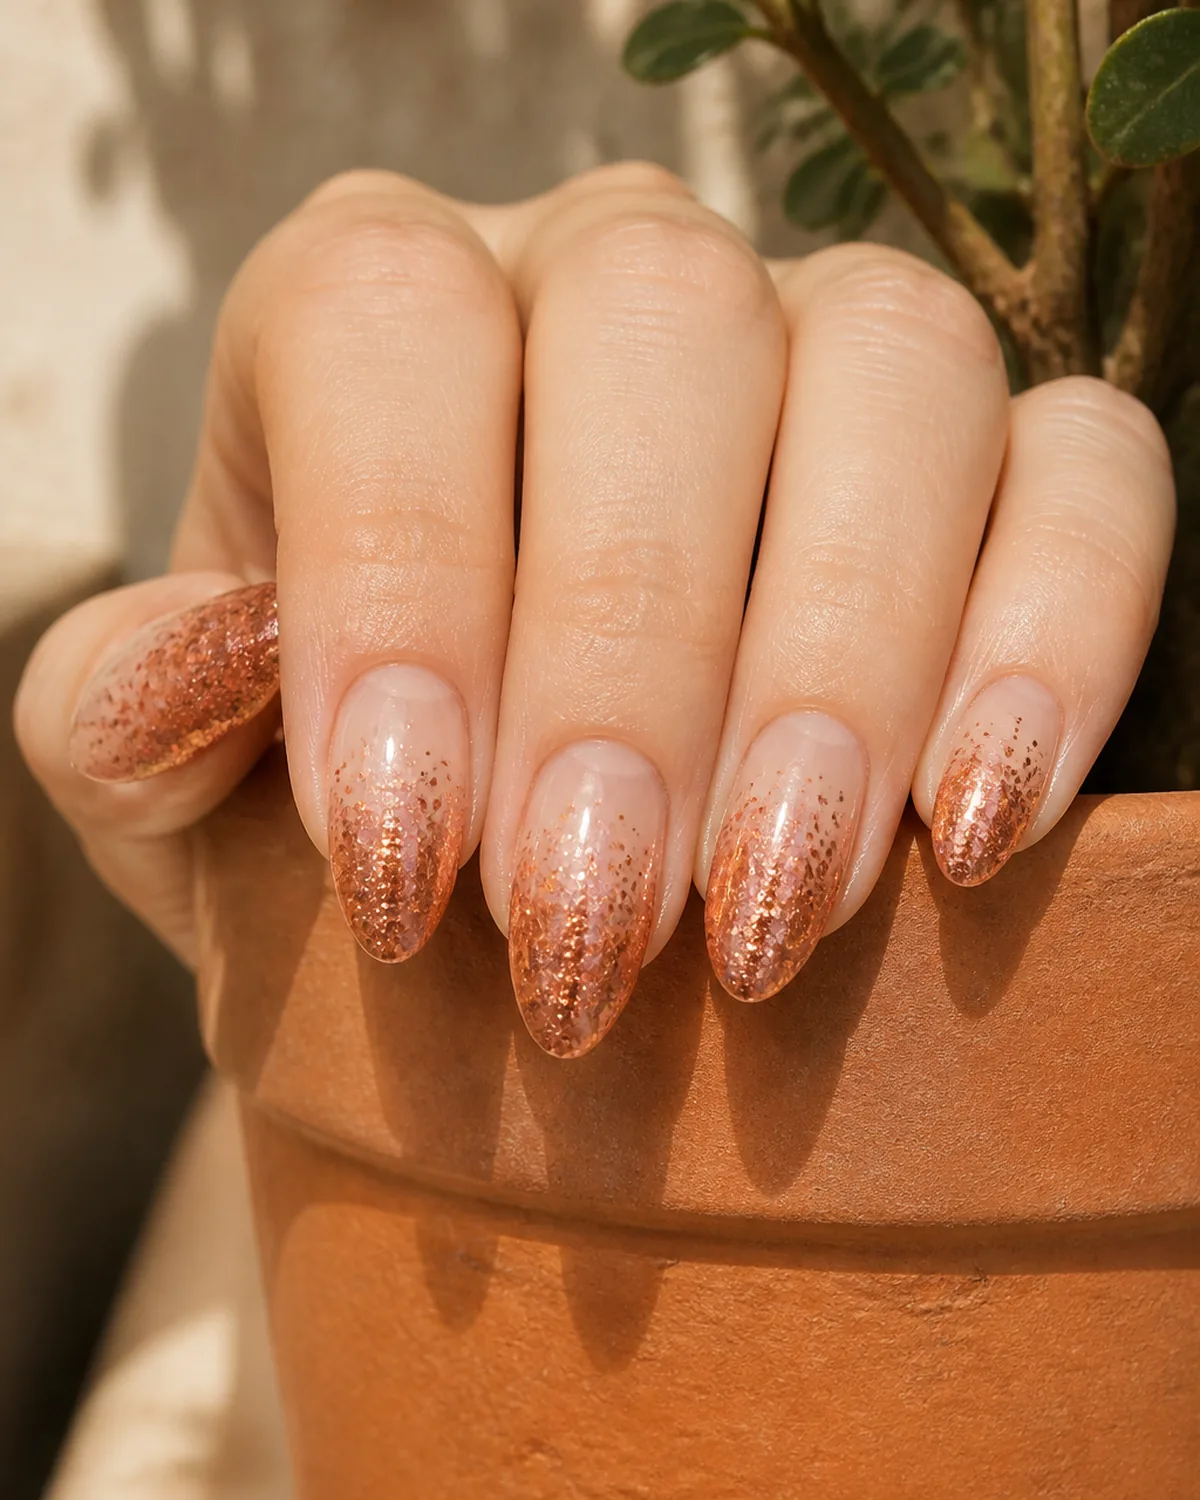
Copper sits between gold and rose gold — warmer than either, with an almost metallic depth that reads as expensive. The gradient application fades from dense copper at the tips to bare nail at the cuticle, creating a glow that builds toward the fingertips.
The almond shape tapers toward the tip, which naturally concentrates the densest glitter into the narrowest point. This creates a visual focus that other shapes cannot replicate — on square or coffin nails, the glitter spreads evenly across a wide tip and loses intensity.
The terracotta pot is a tonal match that reinforces the warmth. Copper glitter also pairs with earthy neutrals, olive, and chocolate tones. See also: fall nails for more warm-toned inspiration.
11. Lavender Glitter on Oval
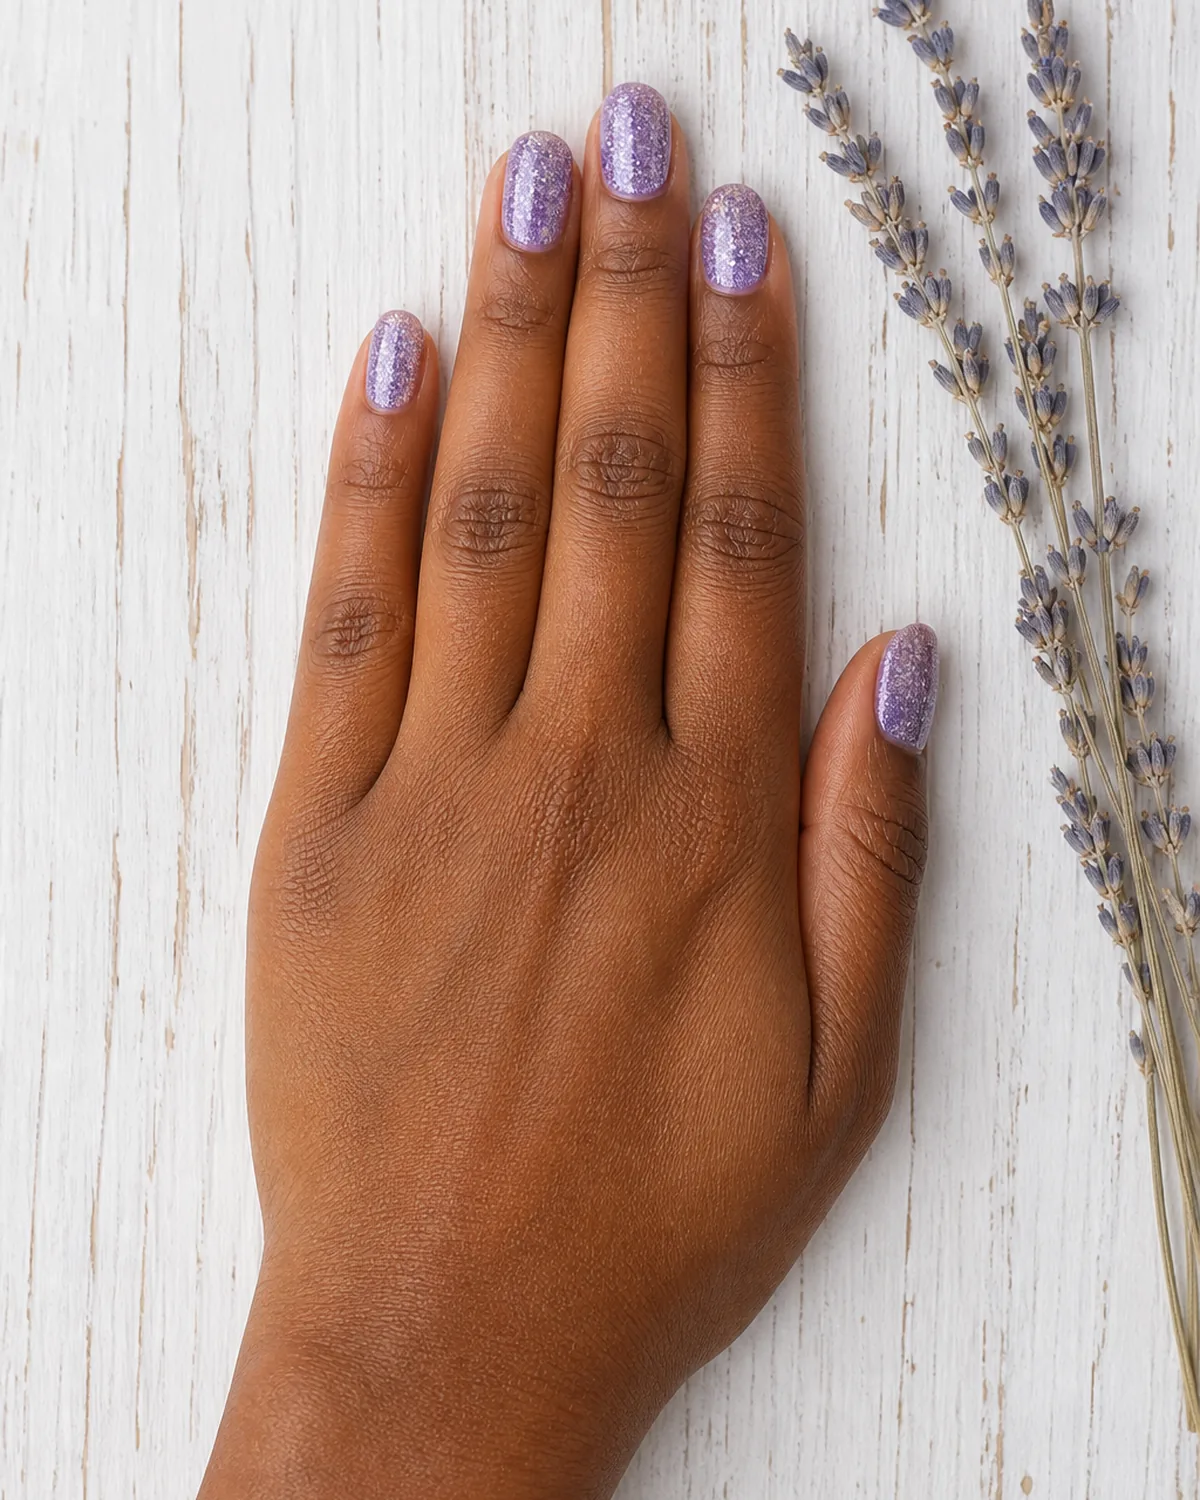
Lavender glitter mixes a soft purple shimmer base with fine silver particles, creating a look that is girly and refined at the same time. On oval nails, the rounded shape softens the sparkle further — this is the gentlest glitter on this list.
The silver glitter mixed into the purple base creates a dual-tone effect: straight-on, the nail reads purple; at an angle, the silver particles flash through. This works best with fine or micro-glitter rather than chunky — large silver flakes over purple would compete with the base instead of complementing it.
One coat of lavender shimmer, one coat of fine silver glitter, topcoat. The dried lavender prop is the obvious pairing, but this shade also works with white, cream, and blush accessories.
12. Red Glitter on Stiletto
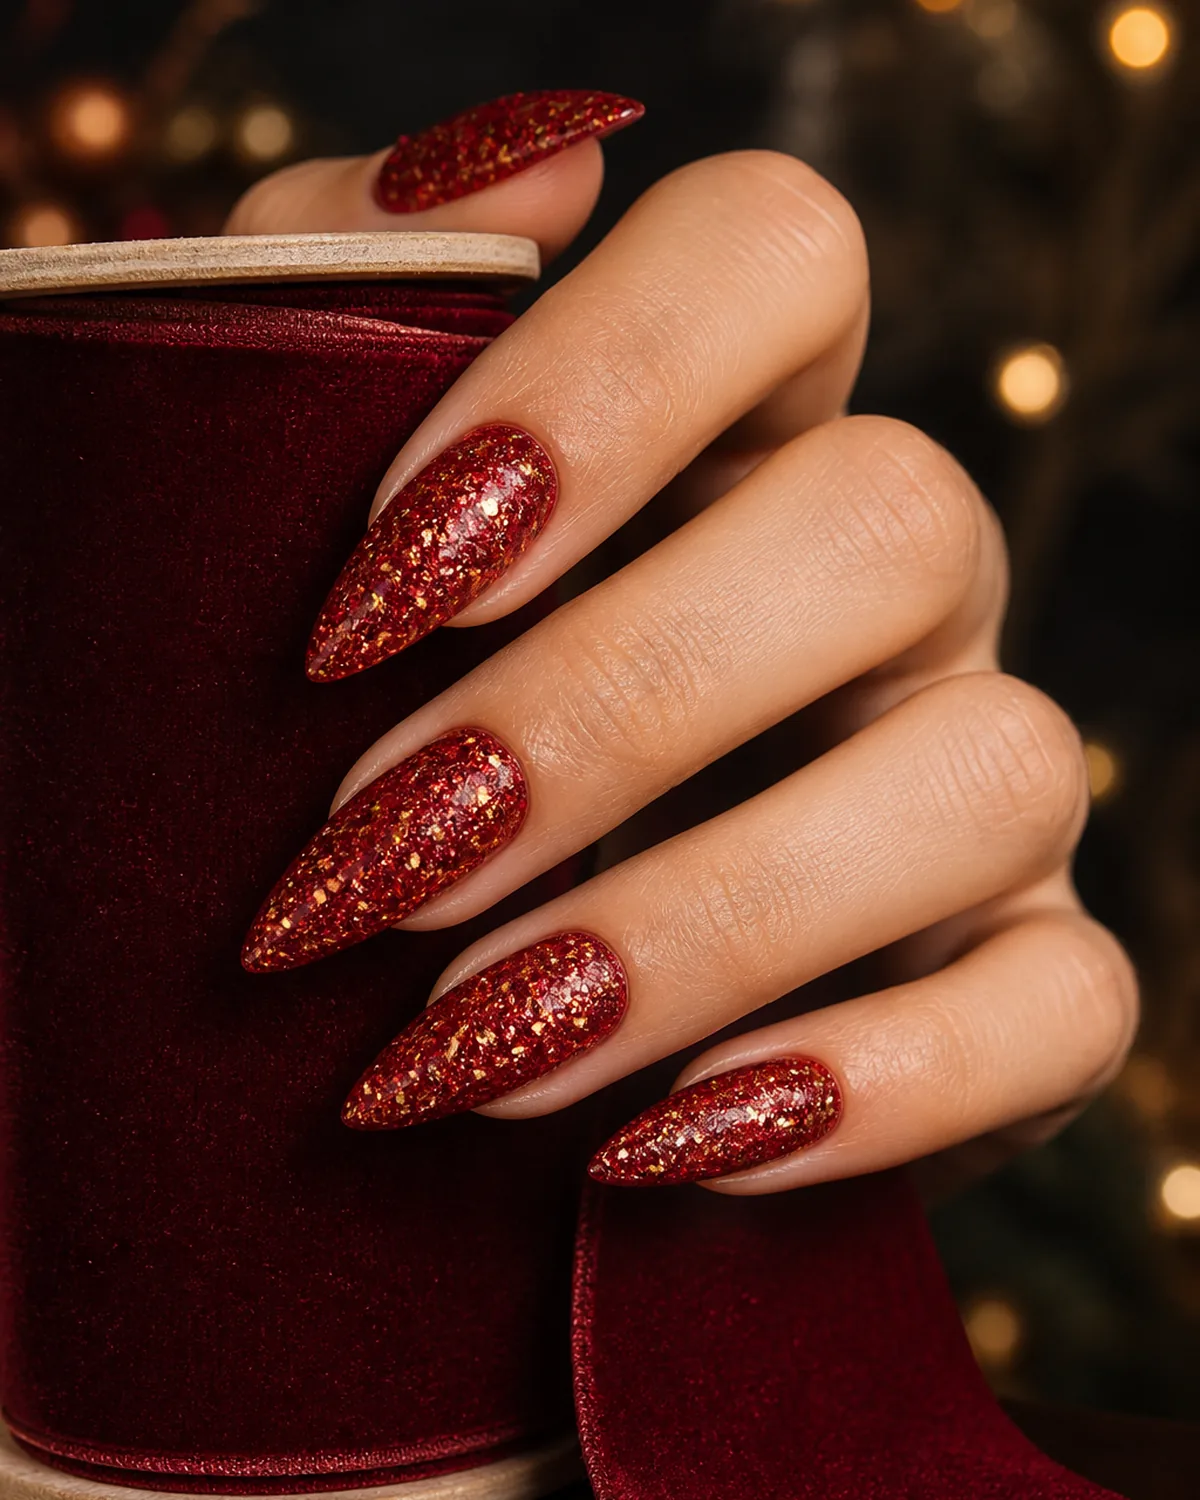
Red glitter on stiletto nails is unapologetically dramatic — the pointed shape adds edge, and the red-plus-gold micro-glitter adds texture and depth that flat red polish cannot match. This is the holiday nail, the New Year nail, the red-carpet nail.
The red-and-gold combination works because the gold particles warm the red and prevent it from reading as flat or one-dimensional. Under warm light, the gold comes forward; under cool light, the red dominates.
Two coats of red glitter polish build the density needed for full coverage without the gritty texture that three coats can create. The velvet background reinforces the luxe register — this glitter look wants to be paired with rich textures, not casual cotton.
13. Mixed-Metal Glitter on Coffin
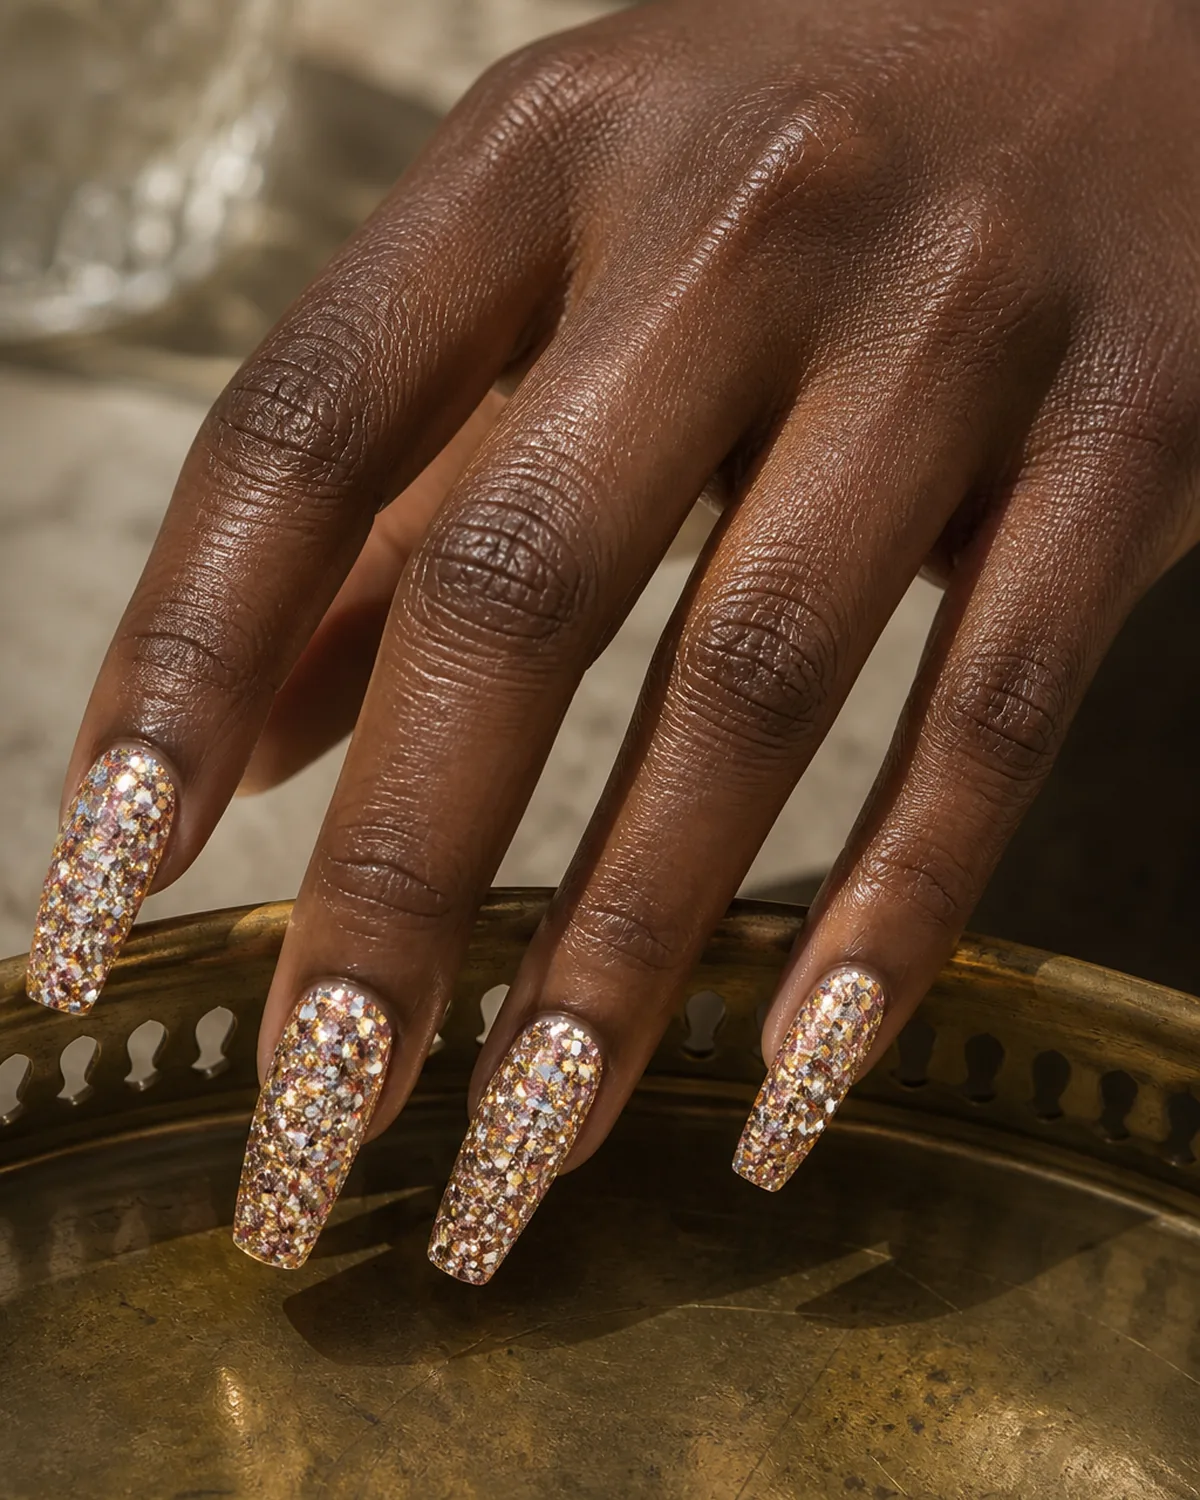
Mixed-metal glitter breaks the single-metal rule by combining gold, silver, and rose gold particles on the same nail. The result is a warm, multi-tonal sparkle that works with any jewelry because it already contains every metal tone.
On coffin nails, the long flat tip gives the three metals room to coexist without looking muddy. The key is using a clear or nude base so each metal particle reads individually rather than blending into an undefined shimmer.
Mixed-metal glitter also solves the common dilemma of choosing between gold and silver — this look wears both, plus rose gold, simultaneously. A clear glossy topcoat is mandatory to keep the particles separated and reflective rather than matte and blended.
13 Glitter Nail Ideas to Try
- 1Fine silver glitterMicro-particle silver on short almond, sparkle without commitment.
- 2Chunky gold glitterDense hexagonal gold flakes on medium coffin, the opposite of subtle.
- 3Holographic glitterRainbow-shifting holo on stiletto, a different color from every angle.
- 4Rose gold ombreBare cuticle fading into dense rose gold at the tips on oval, the most wearable heavy glitter.
- 5Black glitterA midnight-sky effect on short square, fine sparks in a dark base.
- 6Champagne accentAll the glitter on one ring finger over clean nude almonds.
- 7Glitter French tipsThe white French line swapped for silver sparkle on squoval, modern with the structure kept.
- 8Emerald glitterA jewel-tone green base with matching green sparkle on coffin, monochrome richness.
- 9Confetti glitterIrregular iridescent flakes in clear gel over sheer pink on round, scattered prismatic light.
- 10Copper gradientWarm metallic copper fading from dense tips to bare cuticle on almond.
- 11Lavender glitterSoft purple shimmer with fine silver particles on oval, girly and refined at once.
- 12Red glitterRed-gold micro-glitter on stiletto, unapologetically dramatic holiday sparkle.
- 13Mixed-metal glitterGold, silver, and rose gold on the same coffin nail, matching every piece of jewelry.
styvea.com

Sloane Avery edits Styvea, where she shares nail design ideas, shapes, colors, and at-home manicure how-tos for anyone who loves a good manicure. Every guide is reviewed for clarity, usefulness, image accuracy, and Pinterest-to-page alignment before publication. Visit the About page.