Swirl nails move the way no other nail art pattern does. Where geometric designs sit still and florals hold a shape, swirls flow — curving, looping, pulling the eye along each nail like ink dropped in water.
The range inside this single pattern family covers more ground than most people realize. Latte swirls in cream and caramel read cozy. Black and white retro swirls read editorial. Neon on black reads nightlife.
In this guide
10 Swirl Nail Ideas
Tap any idea to jump straight to it.
1. Latte Swirl on Medium Almond
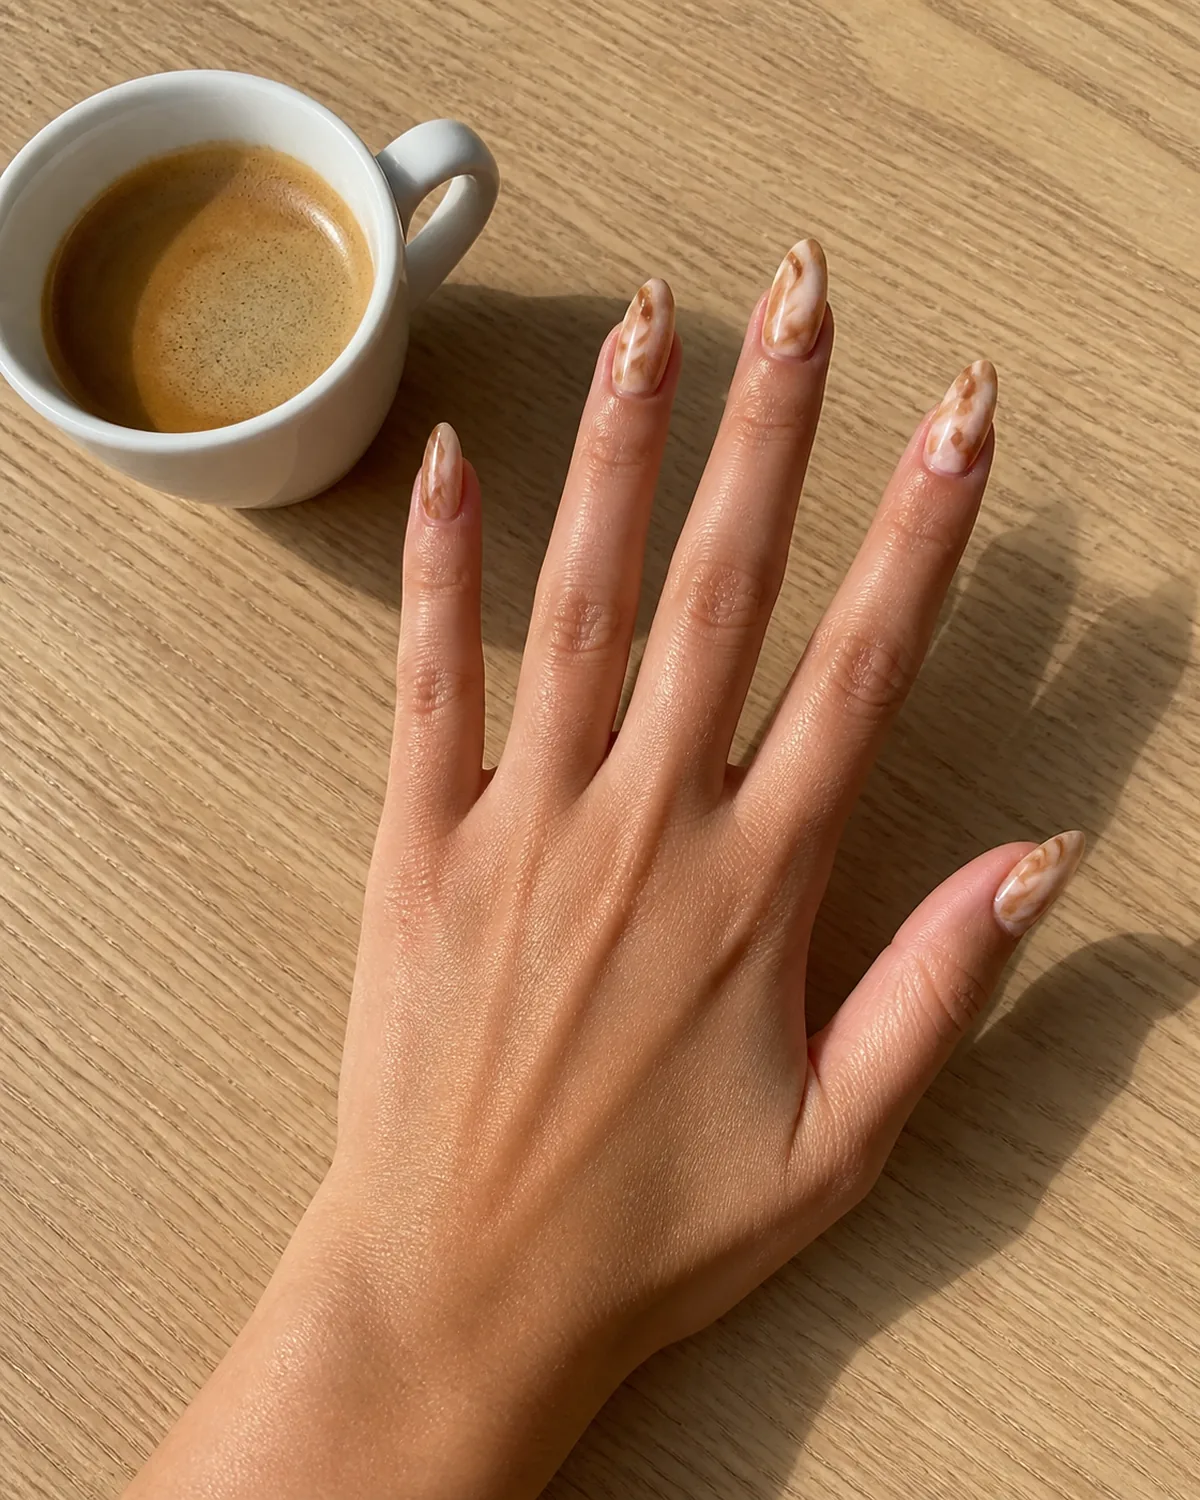
Latte swirl nails pull their color palette directly from a cappuccino — creamy white and warm caramel-brown flowing in wide, soft curves over a sheer nude base. The effect mimics steamed milk art, which gives the design an immediately recognizable aesthetic without requiring anyone to explain what it is.
Medium almond is the most forgiving shape for swirl art. The tapered sides create natural lanes for the curves to follow, and the rounded tip prevents the design from ending abruptly at a flat edge.
- Choose two polishes within the same warm family — one lighter, one darker — for the most natural coffee-art effect
- Apply the base nude, let it dry, then draw the swirls with a thin detail brush while the second color is still workable
- Keep the curves wide and relaxed rather than tight — the latte aesthetic comes from soft, lazy movement
A glossy top coat is non-negotiable here. The wet-look shine is what makes the design read as liquid rather than painted. Matte finish kills the coffee reference entirely.
2. Black and White Retro Swirl on Long Coffin
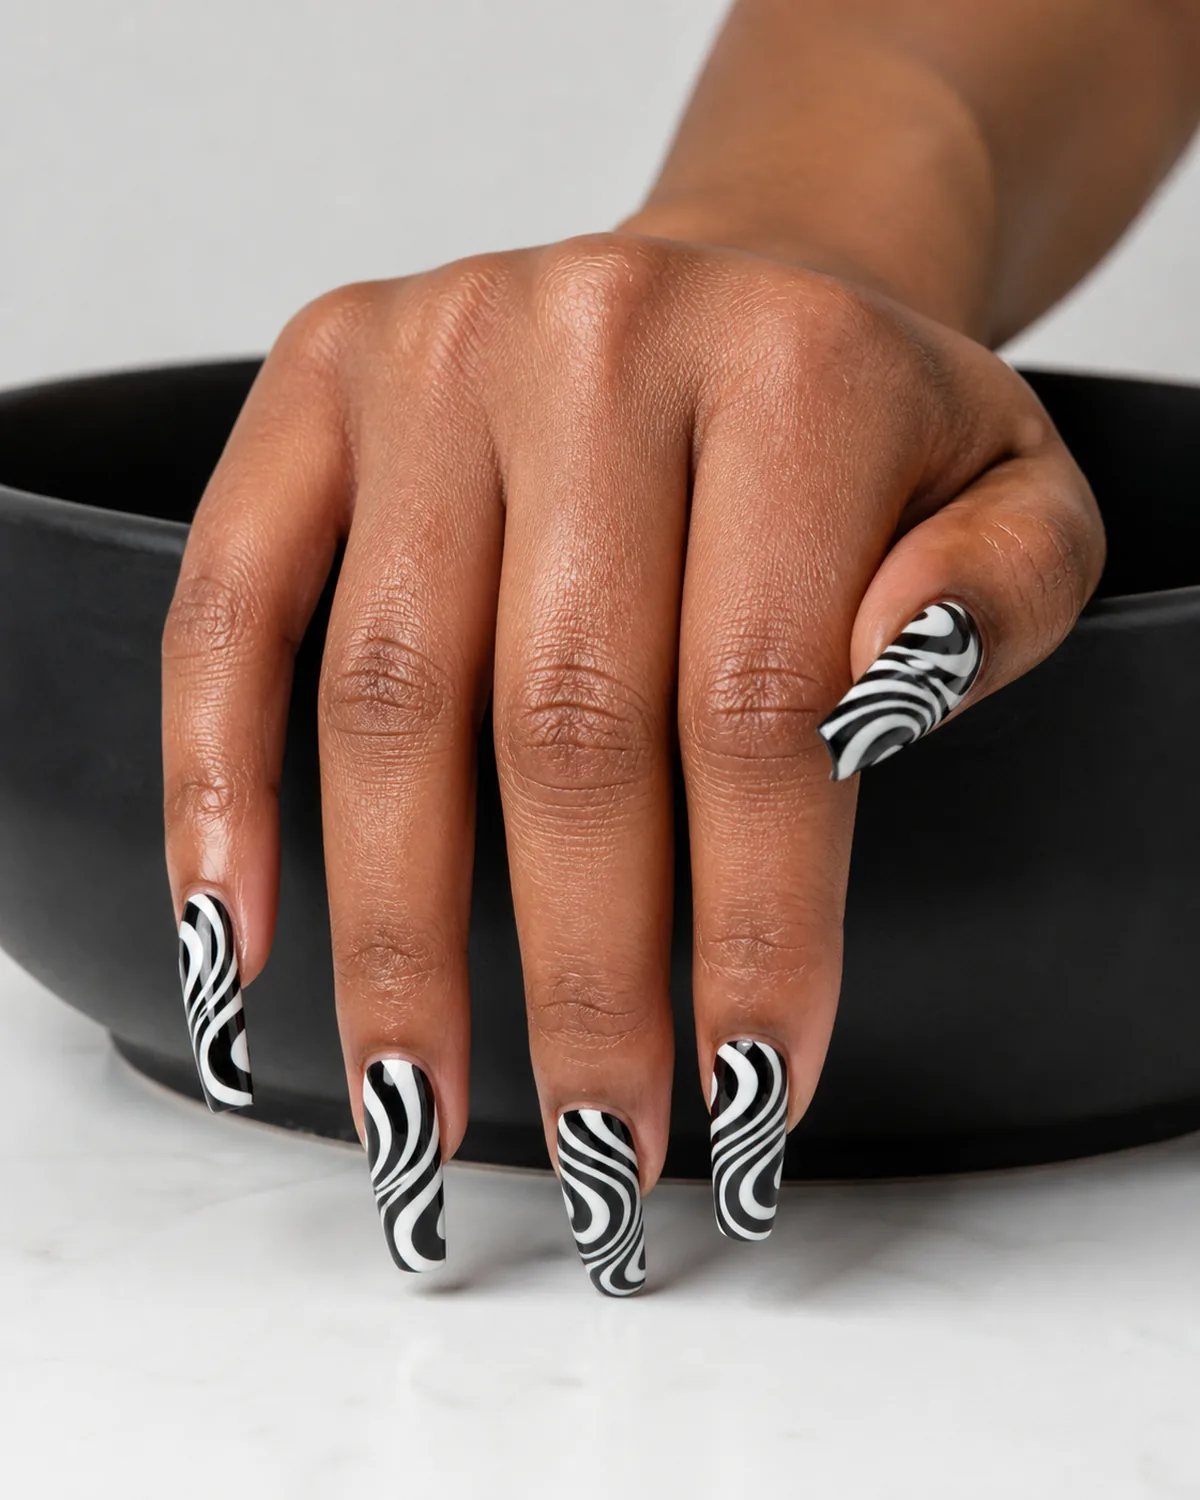
This is the loudest version of swirl nails. Bold alternating black and white lines wrap around each nail in a pattern that references 1960s psychedelic posters — the kind of design that demands attention from across a room.
Long coffin gives the swirl lines enough real estate to complete full rotations. On shorter lengths, black-and-white swirls tend to look cramped. The flat tip of the coffin shape provides a clean terminus for each line.
The contrast ratio matters. Use a true opaque black and a true opaque white — any sheerness or transparency will make the swirls look muddy where the colors overlap. Two coats of each minimum.
- Start with a white base, let it cure fully, then draw the black swirl lines with a striping brush
- Keep line thickness consistent — varying widths read as mistakes rather than design choices in a retro pattern
- The lines should wrap around the sides of the nail, not stop at the edges
3. Pastel Rainbow Swirl on Short Round
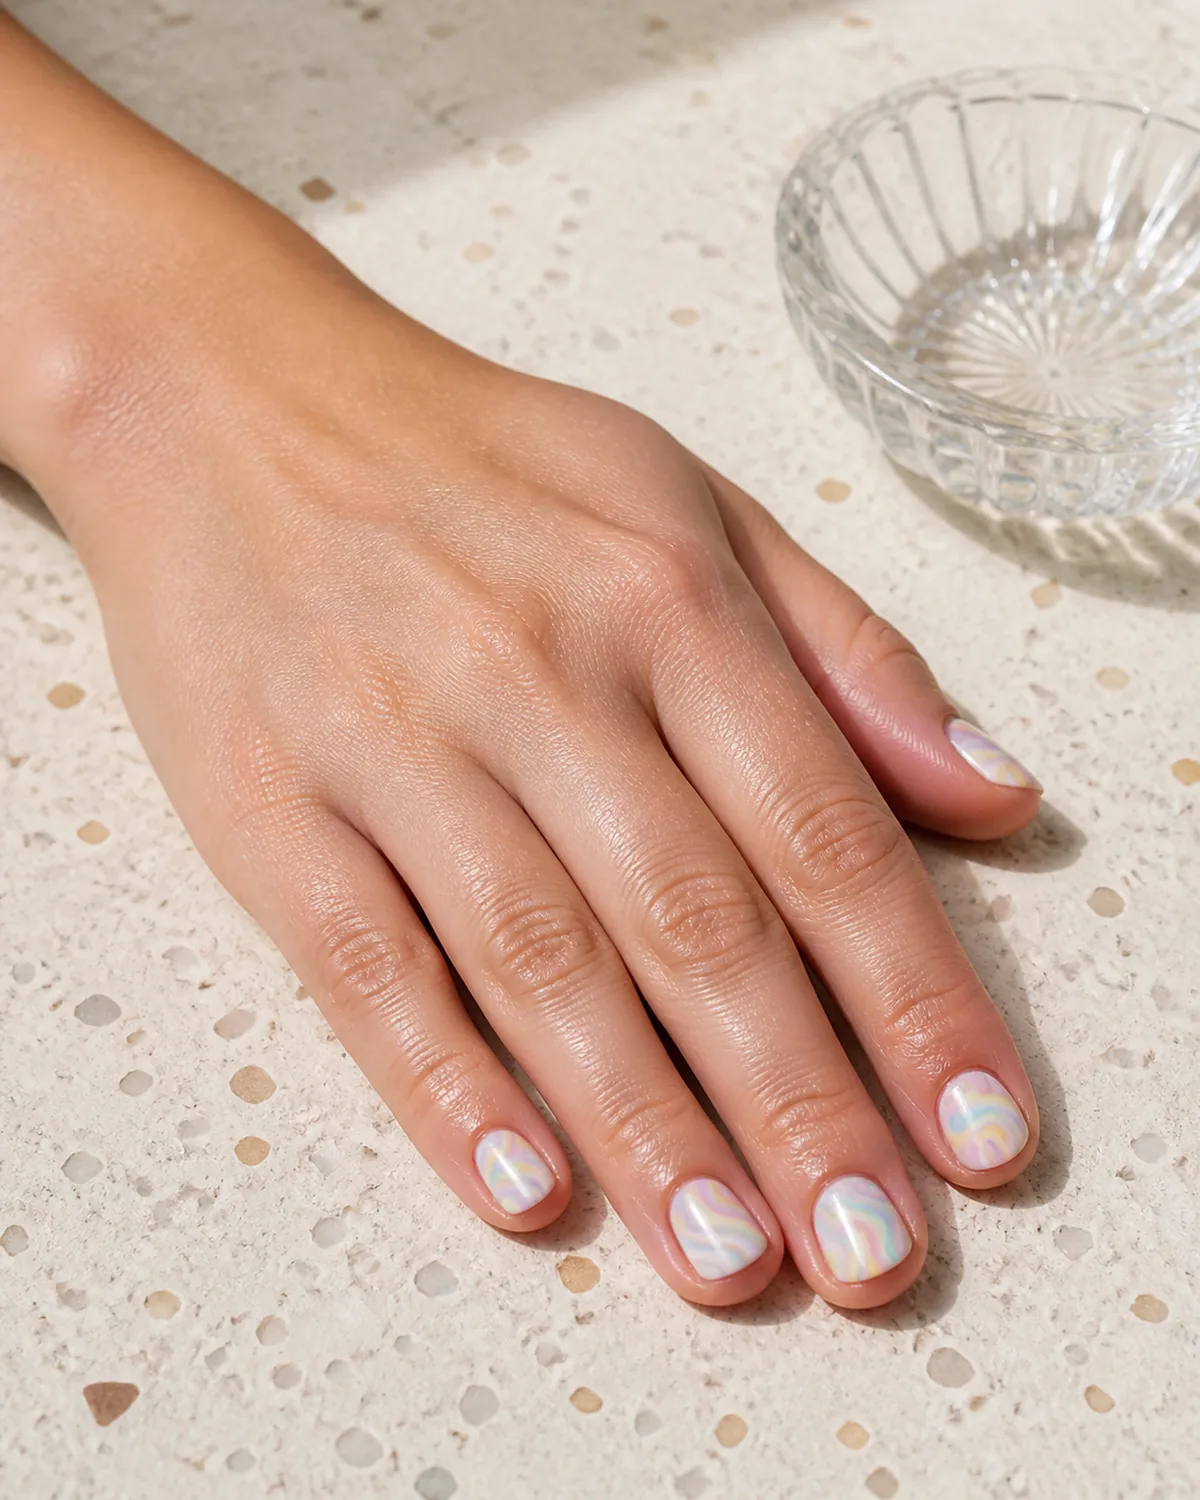
Pastel rainbow swirls take the same curving technique and soften it completely. Soft pink, lavender, mint, and butter yellow blend in gentle curves over a white base, creating a watercolor effect that reads playful without crossing into childish territory.
Short round nails keep the pastel palette grounded. The compact canvas forces each color to occupy a small area, which prevents any single pastel from dominating and maintains the balanced rainbow impression.
- Apply each color in sequence while the base is still slightly tacky — this creates natural blending at the color boundaries
- Use a dotting tool rather than a brush for the swirl motion — it gives softer edges than a bristle tip
- Three to four colors is the sweet spot; more than five starts to muddy
The white base coat underneath is doing more work than it appears. It brightens every pastel layered over it and prevents the colors from looking dusty. A nude base would mute the entire palette.
4. Tonal Nude Swirl on Oval
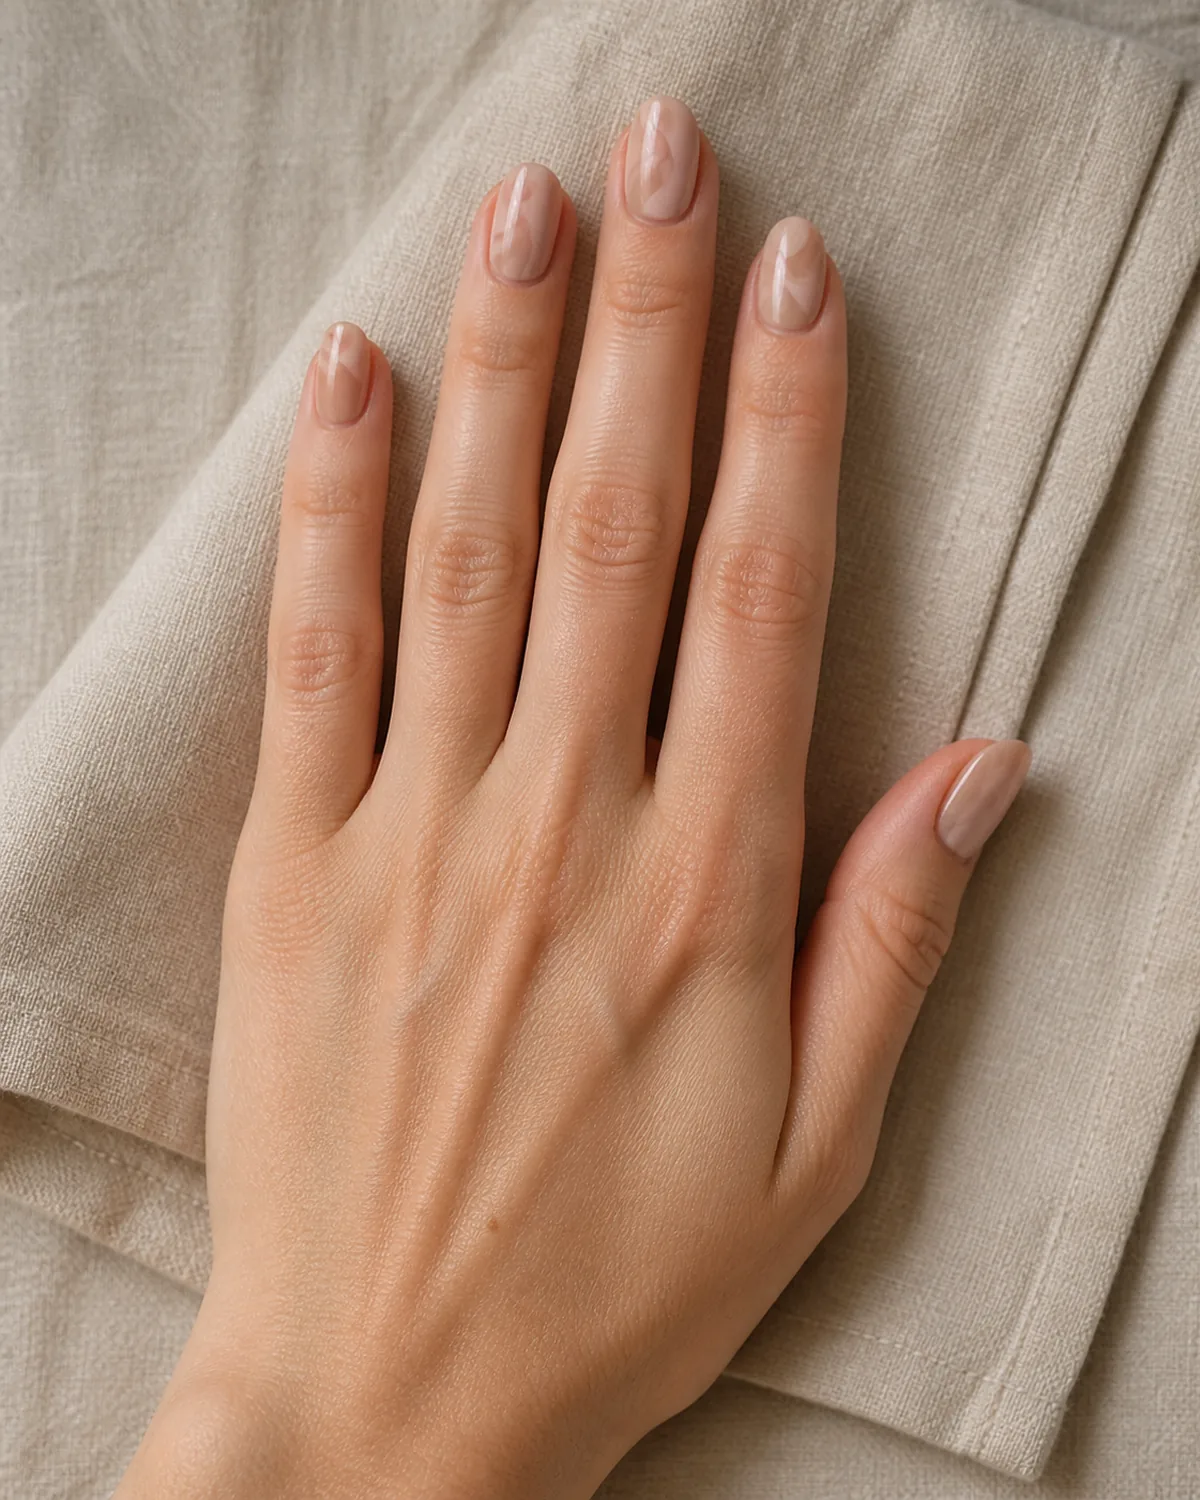
Tonal nude swirls are the version of this trend for anyone who wants movement on their nails without visible color. Two shades of nude — light beige and warm taupe — swirl together in subtle curves that only register up close. From a distance, the nails look like a slightly unusual solid neutral.
Oval elongates the subtle design just enough to keep it visible. The rounded shape echoes the curved swirl lines, creating a cohesive softness.
- The closer the two nude shades are in tone, the more sophisticated the result — a one-shade-apart difference reads intentional, a three-shade gap reads like a mistake in the mix
- Apply both shades while wet and marble them with a thin brush, barely dragging
This is the most wearable version of swirl nails on this list. It works in professional environments where bold nail art would raise eyebrows, while still giving the wearer something more interesting than a plain manicure to look at.
Find your match
Which Swirl Style Is Your Vibe?
5. Red and Orange Sunset Swirl on Medium Stiletto
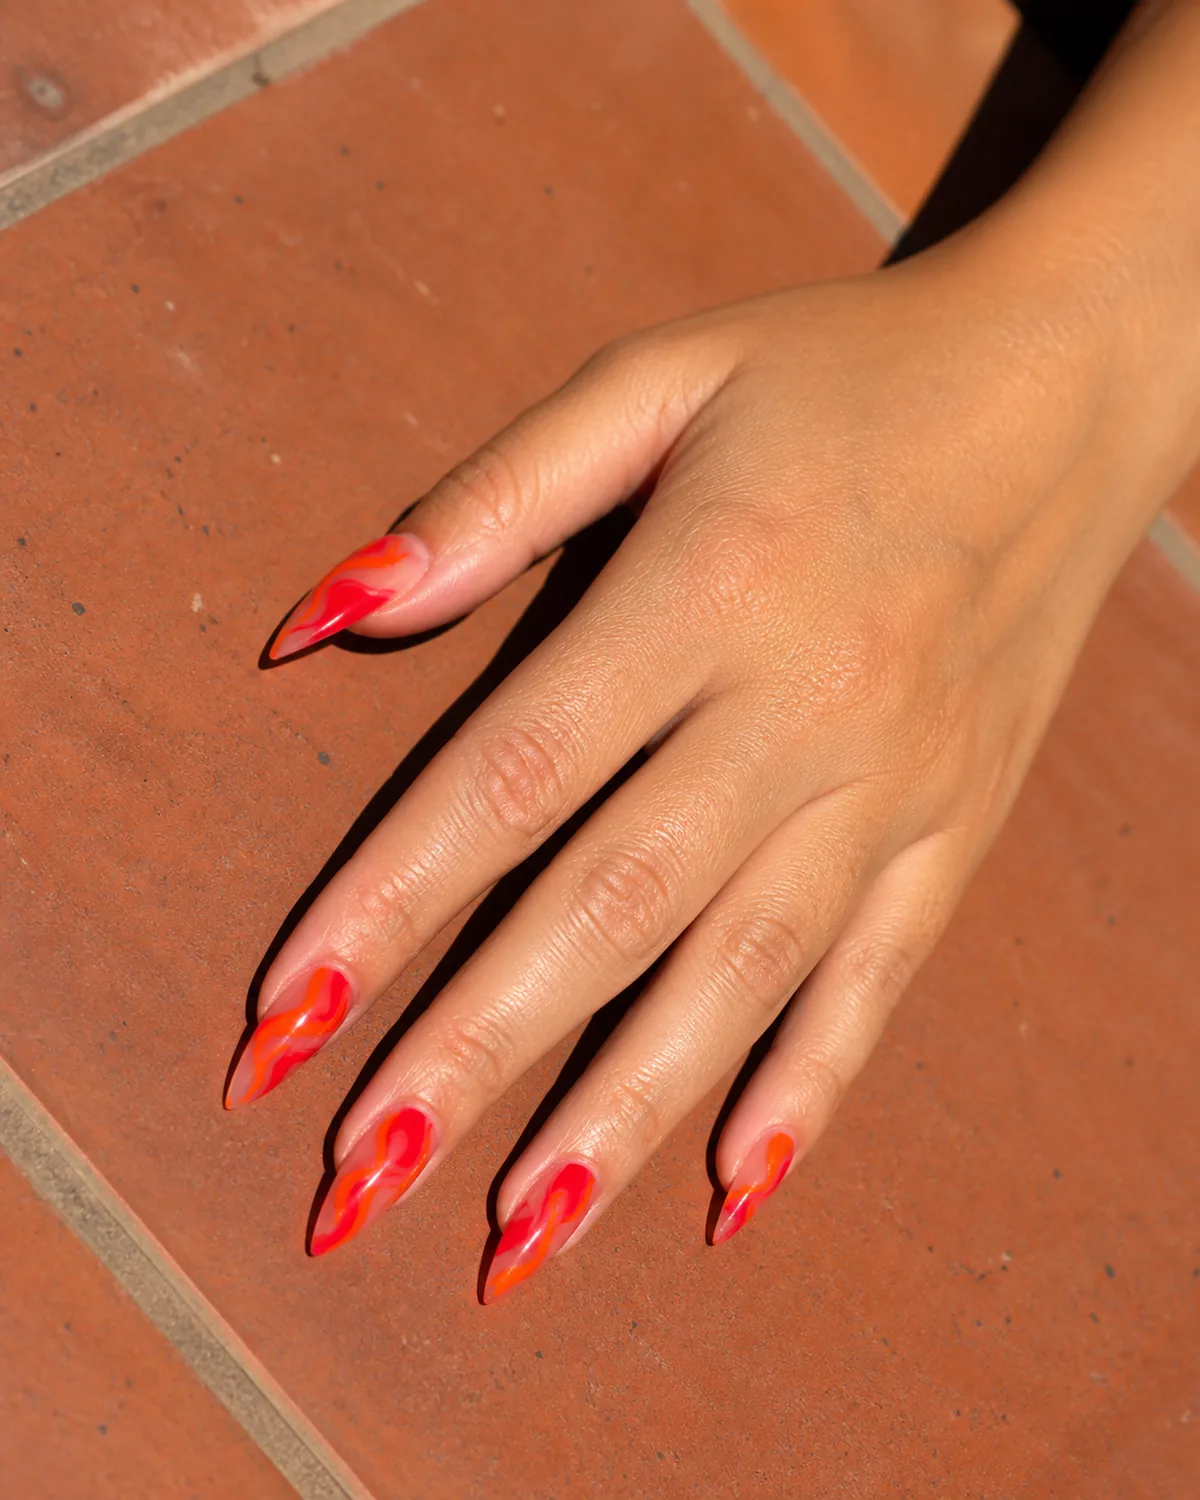
Sunset swirl nails take the organic motion of the swirl pattern and pair it with colors that reference the sky at dusk. Saturated warm red and bright orange flow in wide dramatic curves that evoke molten lava or a Mediterranean sunset.
Medium stiletto amplifies the drama. The pointed tip gives the swirl lines a natural vanishing point, and the longer canvas allows the red-to-orange transition to develop across the full length of each nail.
- The warm sheer base coat underneath prevents white gaps between the swirl colors — use a tinted nude or light peach rather than clear
- Draw the red swirls first, then thread the orange through the gaps while both are still wet
- These two colors have similar pigment densities, so they marble naturally without one overwhelming the other
This is a summer-to-fall transitional design. The warm tones feel seasonless in a way that pastel or neon swirls do not.
6. Sage Green and Cream Swirl on Squoval
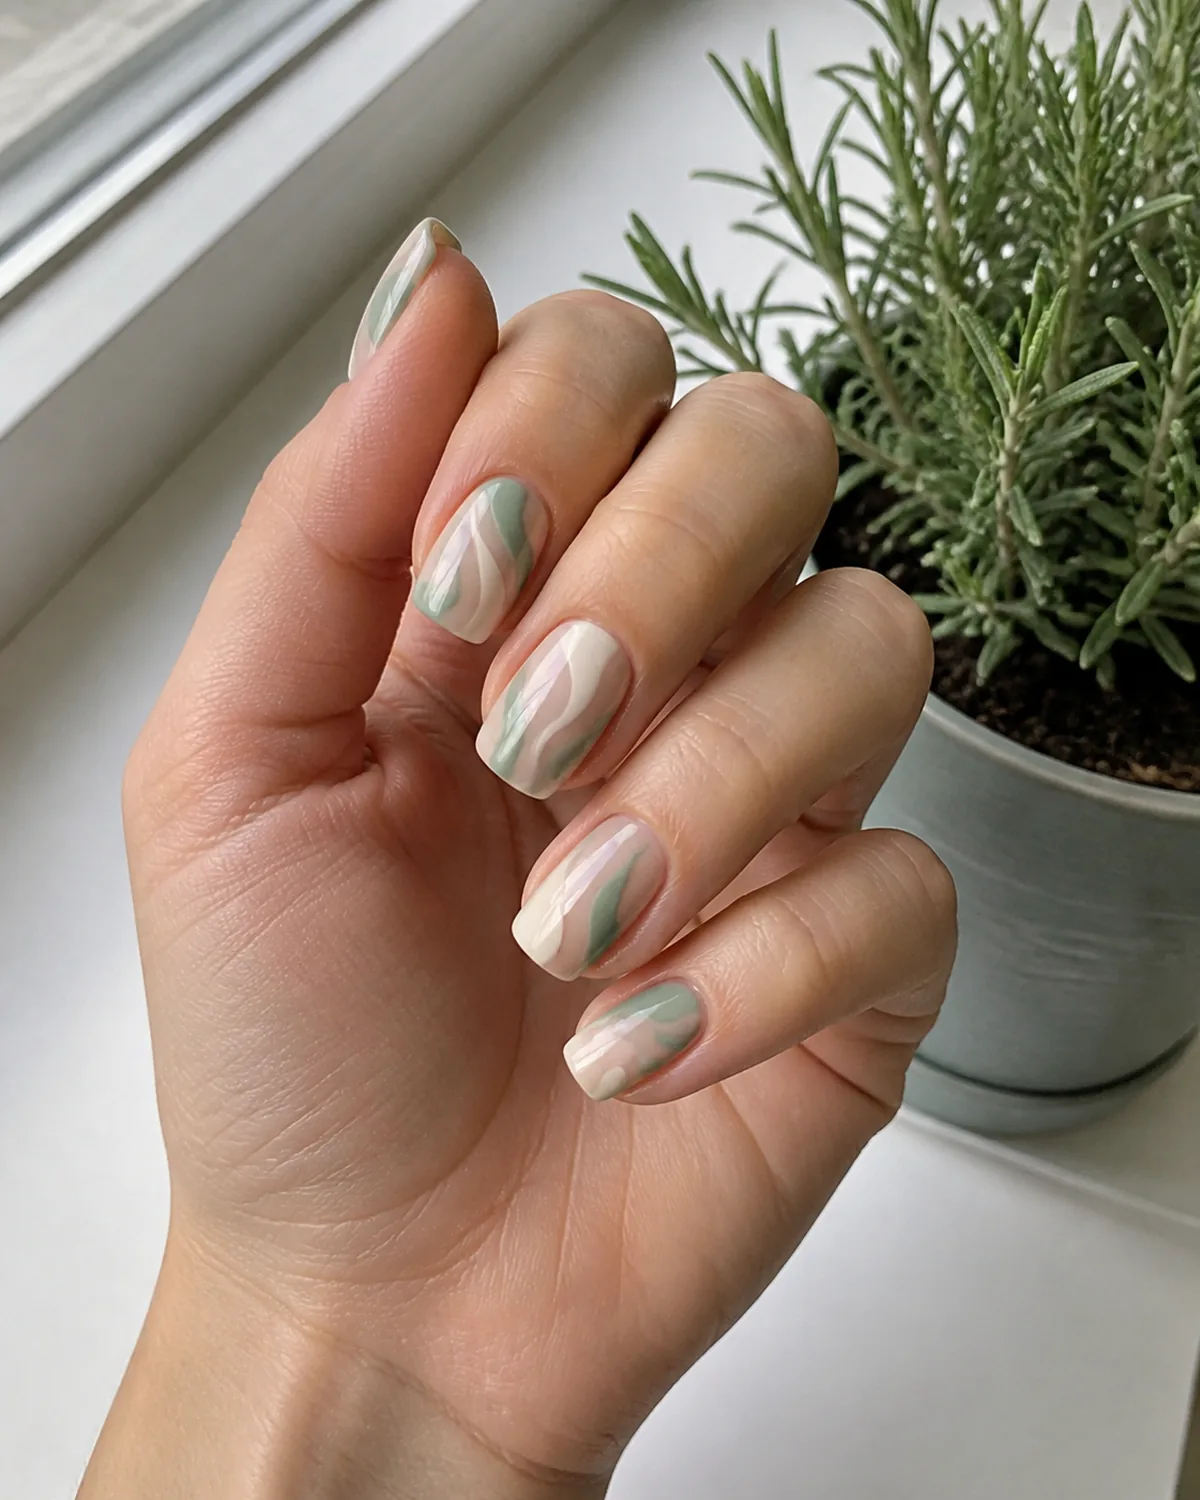
Sage green and cream is the color combination that makes swirl nails feel like they belong in a ceramics studio. The muted green and off-white create organic curves that reference handmade pottery glazes — intentionally imperfect and warm.
Squoval keeps the earthy palette practical. The straight sides and softened corners complement the organic swirl lines without competing for attention. It is the most versatile everyday shape for an art-forward design.
- Sage green reads cooler than it looks in the bottle — test it against cream on a palette before applying
- Use a thin brush to draw the sage lines, letting the cream show through as the dominant base color
- The ratio should be roughly 40% sage, 60% cream — sage as the accent, not the background
A glossy top coat pushes this design toward a glazed-ceramic look. A matte finish pushes it toward a more earthy, stone-like effect. Both work, but they produce completely different moods.
7. Chrome Silver Swirl on Short Almond
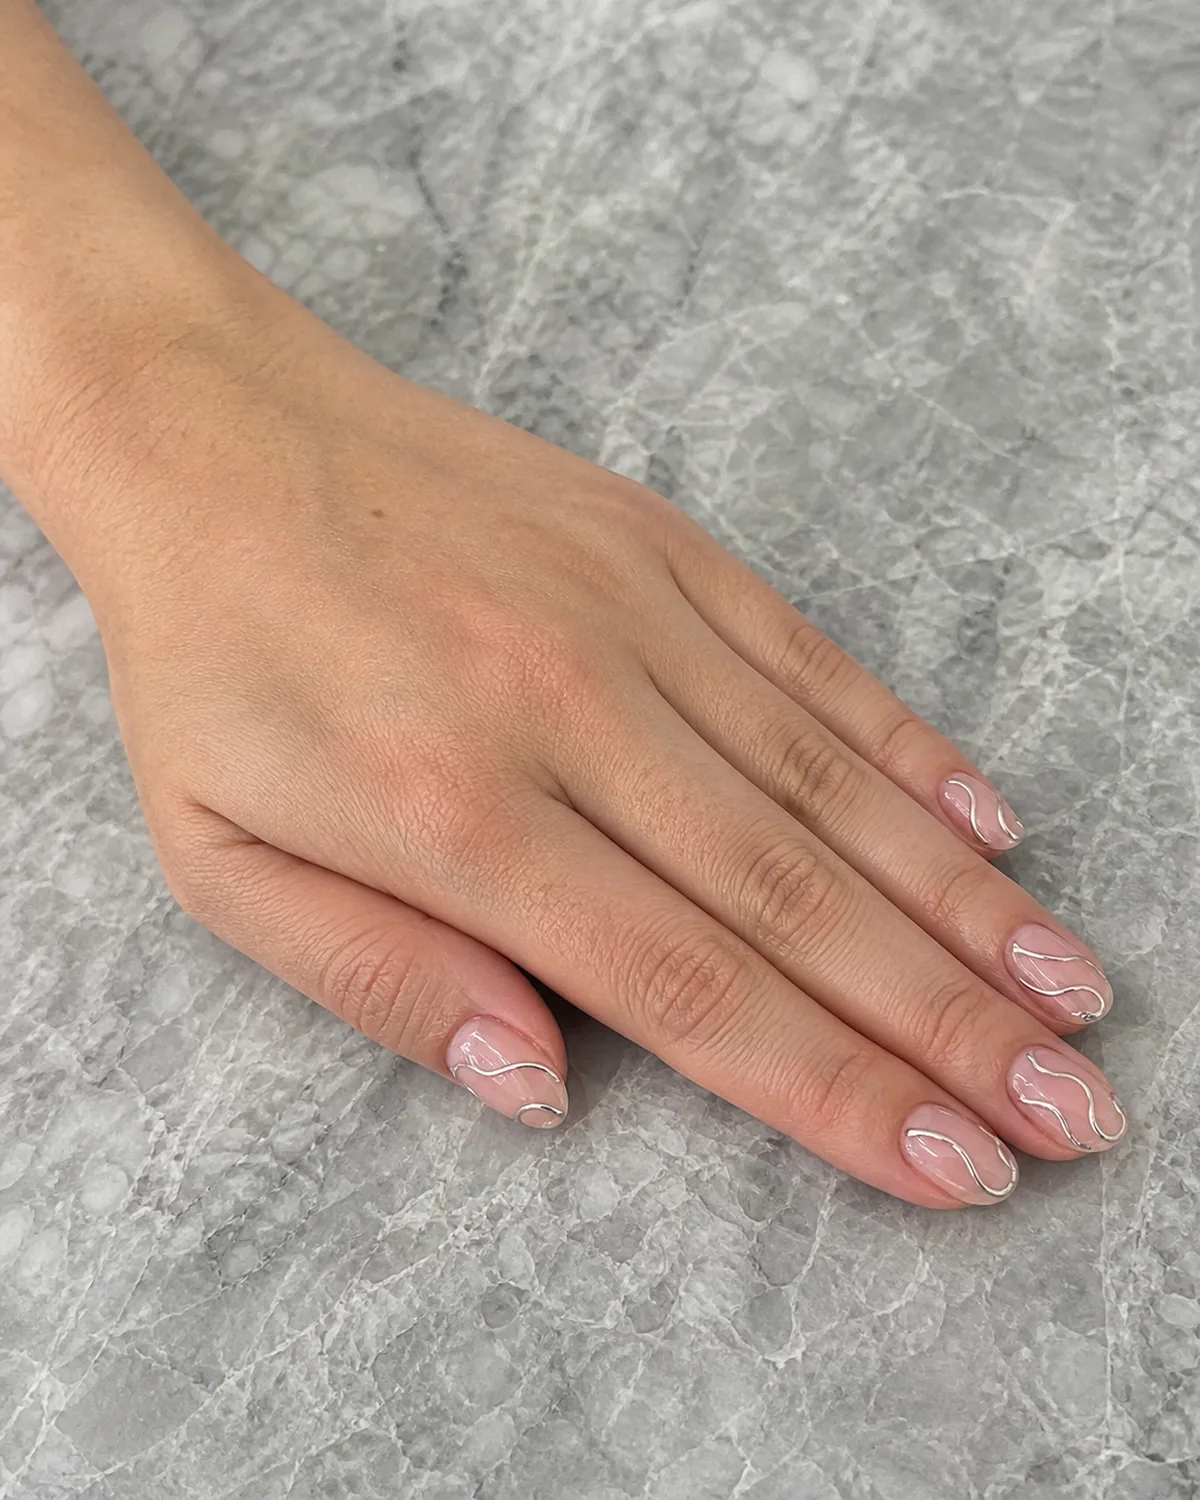
Chrome silver swirl nails use metallic line work as the design element rather than color blocks. Thin raised chrome silver lines are drawn over a sheer pink jelly base, catching light with each curve and creating a look that shifts between subtle and reflective depending on the angle.
Short almond grounds the metallic element. The compact shape prevents the chrome lines from reading as costume jewelry, while the tapered sides guide the swirl curves naturally along the nail.
- Apply the jelly base first and cure it completely before adding the chrome swirl lines — wet-on-wet will cause the chrome pigment to bleed into the base
- Use a liner brush with chrome powder mixed into a gel medium for the crispest metallic lines
- Keep the swirl lines thin and widely spaced — the jelly base is part of the design, not just a background
This is the version of swirl nails that works for evening events without committing to full glitter coverage or an all-over metallic finish.
The method
How to Get Clean Swirl Nails
8. Brown and White Chocolate Swirl on Medium Coffin
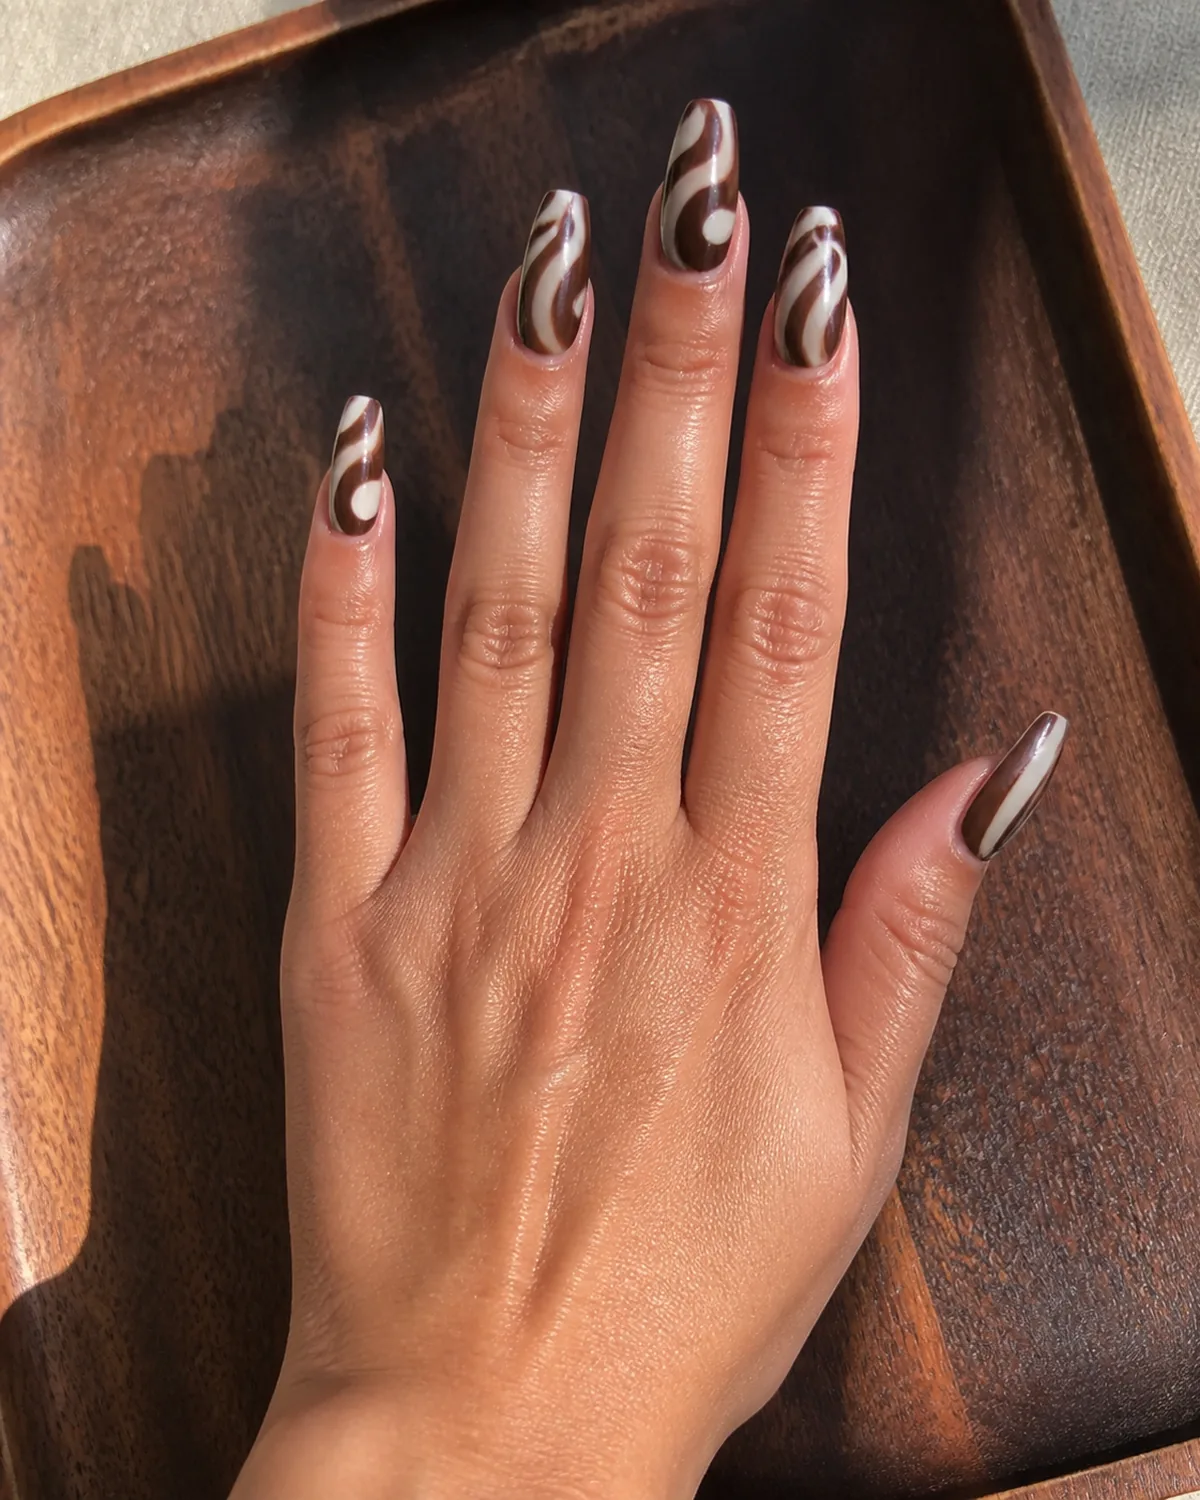
Chocolate swirl nails take the latte palette (idea 1) and crank up the contrast. Rich chocolate brown and warm white swirl in thick, alternating ribbons that reference melted chocolate and cream — the kind of pattern you see when two colors of ganache fold together.
Medium coffin gives the thick ribbons enough width to register as distinct bands rather than thin lines. The flat tip provides a clean edge where the swirls terminate.
- Use opaque formulas for both colors — the chocolate brown especially needs full coverage to avoid looking sheer and muddy
- Draw the brown swirls first on a white base, making wide S-curves that leave roughly equal amounts of white showing
- The ribbons should be thick enough that each one is wider than a thin line — this is not a marble effect, it is a bold swirl
The chocolate swirl works year-round but peaks in autumn and winter. Pair it with the warm-toned clothing palette of those seasons and it functions as a neutral.
9. Neon Swirl on Long Stiletto
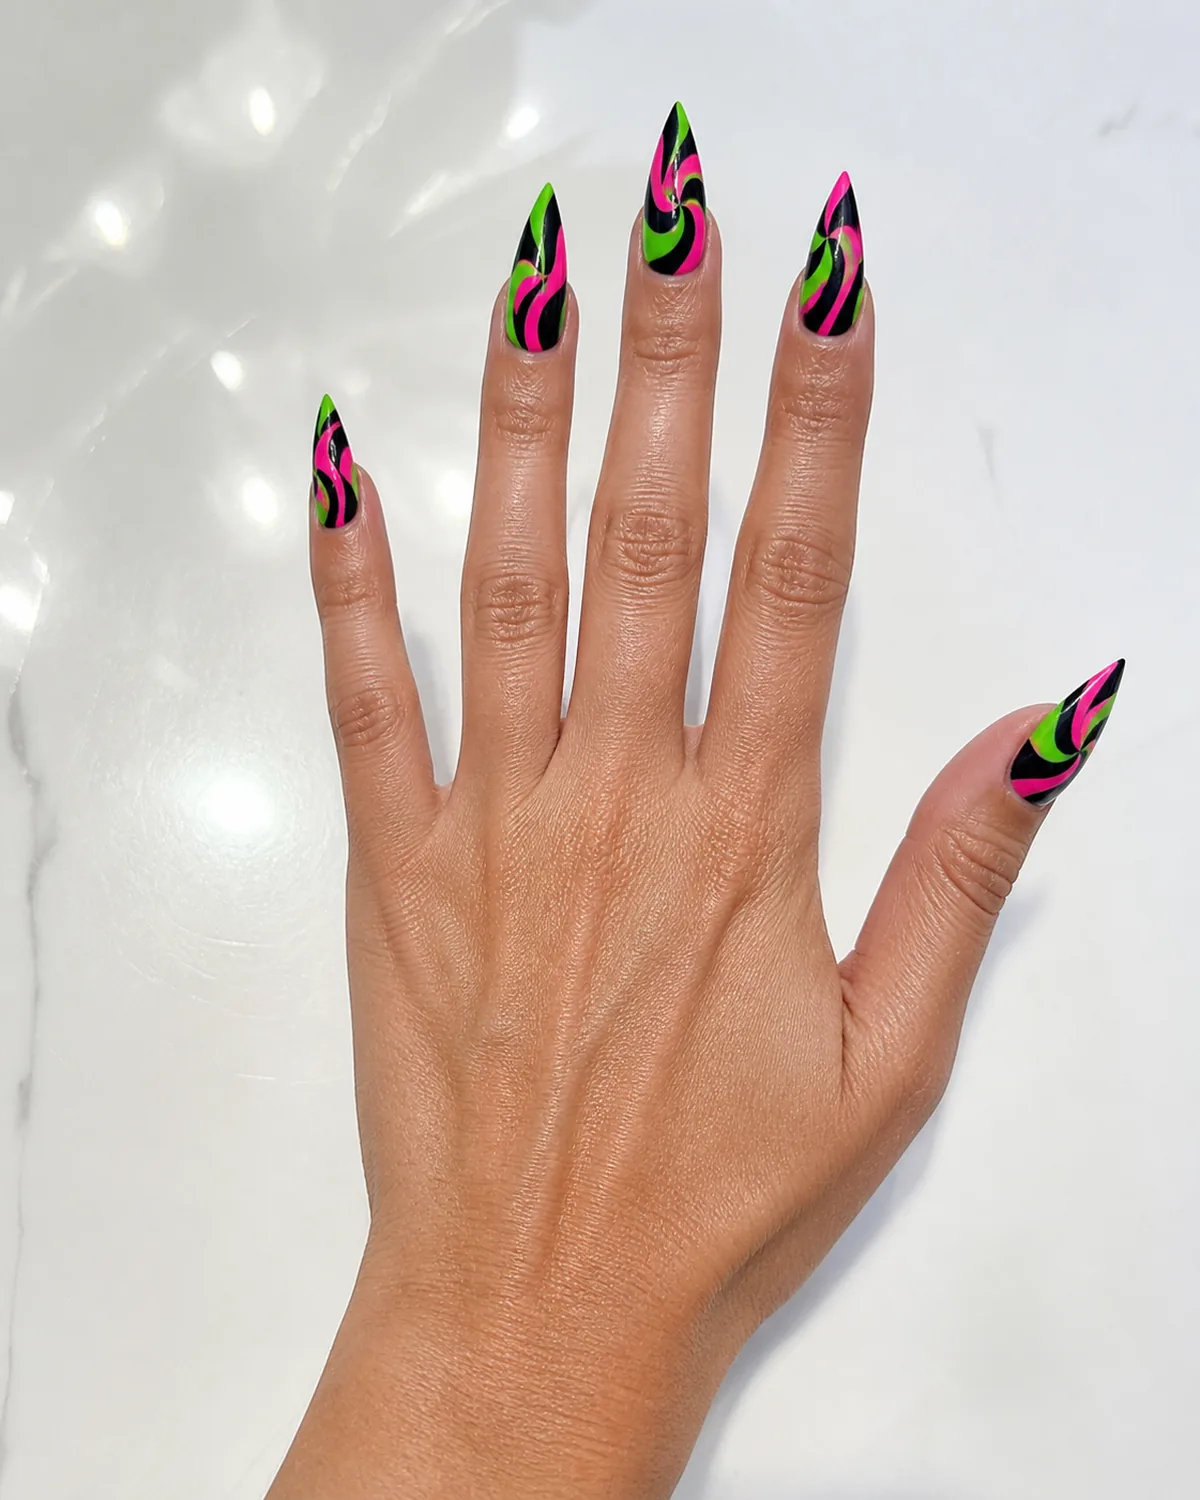
Neon swirl nails are the most visually aggressive version of this trend. Electric neon green and hot pink swirl in bold, high-contrast curves over a black base, creating a design that looks like it belongs under UV light even in natural daylight.
Long stiletto is the right shape for this level of visual intensity. The extended length gives the neon swirls maximum surface area, and the dramatic point reinforces the edgy, nightlife energy of the color palette.
- The black base is structural, not optional — it makes the neon colors pop with a contrast ratio that white or nude bases cannot match
- Apply the neon swirls with a slightly thicker brush than you would use for tonal designs — neon polishes are often semi-sheer and need width to look saturated
- Two neon colors is the maximum; adding a third will turn the design into visual noise
This design photographs differently than it looks in person. Under flash or harsh light, the neon colors will look even more electric. Under warm indoor light, the pink will shift toward coral.
10 Swirl Nail Ideas to Try
- 1Latte swirlCreamy white and caramel-brown curves on medium almond, the coffee-art entry point.
- 2B&W retro swirlBold alternating black and white psychedelic lines wrapping long coffin.
- 3Pastel rainbow swirlSoft pink, lavender, mint, and butter yellow blending on short round.
- 4Tonal nude swirlTwo shades of nude nearly camouflaged in subtle curves on oval.
- 5Sunset swirlSaturated warm red and bright orange evoking molten dusk on medium stiletto.
- 6Sage & cream swirlMuted sage green and off-white in organic pottery-glaze curves on squoval.
- 7Chrome silver swirlThin metallic lines catching light over sheer pink jelly on short almond.
- 8Chocolate swirlRich chocolate brown and warm white in thick alternating ribbons on medium coffin.
- 9Neon swirlElectric neon green and hot pink over black on long stiletto.
- 10Abstract accent swirlConcentric burgundy and gold swirl on one accent nail, nude on the rest, medium oval.
styvea.com
10. Abstract Swirl Accent on Medium Oval
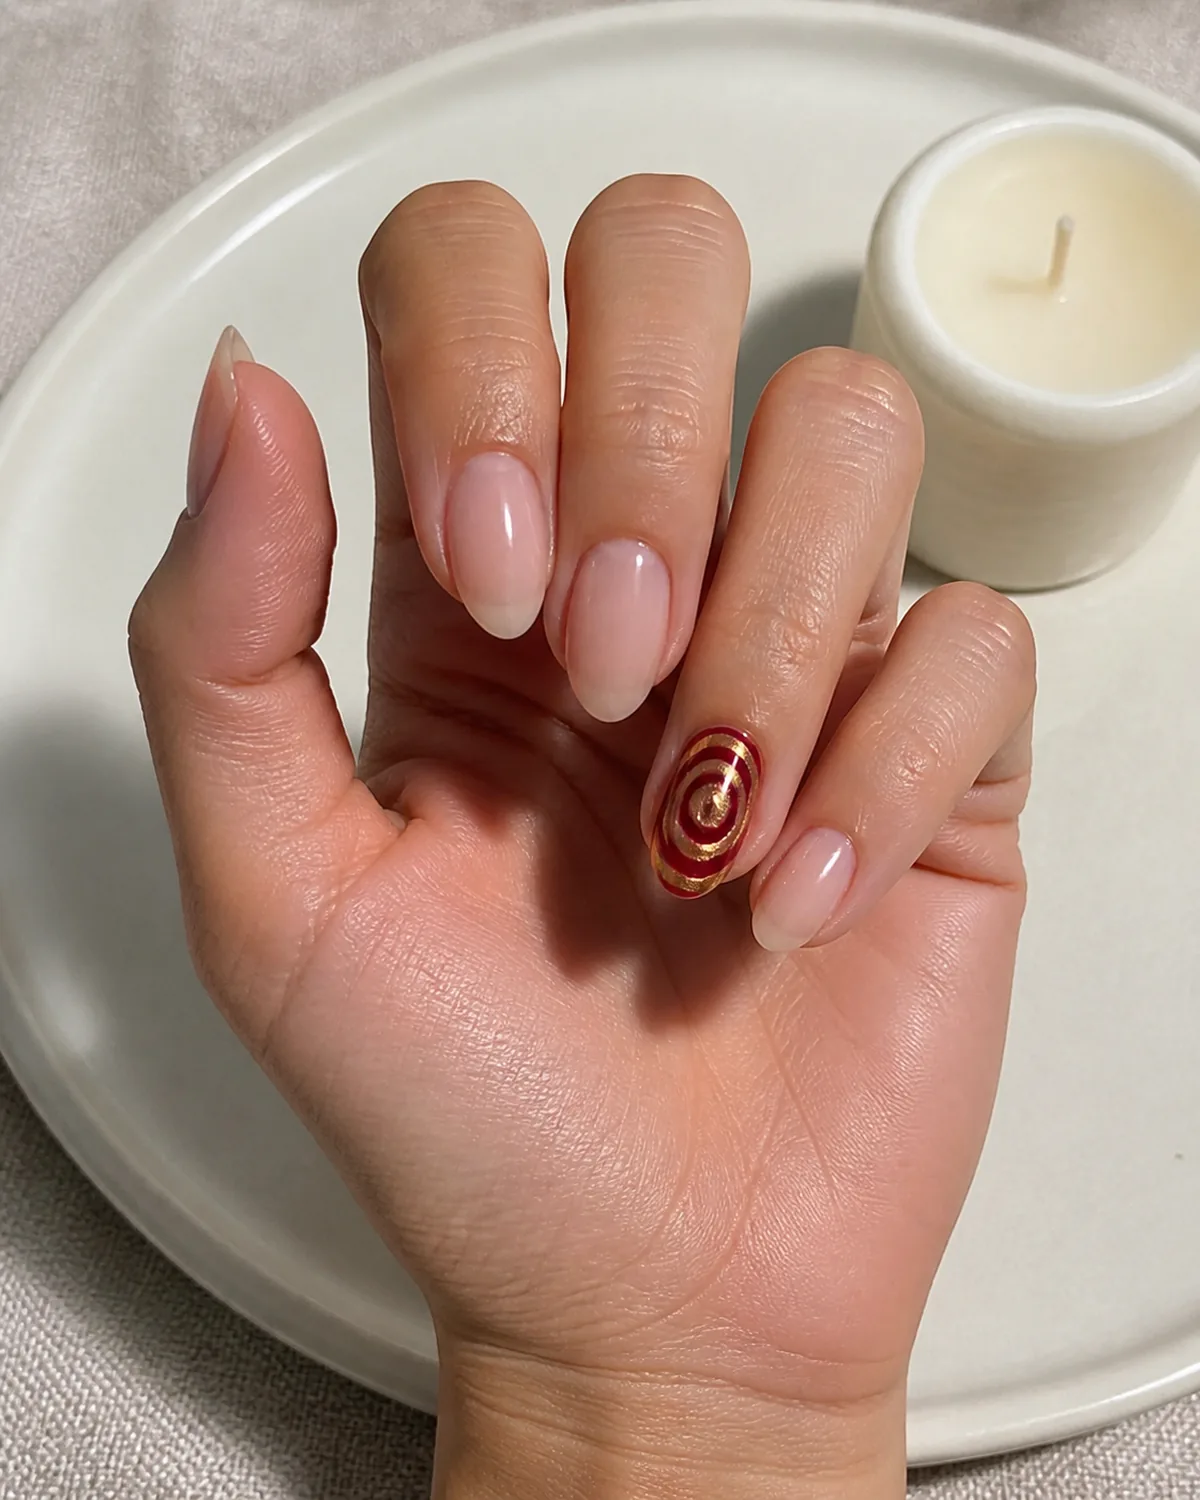
The accent nail approach takes the swirl pattern and concentrates it on a single finger. The ring finger features bold concentric swirl circles in deep burgundy and gold, while the remaining four nails stay in plain sheer nude. The contrast between the detailed accent and the clean surround makes the swirl work harder on less real estate.
Medium oval is a clean, classic shape that lets the accent nail be the sole point of visual interest. The remaining nude nails look intentionally minimal rather than unfinished.
- The burgundy-and-gold combination gives the accent nail a richness that justifies being the only decorated nail — pastel swirl accents tend to look incomplete
- Draw the concentric circles from the outside in, starting at the cuticle edge and spiraling toward the center
- The nude polish on the other four nails should be the same shade as the accent nail's base — mismatched nudes will look like two different manicures
This is the entry point for anyone who likes the swirl trend but does not want it on all ten fingers. One accent is enough to reference the pattern without committing to a full set.
Frequently Asked Questions
Do swirl nails work on short nails? Swirl nails work on every length, but the pattern scale needs to match the nail size. Short nails look best with fewer, wider curves rather than tight spirals. On short round or squoval shapes, two or three flowing curves per nail is the sweet spot.
What tools do I need for swirl nail art at home?
- A thin detail brush for controlled line work, or a dotting tool for softer organic curves
- A palette (a piece of foil works) to load small amounts of polish
- A liner brush for fine metallic lines (chrome silver swirl)
- A good top coat that can be applied in a single smooth pass
How do I keep swirl lines from smudging? The most common cause is applying the top coat too aggressively. After the swirl lines are fully set, apply the top coat in one smooth pass from cuticle to tip — do not brush back and forth. With regular polish, wait five minutes after the last swirl line before sealing. With gel, cure each swirl color individually before adding the next.
Can I do swirl nails with regular polish or do I need gel? Regular polish works for every design on this list. Gel is easier for beginners because each layer cures under a lamp and stays workable until you cure it. The key difference is working time — regular polish gives about 30 seconds before it sets. If timing stresses you out, gel is more forgiving.
What is the easiest swirl design for beginners? The tonal nude swirl (idea 4) is the most forgiving — the two colors are so close in shade that imprecise lines still look intentional. The latte swirl (idea 1) is a close second. Avoid starting with black-and-white retro or neon, which demand clean lines and punish any wobble.

Sloane Avery edits Styvea, where she shares nail design ideas, shapes, colors, and at-home manicure how-tos for anyone who loves a good manicure. Every guide is reviewed for clarity, usefulness, image accuracy, and Pinterest-to-page alignment before publication. Visit the About page.