3D nails add real height to a manicure — a sculpted bow, a cluster of pearls, a raised flower — elements that physically sit on top of the nail plate instead of just sitting flat as a printed pattern. Run a fingertip across one and you can feel it.
These fifteen looks move through the most common raised elements — pearls, bows, gems, charms, a flower, a butterfly, a chain — across placements and bases. Early ones are easy single-element starts; later ones layer several pieces together.
Save the element you want to ask for next.
From a single pearl cluster through a hand-sculpted bow and a draped micro-chain, these fifteen looks all use the same principle — a raised element with real height and shadow — at different types and placements. Jump straight to the one that matches your mood.
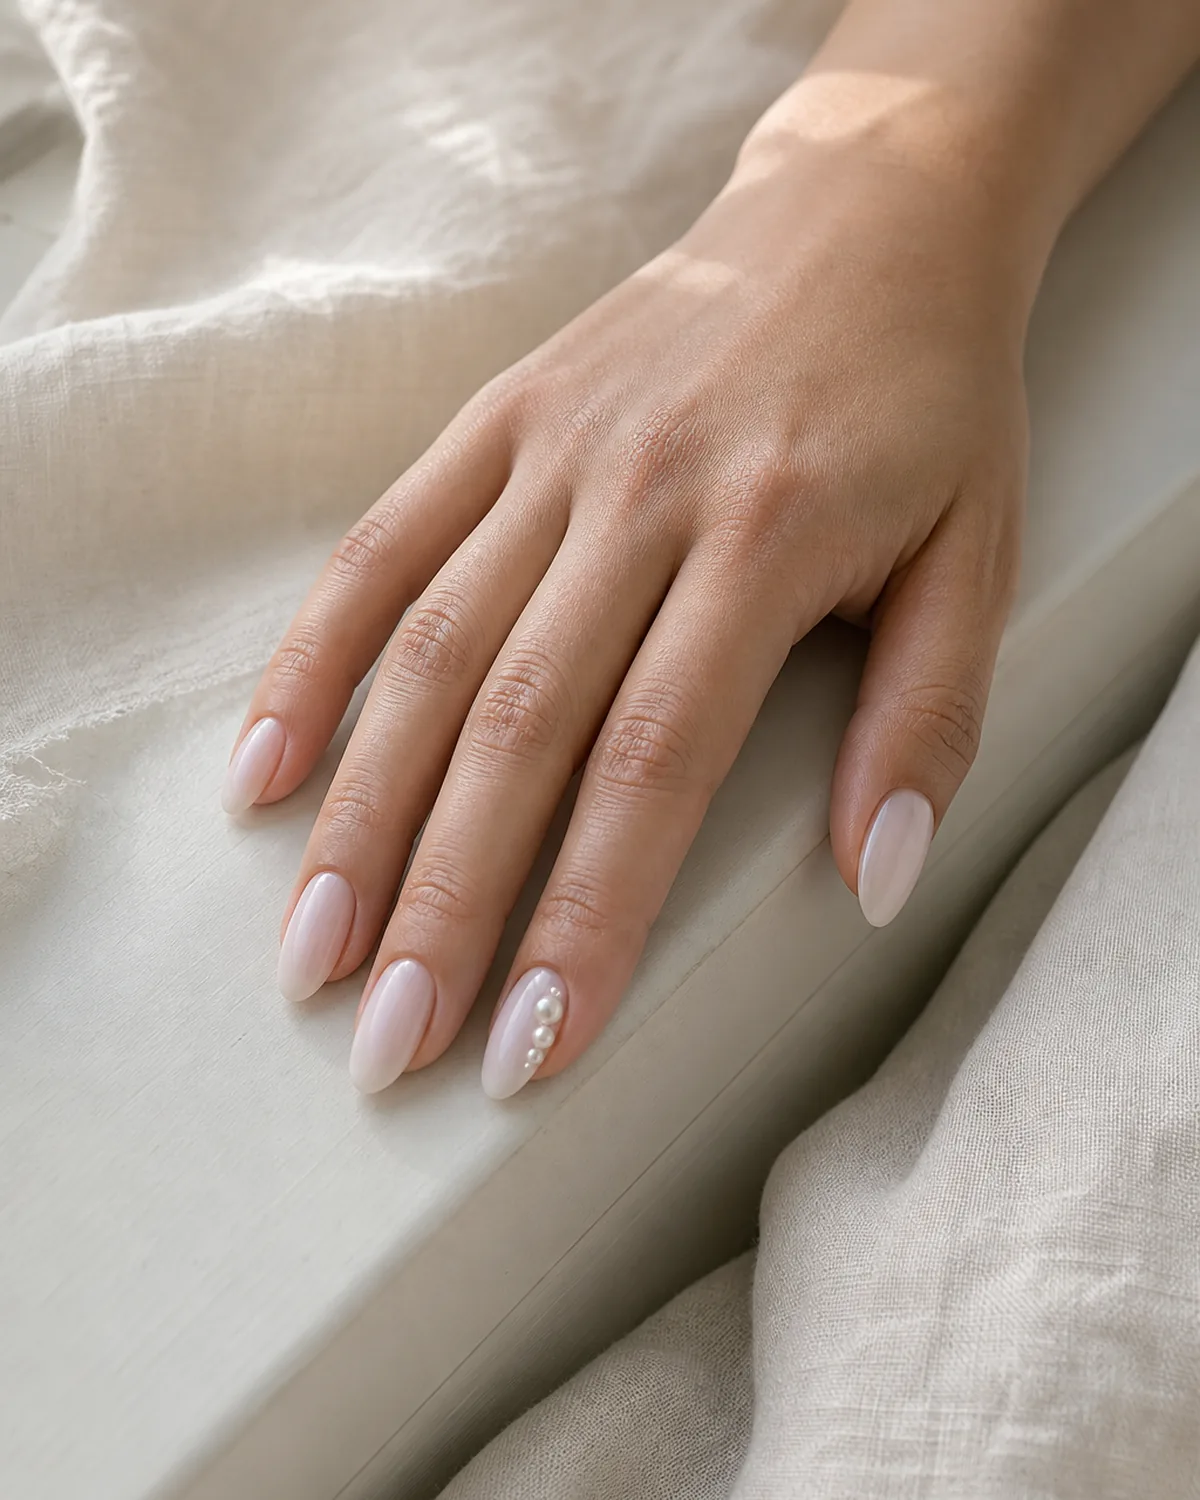
1. A Single Pearl Cluster Tucked Into One Corner
A handful of tiny pearls, applied close together in one corner of the nail rather than spread evenly, is the simplest way into three-dimensional nail art. Each pearl sits slightly proud of the surface, catching a highlight and casting a soft shadow onto the polish beneath it.
It reads more like a piece of jewelry than a printed design, in the same low-key register as the spring nail trends that lean on texture over color this season. Medium almond nails give the cluster a clean curve to sit against without crowding the free edge.
- Paint a sheer milky base across all ten nails and cure.
- Dot a small amount of clear gel adhesive into one corner of the accent nail.
- Place three to five tiny pearls close together into the wet gel.
- Cure fully, then seal the edges with a thin layer of top coat around the pearls.
- Leave the pearls themselves uncoated so they keep their soft shine.
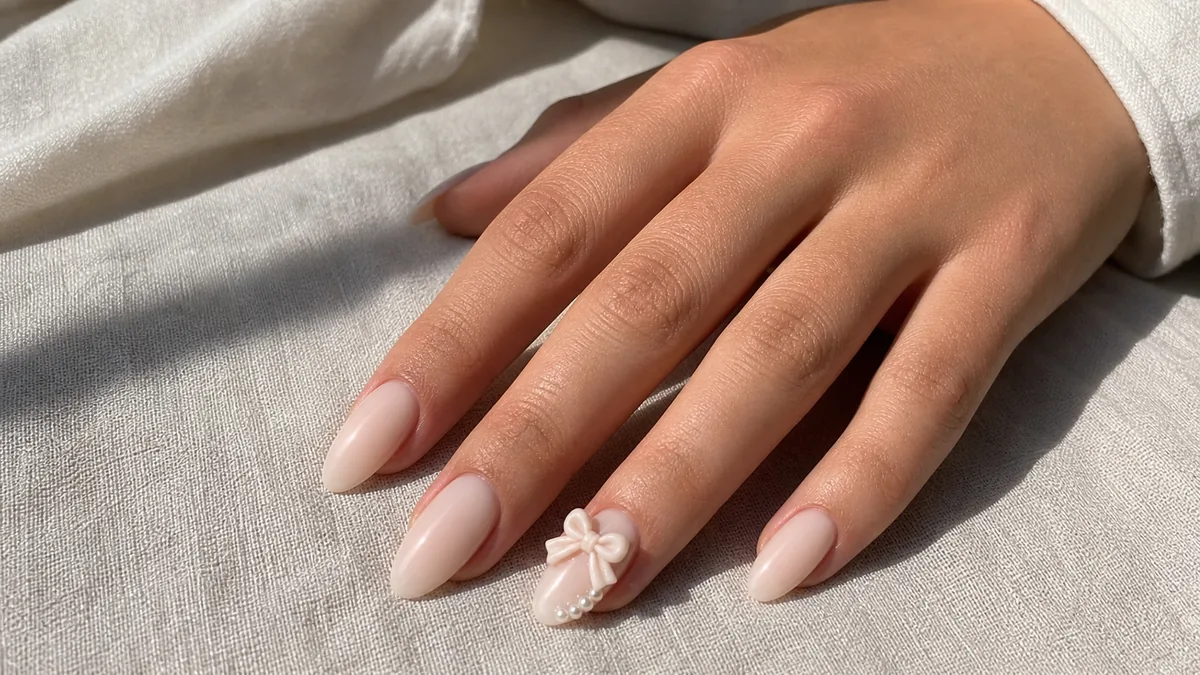
2. What a Hand-Sculpted Bow Actually Looks Like Up Close
Up close, a hand-sculpted bow has none of the flatness of a bow decal. It is built loop by loop from acrylic or hard gel, pinched at the center, with visible ridges where each loop was shaped separately before curing. Held at an angle, it throws a shadow the way any small object would.
That shadow is the whole point — it is what tells the eye "this is not paint." Medium oval nails on a soft pastel base give the bow room to sit without fighting the nail's own curve.
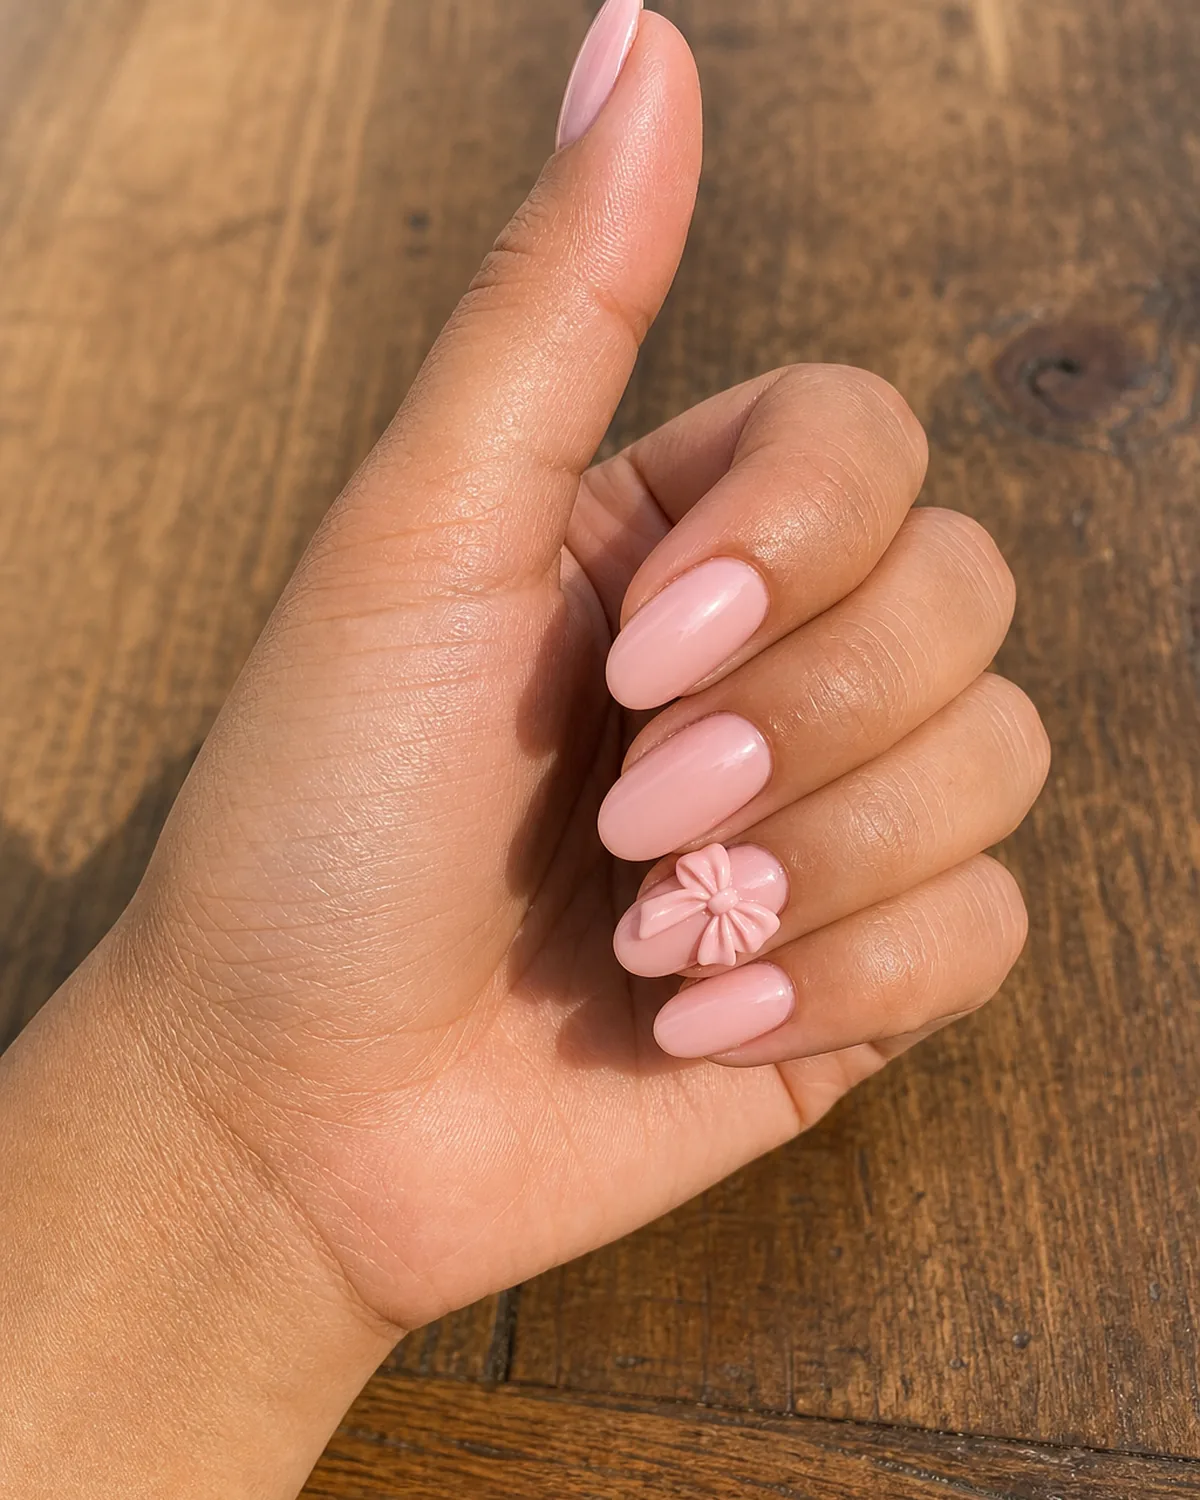
- Paint a soft pastel base across all ten nails and cure.
- Sculpt two loop shapes and a small center knot from acrylic on a separate surface.
- Once firm, position the loops and knot onto the accent nail while still workable.
- Press gently to secure, then let the piece fully harden.
- Seal only the base polish around the bow, not the bow itself.
3. A 3D Flower Built Petal by Petal on One Accent Nail
Five small petals, sculpted individually from gel and layered so each one overlaps the last slightly, come together into a small raised flower. Because every petal was shaped and cured on its own, the finished flower catches light differently across its surface — one petal bright, the next in shadow.
It is a slower build than most of the elements on this list, but the payoff is a flower that looks genuinely dimensional rather than stamped. Medium coffin nails on a nude base keep the flower as the only visual event.
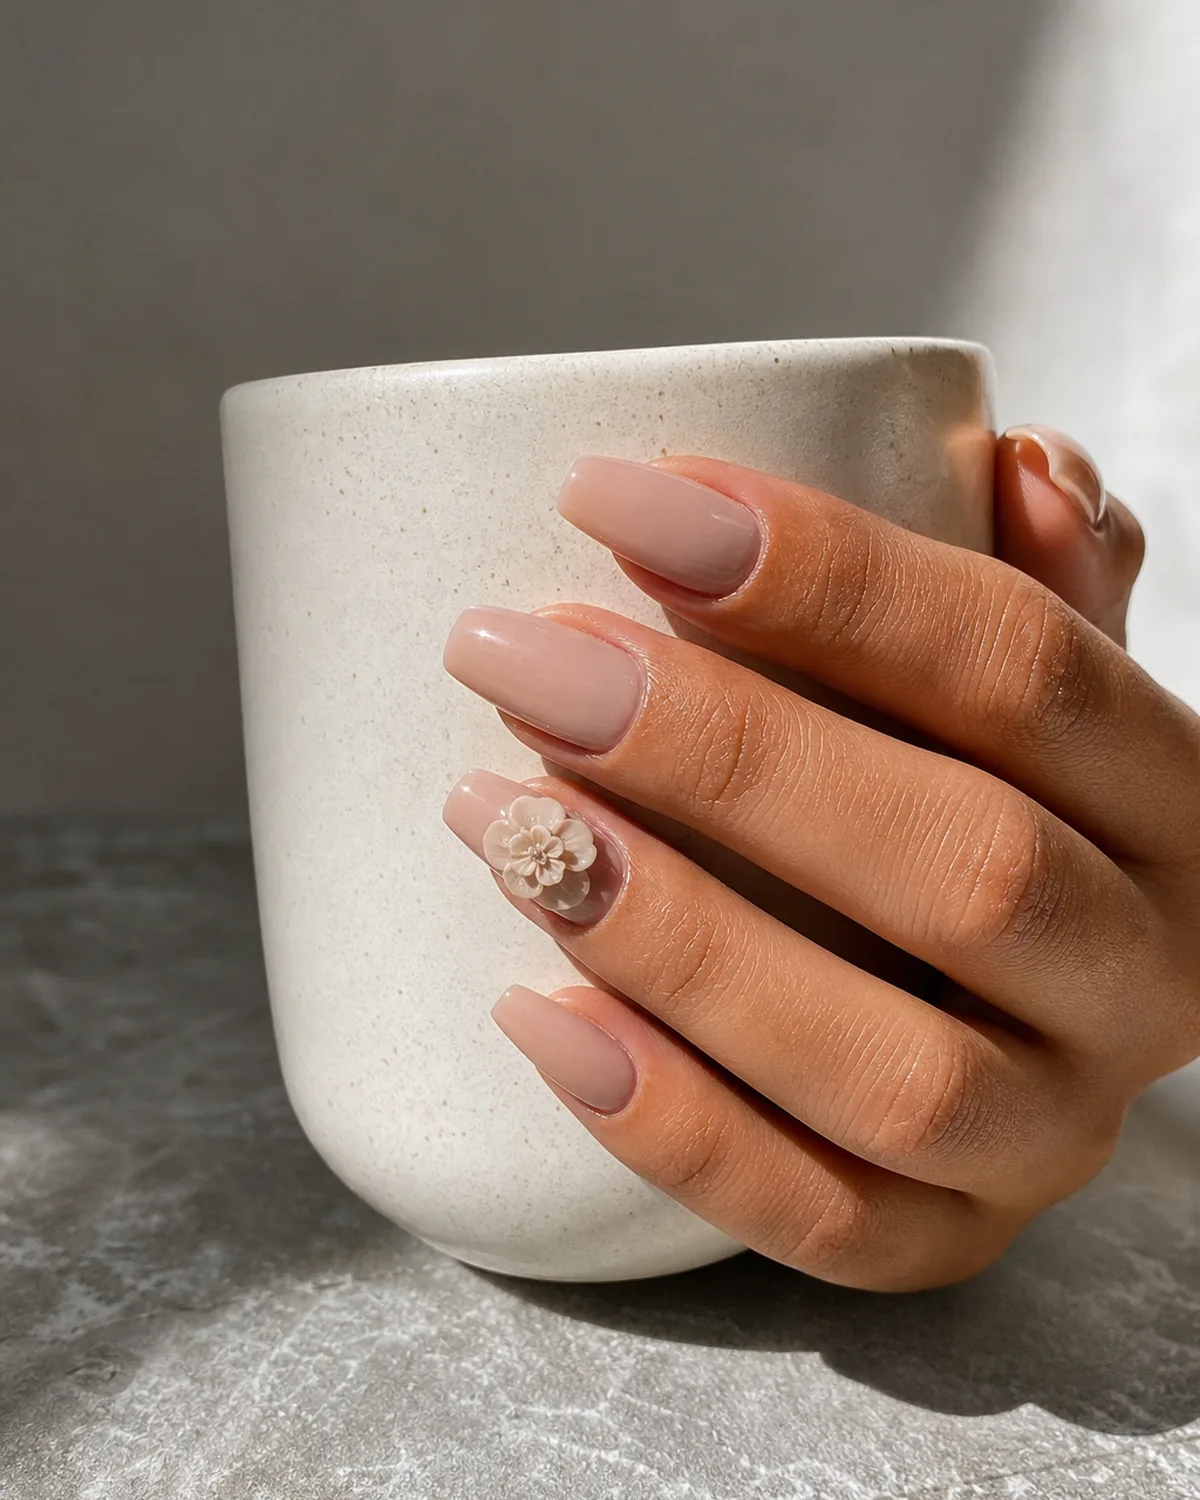
- Paint a nude base across all ten nails and cure.
- Sculpt five small petal shapes from clear or white gel, curing each briefly.
- Layer the petals in a circle on the accent nail, slightly overlapping.
- Add a small center dot of gel and cure the whole flower fully.
- Finish with top coat around the flower's base, not across its petals.
4. When the Charm Sits Right on Top of the French Line
A tiny heart charm placed directly on the smile line takes a classic french tip nails look and gives it one raised focal point. The charm straddles the line between the white tip and the nude bed, so it reads as an addition to the French shape rather than a replacement for it.
The charm's dimension matters more here than usual — set against the hard geometric edge of a French line, a flat decal would look pasted on, while a genuinely raised charm reads as intentional. Short square nails keep the smile line crisp enough to frame the charm clearly.
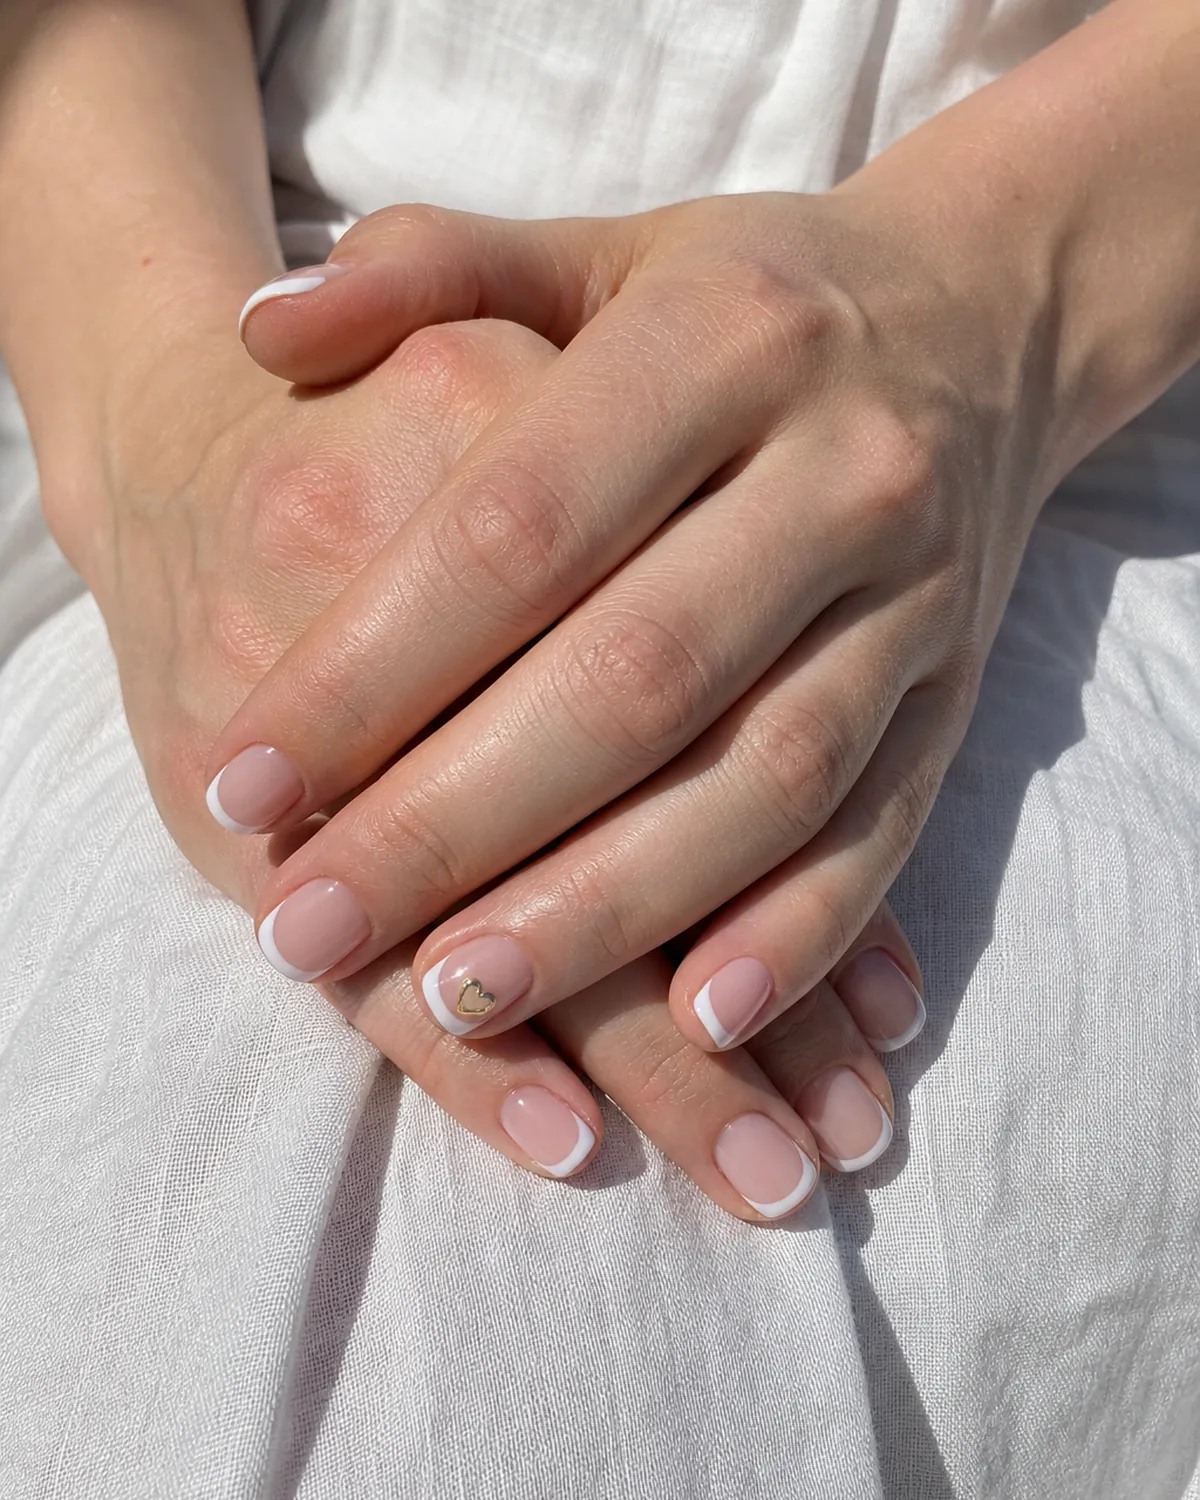
- Complete a classic French manicure with a clean smile line and cure.
- Dot a small amount of clear gel adhesive directly on the smile line of one nail.
- Set a tiny heart charm into the adhesive, centered on the line.
- Cure until fully set, checking the charm hasn't shifted.
- Seal the surrounding polish with top coat, leaving the charm's face uncoated.
5. A Row of Tiny Pearls Following the Cuticle Curve
Instead of one cluster, this version lines up five or six small pearls in a single row that follows the curve of the cuticle. The row reads as a deliberate border rather than a scatter, and because each pearl is individually raised, the row catches light in a soft, broken line rather than one flat streak.
It borrows the logic of a delicate necklace laid along a collarbone — a repeated small element rather than one large statement. Medium round nails on a soft blush base let the curve of the row match the curve of the nail exactly.
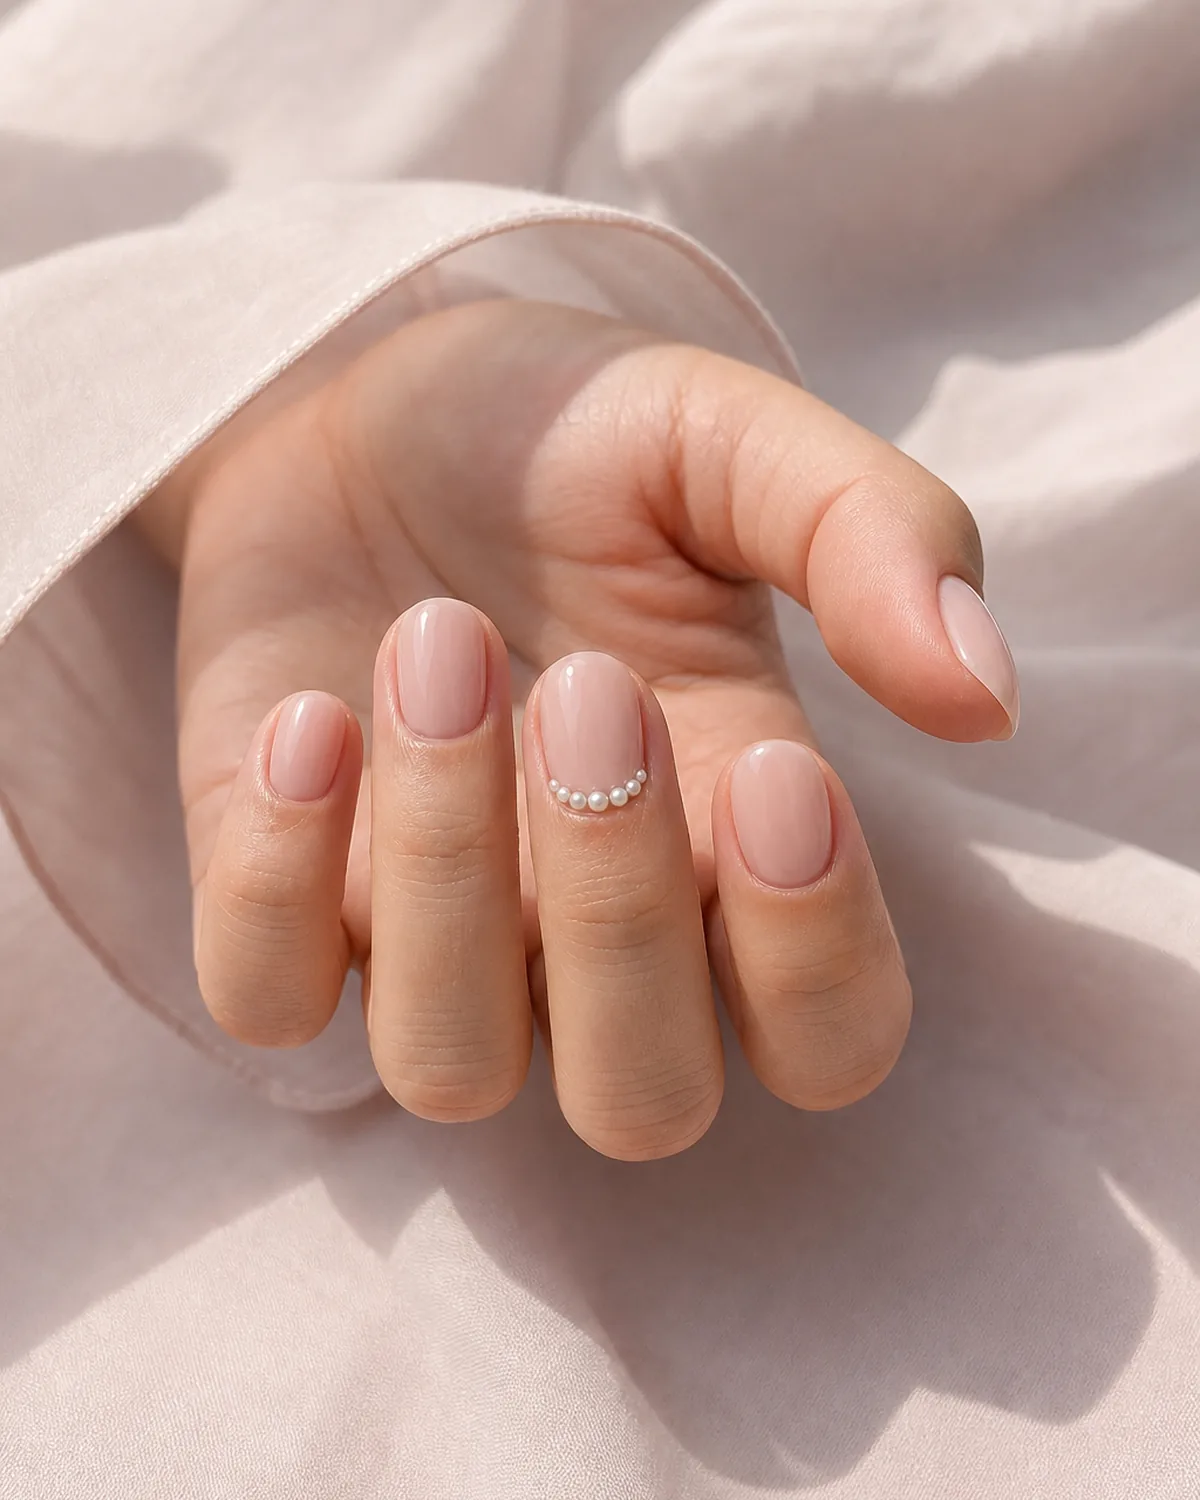
- Paint a soft blush base across all ten nails and cure.
- Dot a thin line of clear gel adhesive just above the cuticle on the accent nail.
- Place five to six tiny pearls in a row along the adhesive, following the curve.
- Cure fully, checking that each pearl sits at a consistent height.
- Seal the base polish around the row, leaving the pearls uncoated.
You don't need every element at once. Pick the amount of dimension you actually want this week, and start with that one.
6. When One Nail Gets the Bow and the Rest Get Nothing
Scale changes what a sculpted bow communicates. Made larger than the corner-sized version, with wider loops and a deeper center pinch, it stops reading as an accent detail and takes over the entire nail on its own.
The other nine stay bare except for a plain soft-ivory polish, deliberately left alone so the single bow has no competition anywhere on the hand. Medium almond nails give that one loaded nail a long enough plane for the bigger loops to sit without overhanging the free edge.
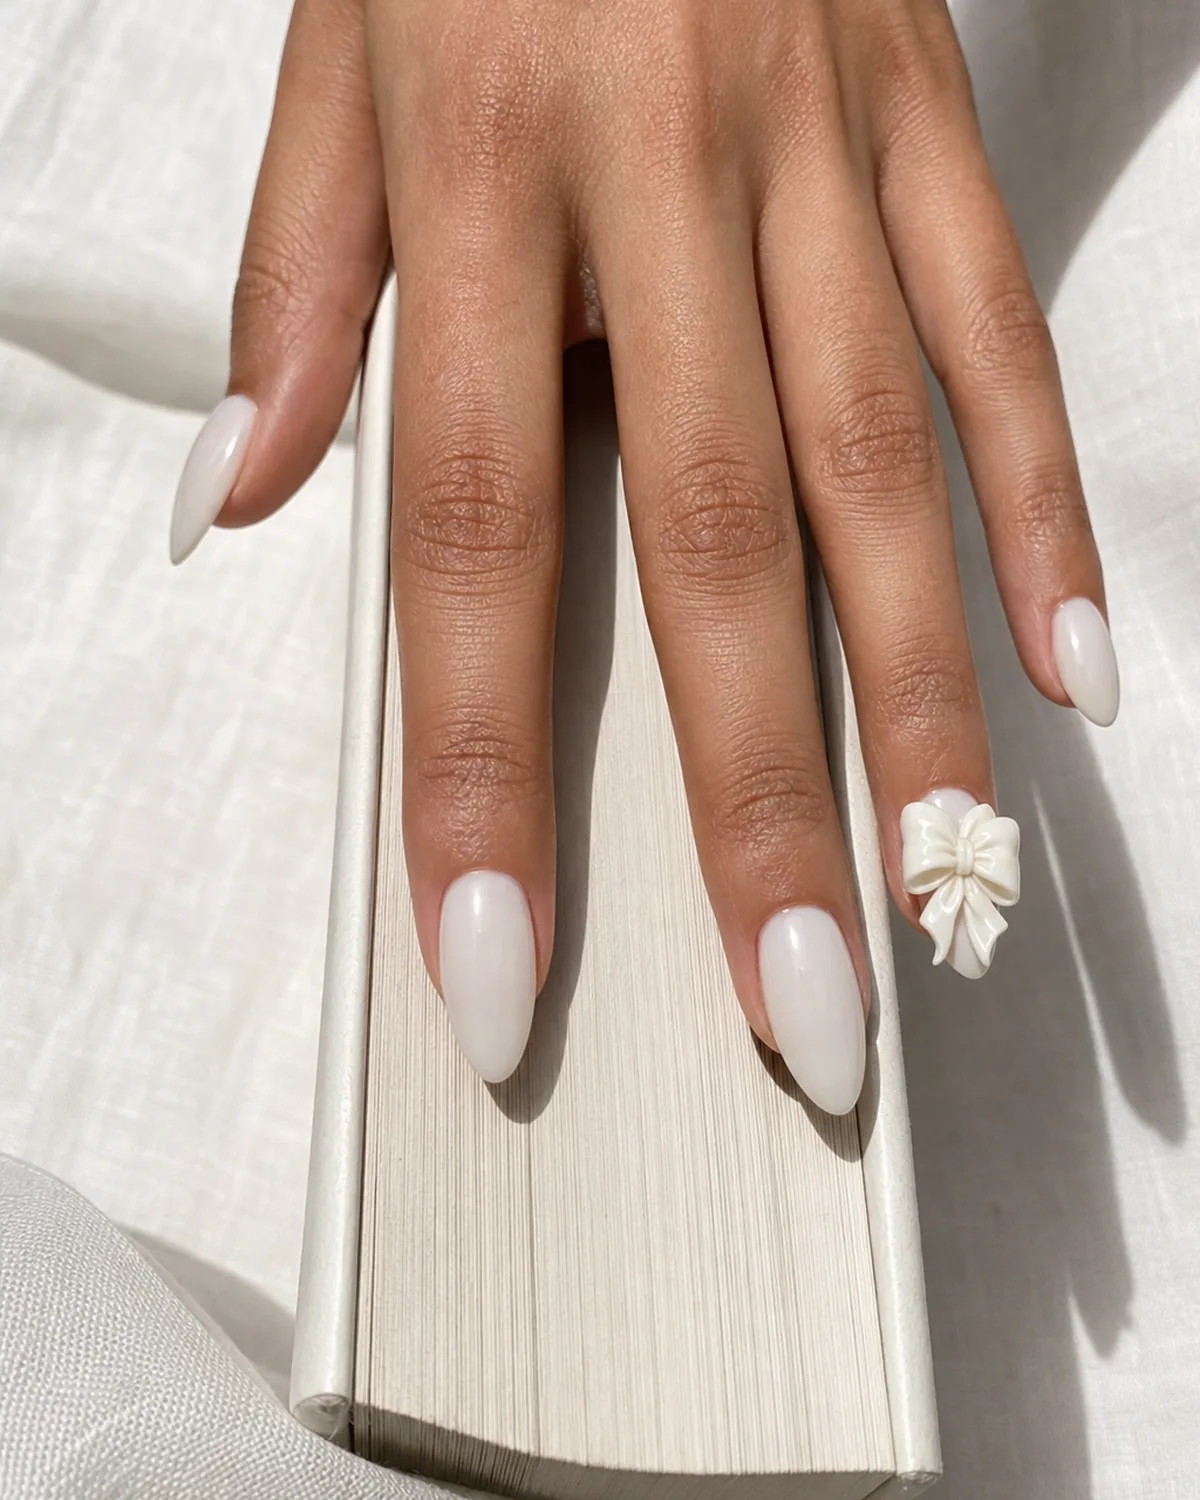
- Paint a plain soft-ivory polish across all ten nails and cure.
- Sculpt a larger bow — wider loops, deeper pinch at the center — from acrylic.
- Let the piece firm up before positioning it on the one nail that will carry it.
- Press to secure and allow it to fully harden.
- Leave the nine remaining nails untouched aside from their base coat.
7. A Draped Micro-Chain That Catches the Light Differently Than Polish Ever Could
A fine metallic chain, no wider than a pearl, is looped loosely across the nail and secured at both ends near the side walls. Unlike every other element on this list, it isn't rigid — it sits with a slight sag in the middle, so it genuinely moves and catches light differently depending on the angle of the hand.
Nothing painted on can replicate that shift, which is exactly why it earns a place here over a printed chain-link pattern. Medium oval nails on a soft nude base let the chain's drape read clearly against a quiet backdrop.
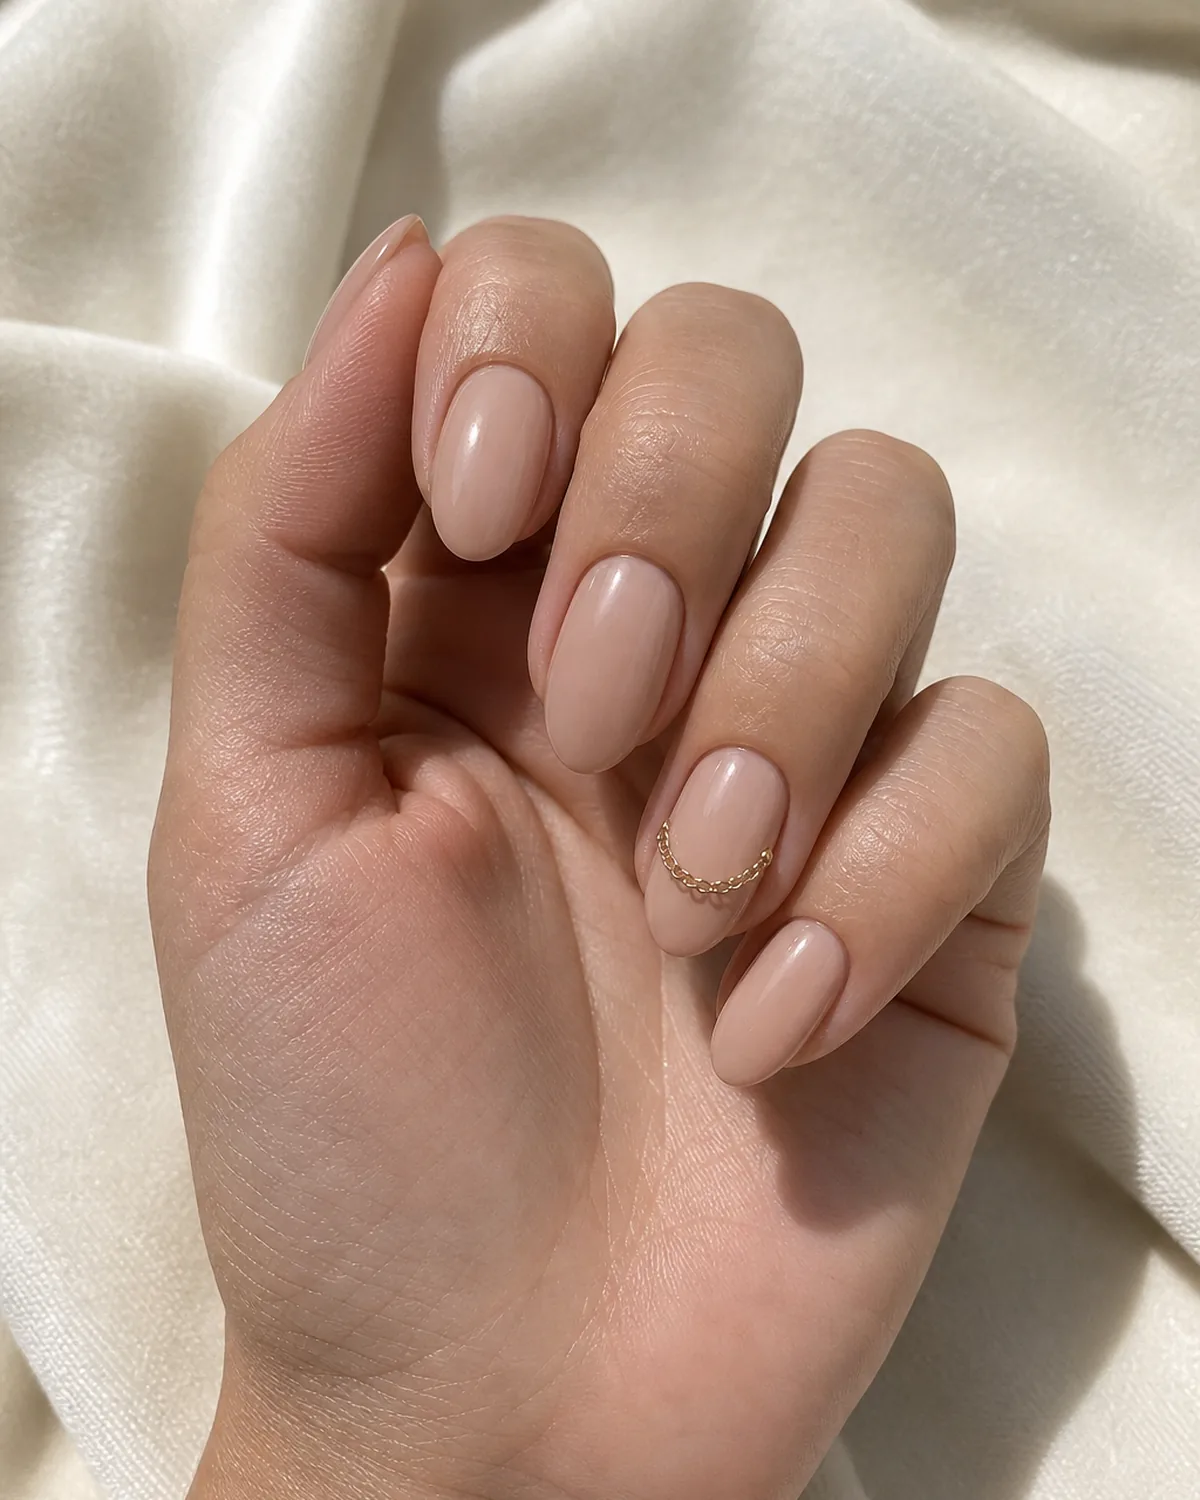
- Paint a soft nude base across all ten nails and cure.
- Secure one end of a fine metal micro-chain near one side wall with clear gel.
- Drape the chain loosely across the nail and secure the other end near the opposite side.
- Cure both anchor points fully, checking the chain keeps its natural sag.
- Seal only the anchor points, leaving the chain's length free.
8. A Client Who Wanted "Something You Can Actually Feel"
A regular came in scrolling through her camera roll and stopped on a set with almost no color at all — just a sheer wash and a scattering of raised gel dots. "I want something I can actually feel when I run my thumb over it," she said, which turned out to be the clearest brief anyone had given in weeks.
The result was a handful of small raised dots in varying sizes across one nail, each cured to a firm, slightly domed finish. Short square nails on a sheer wash base kept the texture as the only feature, with nothing else competing for attention.
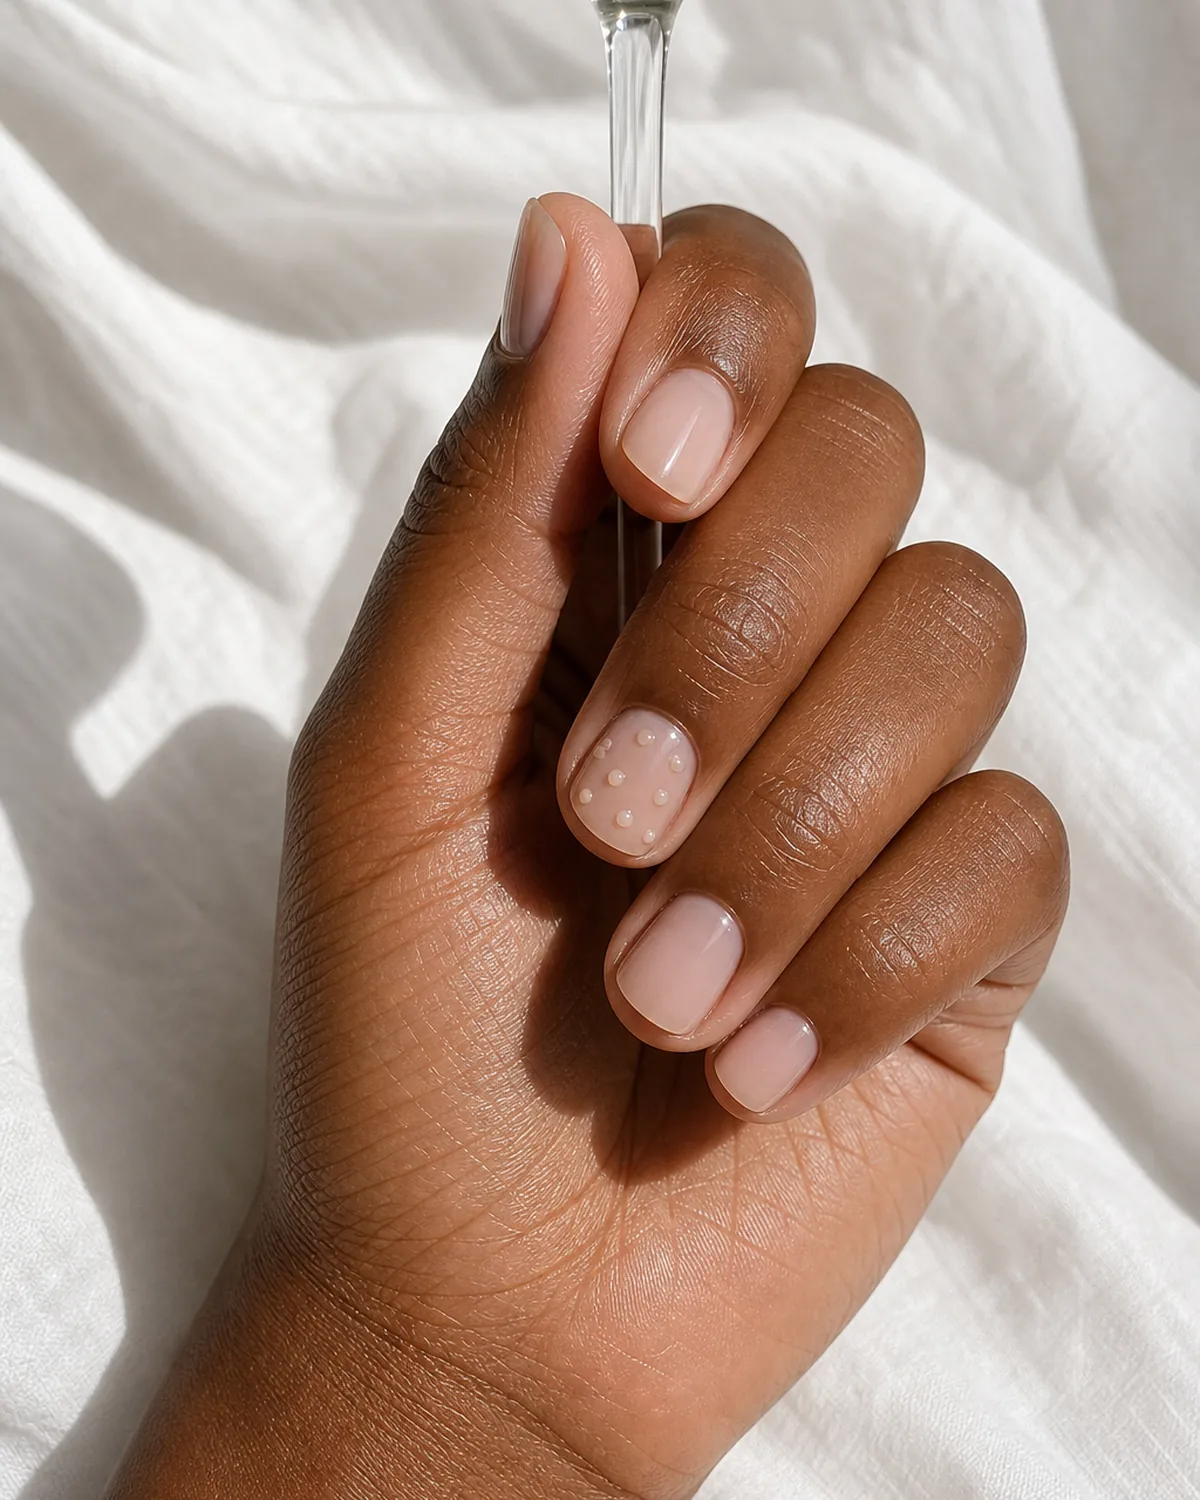
- Paint a sheer wash base across all ten nails and cure.
- Dot small amounts of clear or white gel across the accent nail in varying sizes.
- Shape each dot into a slightly domed bead before curing.
- Cure fully so each dot holds a firm, touchable texture.
- Leave the dots uncoated so the texture stays raised, not smoothed over.
9. A Cluster of Mixed Gems, Scattered Not Lined Up
Gems in three or four different sizes and colors, applied in a deliberately uneven scatter rather than a tidy row, give this look its energy. Some sit closer to the cuticle, others drift toward the side wall, and no two are the same size — the asymmetry is what keeps it from reading as a kit-applied pattern.
Each gem still catches light individually, which is the real difference between this and a flat rhinestone print. Medium coffin nails on a soft lilac base give the scatter enough room to breathe without feeling crowded.
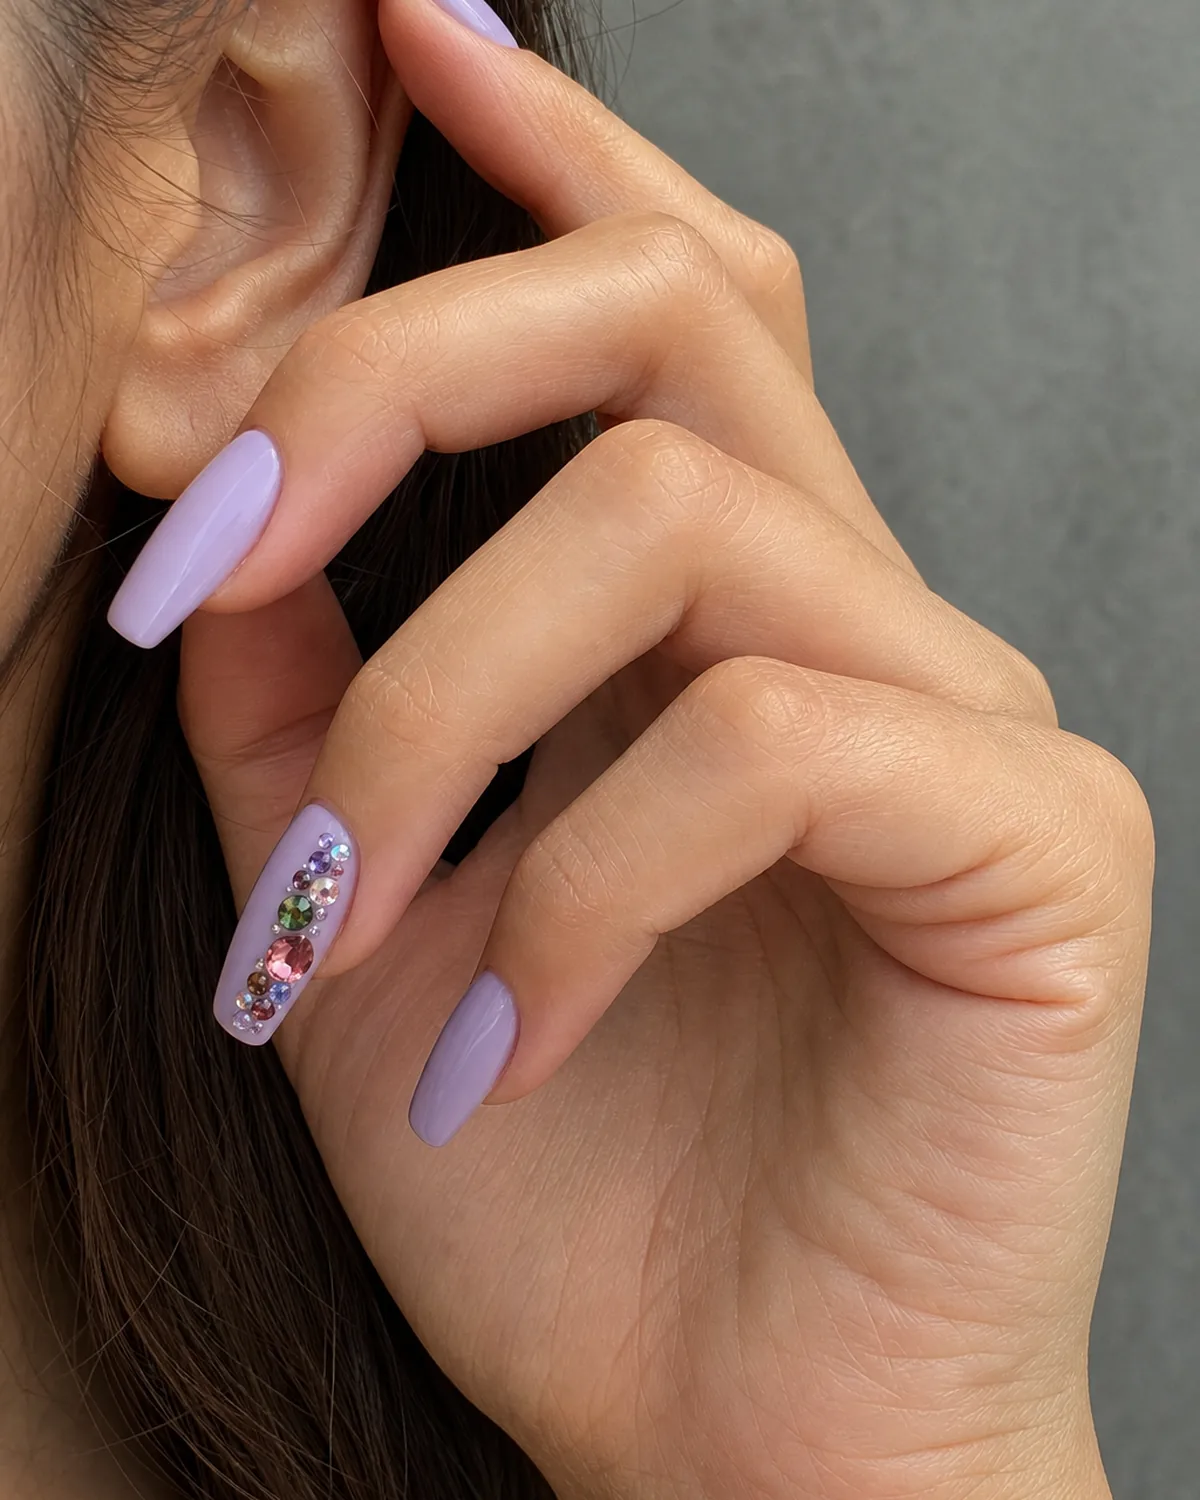
- Paint a soft lilac base across all ten nails and cure.
- Select gems in three or four different sizes and colors.
- Apply them to the accent nail in a deliberately uneven scatter, not a row.
- Cure each gem fully before moving to the next.
- Seal the base polish around the gems, leaving each gem's face uncoated.
10. A Sculpted Heart That Sits Just Slightly Proud of the Nail
Not every raised element needs to be dramatic. A small heart sculpted from gel, kept low and just barely lifted off the nail plate, is easy to miss head-on and only reveals itself from a slight side angle, where its edge catches a thin line of shadow.
It rewards a second look rather than announcing itself immediately. Short almond nails on a classic red base keep the heart's subtle profile the one quiet detail in an otherwise familiar color.
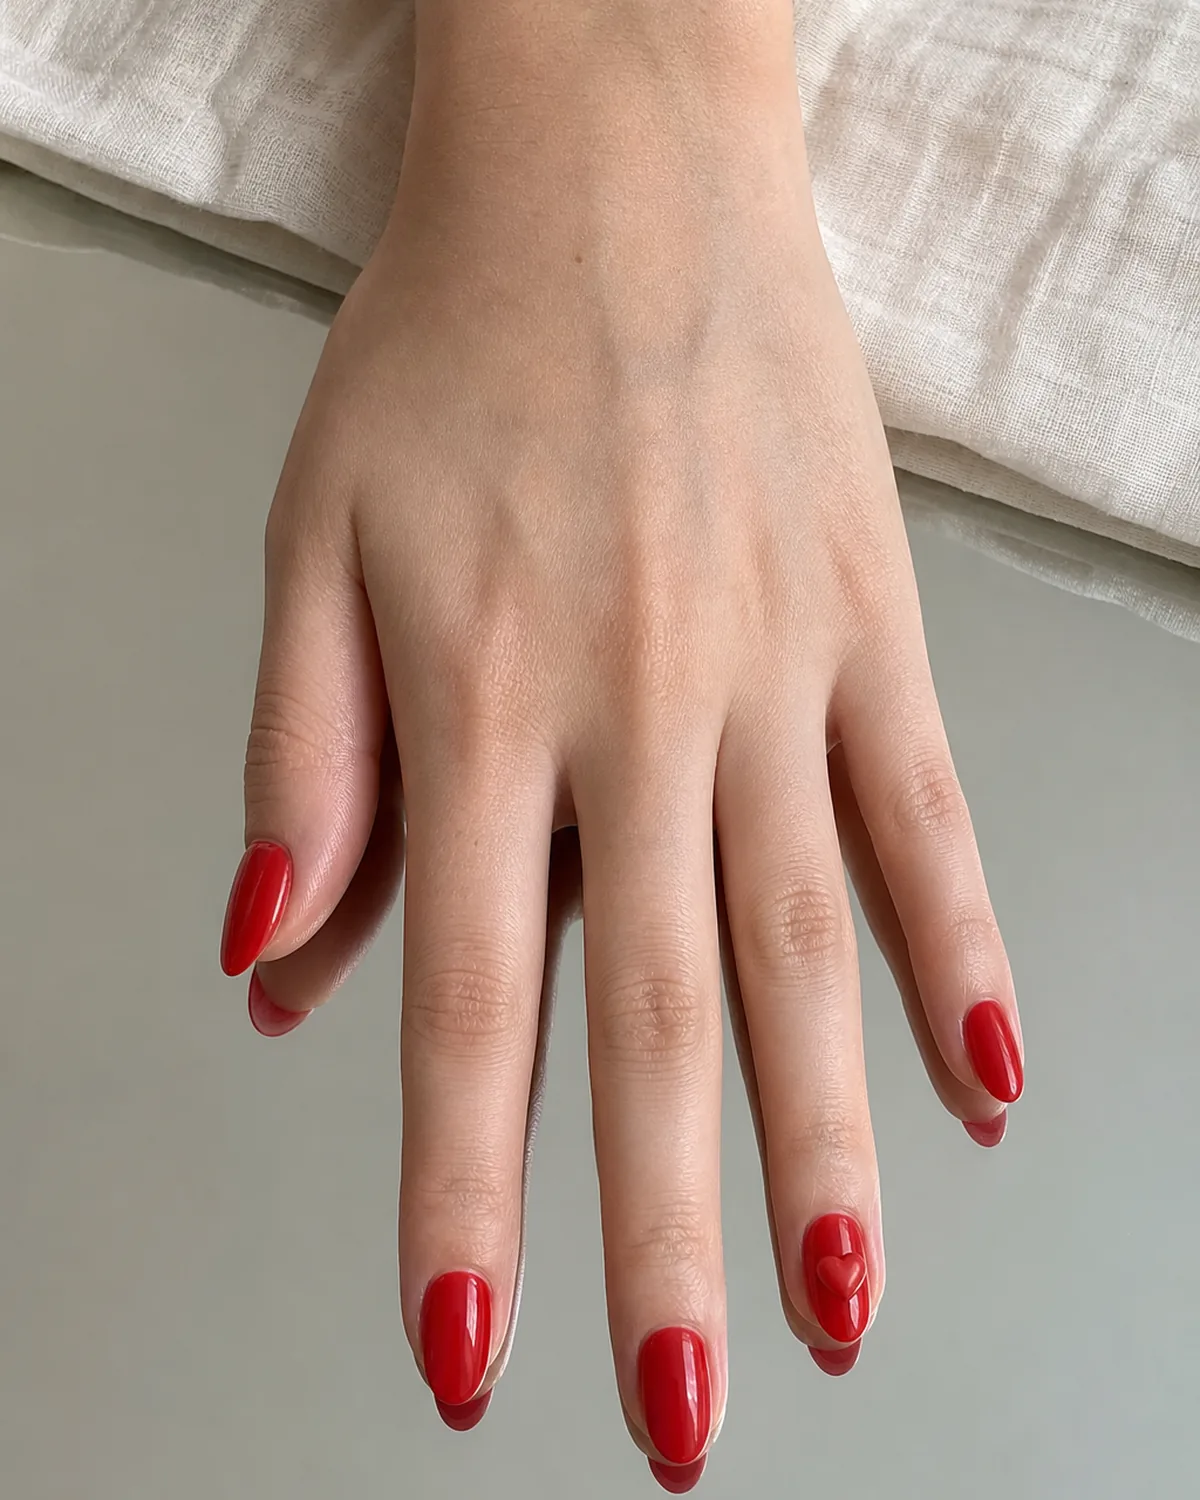
- Paint a classic red base across all ten nails and cure.
- Sculpt a small, low heart shape from clear or matching gel.
- Position it on the accent nail while still workable, keeping the profile low.
- Cure fully, checking the edge holds a slight raised line.
- Seal the base polish around the heart, leaving its surface uncoated.
11. A 3D Butterfly Landing on a Milky Nude Base
A sculpted butterfly with wings lifted slightly off the nail plate looks like it just landed rather than sitting flush against the surface. The lift is small — a few millimeters — but it's enough for each wing to cast its own thin shadow, which is what separates this from a flat butterfly decal.
Kept to a single accent nail on an otherwise quiet milky nude set, the butterfly becomes the whole story. Medium square nails give the wings a flat, stable plane to be anchored against.
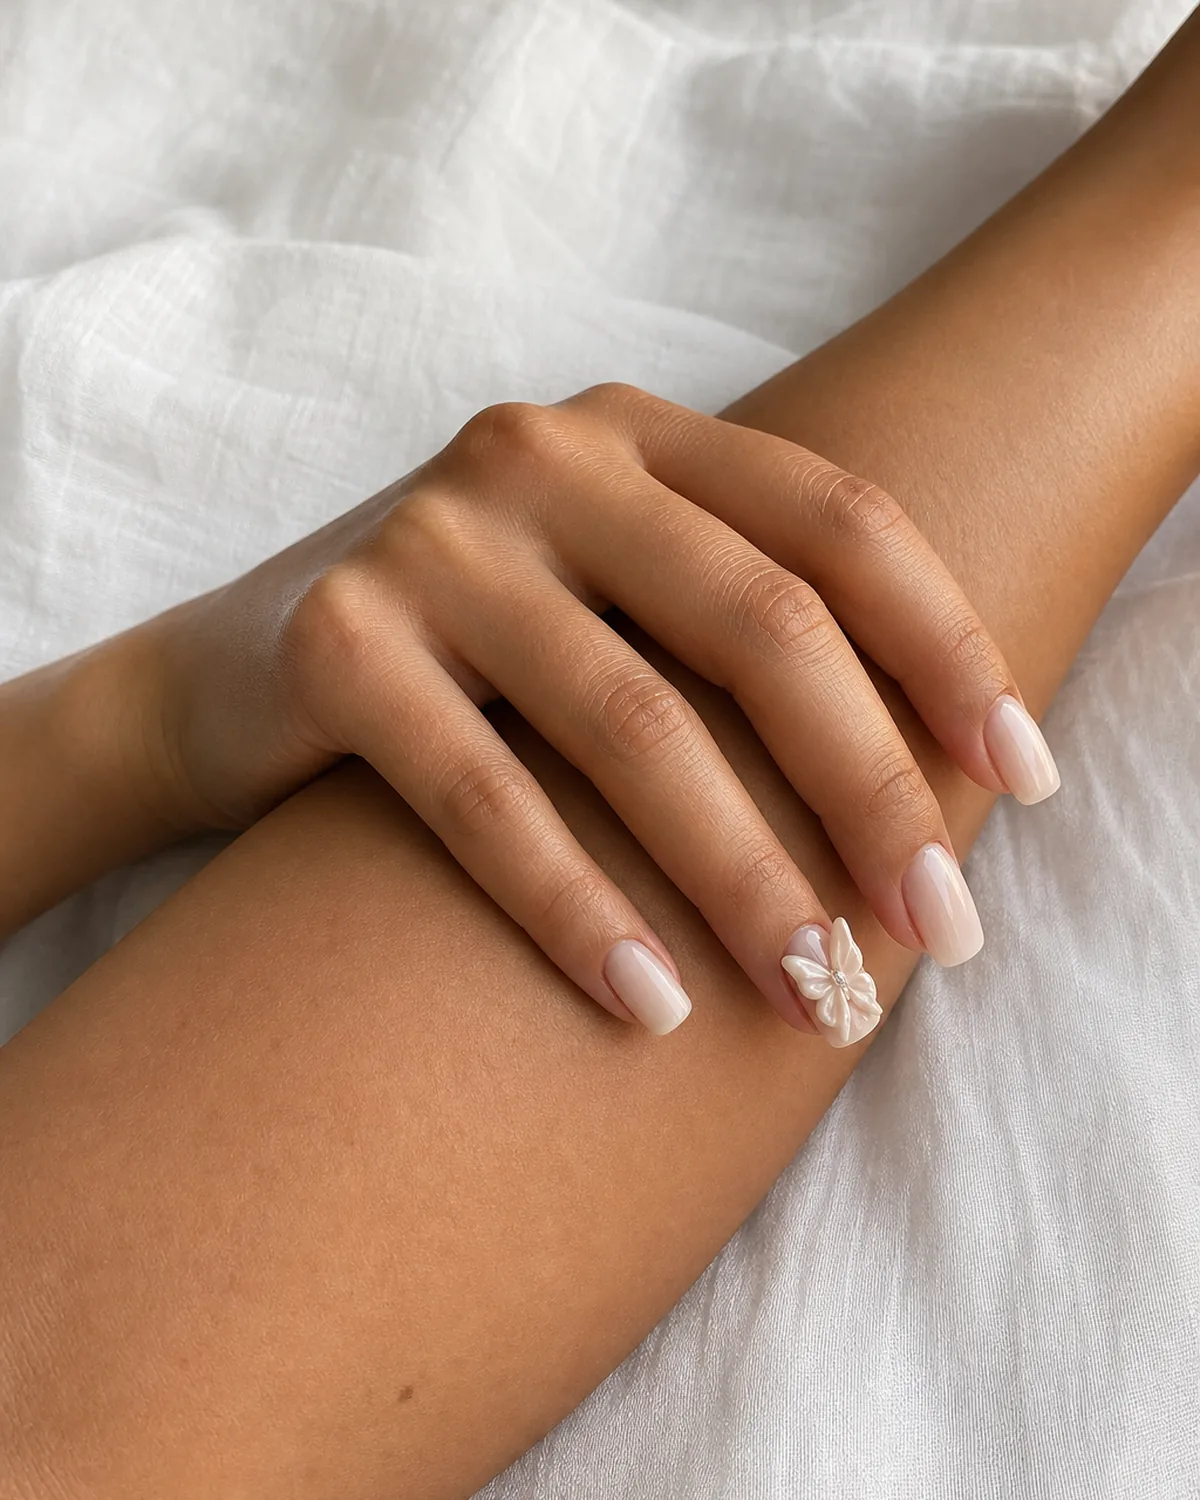
- Paint a milky nude base across all ten nails and cure.
- Sculpt two wing shapes and a small body from gel, curing the body first.
- Attach the wings to the body at a slight upward angle before final cure.
- Position the assembled butterfly on the accent nail and press to secure.
- Cure fully, then seal only the base polish, not the wings.
12. The Asymmetric Scatter That Only Uses Three Nails
Spreading raised pearls and small gems across just three of the ten nails, in a deliberately uneven distribution across the hand rather than a matching pair or a single accent, gives the whole set a looser, more collected feel. The other seven stay bare in a soft nude, so the eye has to travel to find the detail.
It takes more restraint than it looks like — the instinct is to balance the placement, but leaving it uneven is what makes it read as considered rather than symmetrical. Medium oval nails on a soft nude base keep the bare majority calm.
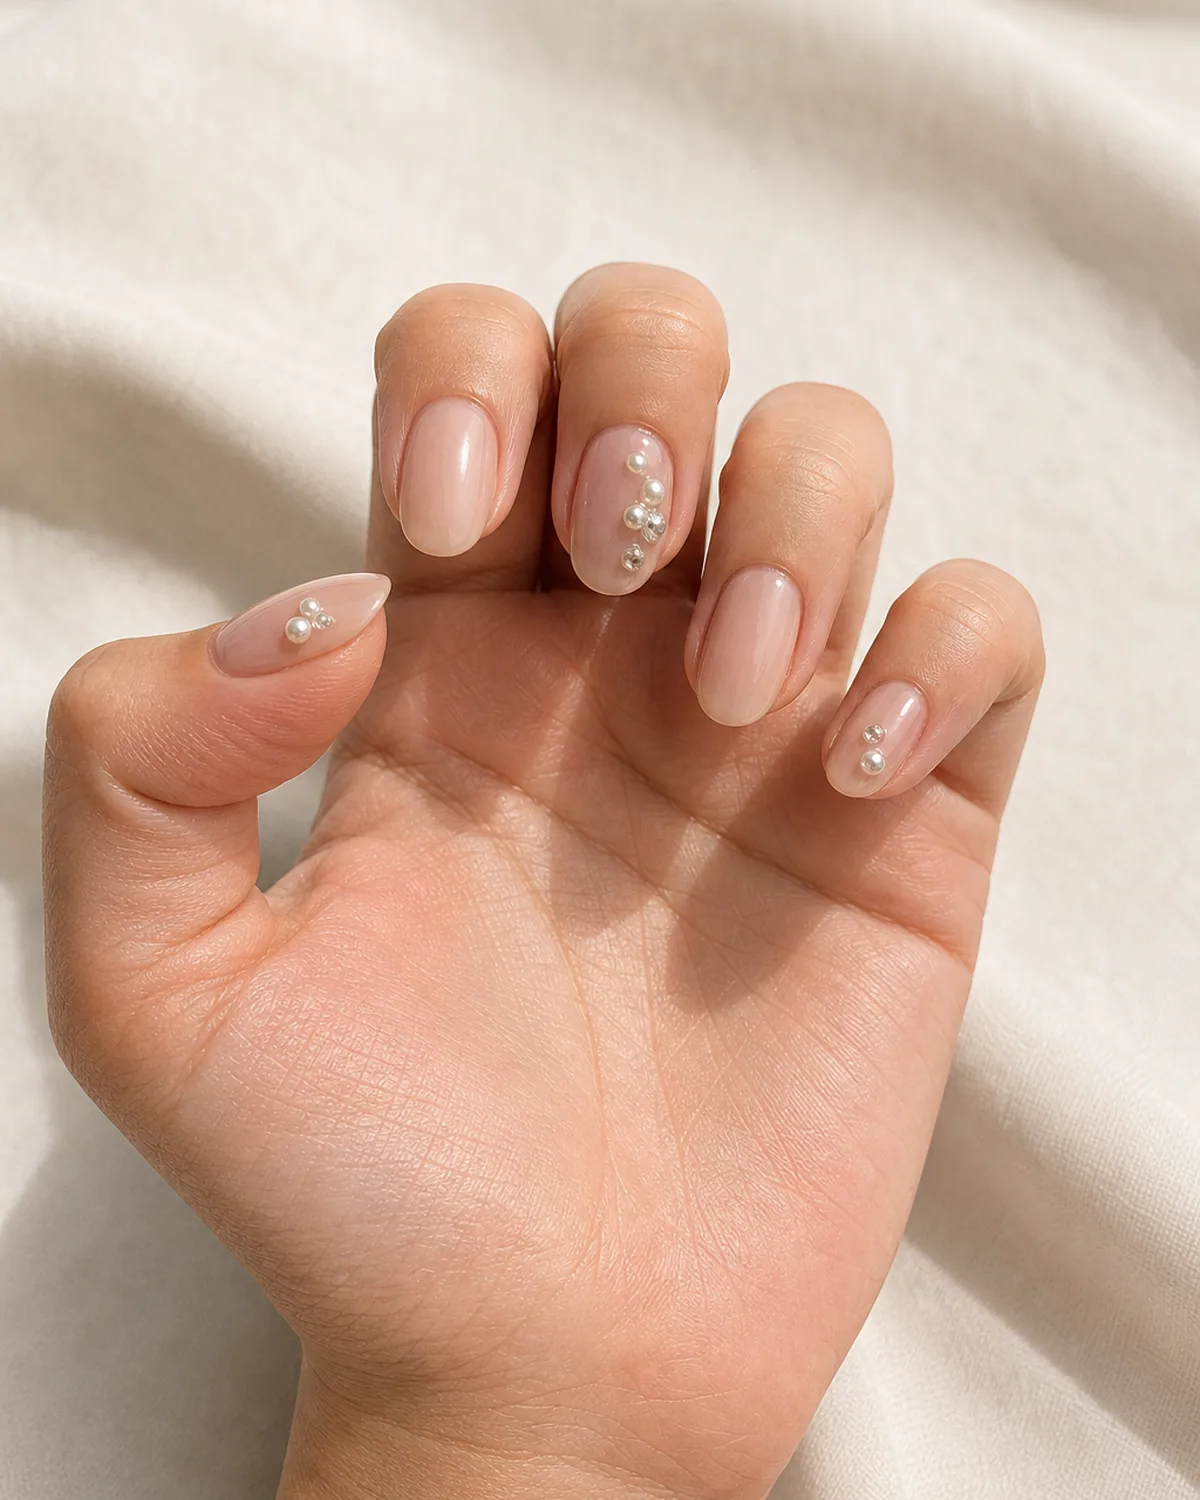
- Paint a soft nude base across all ten nails and cure.
- Choose three nails at random, avoiding a matching or symmetrical pattern.
- Apply a small pearl or gem to each of the three chosen nails.
- Cure each placement fully before moving to the next nail.
- Leave the remaining seven nails bare aside from the base polish.
13. Pearls and Gems Mixed on the Same Accent Nail
Combining both pearls and gems in one cluster, rather than choosing one or the other, mixes two different finishes — the pearls matte-soft, the gems faceted and sharp — into a single raised grouping. The contrast in texture does more work than either element would do alone.
It reads dressier than a pearl-only or gem-only cluster, closer to a small piece of jewelry than a nail detail. Short almond nails on a soft pink base keep the mixed cluster from feeling overloaded.
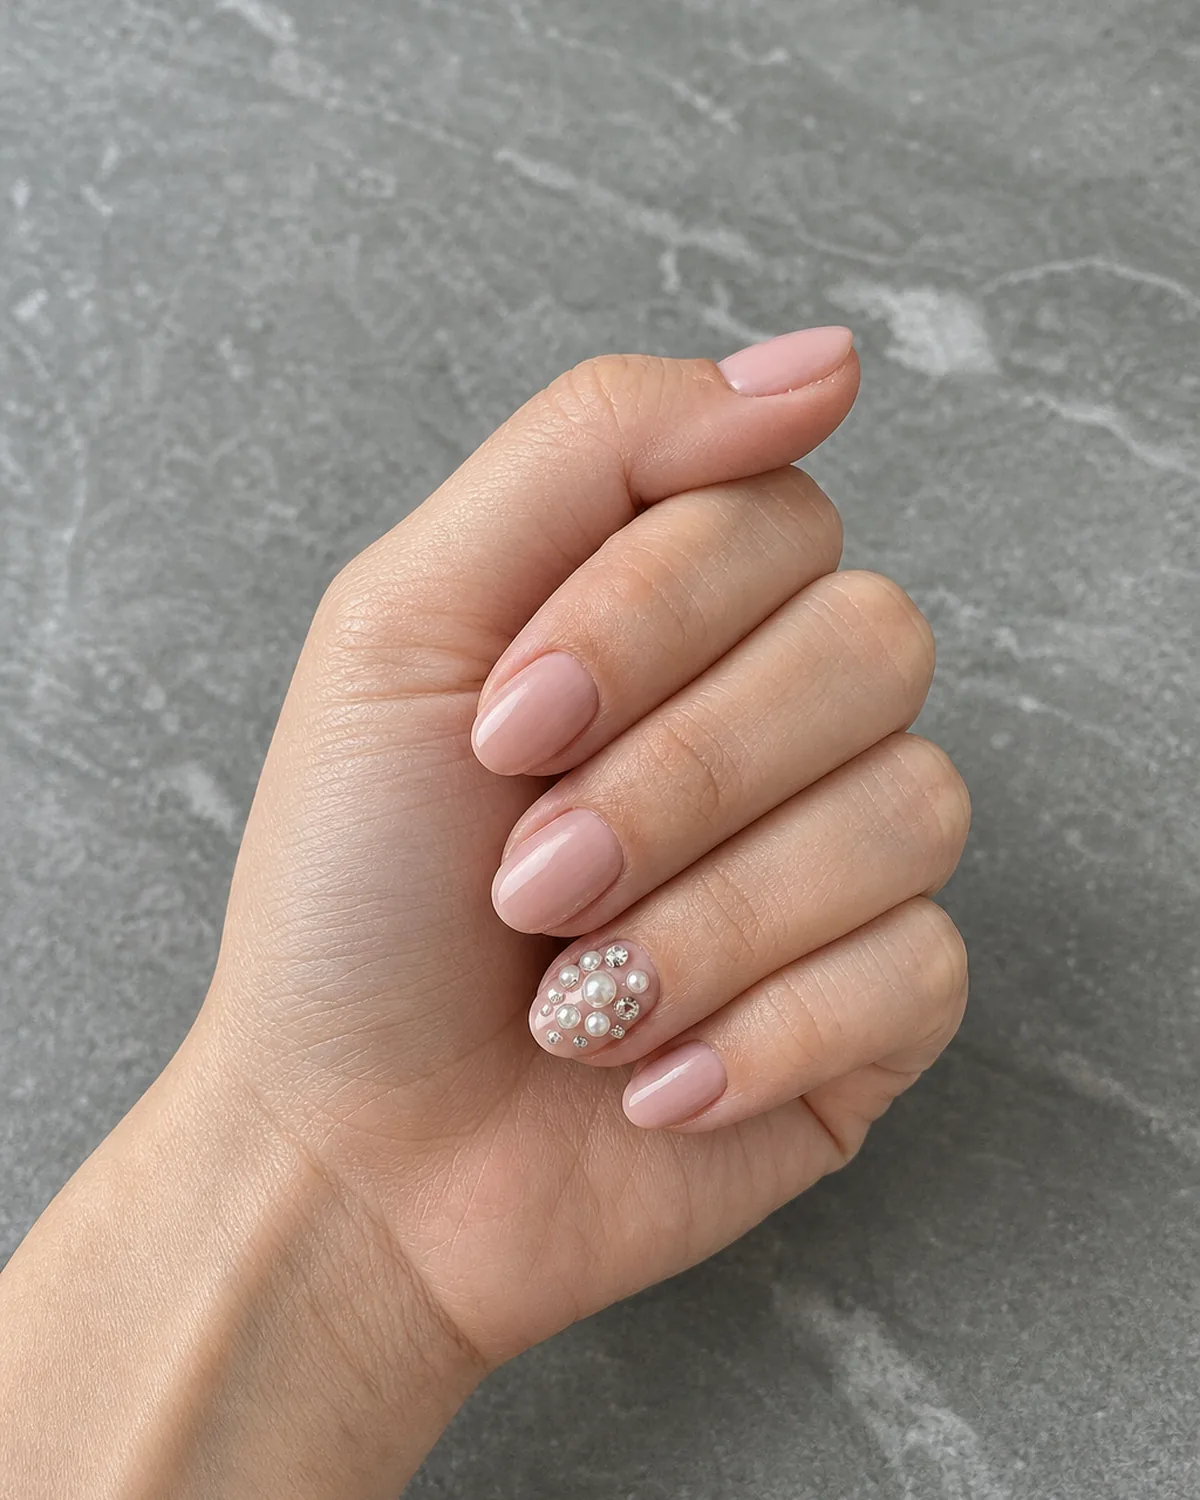
- Paint a soft pink base across all ten nails and cure.
- Group two or three pearls and two or three small gems together in one area.
- Apply the mixed cluster to the accent nail, alternating pearl and gem placement.
- Cure fully, checking both textures sit at a similar height.
- Seal the base polish around the cluster, leaving both elements uncoated.
14. A Bridal-Leaning Set Built From Layered Small Pieces
Rather than one large element, this set builds dimension gradually across two accent nails — a few tiny pearls here, a thin line of fine gold detailing there, layered so no single piece dominates. The cumulative effect reads formal without any one part looking like the "main" decoration.
It takes longer to place than a single bow or flower, but the payoff is a set that photographs well from any angle since the dimension is spread rather than concentrated. Medium round nails on an ivory milky base keep the palette quiet enough for the layered pieces to stand out.
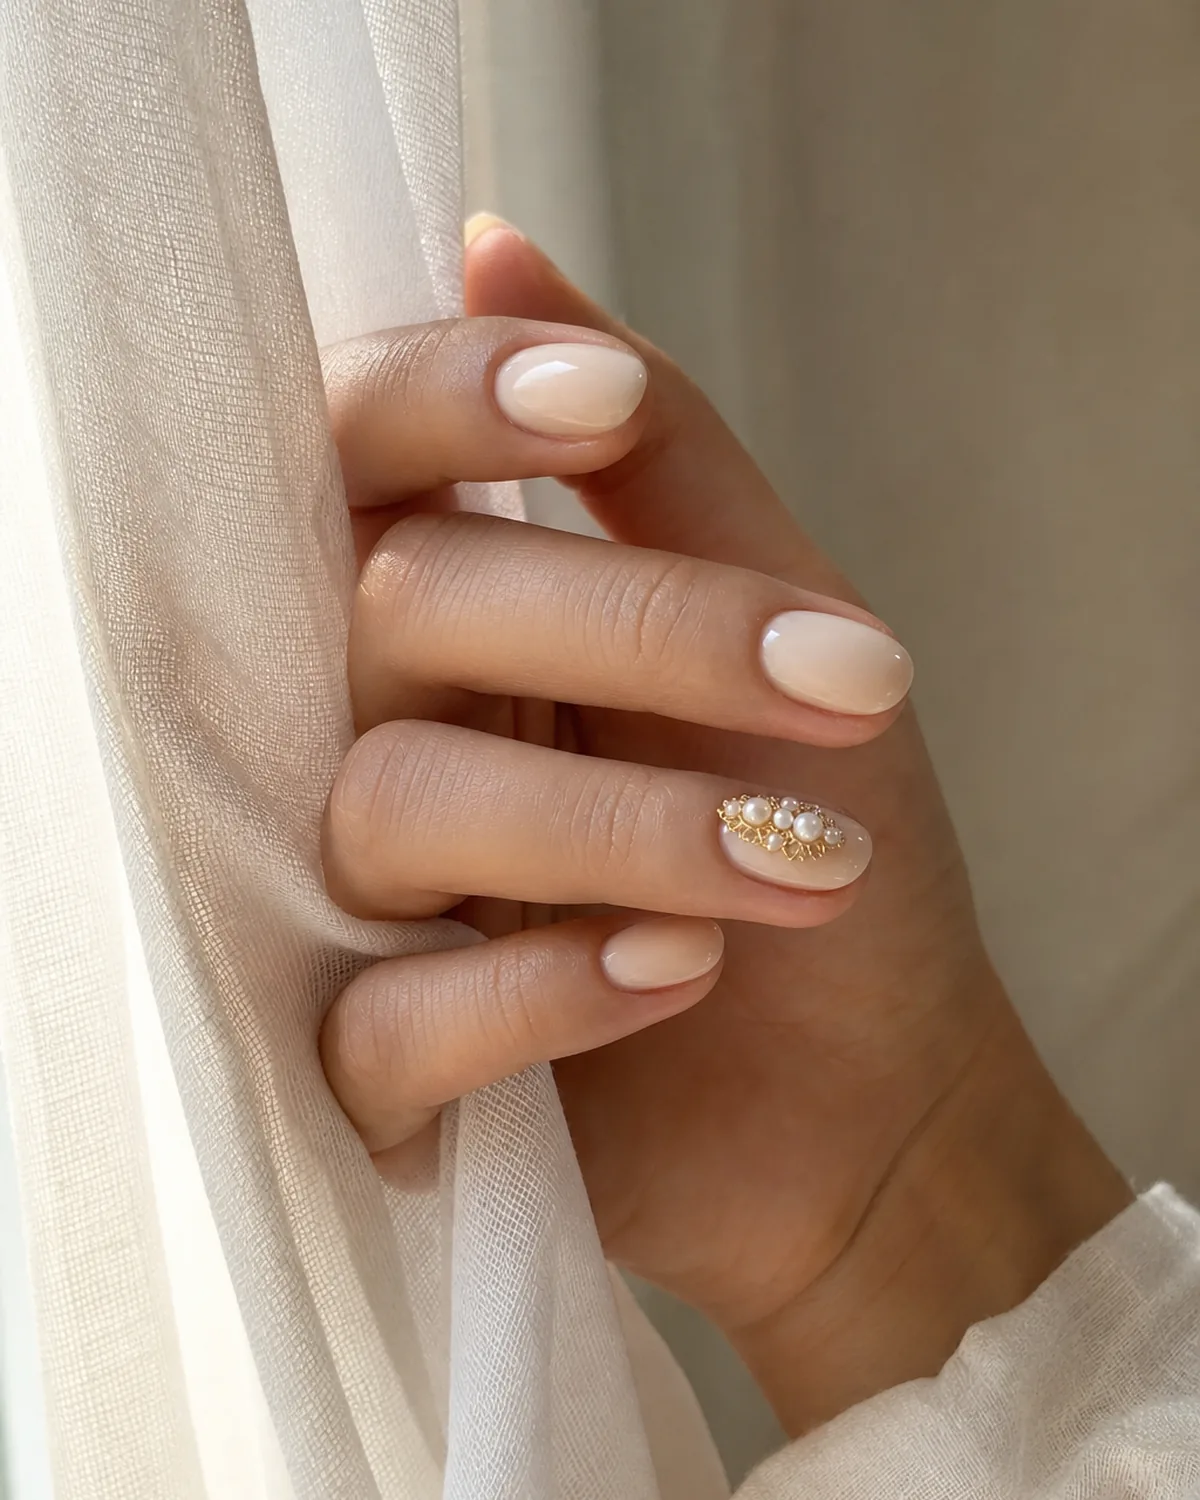
- Paint an ivory milky base across all ten nails and cure.
- Apply two or three tiny pearls to one accent nail near the cuticle.
- On a second accent nail, add a thin line of fine gold detailing near the side wall.
- Cure each element separately before adding the next layer.
- Seal the base polish, leaving all raised pieces uncoated.
15. The Single Dot of Dimension That Still Reads Minimal
One small raised gel dot, placed on an otherwise bare glossy nail, proves the point of this whole list: three-dimensional nail art doesn't have to mean maximalist nail art. The dot is barely larger than a grain of rice, but held at an angle it still casts a small, unmistakable shadow.
Set next to the flat glossy shine of glazed donut nails, the difference is easy to feel even if it's subtle to see — one is entirely surface, the other has a single point where the surface actually lifts. Short square nails on a bare glossy nude base keep this one quiet and wearable.
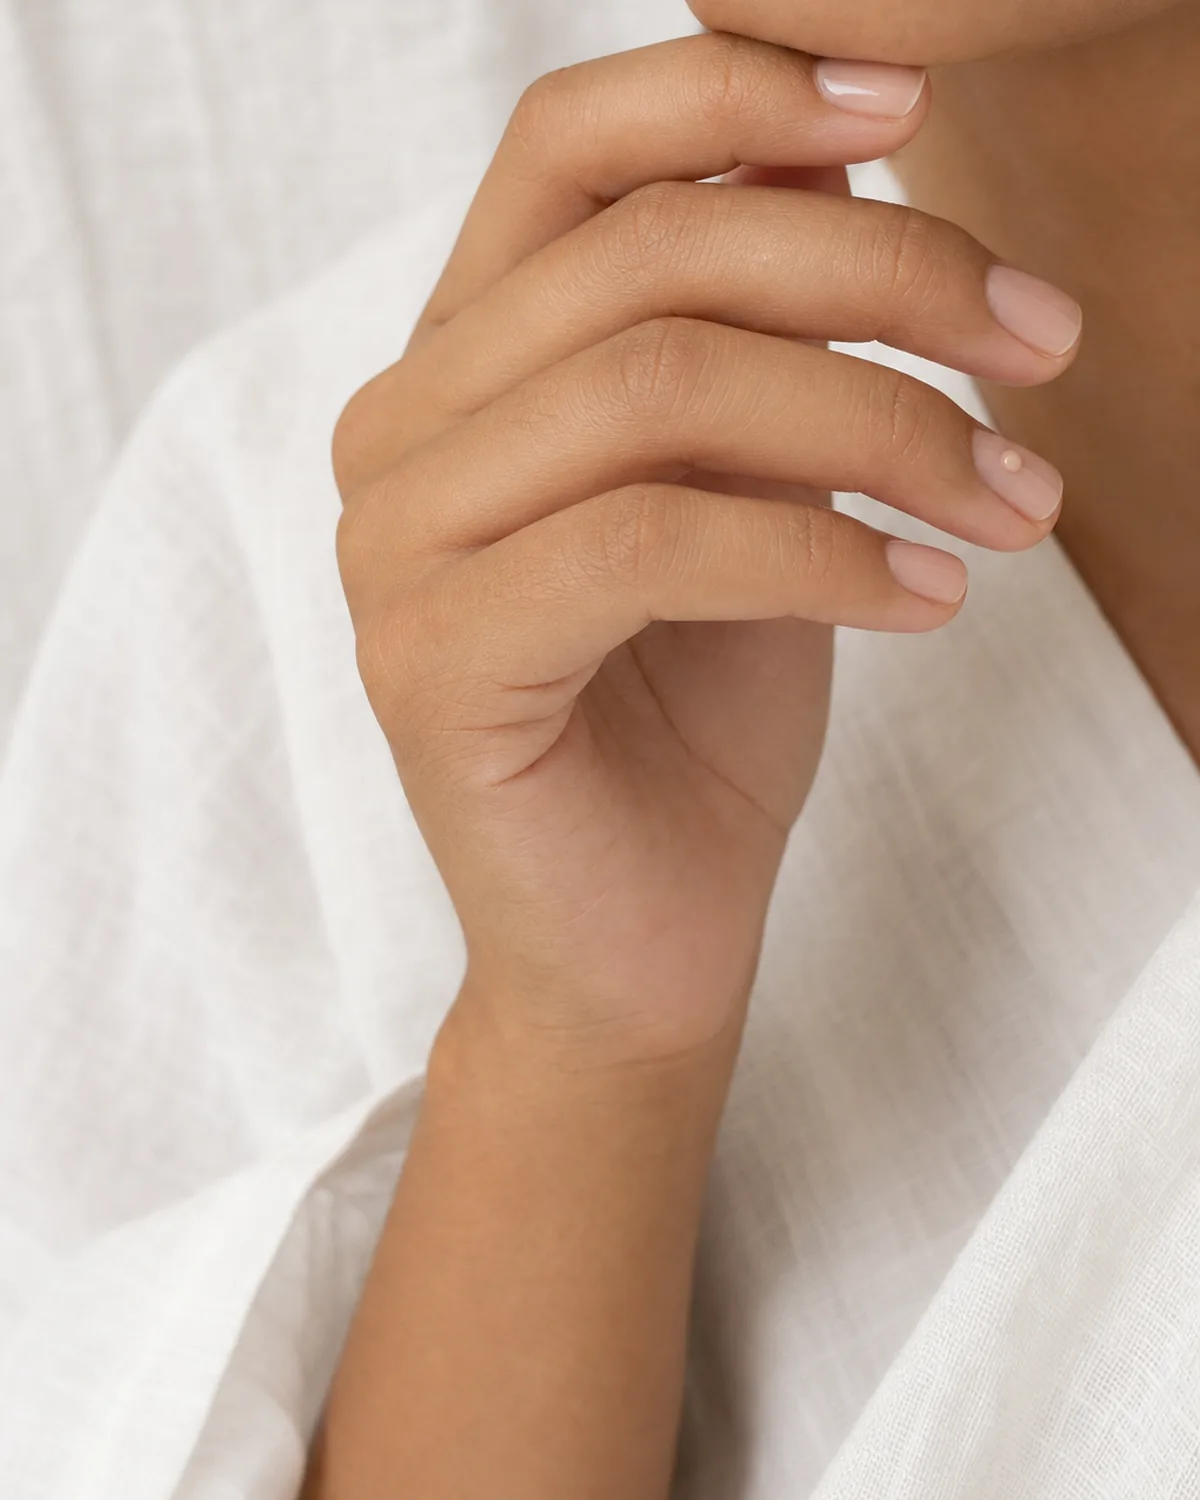
- Paint a bare glossy nude base across all ten nails and cure.
- Dot a small, single amount of clear gel onto one accent nail.
- Shape it into a small, slightly domed bead before curing.
- Cure fully, checking it holds a firm, visible height.
- Finish with a light top coat around the dot only, not across it.
Three-dimensional elements are more fragile than polish alone, so ask your tech about placement before choosing anything near the free edge. A well-cured piece on a well-shaped nail can hold for a full fill cycle without lifting.
Three-dimensional nail art comes down to four decisions: pick one element type instead of several, decide how much of the hand it should cover, keep the base simple enough for the element to actually read, and understand that placement affects how long it lasts. These four rules are what make any of the fifteen looks above land as intentional rather than cluttered.
15 3D Nail Ideas to Try
- 1Pearl cluster cornerTiny raised pearls in one corner on medium almond.
- 2Sculpted bowA hand-built acrylic bow with visible ridges on medium oval.
- 33D flowerPetal-by-petal sculpted flower on medium coffin.
- 4Heart charm on French lineA raised charm sitting right on the smile line on short square.
- 5Cuticle pearl rowA curved row of tiny raised pearls on medium round.
- 6Oversized bowA statement-scale sculpted bow on medium almond.
- 7Draped micro-chainA fine chain that actually moves on medium oval.
- 8Raised gel dotsTouchable texture, no extra color, on short square.
- 9Mixed gem scatterAsymmetric raised gems in varying sizes on medium coffin.
- 10Sculpted heart bumpA subtle raised heart on short almond.
- 113D butterflyLifted sculpted wings on medium square.
- 12Asymmetric scatterRaised pieces on just three nails on medium oval.
- 13Pearls and gems mixTwo textures in one cluster on short almond.
- 14Layered bridal piecesGradual dimension across two nails on medium round.
- 15Single minimal dotOne small raised dot on short square, still reads minimal.
styvea.com

Sloane Avery edits Styvea, where she shares nail design ideas, shapes, colors, and at-home manicure how-tos for anyone who loves a good manicure. Every guide is reviewed for clarity, usefulness, image accuracy, and Pinterest-to-page alignment before publication. Visit the About page.