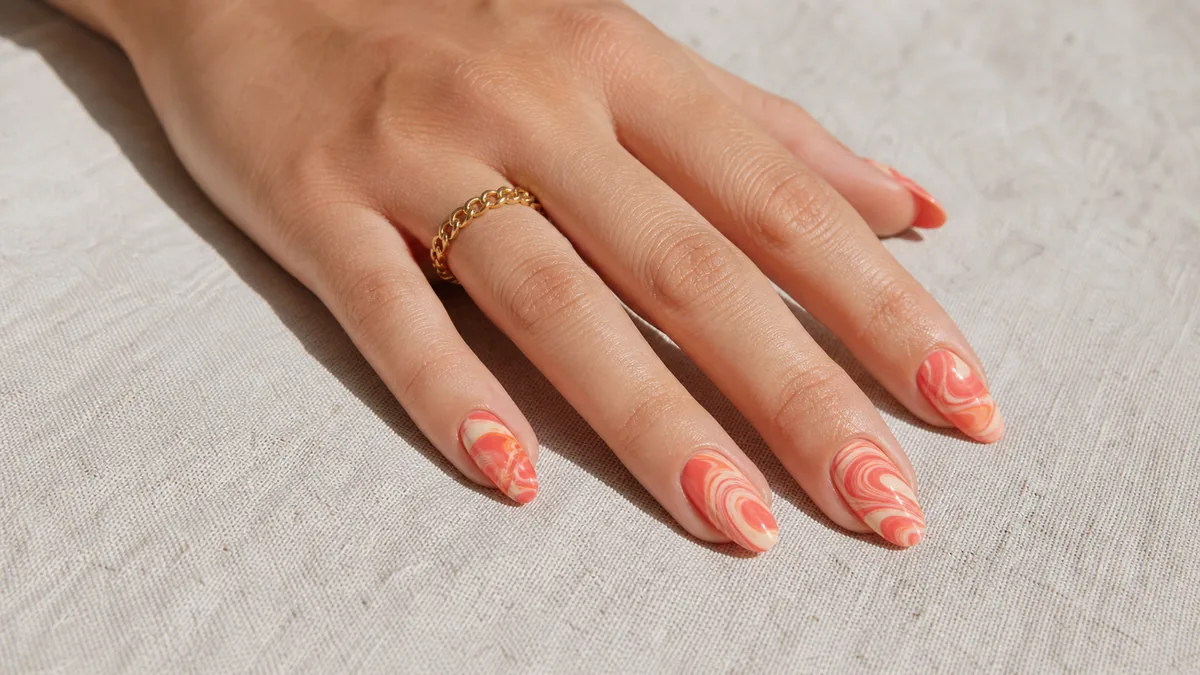
Water marble nails come from a cup of water, not a brush. A few drops of polish are spun into a swirl, then the bare nail is dipped through that floating film so the pattern transfers whole, edges soft the way spilled ink spreads.
These fifteen looks run from the classic two-drop swirl through sunset and ocean color stories, floral blooms, and a few graphic takes. Early ones are the easiest start; later ones layer in French placement, tight rings, and loose drips.
Save the swirl that matches the colors you already reach for.
From the classic two-drop swirl through a feathered floral bloom and a graphic black-and-white version, these fifteen looks all come from the same water-marbling technique at different colors and placements. Jump straight to the one that matches your mood.
1. The Two-Drop Swirl That Started It All
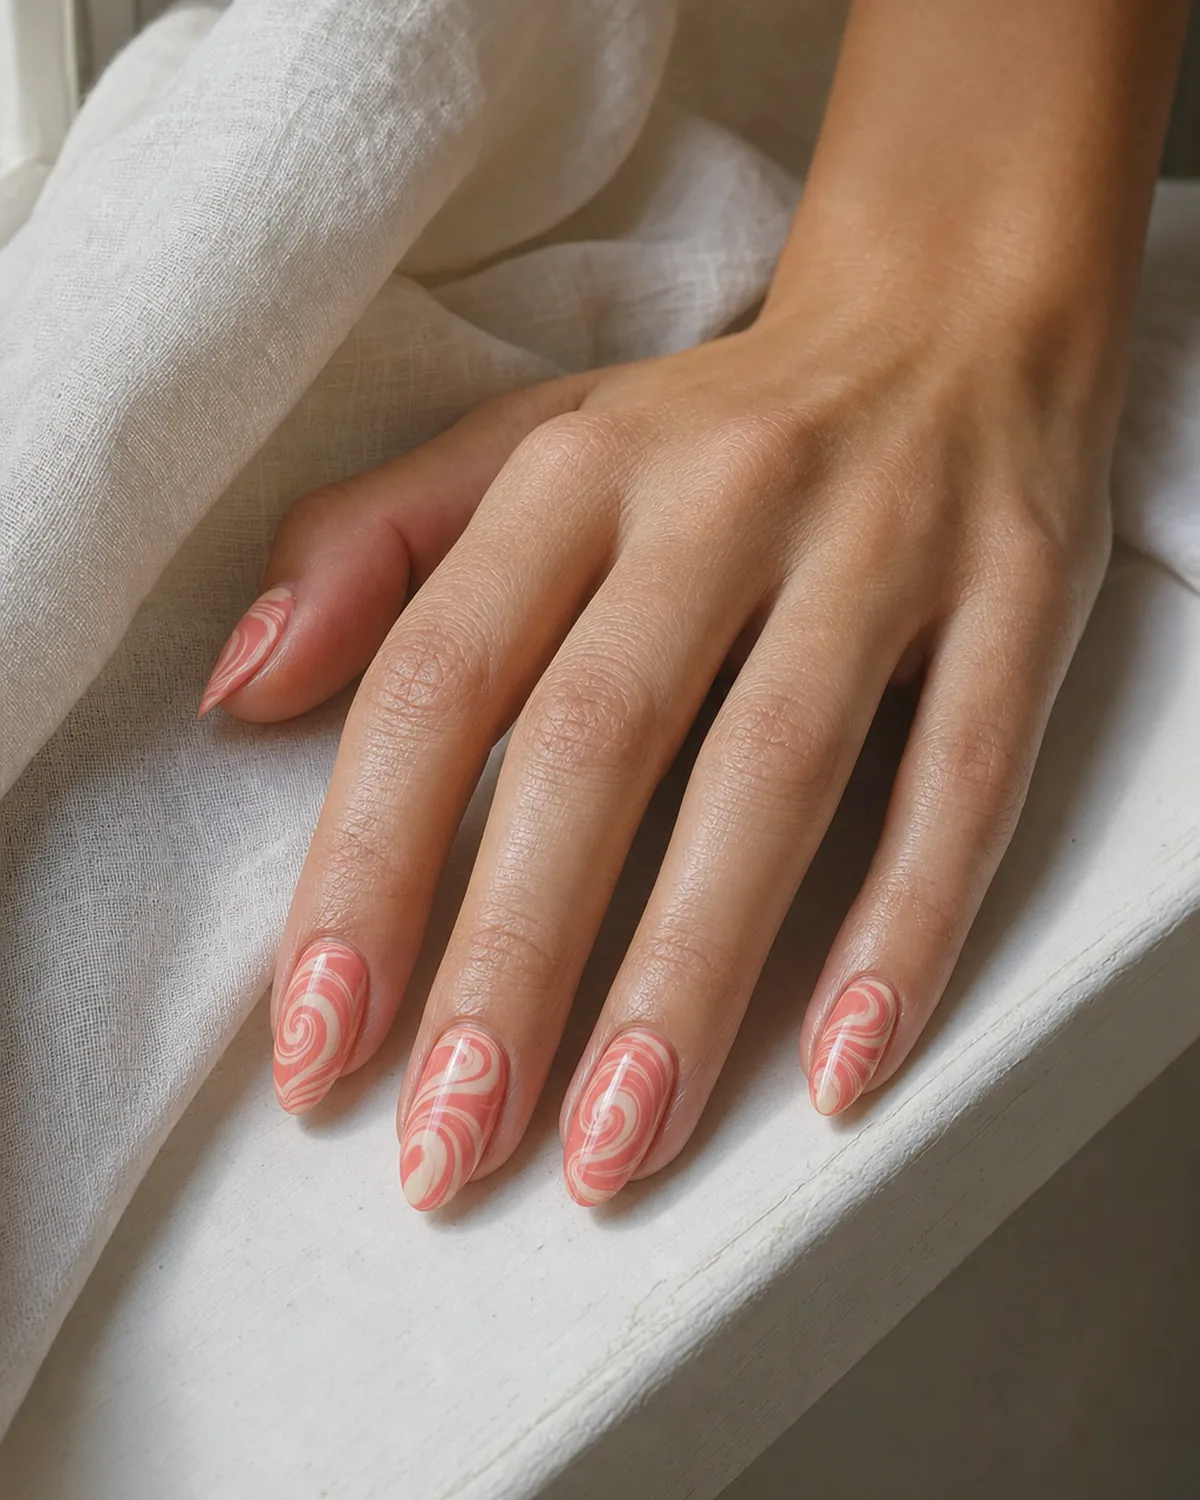
This is the water marble everyone learns on first. Two polish colors are dropped one after another into a cup of still water, where they spread into thin rings on the surface. A tool traces through both rings in a loose spiral, and the bare nail is dipped straight down through the center so the swirl wraps the whole nail in one motion.
It has more in common with the free-flowing drips people reach for during spring nail trends than with any brush-painted pattern.
The result is soft and a little unpredictable, which is exactly the appeal. No two nails come out identical, so the set reads handmade rather than printed. Medium almond shapes give the swirl room to wrap fully around the curve without pinching at the sides.
- Fill a small cup with room-temperature water and let it settle still.
- Drop coral polish onto the surface, then cream polish inside the first ring.
- Drag a thin tool through both rings in one loose spiral.
- Dip the bare nail straight down through the swirl's center and lift.
- Clean the excess film from the skin, then seal under a glossy top coat.
2. What a Sunset Looks Like Pulled Off the Water's Surface
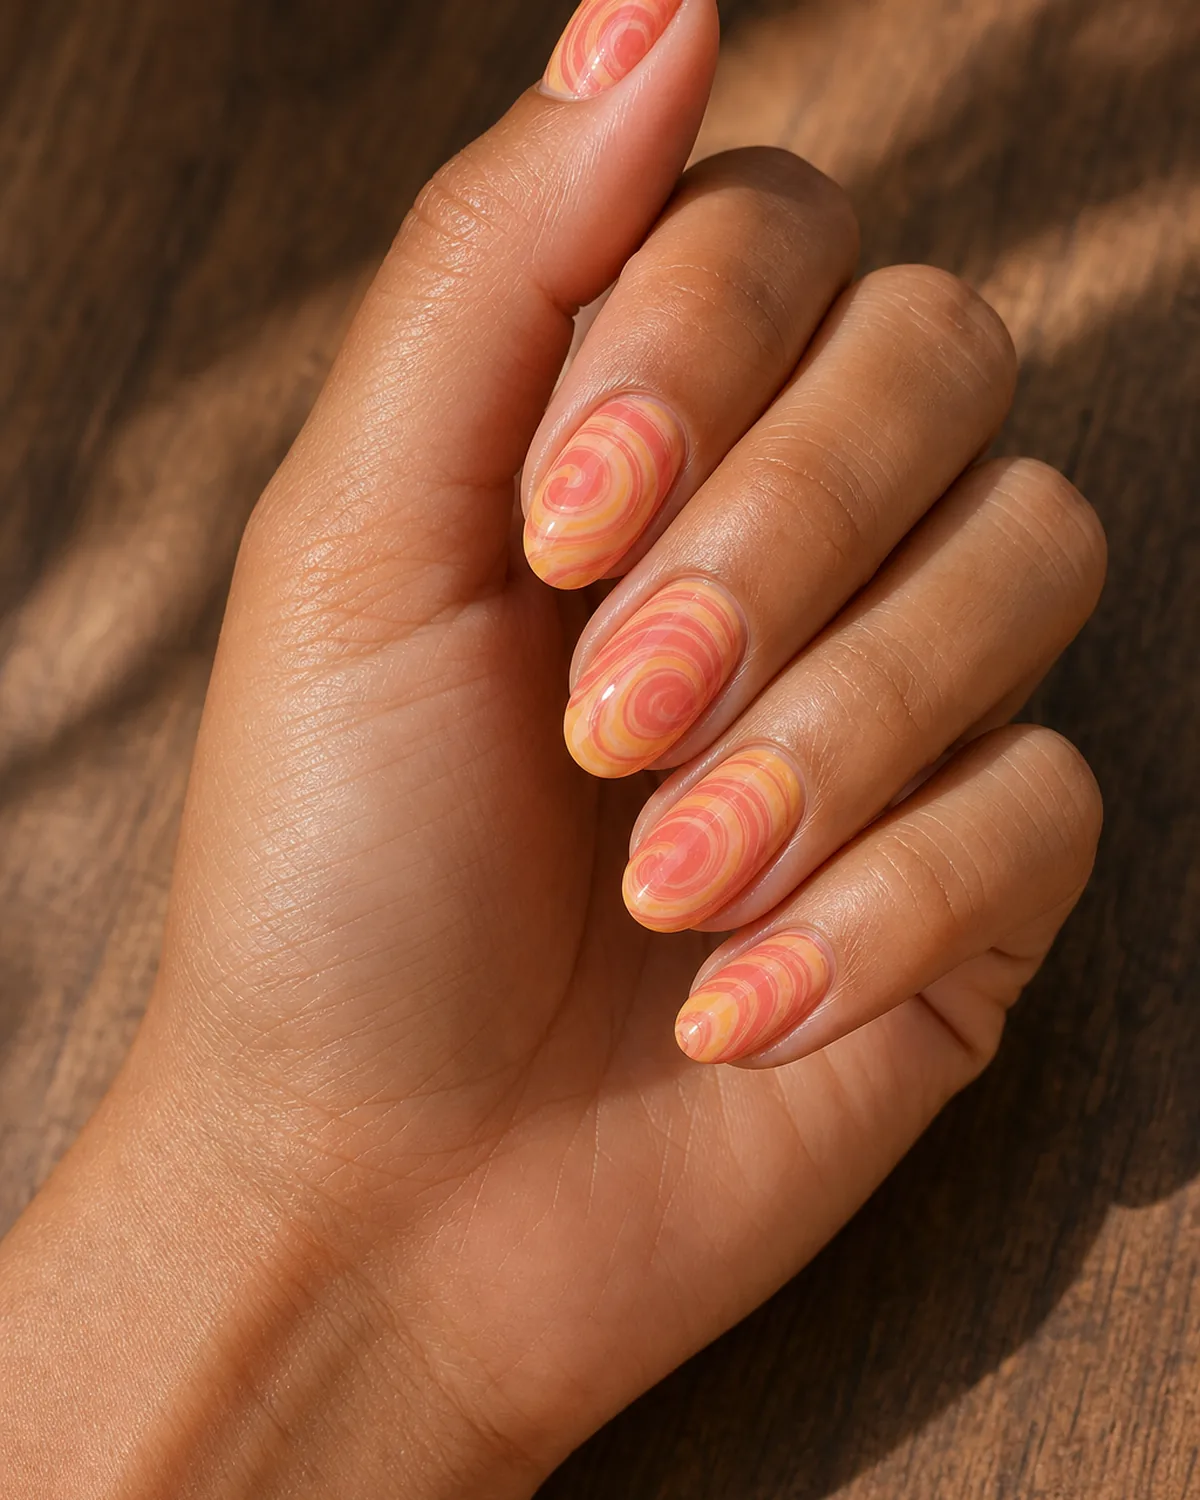
What happens when three warm colors go into the same cup? A soft gradient with visible swirl lines, closer to a sunset than a straight color fade. Coral, apricot, and a pale yellow drop are layered ring inside ring, then spun once so the colors blend at their edges but keep their individual bands visible where the swirl caught them.
It photographs warm and soft, especially in daylight, because the ring structure catches light differently than a flat airbrushed gradient would. Medium oval nails keep the three-color band from feeling crowded.
- Drop coral, then apricot, then pale yellow in concentric rings on the water.
- Spin the tool through all three once, keeping the rings distinct rather than fully blended.
- Dip the bare nail through the outer edge of the rings for a banded effect.
- Wipe away excess film immediately so the bands stay crisp.
- Seal under a glossy no-wipe top coat.
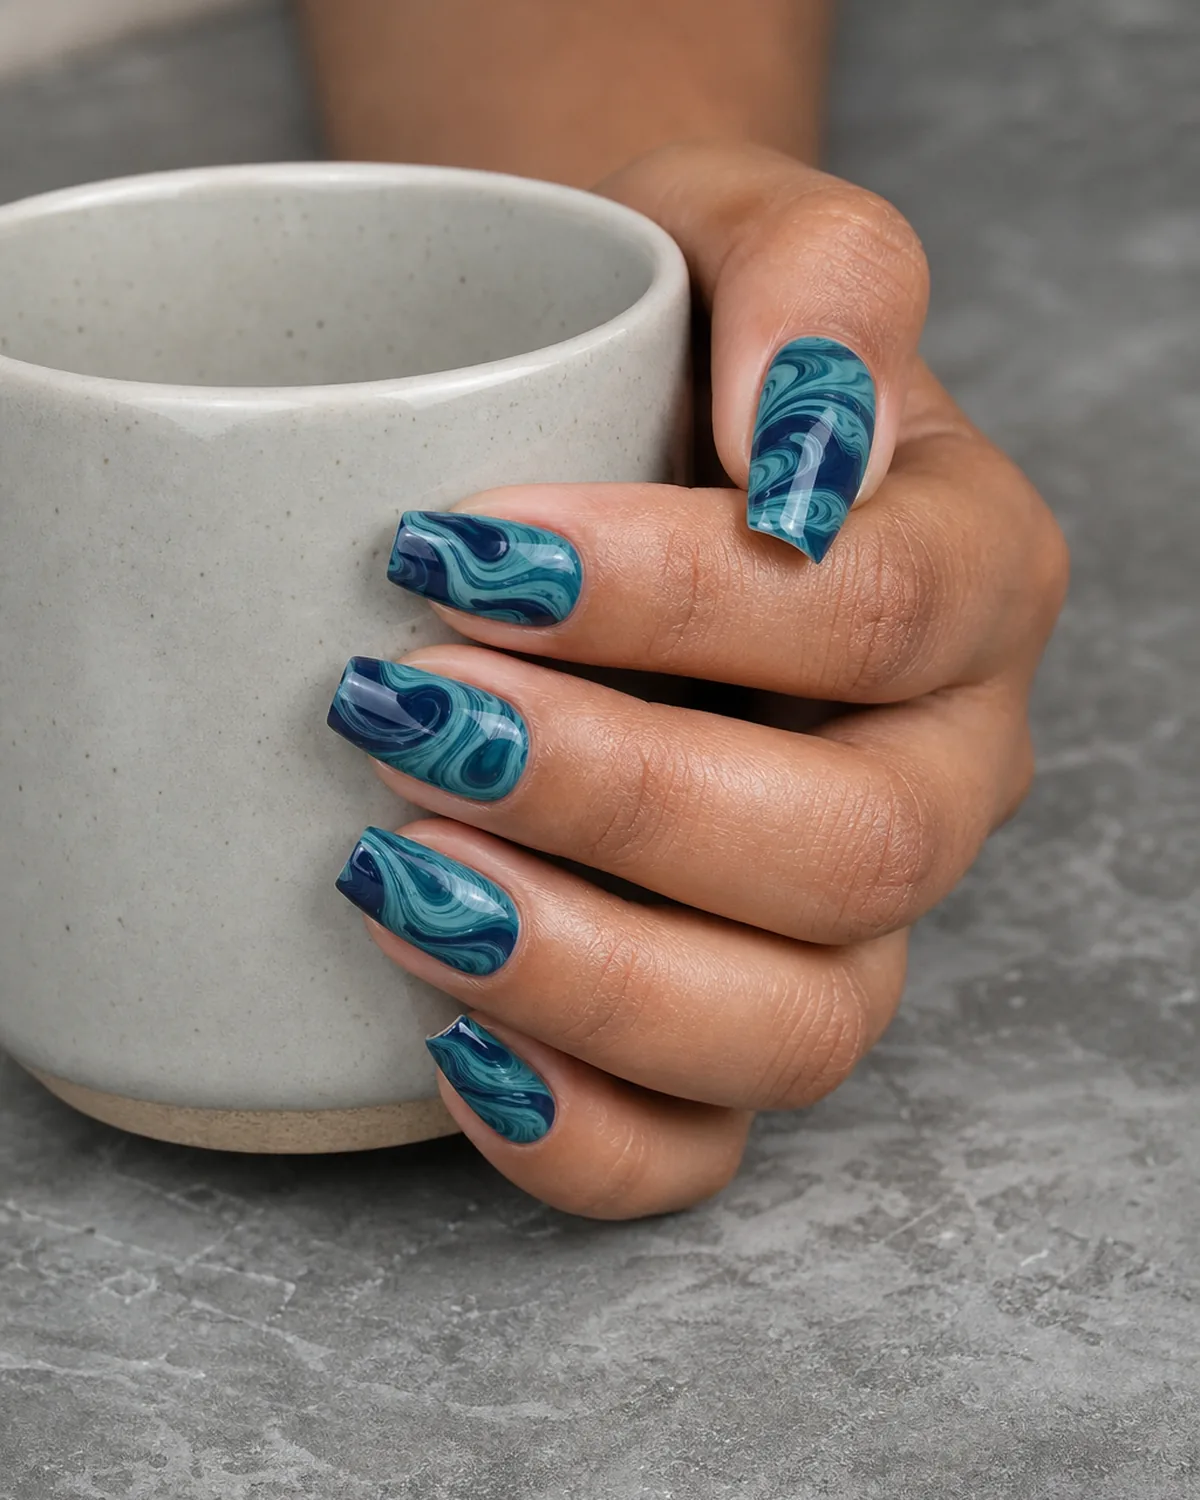
3. A Cool Ocean Drip in Teal and Deep Blue
Not every water marble runs warm. Teal and a deep navy blue dropped into the same cup pull toward something closer to moving water than sunset. The two colors sit close on the color wheel, so the swirl blends into soft gradients rather than sharp bands, with a few thin ribbons where the darker blue threads through the teal.
This one wears quiet. Medium coffin nails give the ribboned pattern a longer plane to travel across, so the blend reads more deliberate than accidental.
- Drop teal, then navy, into the water in slightly offset positions.
- Drag the tool in wide loops rather than a tight spiral for softer ribbons.
- Dip the nail at an angle to catch more of the teal along the sidewalls.
- Rinse the excess film from the skin before it dries.
- Finish with a glossy top coat.
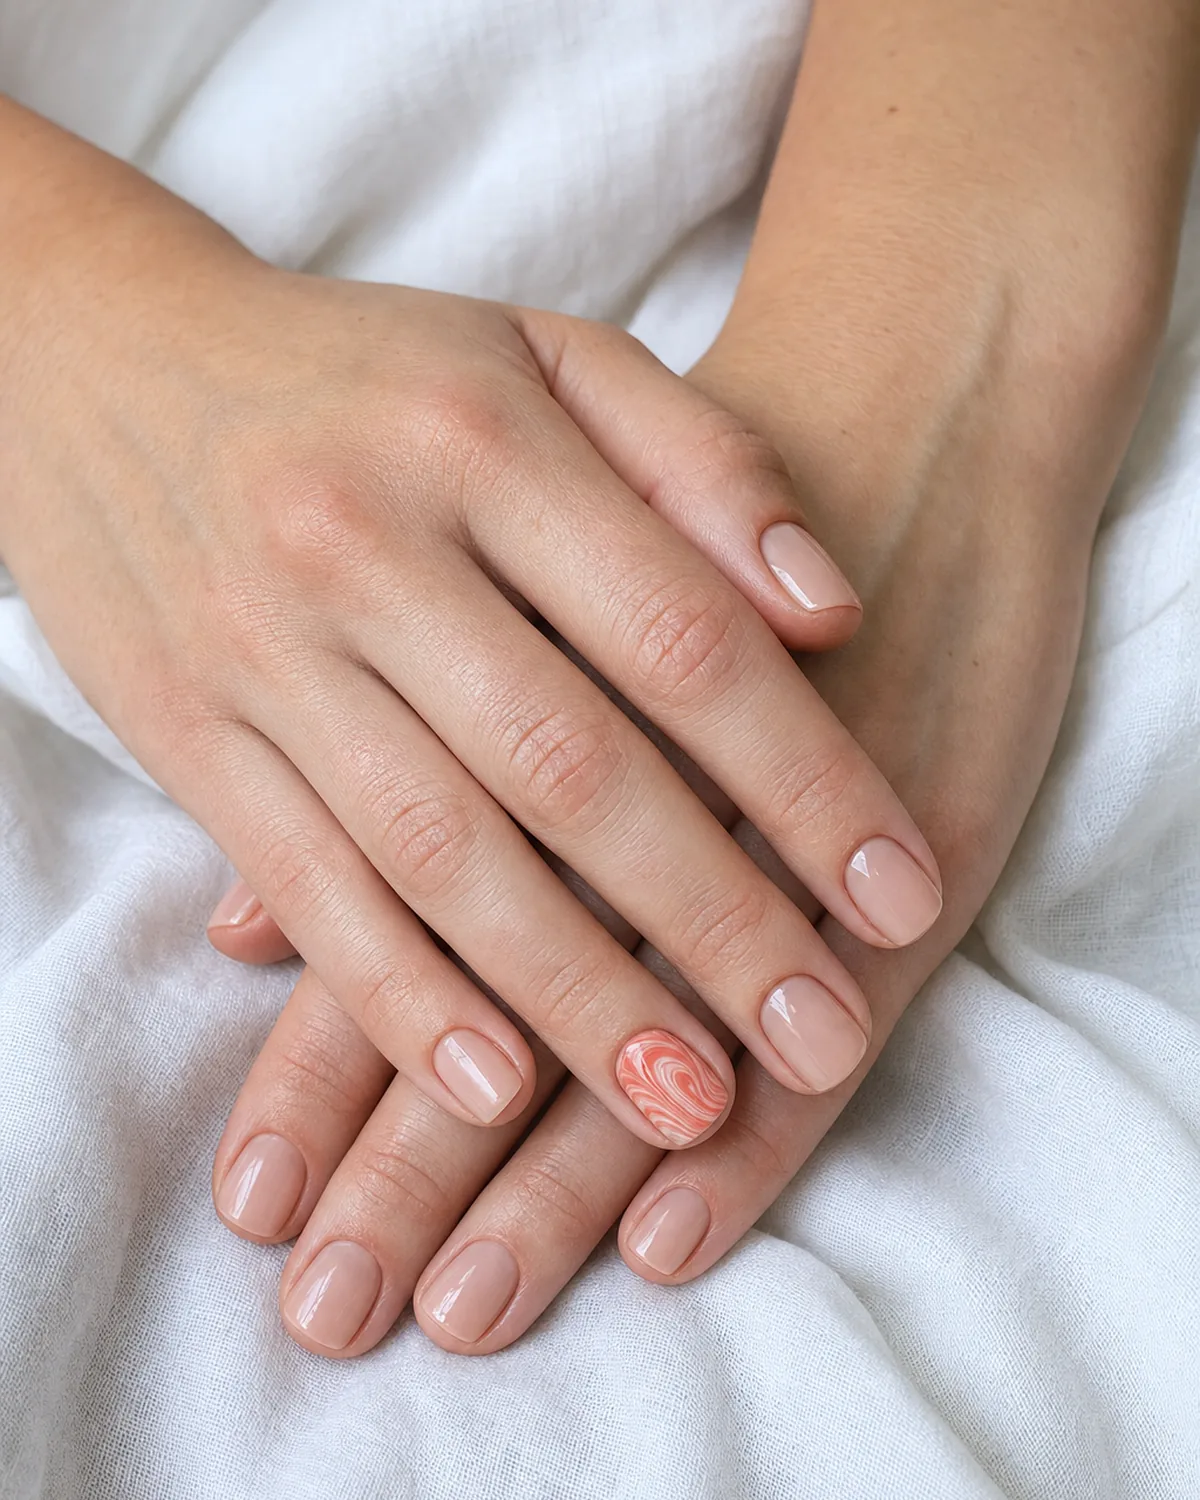
4. One Accent Nail, the Rest Left Bare
You do not need all ten nails swirled for the look to register. This version keeps nine nails in a plain sheer wash and gives the ring finger the full water marble treatment, so the swirl becomes the single focal point instead of competing with itself down the hand.
It is the version to book when you want the technique without the commitment, or when you are short on time and still want one nail to do the talking. Short square nails keep the sheer base clean and let the one accent nail carry all the visual weight.
- Paint nine nails in a sheer nude or milky wash and cure.
- Water marble the ring finger only, following the two-drop method.
- Wipe the accent nail's surrounding skin clean of any drifted film.
- Match the sheer base's finish to the swirl nail's top coat so both read cohesive.
- Seal all ten under the same glossy top coat.
You don't need all fifteen swirls at once. Pick the color story and placement you actually want this week, and start with that one.
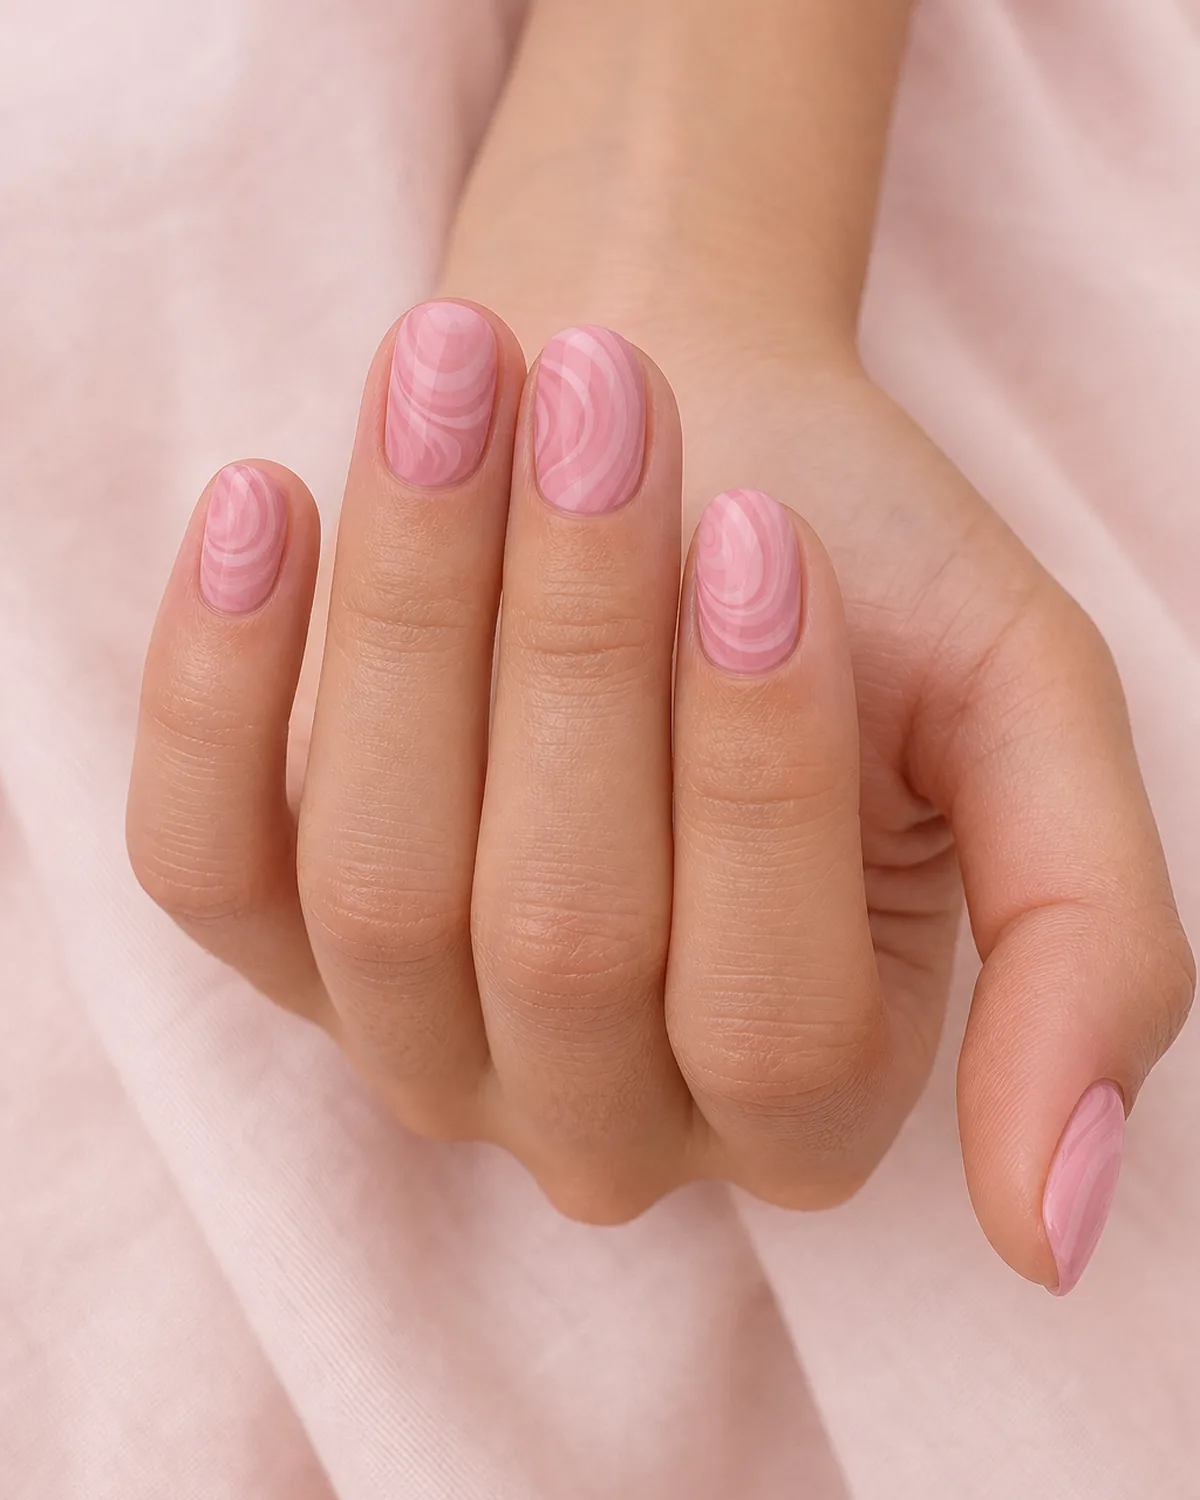
5. A Monochrome Tonal Swirl, Three Shades of the Same Color
A single-color family can still swirl. Three shades of the same pink, light to dark, dropped into the water produce a tonal ring pattern where the contrast comes from value instead of hue. The swirl is there, but it reads subtle rather than graphic.
This is the water marble for anyone who wants texture without extra color to coordinate with an outfit. Medium round nails let the tonal rings sit gently without a hard edge anywhere on the curve.
- Drop the lightest pink first, then a mid pink, then the darkest pink in rings.
- Spin gently so the tonal rings stay distinct rather than muddying together.
- Dip the nail through the center for even coverage of all three values.
- Clean the film from the cuticle line before it sets.
- Seal under a glossy top coat.
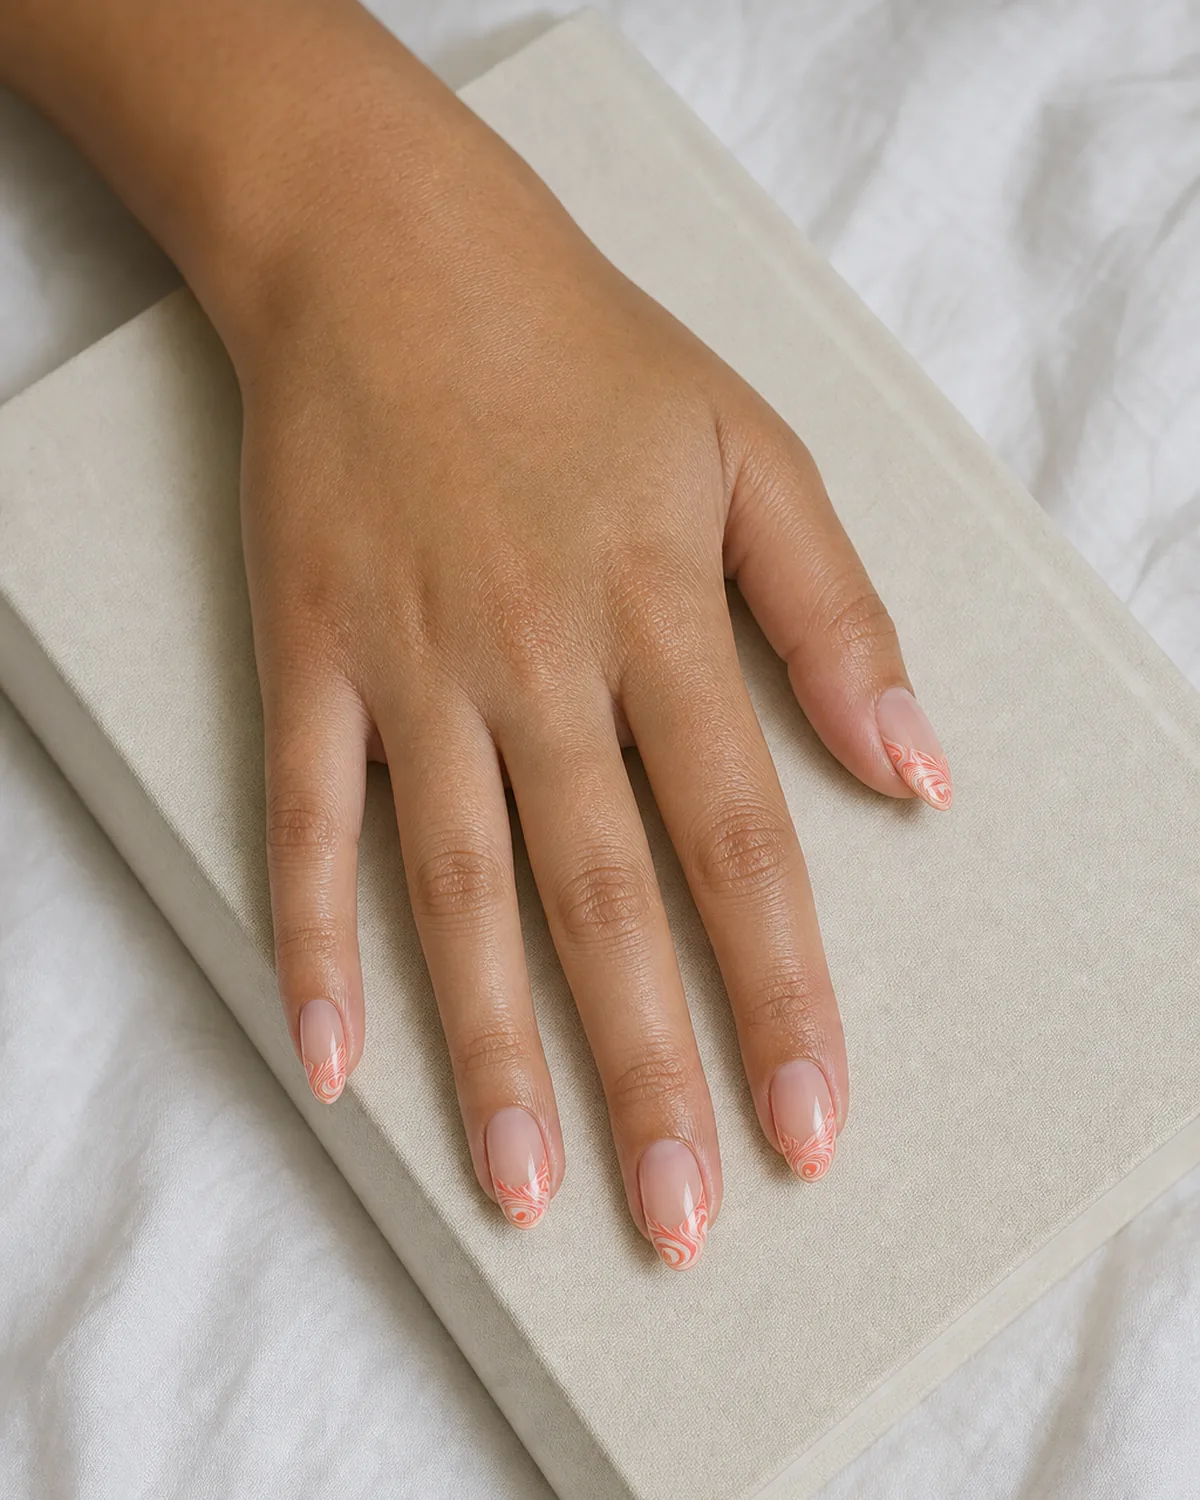
6. When the Water Marble Only Lives Inside the French Tip
French and water marble are not usually paired, but confining the swirl to just the tip area gives both techniques room to work. The nail bed stays a clean sheer wash, and the swirl pattern only appears past the smile line, so it reads like a marbled take on french tip nails rather than a full-nail effect.
It takes a steadier hand because the swirl needs to land inside a smaller, curved zone, but the payoff is a French manicure that still shows off the swirl technique. Medium almond nails give the smile line enough curve for the pattern to wrap naturally.
- Paint a sheer nude or milky base across the whole nail and cure.
- Tape or freehand a smile-line guide near the free edge.
- Water marble only the exposed tip area, dipping at an angle.
- Remove the guide and clean any swirl film that crossed the line.
- Seal under a glossy top coat for a crisp finish.
7. A Feathered Floral Bloom Pulled From the Water, Not Painted
A looser variation on the swirl technique produces something closer to a flower than a ring pattern. Small drops of a light pink and a deeper rose are set close together on the water, then a tool is dragged outward from the center in short strokes, feathering the color into petal-like shapes before the nail dips through.
The result looks hand-painted at a glance, but it is still pulled from the water, not brushed on. Medium oval nails give the feathered bloom shape a clean canvas without any hard edges cutting it off.
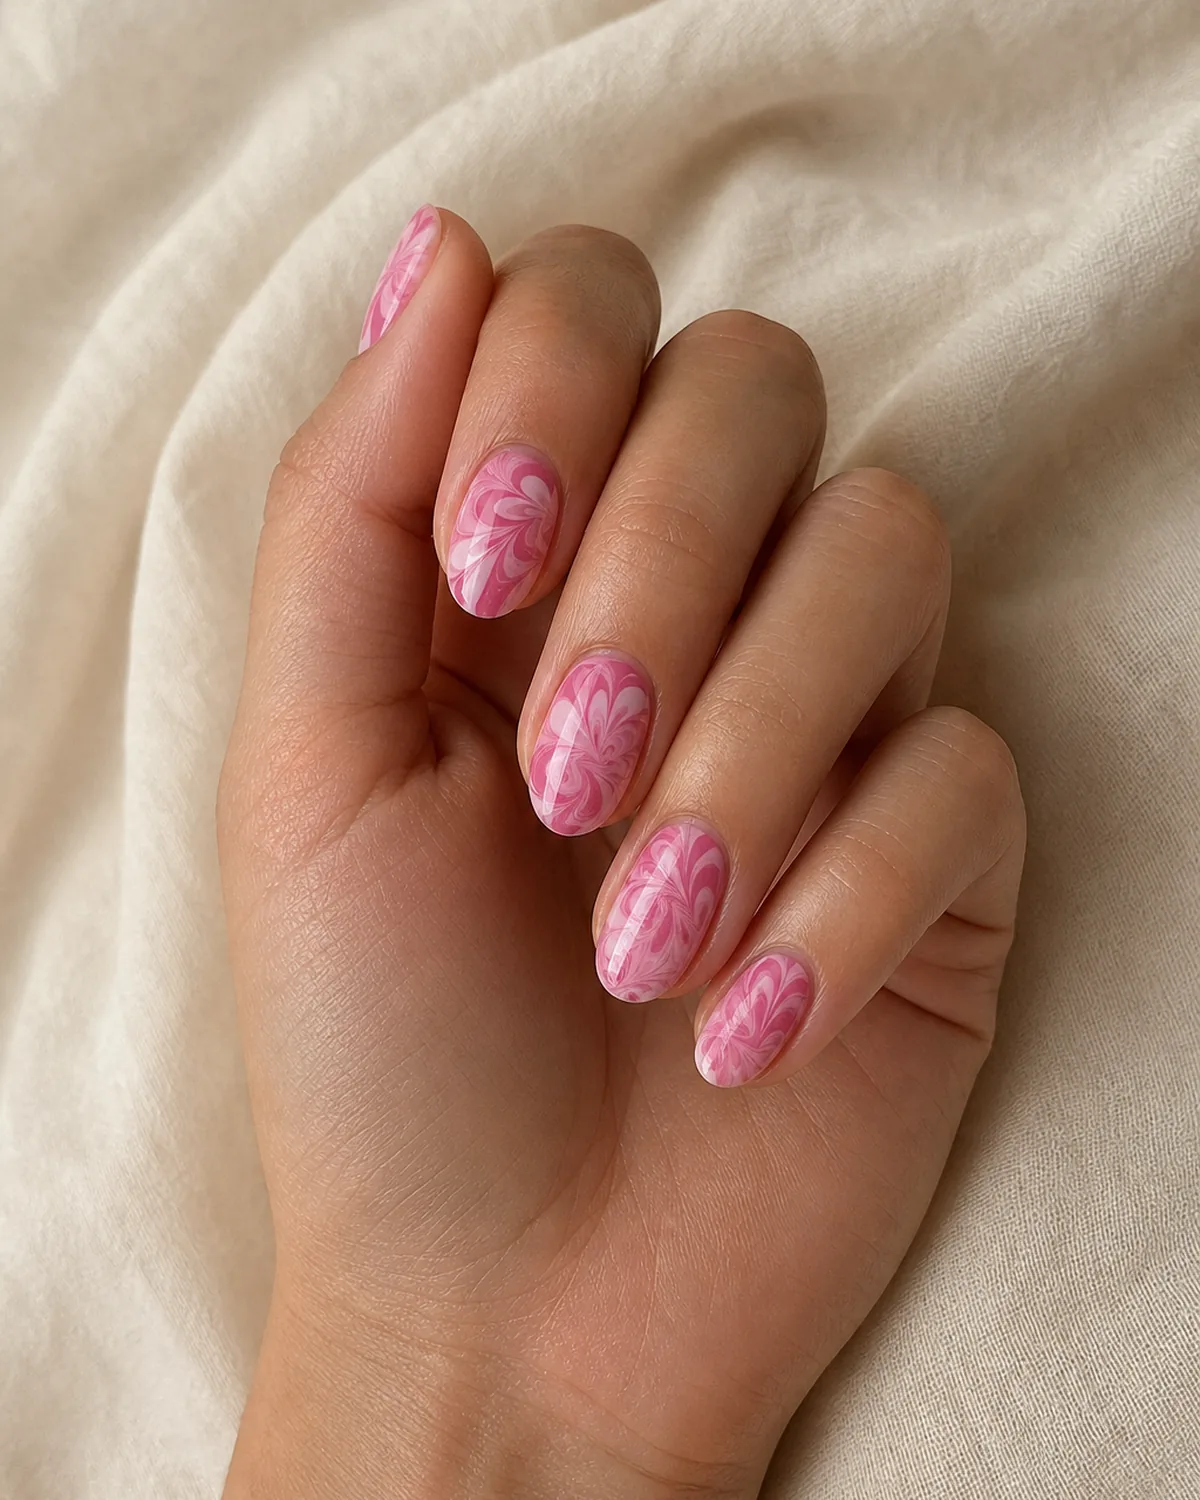
- Drop light pink polish, then rose polish close beside it on the water.
- Drag a thin tool outward from the drops in short feathering strokes.
- Dip the nail through the bloom shape at a slight angle.
- Wipe stray film from the skin immediately.
- Seal under a glossy top coat.
8. Rainbow Multi-Drop for the Days You Can't Pick Just Two Colors
Five colors instead of two turn the same technique into something louder. Red, orange, yellow, green, and blue are dropped in sequence around the water's surface, spun once through the center, and the nail dips through the full spread so every color shows in one continuous ribbon.
It is the boldest version on this list and asks for a steadier hand to keep the colors from muddying into brown at the center. Short square nails keep the multi-color band compact and readable rather than spread thin.
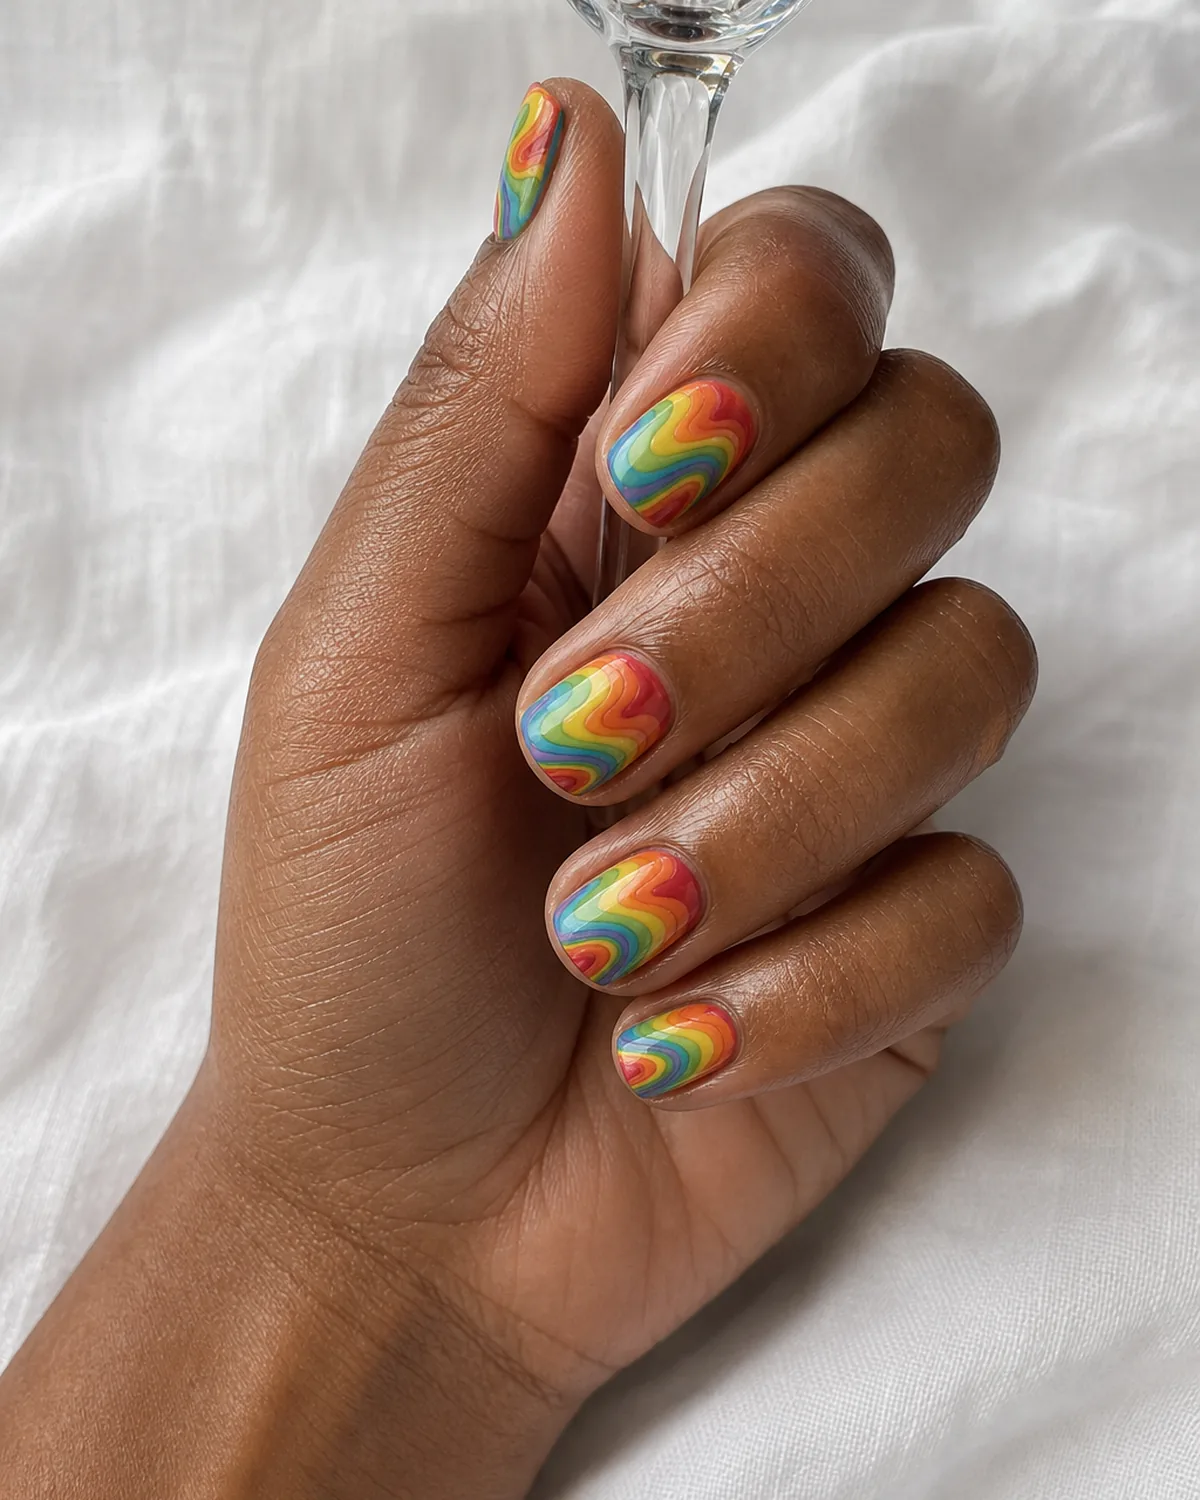
- Drop five colors in sequence around the outer edge of the water.
- Spin once, briefly, through the center to link the colors without overmixing.
- Dip the nail through the outer ring where colors stay most distinct.
- Clean excess film before the colors bleed further.
- Seal under a glossy top coat.
9. The Half-Dip That Leaves the Cuticle Area Bare
Dipping only the lower half of the nail into the swirl leaves a clean bare strip near the cuticle, so the pattern reads more like a graphic block than a full wrap. The bare gap gives the eye somewhere to rest before the swirl takes over toward the free edge.
This version wears more architectural than the full-coverage swirls earlier on the list. Medium coffin nails give the half-dip a long, flat plane so the bare-to-swirl transition line stays straight.
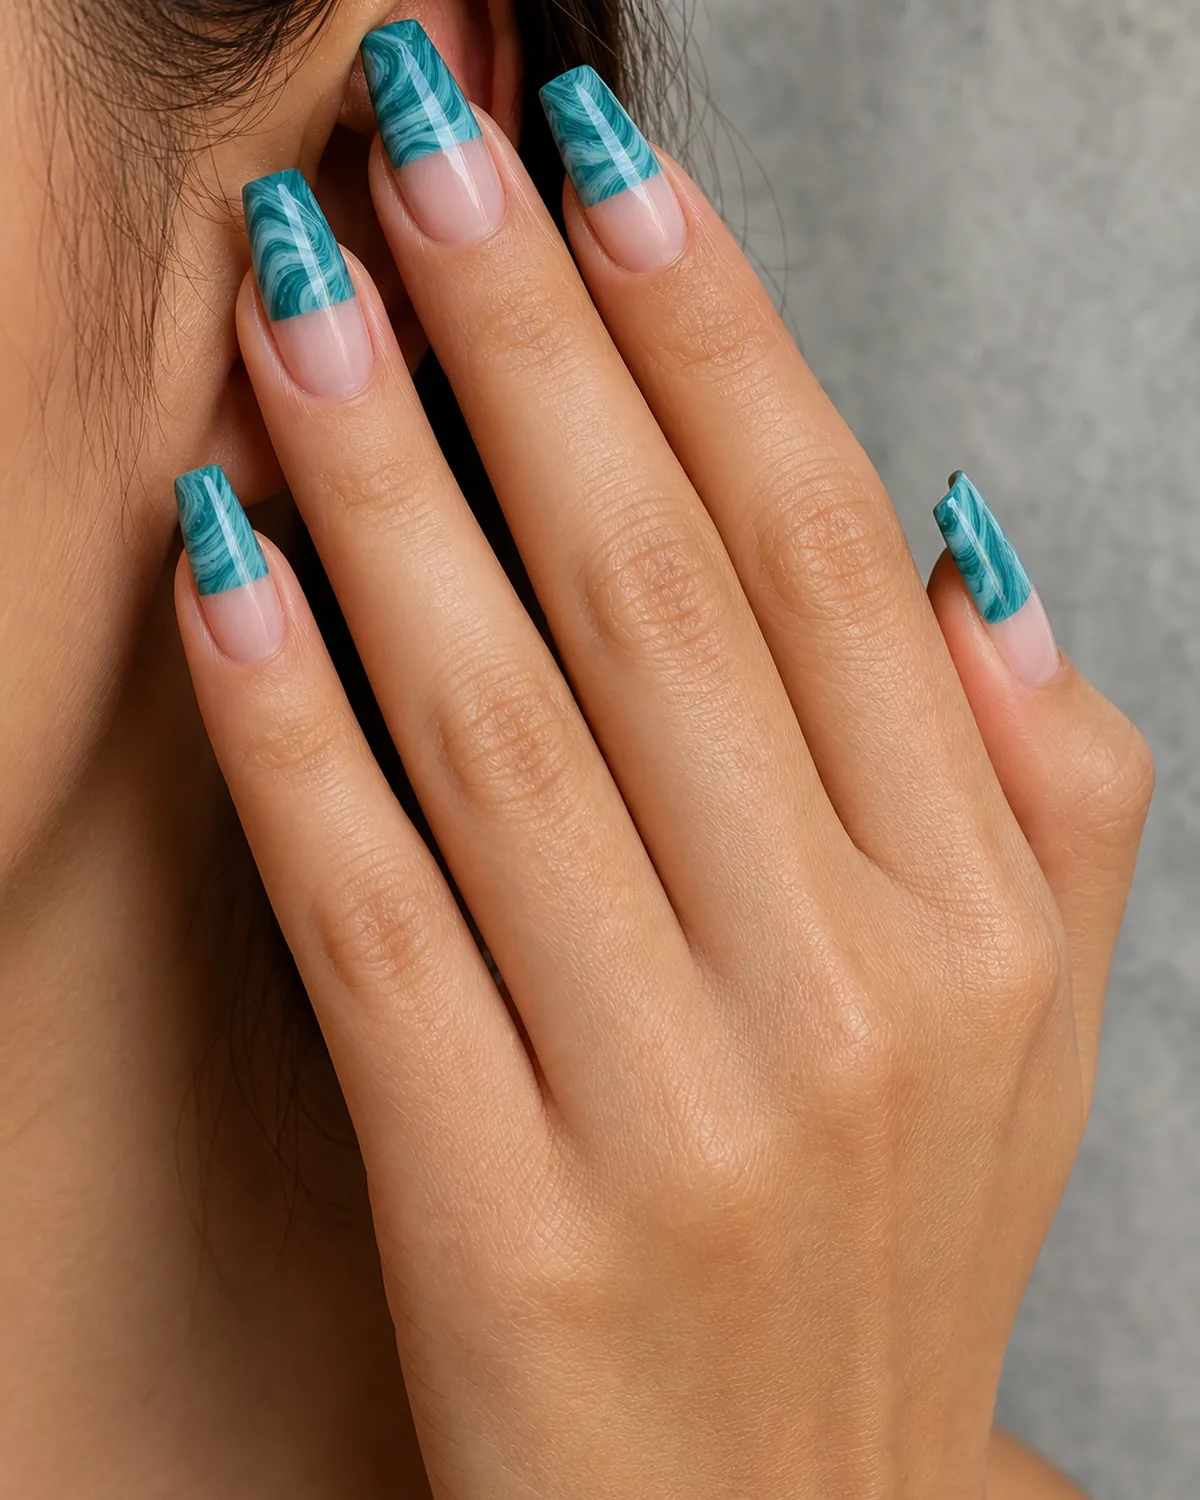
- Paint the whole nail in a sheer top coat base and cure.
- Water marble the cup as usual, then dip only the lower two-thirds of the nail.
- Hold the nail at a shallow angle so the swirl line stays straight.
- Clean any drift near the cuticle line.
- Seal the whole nail under a glossy top coat.
10. A Client Who Wanted "The One Where the Colors Blend Like Ink"
A regular came in scrolling through saved photos and stopped on a set where two dusty colors seemed to melt into each other with no visible boundary. Mauve and slate blue, dropped close together and barely spun, produced exactly that: a soft diffusion where neither color has a hard line, closer to ink dropped in water than a marble pattern.
Barely spinning the tool is the trick here. Too much motion and the colors separate into distinct rings; too little and they stay as two blobs. Medium almond nails give the diffused blend enough surface to spread evenly.
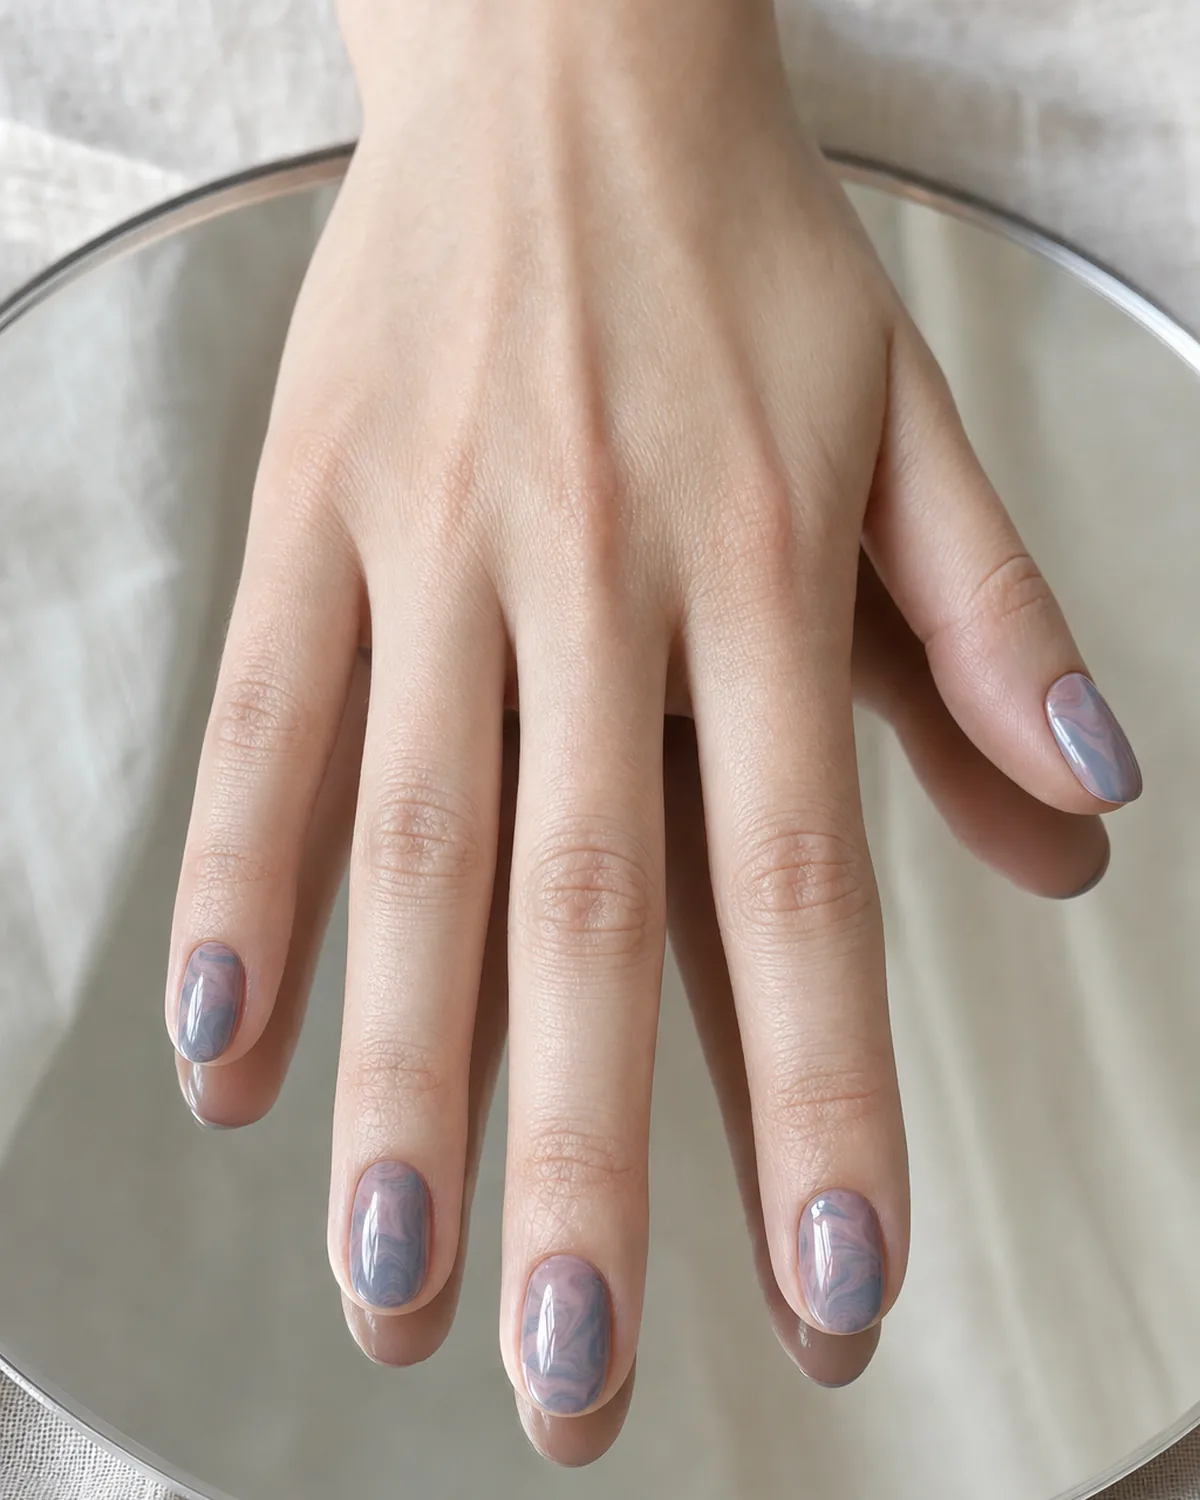
- Drop mauve and slate blue close together on the water's surface.
- Barely touch the tool through the drops, just enough to start diffusion.
- Dip the nail through slowly so the blend transfers without hard lines.
- Wipe the skin clean before the colors fully set.
- Seal under a glossy top coat.
11. Tight Concentric Rings, No Loose Drips
Some water marbles are deliberately controlled. Dropping the same two colors in alternating small amounts, over and over, builds up tight concentric rings before any spinning happens, so the finished pattern reads structured and even rather than organic.
This is the precise, graphic end of the technique, closer to a target pattern than a swirl. Medium square nails give the tight rings a flat, wide surface where the concentric structure stays visible edge to edge.
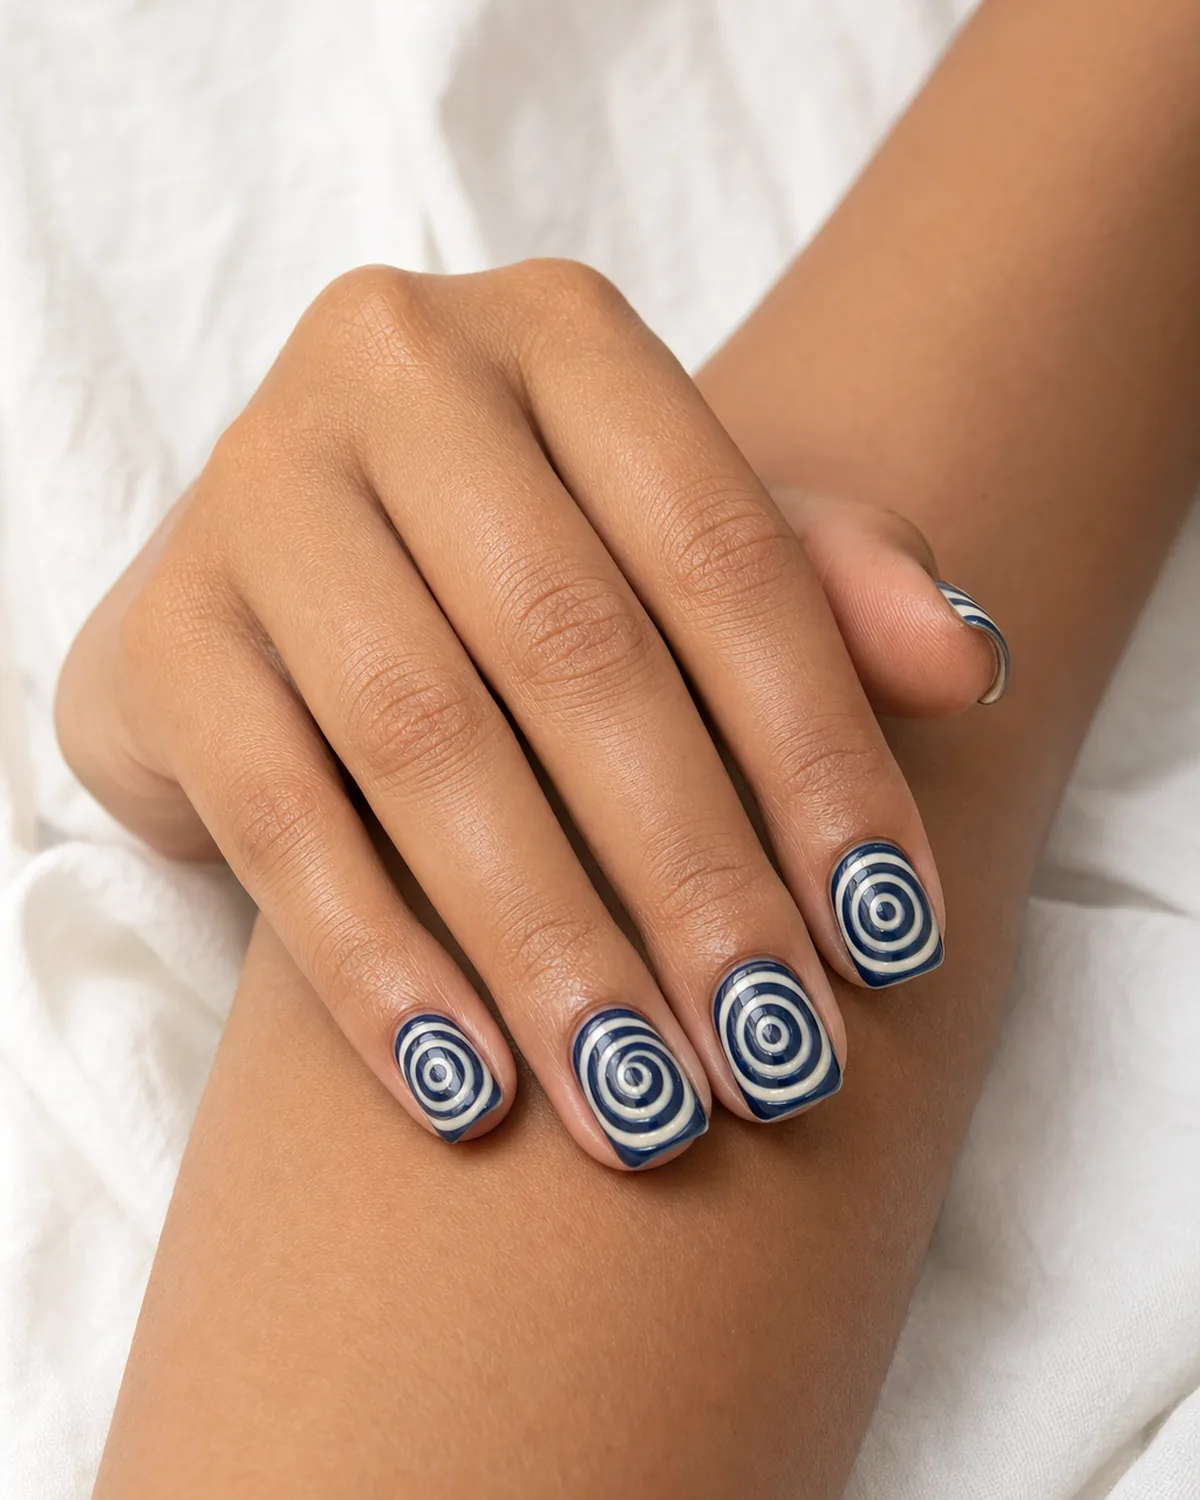
- Alternate small drops of navy and cream in the same spot repeatedly.
- Skip the wide spin; only trace a light single pass through the rings.
- Dip the nail straight down through the center of the rings.
- Clean the excess film carefully to preserve the ring edges.
- Seal under a glossy top coat.
12. Loose, Wide Drips for a Looser Organic Finish
The opposite approach widens the spin into long, loose loops instead of a tight spiral, so the colors stretch into organic streaks rather than rings. Olive green and cream dropped this way produce something closer to a marbled leaf than a graphic pattern.
It takes the least precision of any look on this list and forgives an uneven hand, which makes it a good one to practice the technique on before attempting the tighter versions. Medium oval nails let the loose streaks travel the full length without getting cut off.
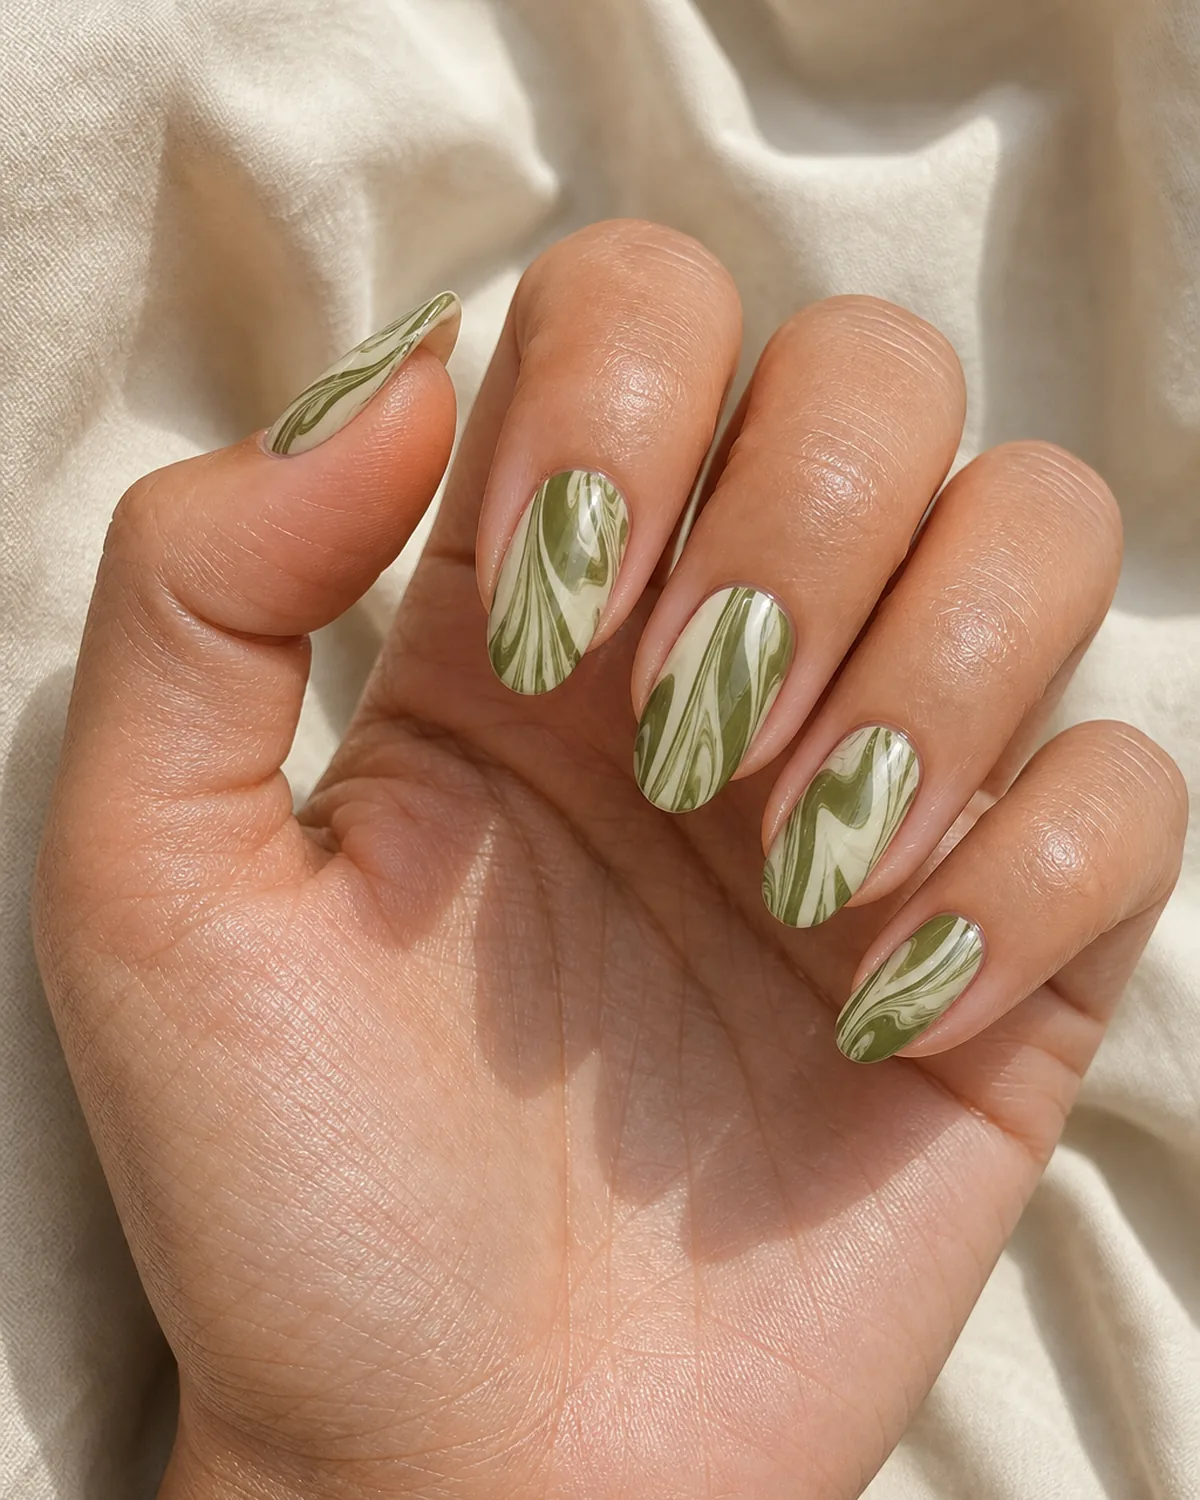
- Drop olive green and cream into the water in a wide arc.
- Drag the tool in long, loose loops across the whole surface.
- Dip the nail through at any angle since the pattern forgives imprecision.
- Wipe away drifted film from the skin.
- Seal under a glossy top coat.
13. Black and White Water Marble, Graphic and High Contrast
Removing color from the equation turns the same swirl technique into something stark. Black and white polish, spun into a tight spiral and pulled onto the nail, produces a marbled pattern with none of the softness color usually brings, closer to spilled ink on paper than a colorful swirl.
It reads more graphic than any color combination on this list because there is nothing to soften the contrast between the two values. Short almond nails keep the high-contrast pattern compact enough to stay readable up close.
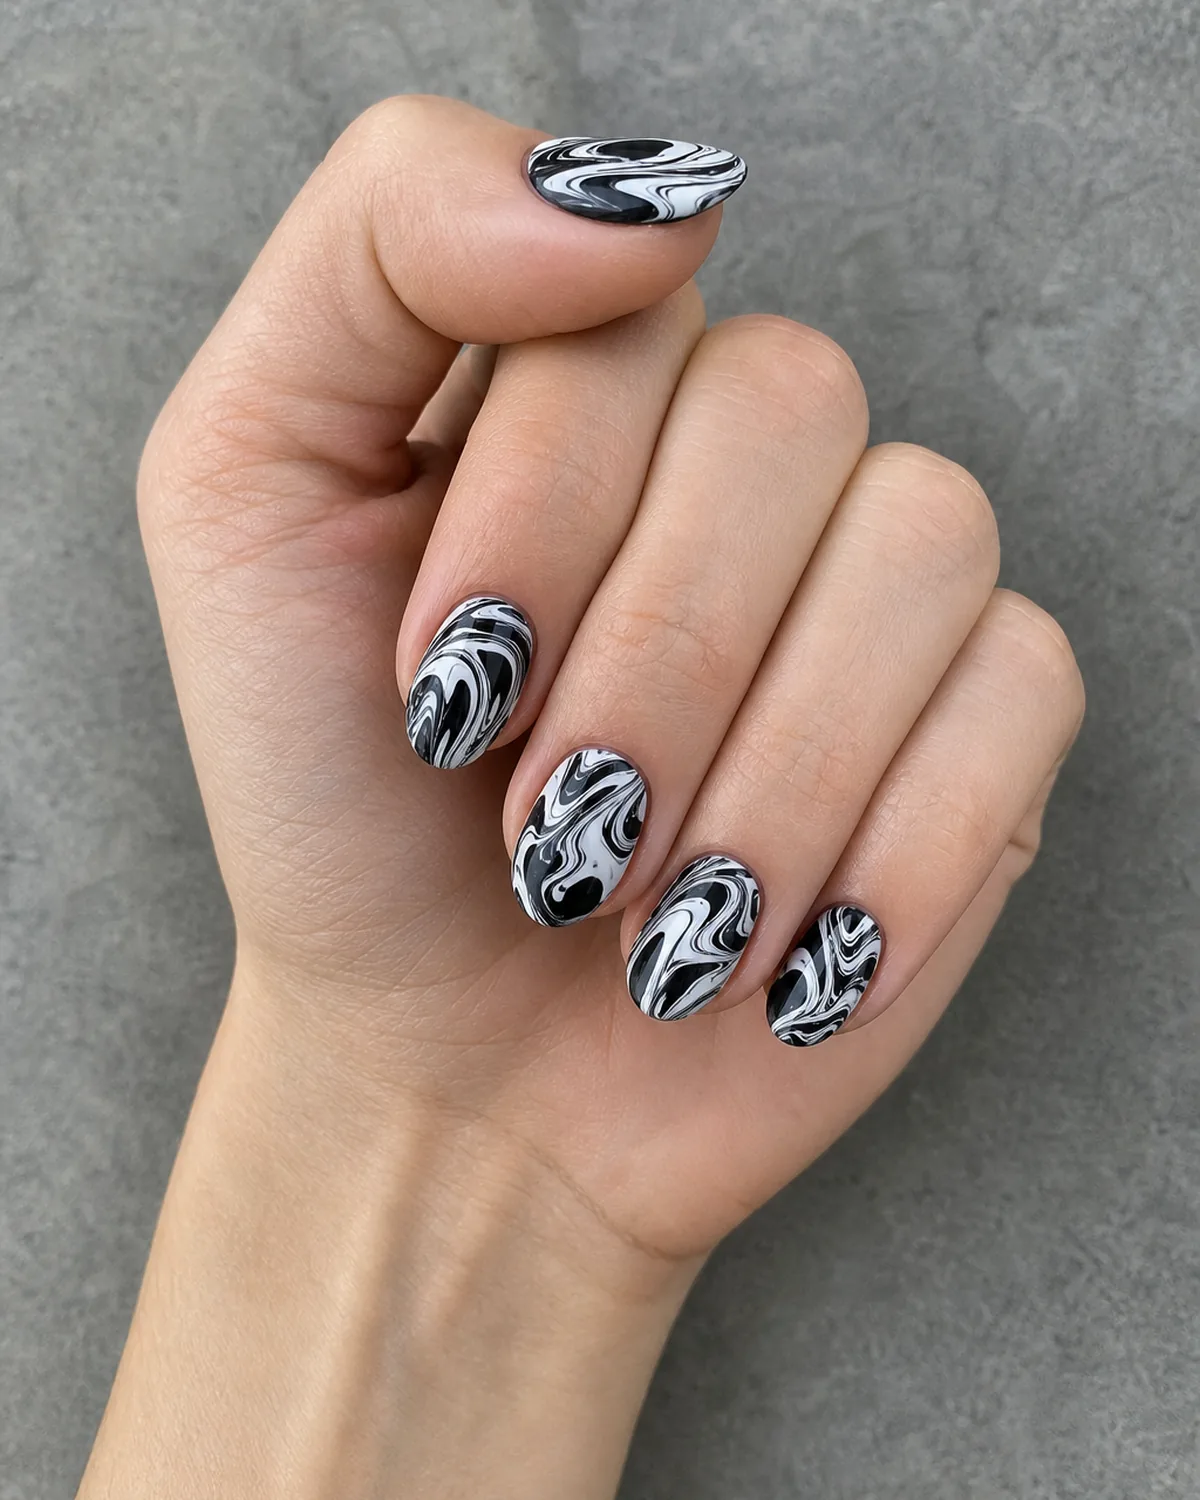
- Drop white polish first, then black polish on top of the water.
- Spin the tool through both in a moderately tight spiral.
- Dip the nail through the center for the strongest contrast.
- Clean any smudged film before it sets on the skin.
- Seal under a glossy top coat.
Water marbling comes down to four decisions: pick a color story that matches the mood you want, control how tight or loose the spin is to get the pattern density you're after, decide how much of the nail the swirl should actually cover, and clean up fast before the film dries on the skin. These four rules are what make any of the fifteen looks above land as intentional rather than accidental.
15 Water Marble Nail Ideas to Try
- 1Two-drop swirlThe classic coral-and-cream starting point on medium almond.
- 2Sunset dripA warm three-color banded gradient on medium oval.
- 3Ocean dripA cool teal-and-navy ribboned swirl on medium coffin.
- 4Accent nail onlyOne swirled ring finger among nine sheer nails on short square.
- 5Monochrome tonalThree shades of the same pink on medium round.
- 6French-tip-confinedA swirl kept inside the smile line on medium almond.
- 7Feathered floral bloomA petal-like pink-and-rose bloom on medium oval.
- 8Rainbow multi-dropA five-color ribbon on short square, the boldest version.
- 9Half-dipA bare cuticle strip above a teal swirl on medium coffin.
- 10Ink-blendA barely-spun mauve and slate-blue diffusion on medium almond.
- 11Tight concentric ringsA structured navy-and-cream target pattern on medium square.
- 12Loose organic dripsWide, forgiving olive-and-cream streaks on medium oval.
- 13Black and white graphicA stark, high-contrast swirl on short almond.
- 14Negative-space centerA coral-cream ring framing bare nail on medium round.
- 15Short square finaleThe flattest, most true-to-life swirl to close the set.
styvea.com
14. A Negative-Space Swirl That Frames Bare Nail at the Center
Instead of covering the whole nail, this version keeps a small circle of bare, unpolished nail at the very center and lets the swirl only occupy the outer ring. A thin strip of tape or a dot of removable base is placed at the center before dipping, then peeled away after the swirl sets.
The bare center reads as a deliberate design choice rather than a gap, since the swirl frames it cleanly on every side. Medium round nails give the negative-space circle enough room to read clearly at the center of the curve.
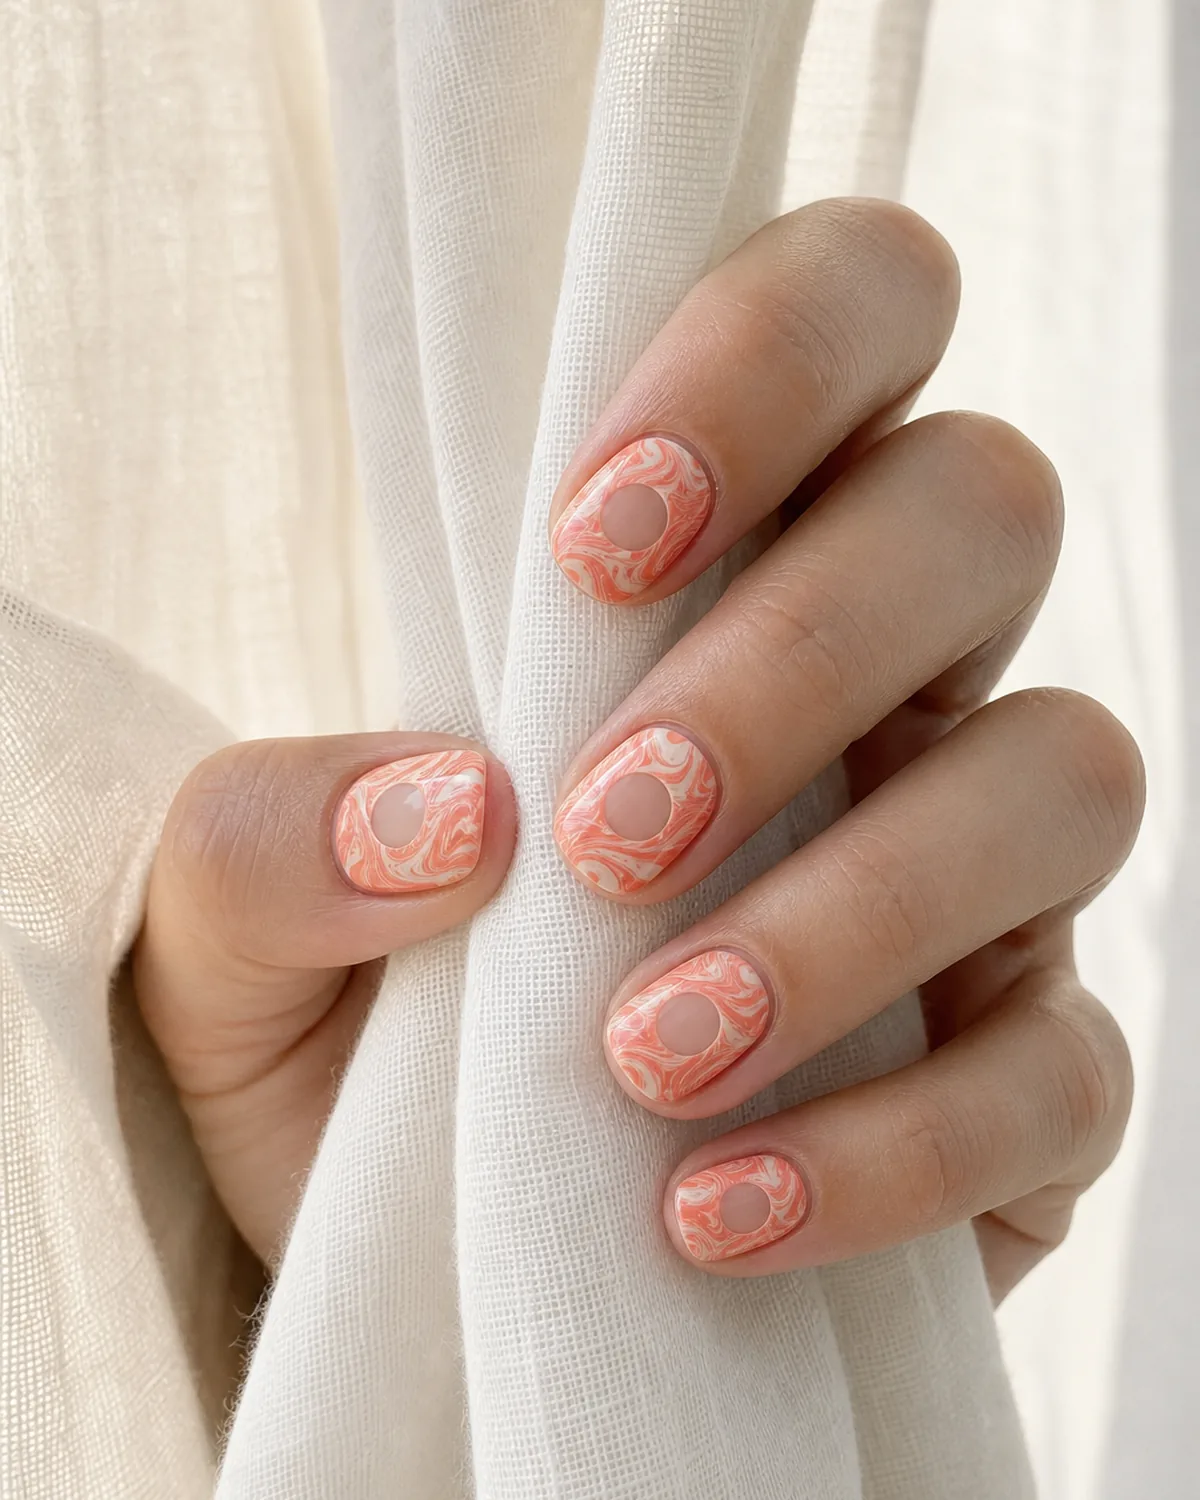
- Place a small dot of removable base or tape at the nail's center.
- Water marble the whole nail as usual, letting the swirl cover the dot.
- Peel the dot or tape away once the swirl has set to reveal bare nail.
- Clean the edges of the revealed circle.
- Seal the whole nail under a glossy top coat.
15. The Water Marble That Photographs Best on Short Square Nails
Short square nails give the swirl a flat, even plane with no curve to distort the pattern, which is part of why this shape photographs the most true-to-life version of the technique. A simple two-tone coral and cream swirl, kept to a shorter length, shows every ring and ribbon without any part of the pattern disappearing around a side curve.
It is worth noting how different this looks from a painted marble nails manicure: the ribbons here curl and drift the way spilled ink does, with none of the branching, dead-ending vein structure a brush-painted stone marble carries. If you want that painted, stone-slab version instead of the swirled water version, it lives on its own as a separate technique.
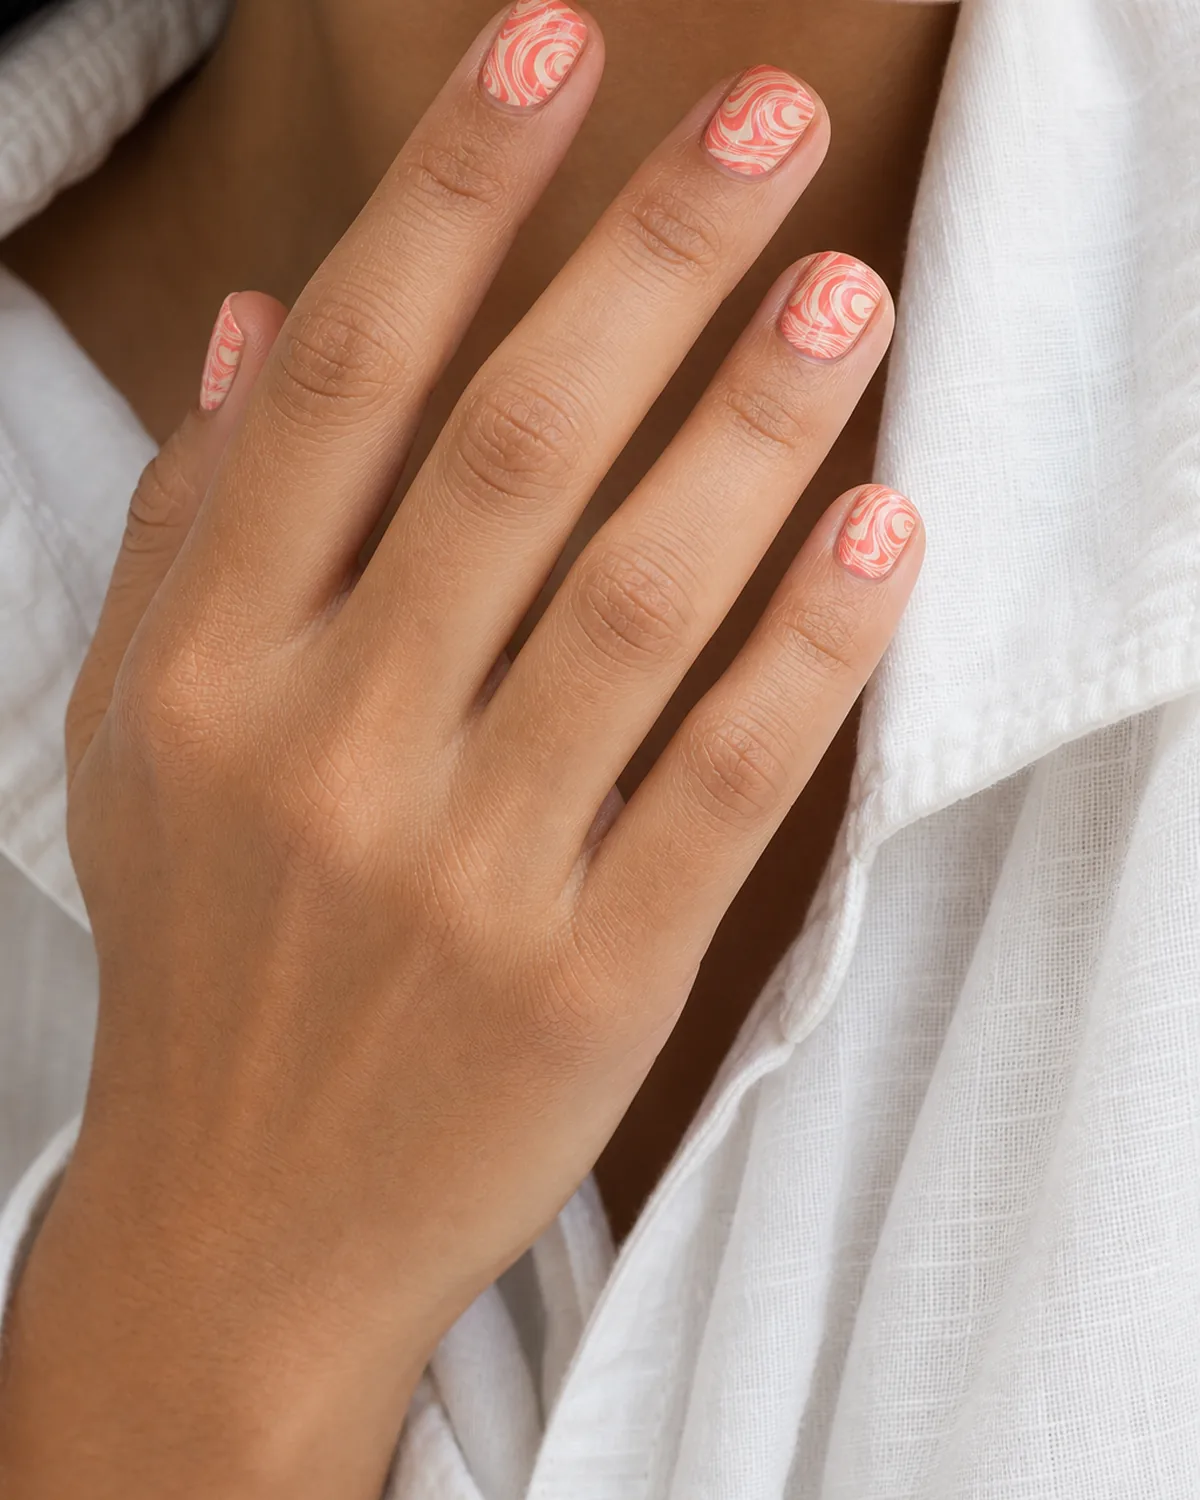
- Paint the base and complete the water marble swirl as in the first look.
- Keep the nail length short and the shape square for the flattest possible plane.
- Photograph or inspect the finished swirl in natural light to check ring clarity.
- Seal under a glossy top coat for shine.
- Book the length and shape that shows off your own swirl best.
Water marbling rewards patience more than most nail art techniques. Practice the spin on a spare nail or a plain plate before committing to a full set, because the motion of the tool matters more than the colors you choose.

Sloane Avery edits Styvea, where she shares nail design ideas, shapes, colors, and at-home manicure how-tos for anyone who loves a good manicure. Every guide is reviewed for clarity, usefulness, image accuracy, and Pinterest-to-page alignment before publication. Visit the About page.