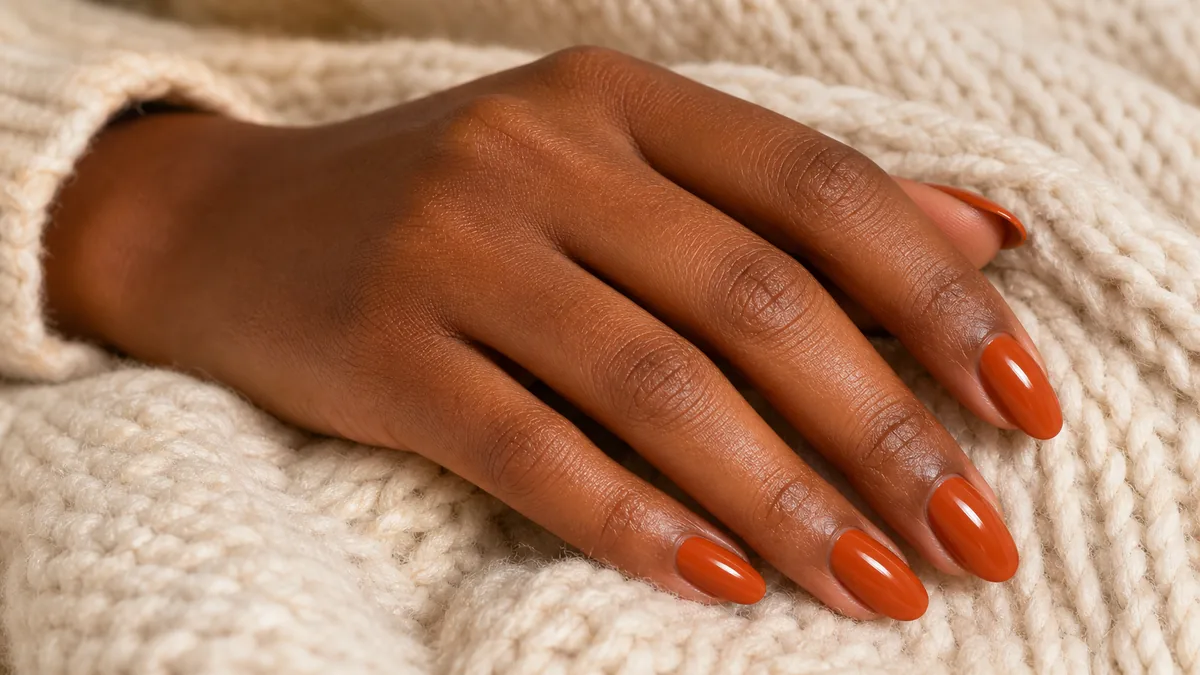
Halloween nails turn a seasonal holiday into something you wear on your hands for weeks. The designs need to hold up through office days, brunches, and the party itself.
The range goes wider than you might expect — from a single spider web accent to full-commitment theatrical designs.
In this guide
16 Halloween Nail Ideas
Tap any idea to jump straight to it.
- 1Spider web accent
- 2Ghost French tips
- 3Pumpkin orange & black cat
- 4Blood drip
- 5Candy corn gradient
- 6Bat silhouettes
- 7Skeleton hand line art
- 8Witchy black chrome
- 9Jack-o-lantern faces
- 10Mummy wrap
- 11Eyeball accent
- 12Cobweb glitter
- 13Neon poison drip
- 14Haunted house silhouette
- 15Black & orange half-moon
- 16Glow-in-the-dark accent
1. Spider Web Accent on Matte Black Almond
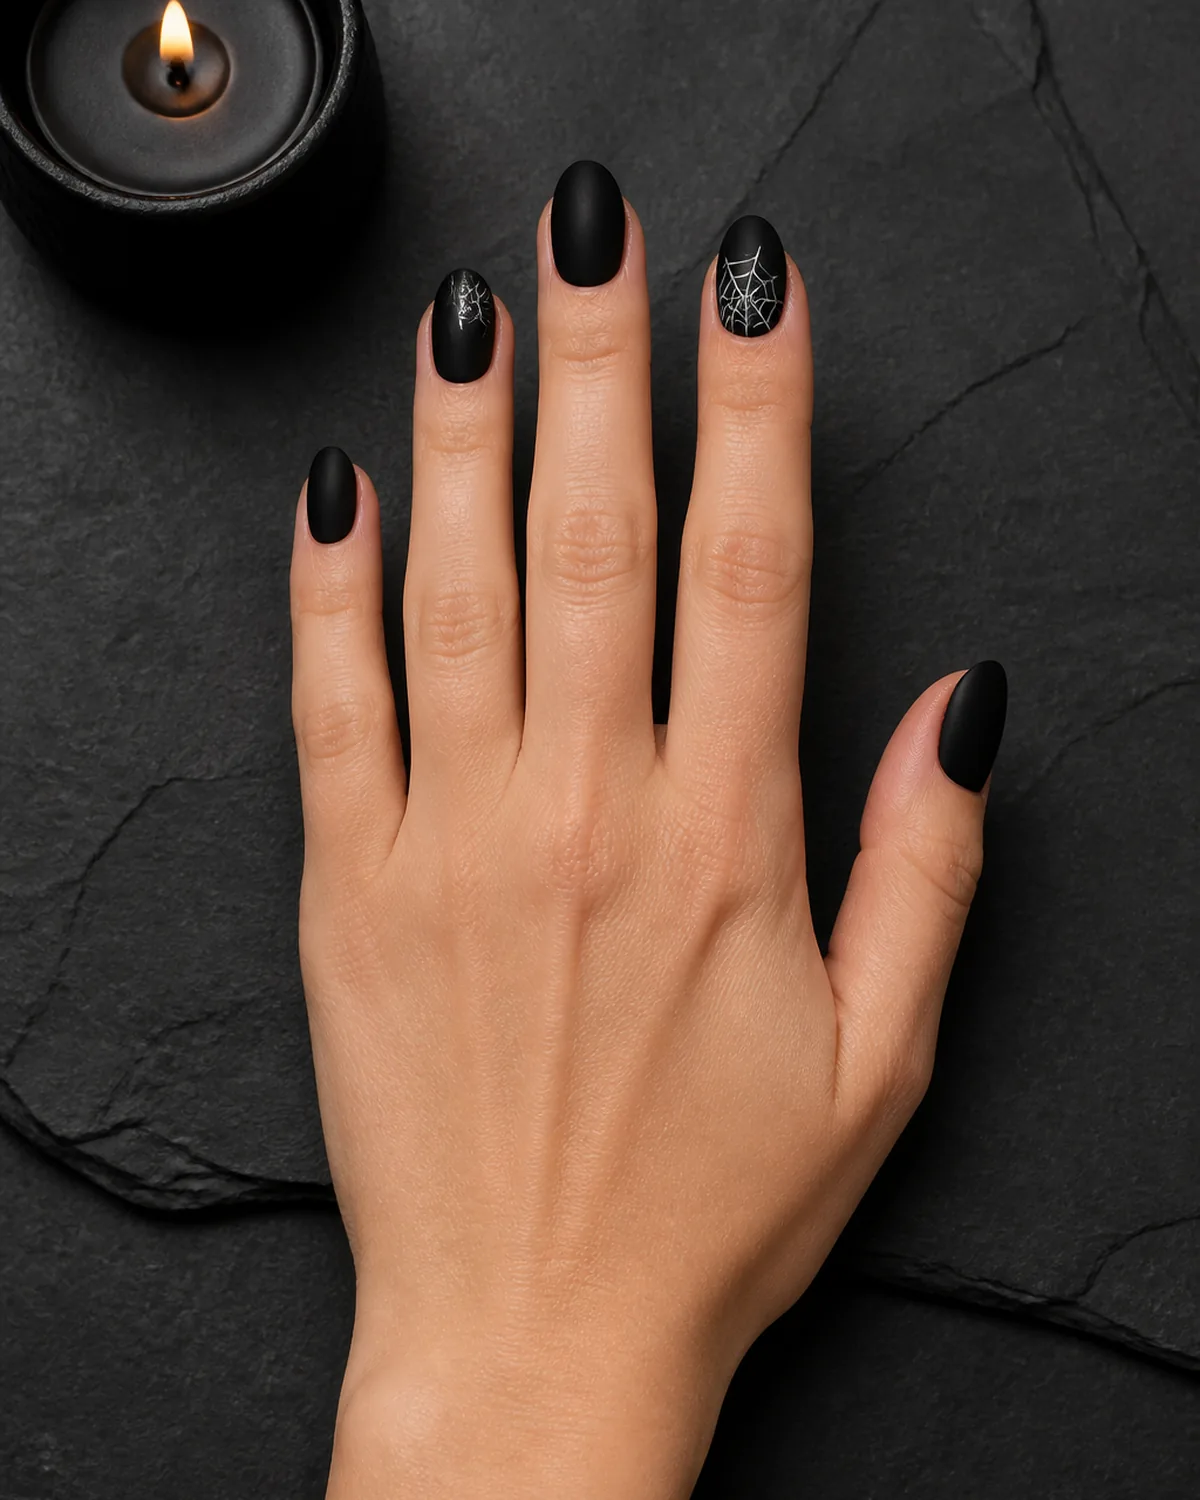
A matte black base with a single white spider web on the ring finger is the most wearable halloween nail design on this list. The web radiates from the cuticle corner in fine lines, subtle enough for the office but unmistakably spooky when someone looks closely.
Almond is the shape that makes accent art land best. The tapered sides give the web design room to spread without hitting a squared-off edge.
- Use a fine-tip nail art brush or a toothpick dipped in white polish to draw the web lines
- Start with two or three straight lines fanning out from the corner, then connect them with curved cross-lines
- Seal with a matte top coat — glossy finish over the web makes it look painted on rather than embedded
2. Ghost French Tips on Short Round
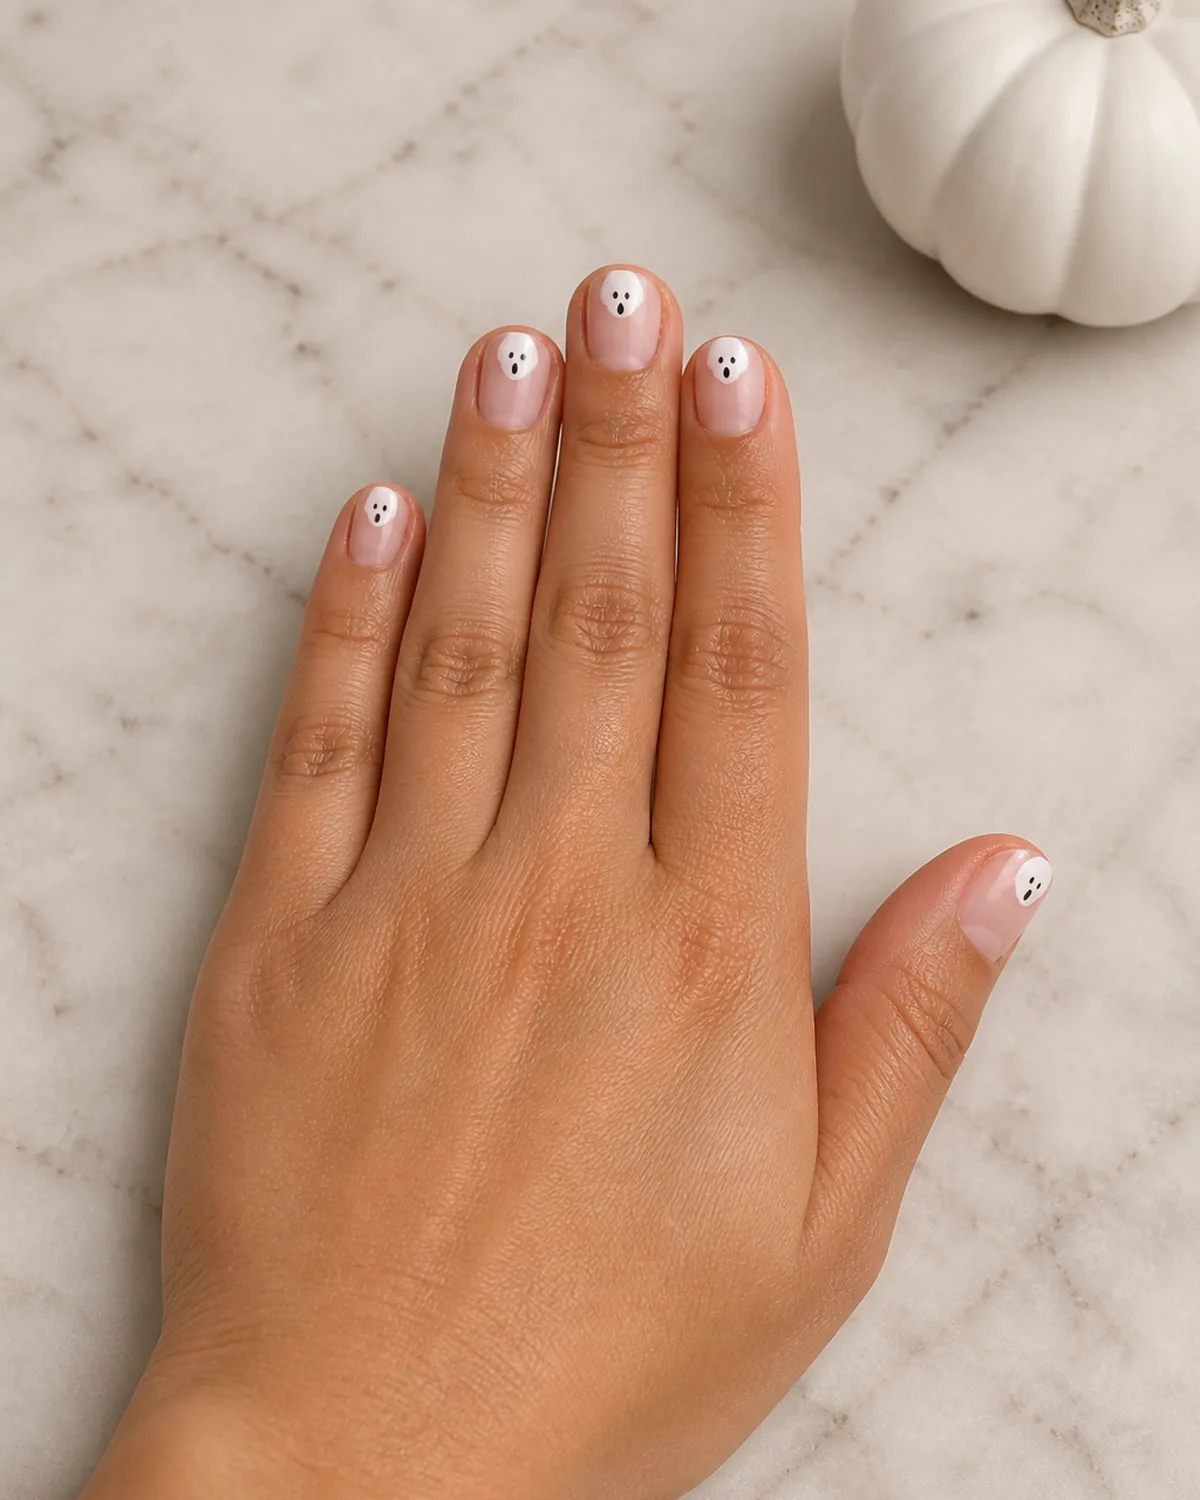
Ghost French tips replace the classic white smile line with tiny ghost faces. Each tip gets a small white blob with two black dot eyes and a round mouth — simple enough to draw freehand.
Short round nails make the ghosts proportionally larger relative to the nail, so the design reads clearly even at a distance. This is one of the most beginner-friendly halloween designs because the ghost shapes are forgiving — slightly uneven blobs look more like ghosts, not less.
- Paint a sheer milky base first, then dot white circles at the tip of each nail
- Add eyes with a dotting tool or the tip of a bobby pin dipped in black polish
- Each ghost can be slightly different — matching them exactly reads more mechanical than charming
Find your halloween vibe
What Is Your Halloween Nail Style?
Not every halloween look has to be full-on scary. Match the mood to where you will actually be wearing them.
3. Pumpkin Orange with Black Cat Silhouette on Coffin
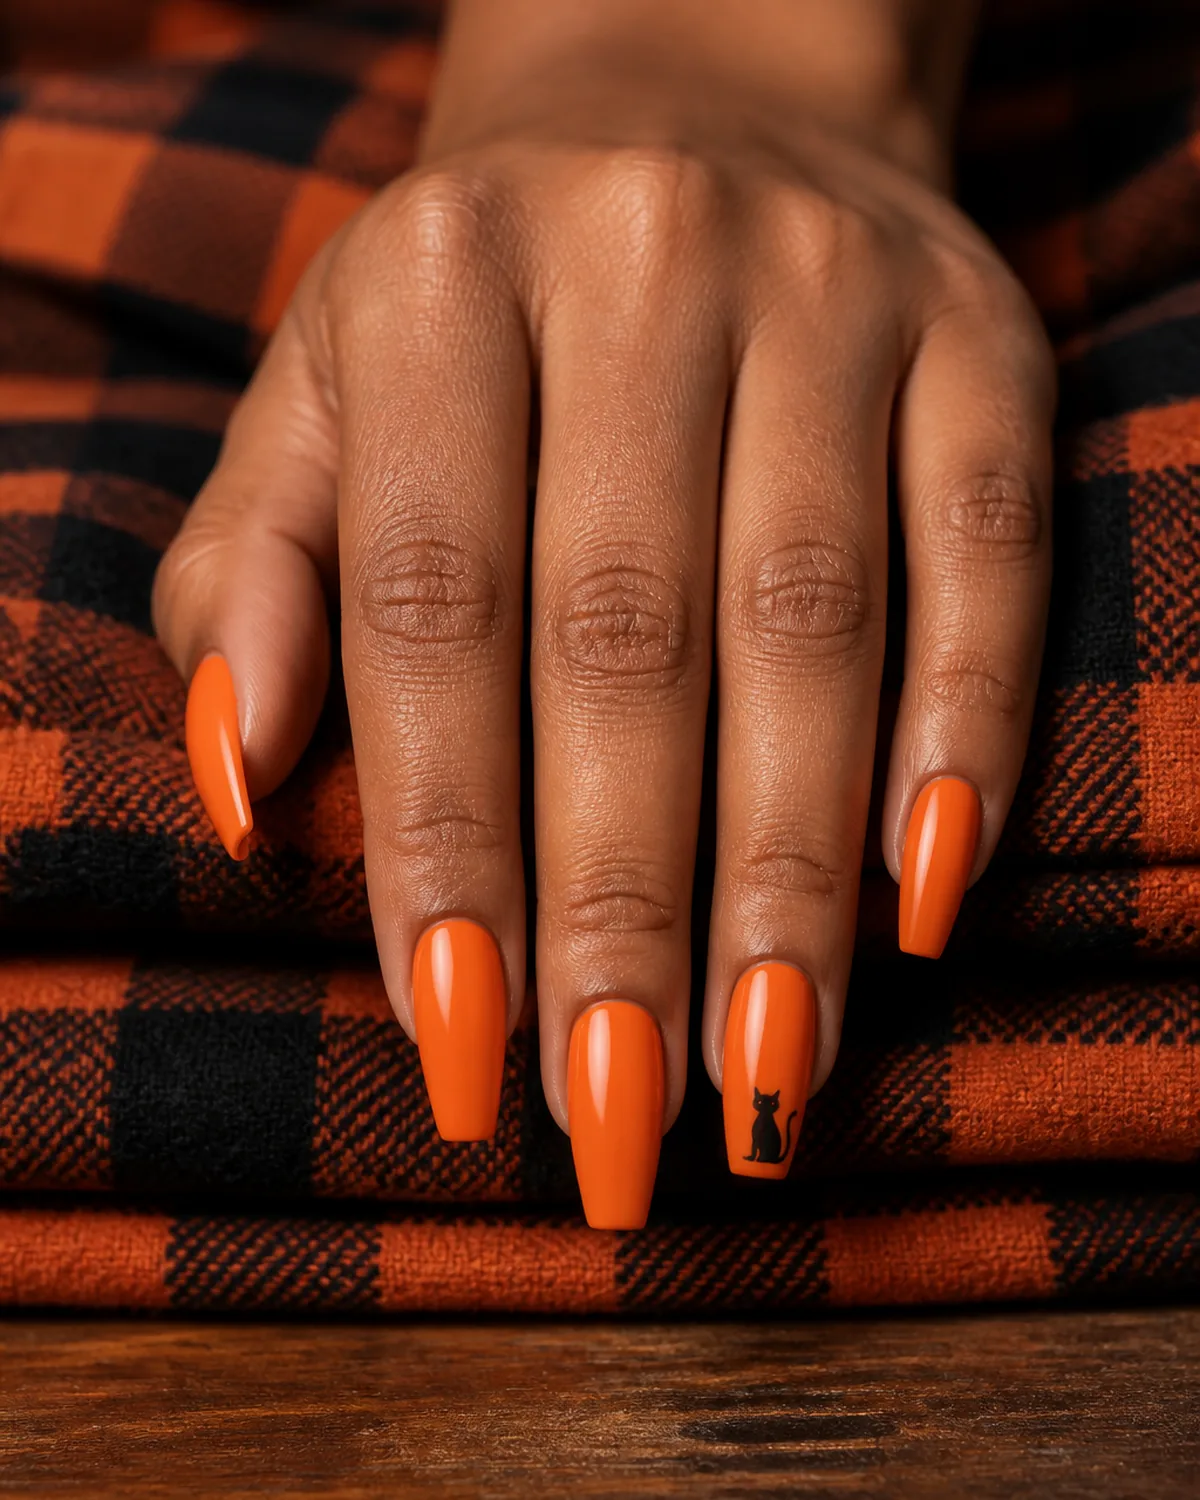
Bright pumpkin orange is the single most halloween-coded color. Covering every nail in a rich orange crème and adding a tiny black cat silhouette on the ring finger creates an instantly recognizable look that still reads as polished.
Coffin nails give the flat tip enough surface area for the cat silhouette to sit clearly. The cat can be as simple as a small arched-back shape — four legs, pointed ears, and a curved tail.
- Two coats of orange crème are usually enough, but check opacity at the cuticle area where orange polishes tend to streak
- Paint the cat silhouette in black after the orange is fully dry to prevent the colors from bleeding
- A thin top coat seals the design without smearing the black details
4. Blood Drip on Nude Stiletto
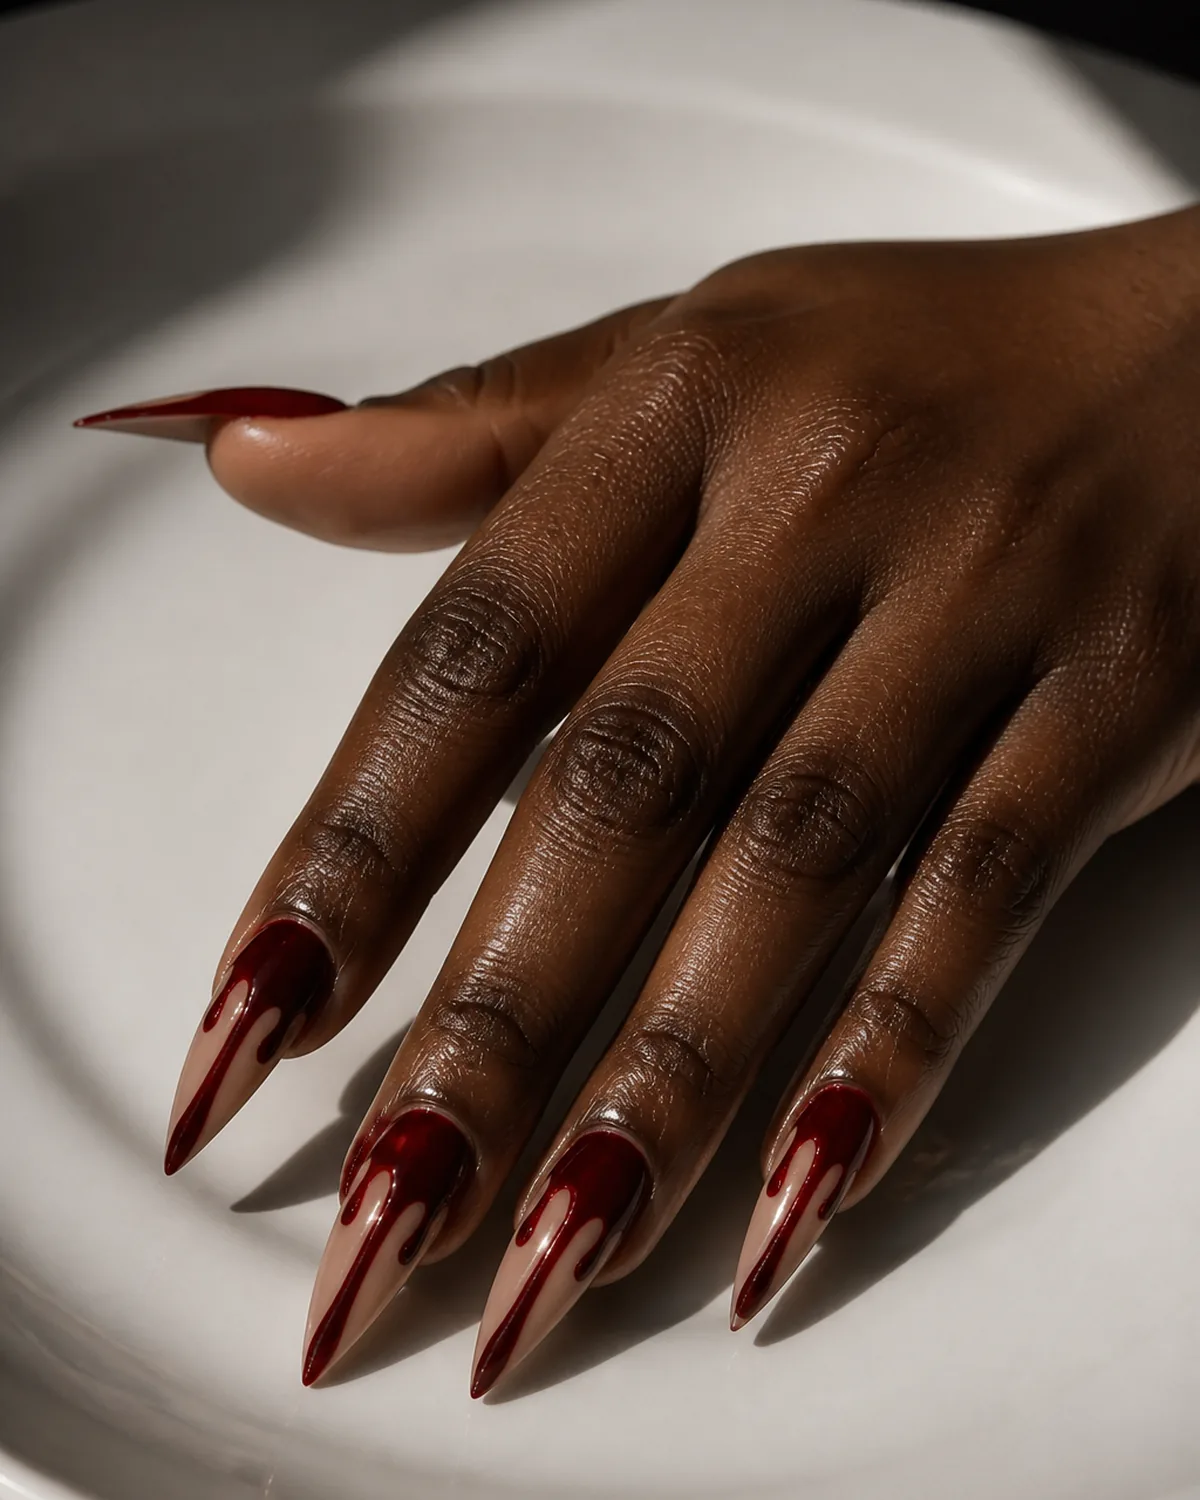
Glossy red polish dripping from the cuticle area over a sheer nude base creates a blood-drip effect that is dramatic without being gory. The translucency of the nude base makes the red drips look like they are pooling on skin rather than sitting on top of paint.
Long stiletto nails amplify the drama. The pointed tips and extended length give the drips room to trail down, and the shape itself already reads as edgy.
- Start the drips at different points along the cuticle line so they look random, not uniform
- Use a thin nail art brush to drag red polish downward in uneven streaks — perfectly even lines look less like drips and more like stripes
- Glossy top coat is essential here; matte finish kills the wet-blood illusion
5. Candy Corn Gradient on Short Squoval
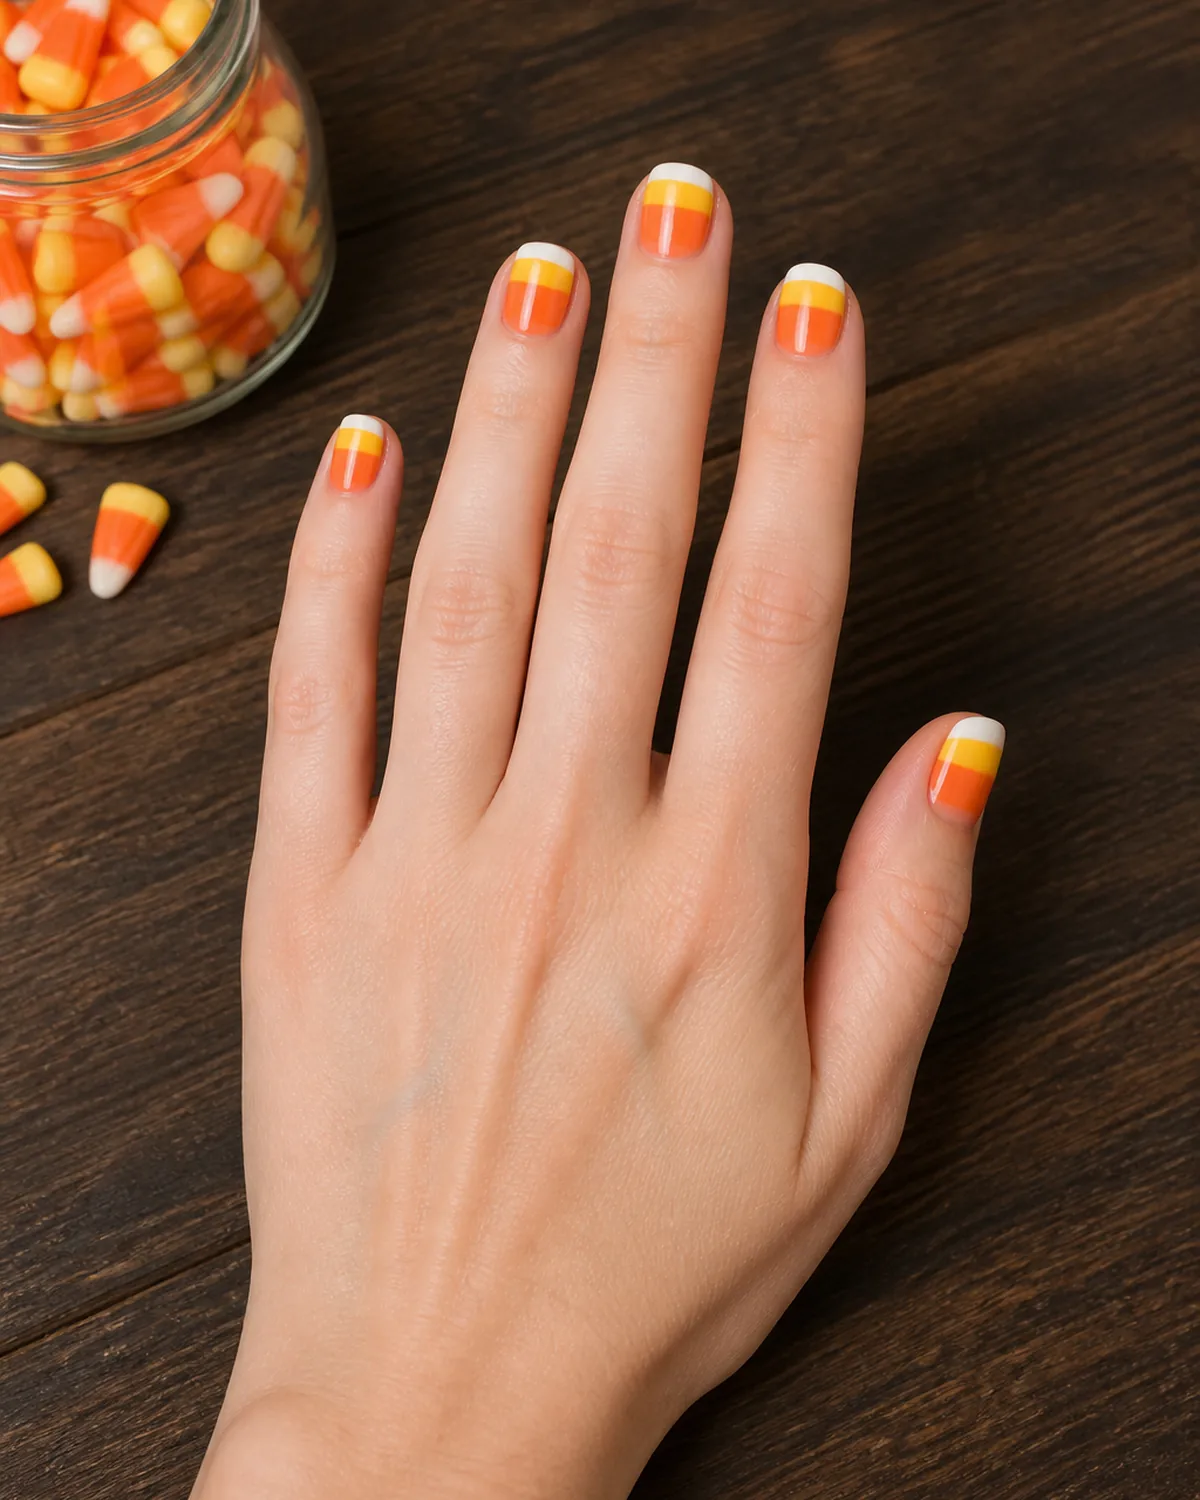
Yellow at the cuticle, orange through the middle, white at the tip — candy corn color blocking is one of the most recognizable halloween motifs translated onto nails. The three-zone gradient is simple to execute and reads as festive from across the room.
Short squoval keeps the gradient compact so each color zone is visible even on shorter nail beds. The straight-across tip gives the white zone a clean edge.
- Use a makeup sponge to dab the three colors in overlapping bands for a blended gradient, or paint crisp horizontal lines for a blocked look
- Apply each color in thin layers to prevent muddiness where the zones overlap
- A glossy top coat unifies the three colors and makes the gradient smoother
How to
How to Make Halloween Nail Art Last
Themed nail art chips faster than solid color because it involves layered details. These steps protect the design.
6. Bat Silhouettes on Dark Purple Oval
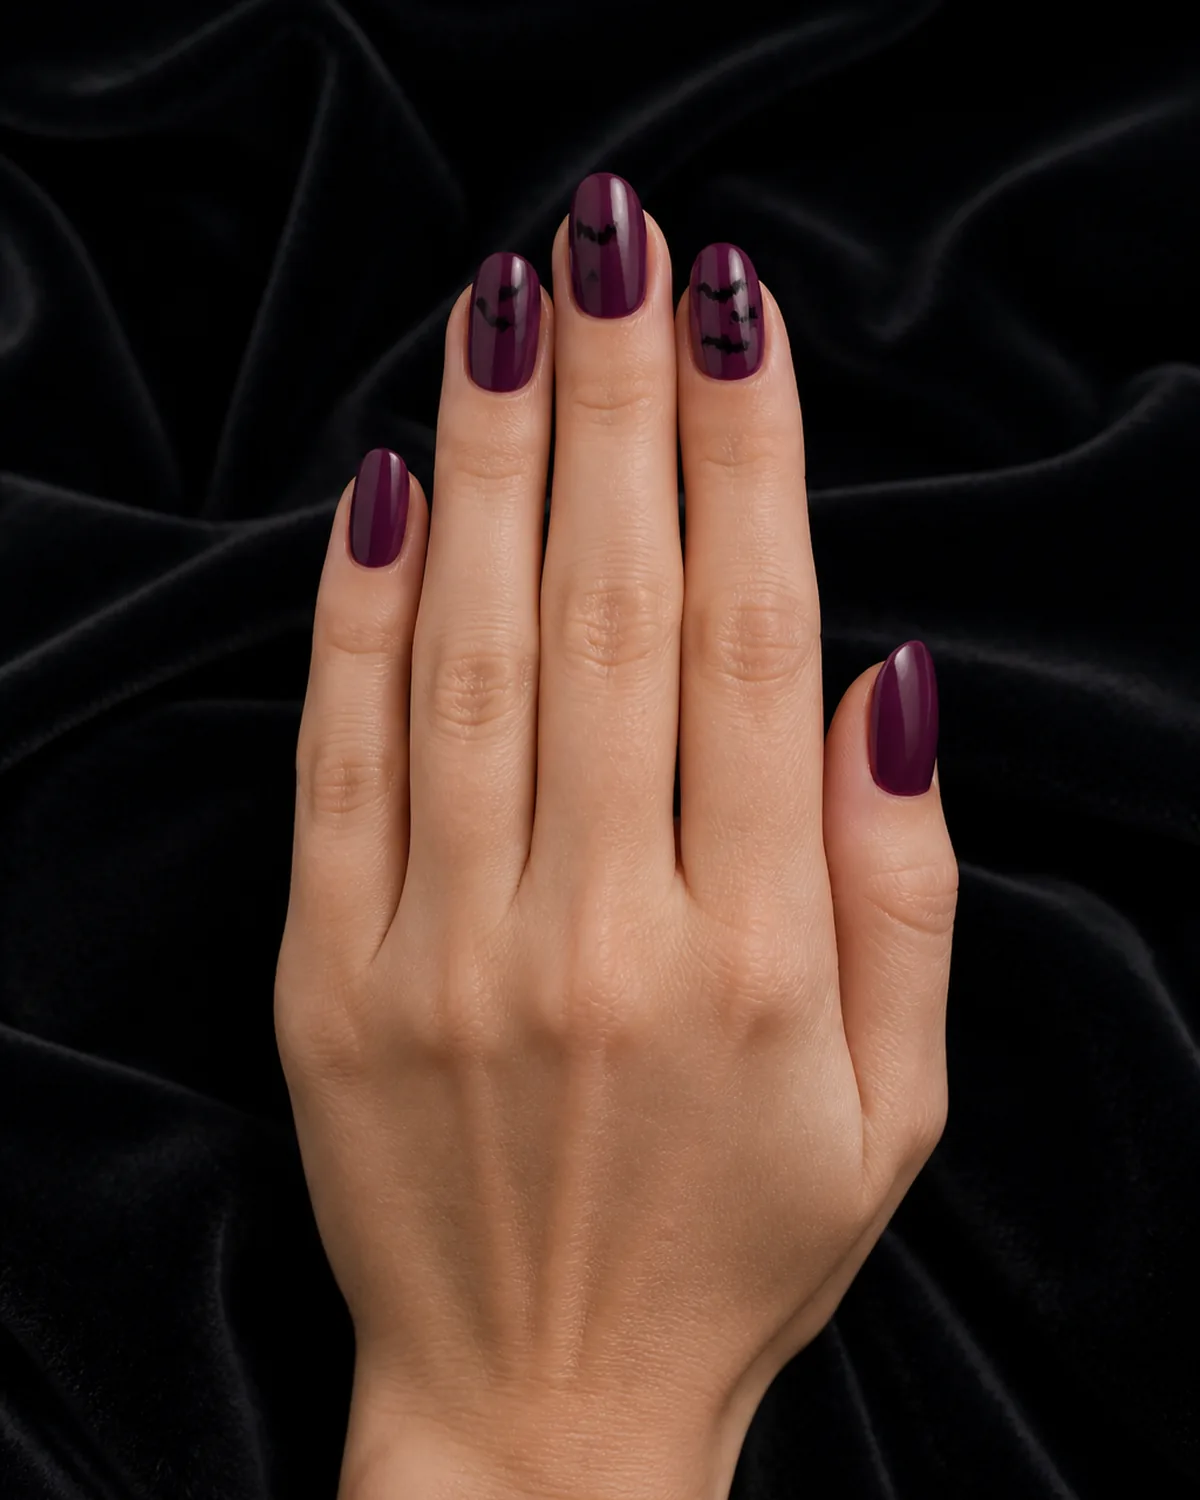
Deep plum purple with black bat silhouettes scattered across two or three accent nails creates a moody look that references halloween without leaning cartoonish. The dark purple base absorbs most of the light, making the black bats a subtle tonal detail rather than a high-contrast graphic.
Oval nails soften the overall effect. The rounded shape complements the organic, wing-like curves of the bat silhouettes better than angular shapes would.
- Paint the bats small — they should be recognizable as bats, not fill the entire nail
- Position them at different heights and angles on the accent nails so they look like a flock in flight
- A purple base close to the black shade keeps the look sophisticated; a lighter purple makes the bats pop more but reads more costume-like
7. Skeleton Hand Line Art on White Almond
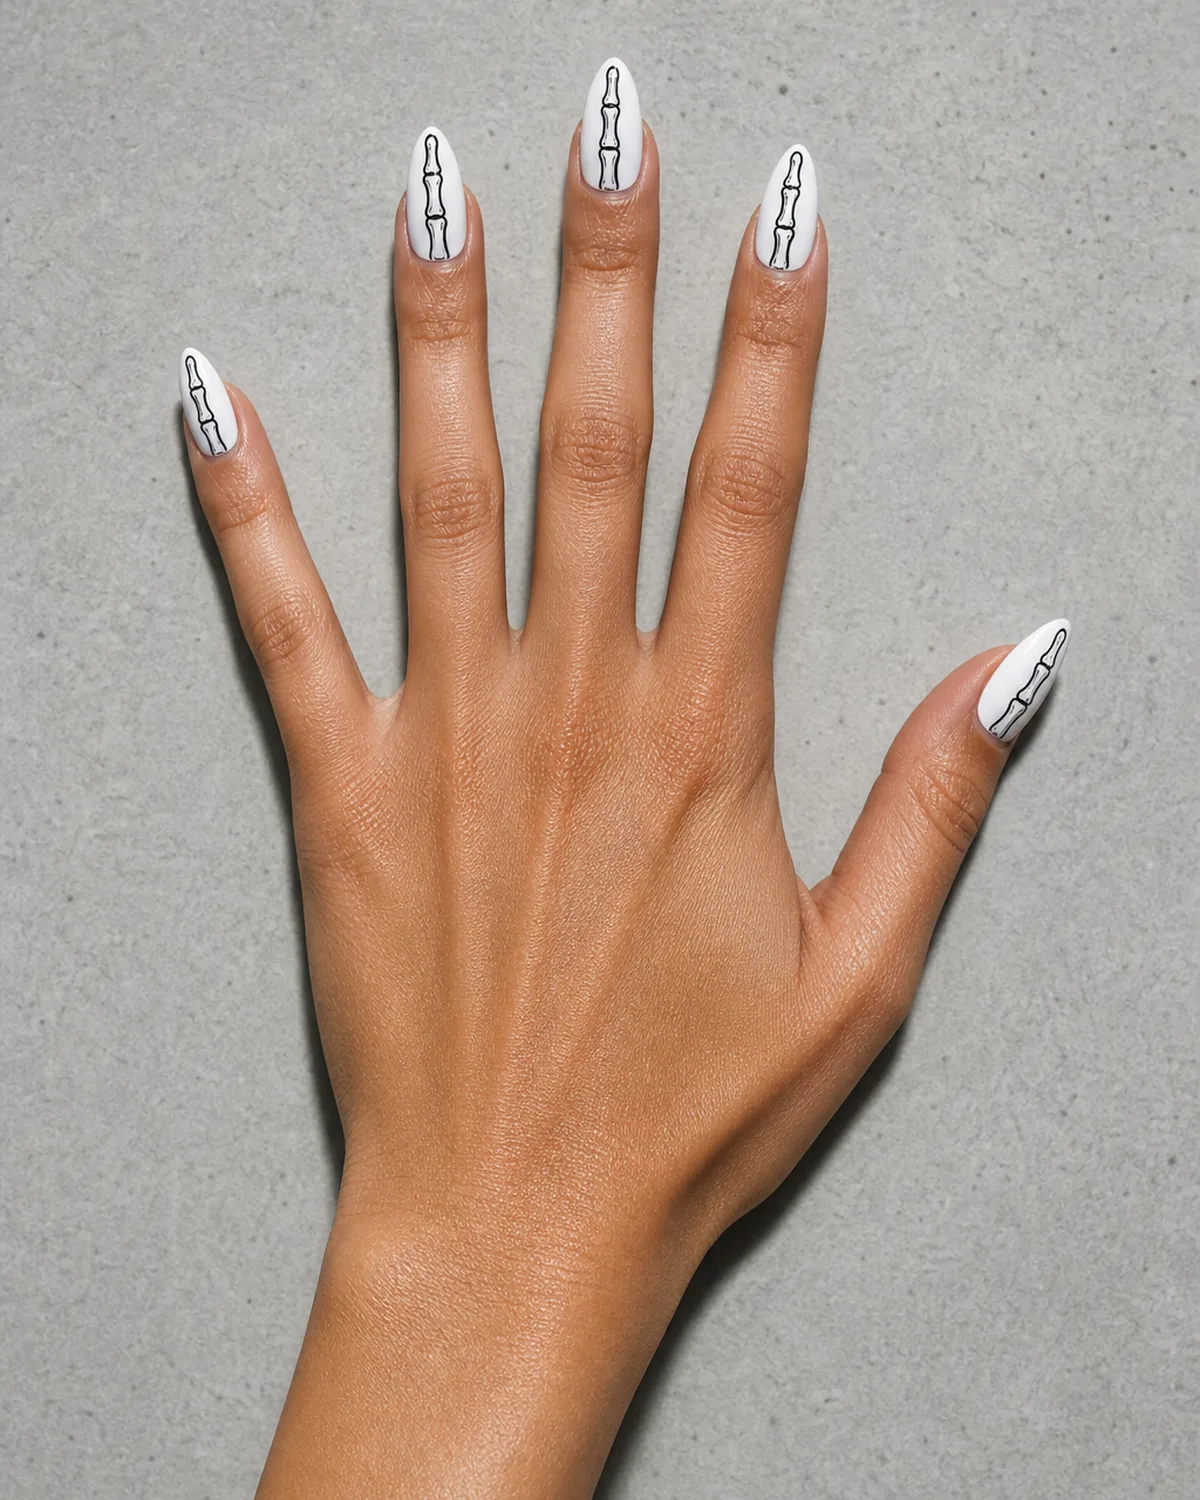
Fine black line art of skeleton bones drawn across each white nail creates an anatomical illustration effect. The bones map loosely onto the actual finger underneath, which gives the design an eerie, X-ray quality.
White almond nails provide the cleanest canvas for black line work. The bright white base makes every line visible, and the almond shape flows naturally with the bone structure being illustrated.
- Use a nail art liner brush for the finest lines — regular brushes are too thick for the joint details
- Reference a simple hand skeleton diagram rather than drawing from memory; the finger bones are three segments per finger, two for the thumb
- Two coats of white base plus a thin top coat before the black line art gives the smoothest drawing surface
8. Witchy Black Chrome on Long Coffin
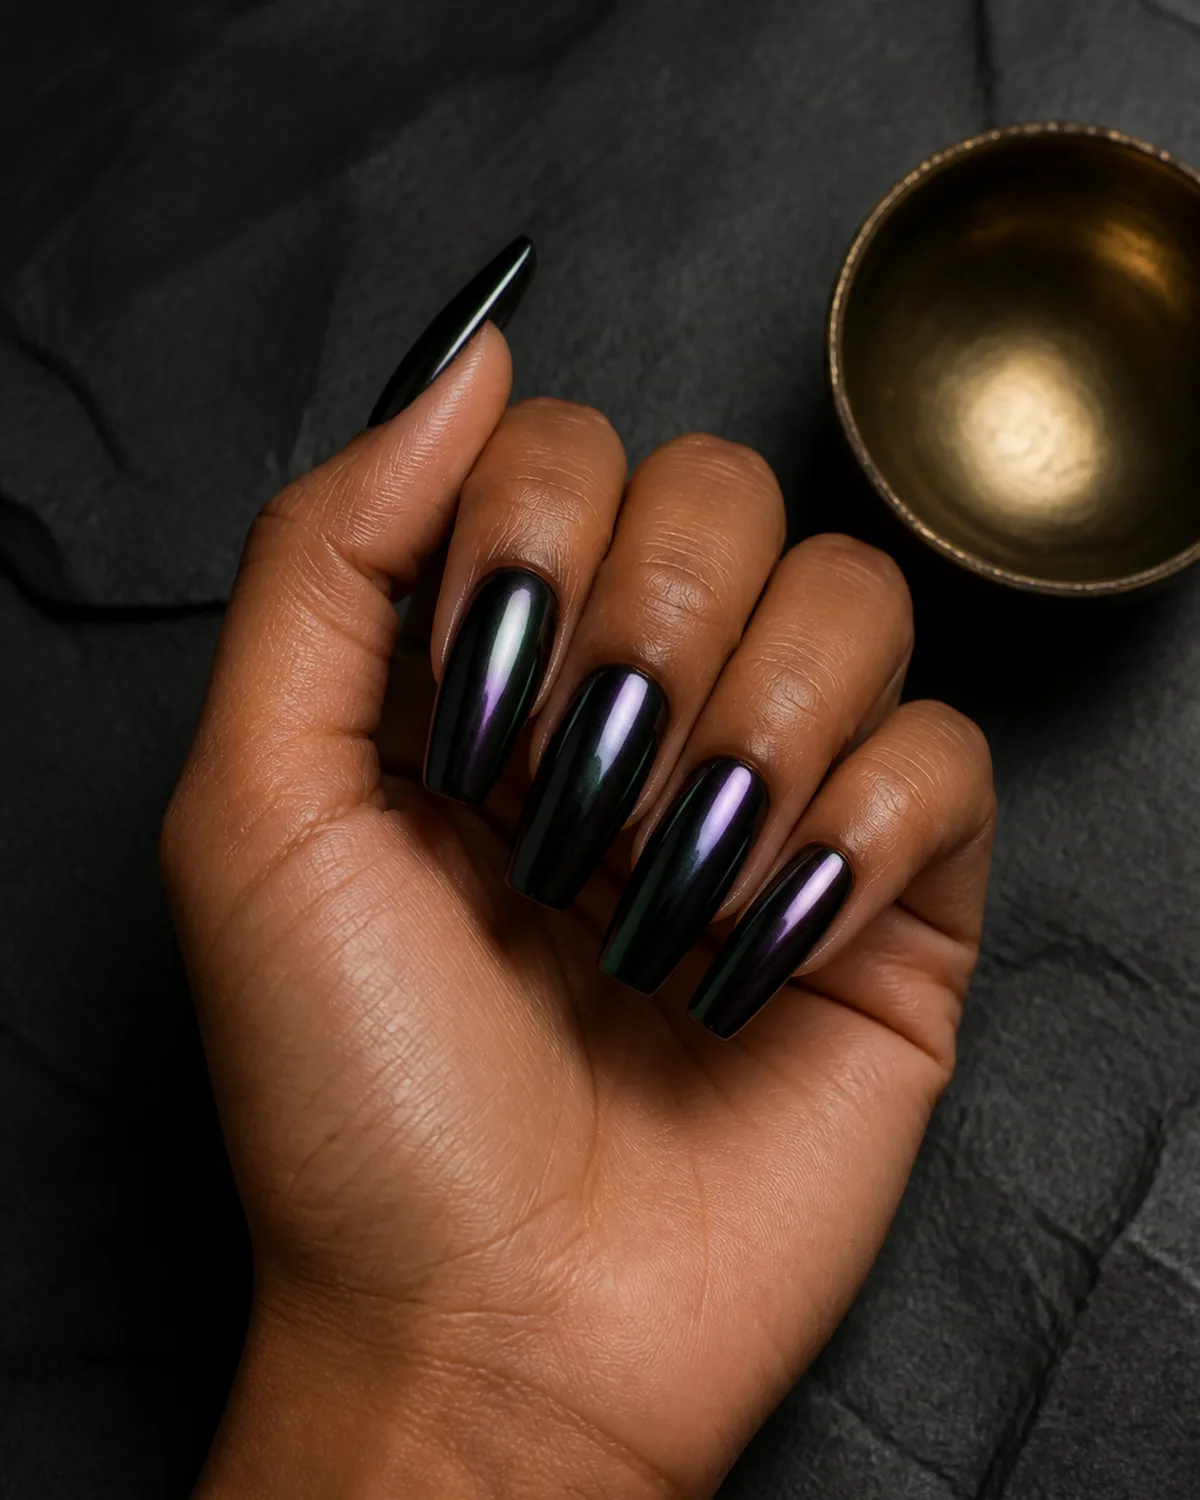
Jet black with a chrome top coat that shifts to dark green and purple under different lighting creates a cauldron-like iridescence. This is halloween as mood rather than motif — no painted designs, just a color shift that feels witchy.
Long coffin is the shape that gives chrome finishes the most surface area to show the color shift. The flat tip and angled sides catch light at multiple angles simultaneously, which means the shift is visible even in static photos.
- Chrome powder rubbed over cured black gel gives the strongest multichrome shift; metallic polish approximates it with less drama
- The darker the base, the more subtle and moody the shift reads — skip chrome over lighter bases for this particular look
- This design works for weeks beyond halloween because it does not read as overtly seasonal
16 Halloween Nail Ideas to Try
- 1Spider web accentMatte black base with a single white web on the ring finger, subtle and wearable.
- 2Ghost French tipsMilky white base with tiny ghost faces on each tip, beginner-friendly.
- 3Pumpkin orange & black catBright orange crème with a black cat silhouette on one accent nail.
- 4Blood dripGlossy red dripping over sheer nude stiletto, dramatic and theatrical.
- 5Candy corn gradientYellow-to-orange-to-white color blocking on short squoval.
- 6Bat silhouettesDeep plum purple with small black bats in flight on accent nails.
- 7Skeleton hand line artFine black bone illustrations across white almond nails, X-ray effect.
- 8Witchy black chromeBlack chrome shifting to green and purple, cauldron-like iridescence.
- 9Jack-o-lantern facesBright orange with carved pumpkin face art in black, playful and cartoonish.
- 10Mummy wrapNude base with white crisscross bandage lines and peekaboo green eyes.
- 11Eyeball accentGlossy black with one hand-painted eyeball per hand, creepy and detailed.
- 12Cobweb glitterBlack base with silver glitter cobweb pattern, sparkle like dew on a web.
- 13Neon poison dripJet black base with neon green drips from cuticle, toxic and theatrical.
- 14Haunted house silhouetteMidnight blue base with a spooky mansion scene across accent nails.
- 15Black & orange half-moonBlack crème with orange half-moon at cuticle, classic two-tone halloween.
- 16Glow-in-the-dark accentMatte black with neon green accent nails that glow under UV or in the dark.
styvea.com
9. Jack-o-Lantern Faces on Orange Short Round
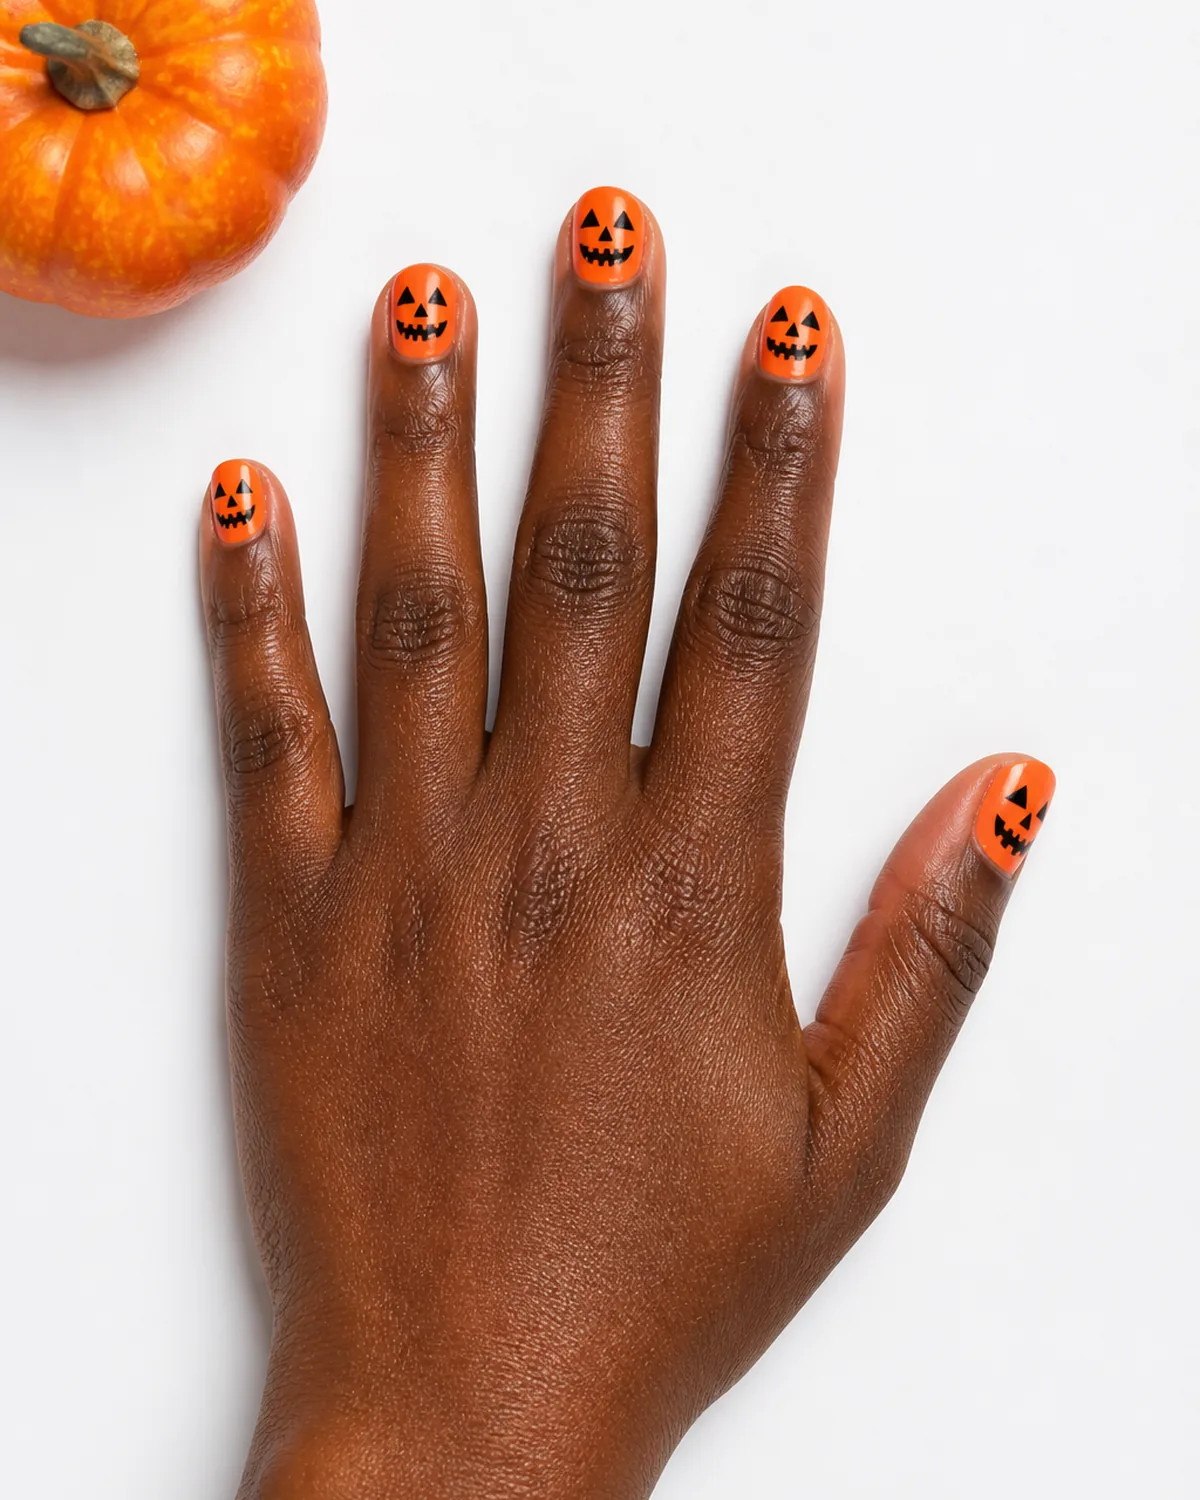
Bright orange with carved pumpkin faces in black is the most overtly festive design on this list. Triangle eyes and a jagged zigzag mouth on each nail read as playful and cartoonish — this is halloween at its most fun.
Short round nails make each jack-o-lantern face fill most of the nail, which gives the faces presence. The rounded shape also mimics the shape of an actual pumpkin, which helps the design land.
- Keep the face elements simple: two triangle eyes, a small triangle nose, and a zigzag mouth is the classic combination
- Each nail can have a slightly different expression — one smiling, one scowling, one surprised — for variety across the hand
- A dotting tool or the end of a thin brush makes cleaner triangles than freehand painting
10. Mummy Wrap on Nude Coffin
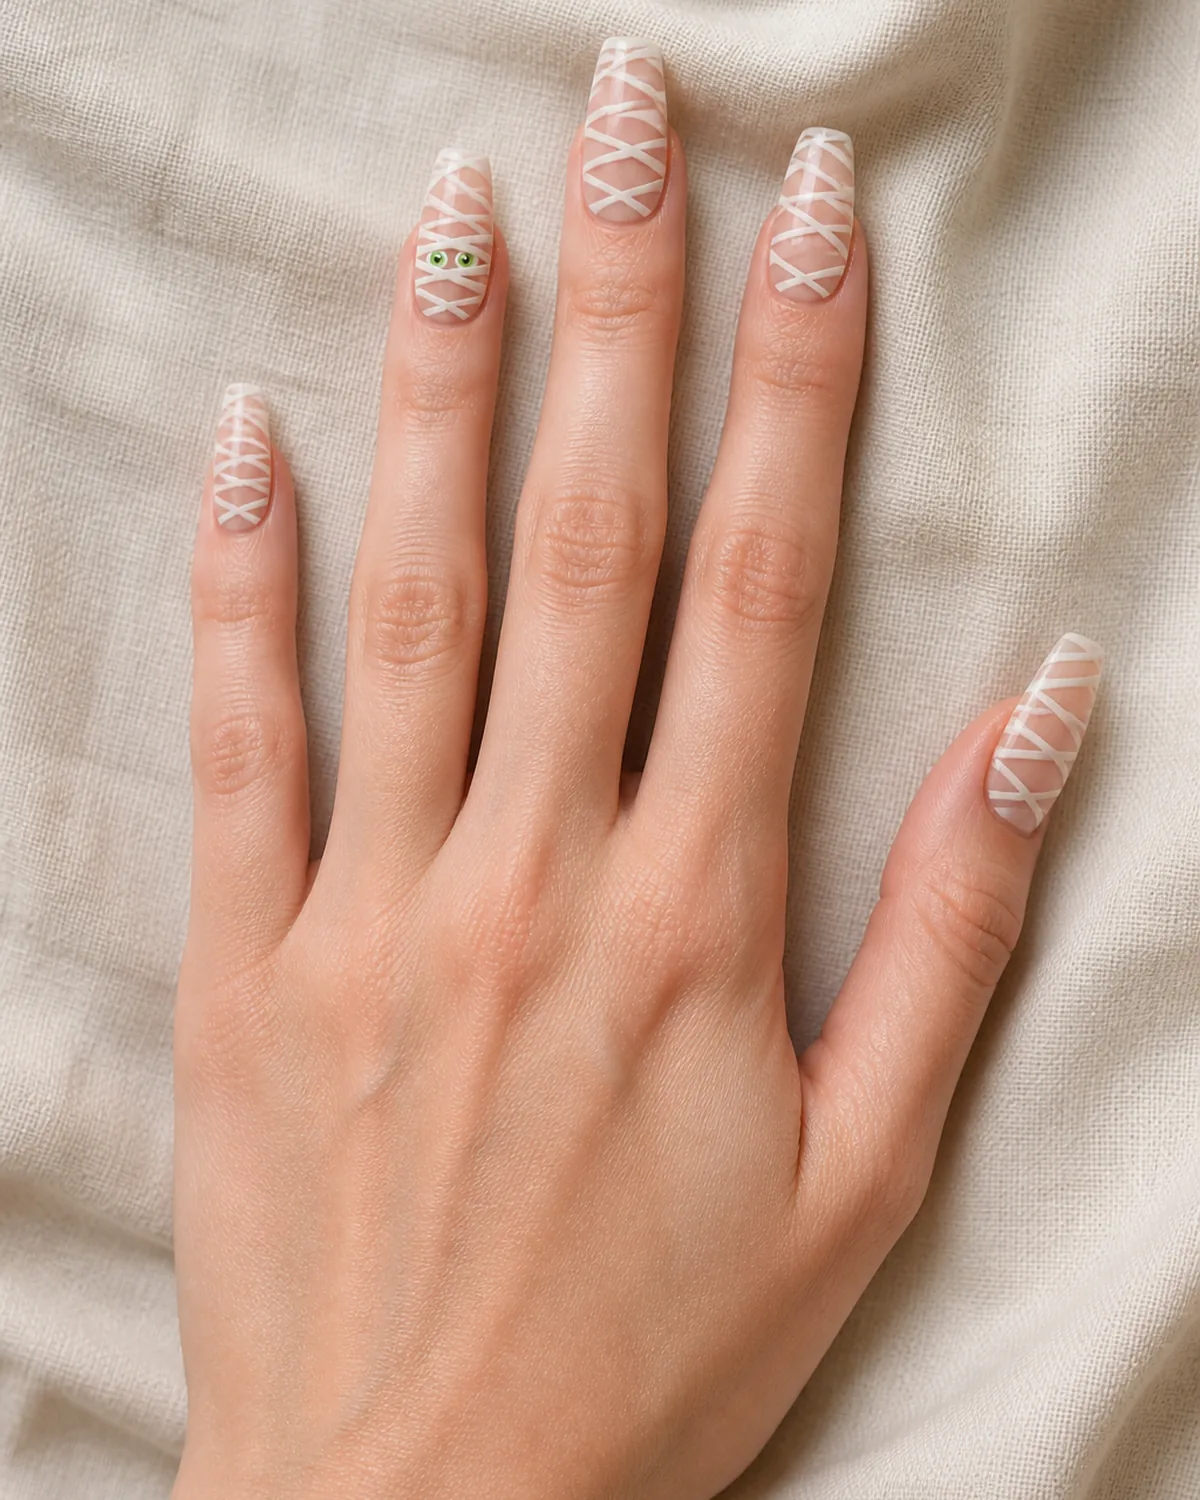
Thin white lines crisscrossing over a nude base mimic mummy bandage wrapping. One nail — usually the ring finger — gets a pair of small green dot eyes peeking through a gap in the wrapping, turning the abstract lines into a character.
Coffin nails give the wrapping pattern a vertical canvas that makes the crisscross lines look like they are spiraling around the nail. The longer length means more wrapping, which makes the mummy concept more readable.
- Paint the white lines in random overlapping diagonals rather than neat parallel bands — messy reads more like actual bandaging
- The green eyes are just two small dots close together, with an optional tiny black pupil dot in the center of each
- Space the lines with gaps of visible nude between them so the wrapping does not become a solid white mass
11. Eyeball Accent on Black Square
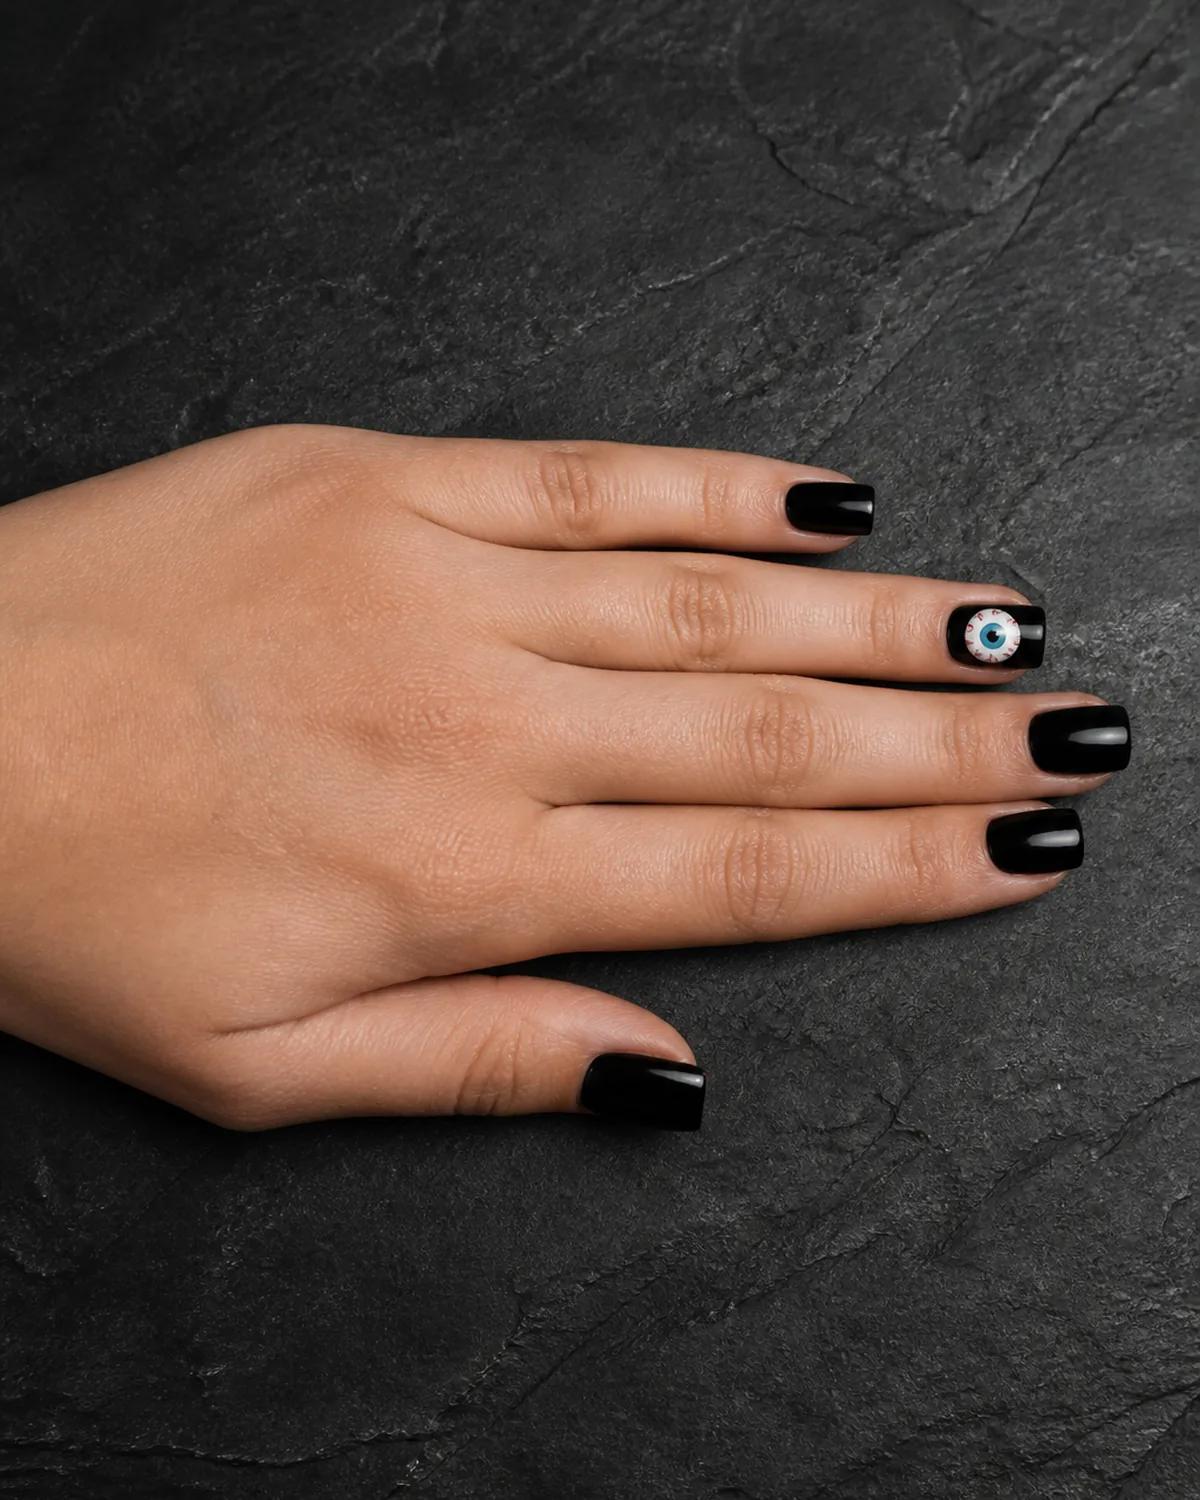
Glossy black on every nail except one accent per hand, where a hand-painted eyeball stares outward — a white circle for the sclera, a colored iris, a black pupil, and optional red veins. This design works because the glossy black creates enough negative space that the eyeball reads immediately.
Square nails give the eyeball a rectangular frame that mimics a television screen, which enhances the staring effect. The flat tip and sharp corners contain the circular design neatly.
- Paint the white circle first and let it dry completely, then layer the iris color and pupil on top
- A tiny dot of white inside the black pupil creates a reflection highlight that makes the eye look three-dimensional
- The iris can be any color — green, blue, brown, or even yellow for an extra eerie look
12. Cobweb Glitter on Black Almond
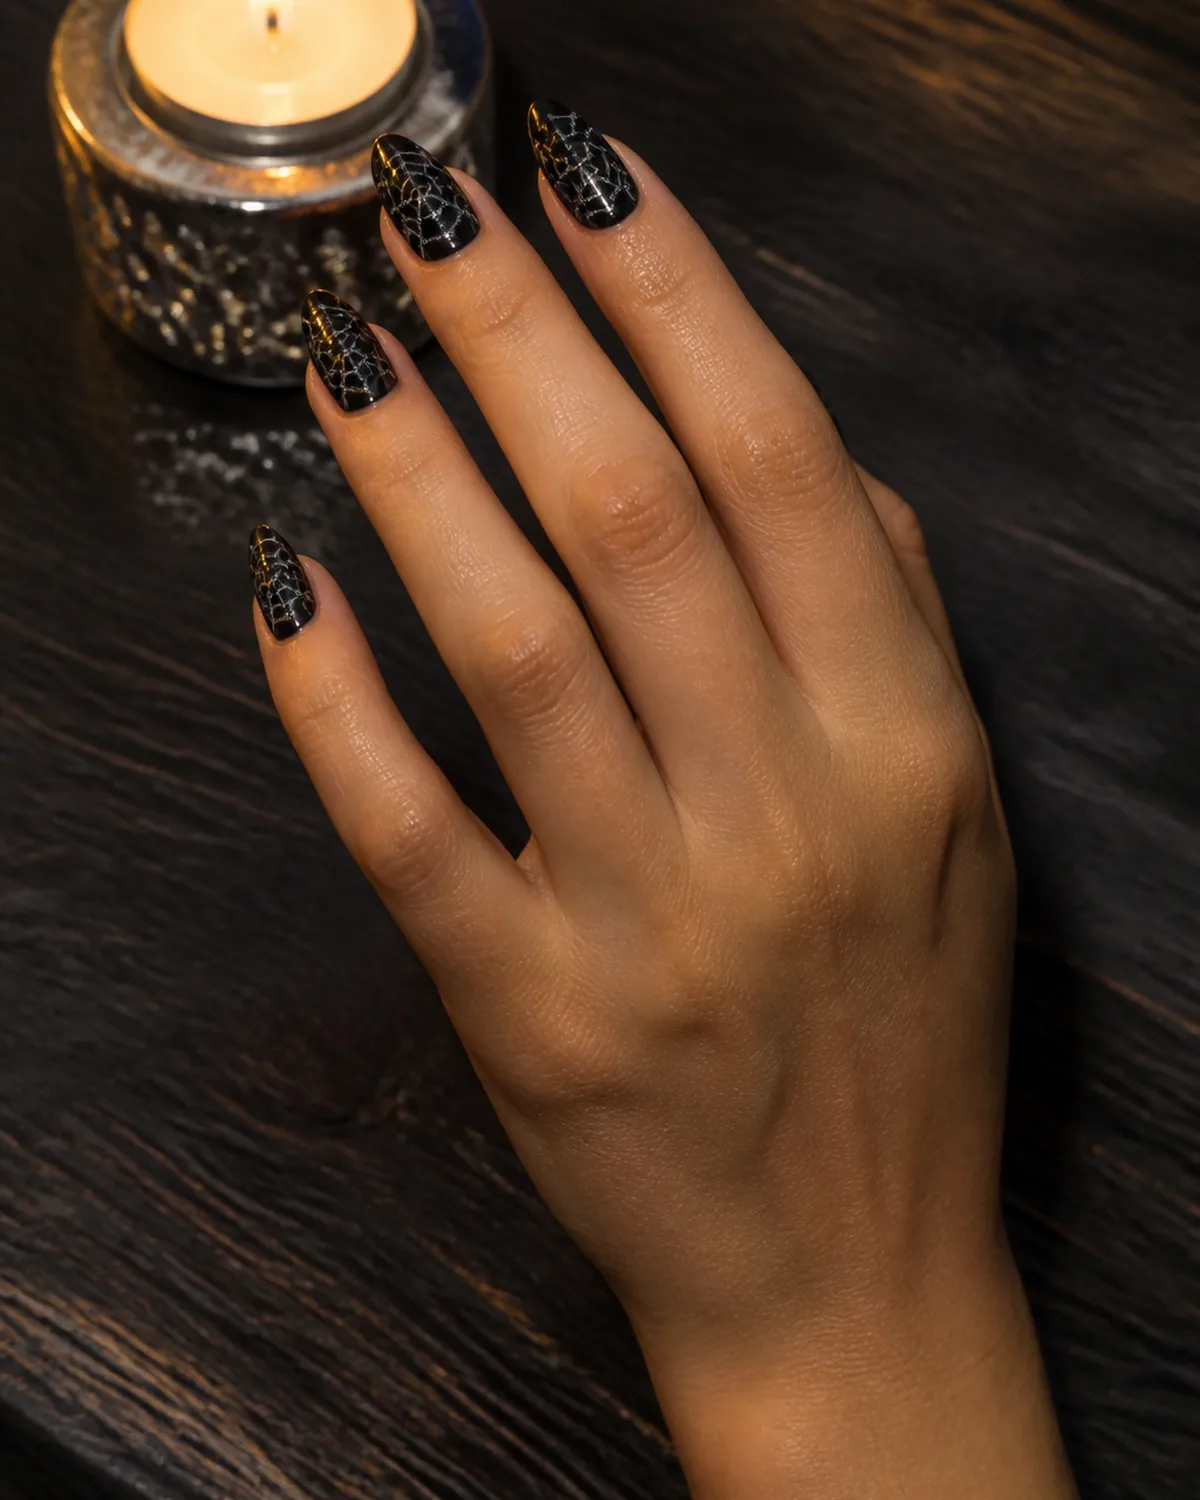
Fine silver glitter in a cobweb pattern over glossy black creates a design that catches light like dew on an actual web. This is one of the more elevated halloween looks — the silver-on-black palette reads festive without being cartoonish.
Almond nails give the cobweb pattern a flowing canvas. The tapered sides let the web lines extend naturally toward the edges, and the rounded tip prevents the design from hitting a hard visual stop.
- Stamping plates with cobweb designs give the cleanest lines — look for plates labeled "halloween" or "spider" in nail art stamping kits
- If freehanding, draw the web structure first (radiating lines), let them dry, then connect them with curved cross-lines
- Silver holographic glitter polish over the web lines adds dimensionality without obscuring the pattern
13. Neon Green Poison Drip on Black Stiletto
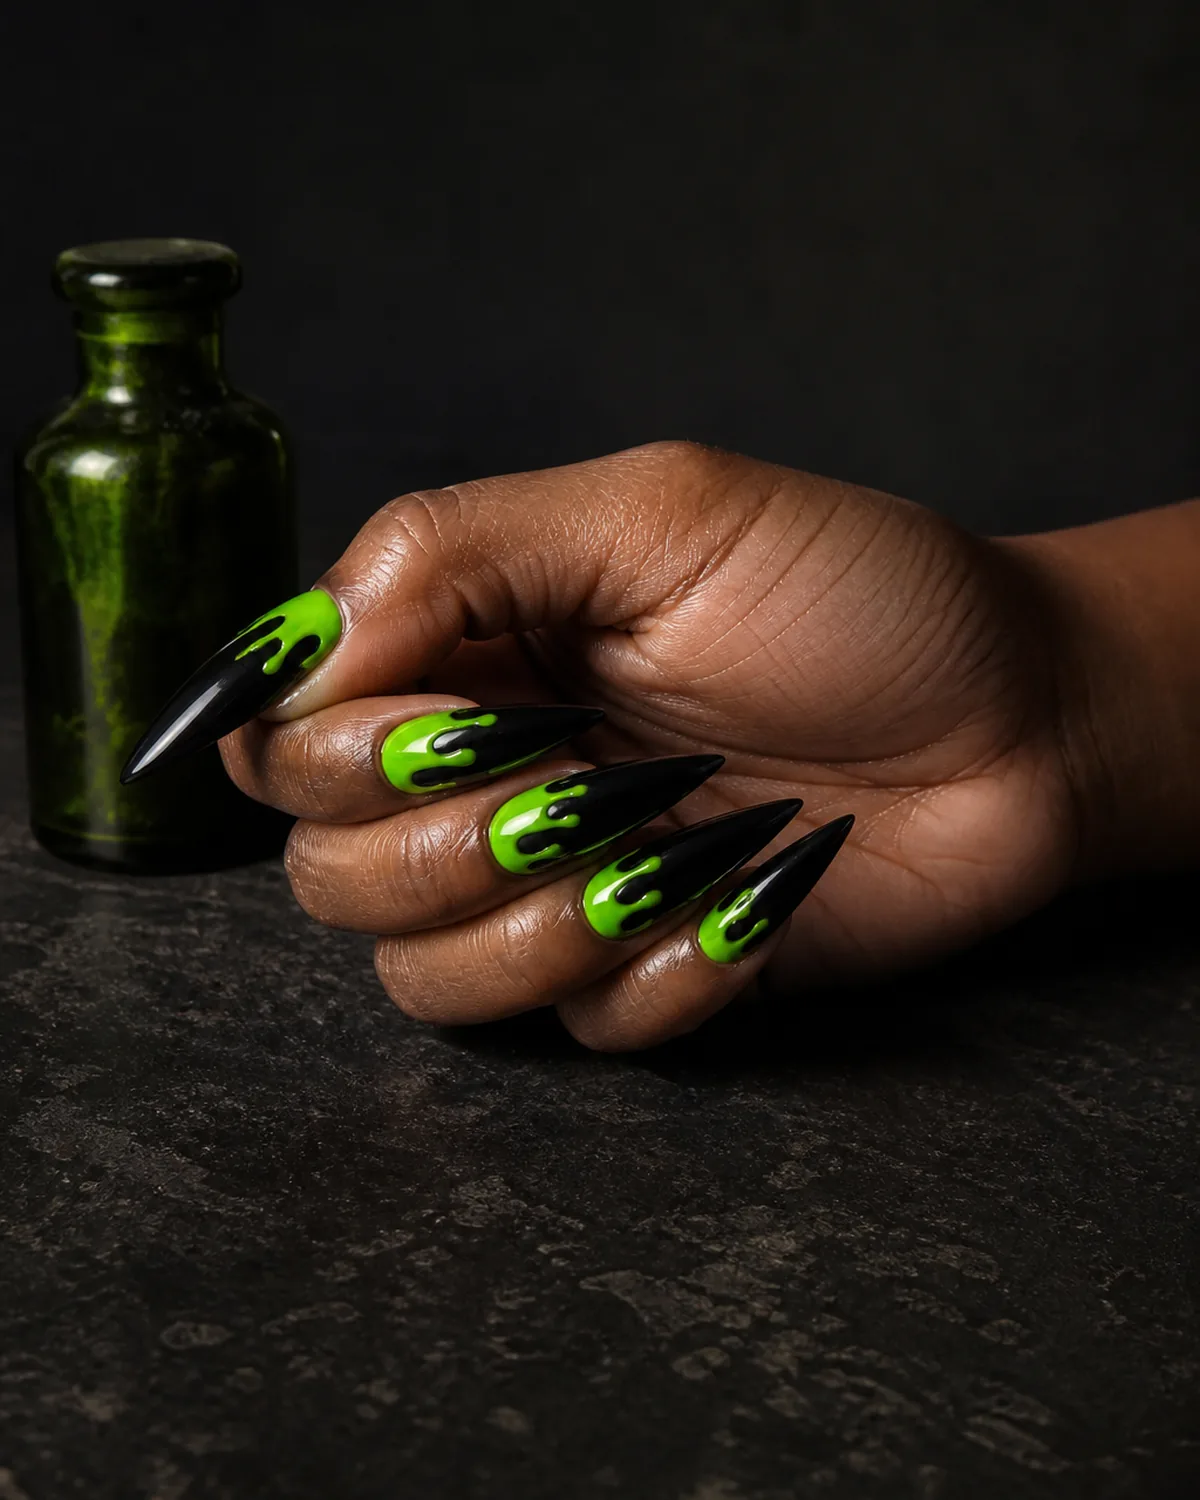
The neon-green-on-black combination takes the blood-drip concept and pushes it into toxic, radioactive territory. The slime-green drips from the cuticle area over jet black create a halloween look that feels more sci-fi horror than gothic.
Long stiletto nails make the drip trails longer, which increases the theatrical effect. The pointed tips also suggest danger, which matches the poison theme.
- Use an actual neon green polish rather than mixing or diluting — neon pigments are formulated differently and glow harder under certain lighting
- The drips should vary in length and width across the nails; uniform drips look too controlled for a slime effect
- This design looks especially strong under black light or UV, which you are likely to encounter at halloween parties
14. Haunted House Silhouette on Dark Blue Oval
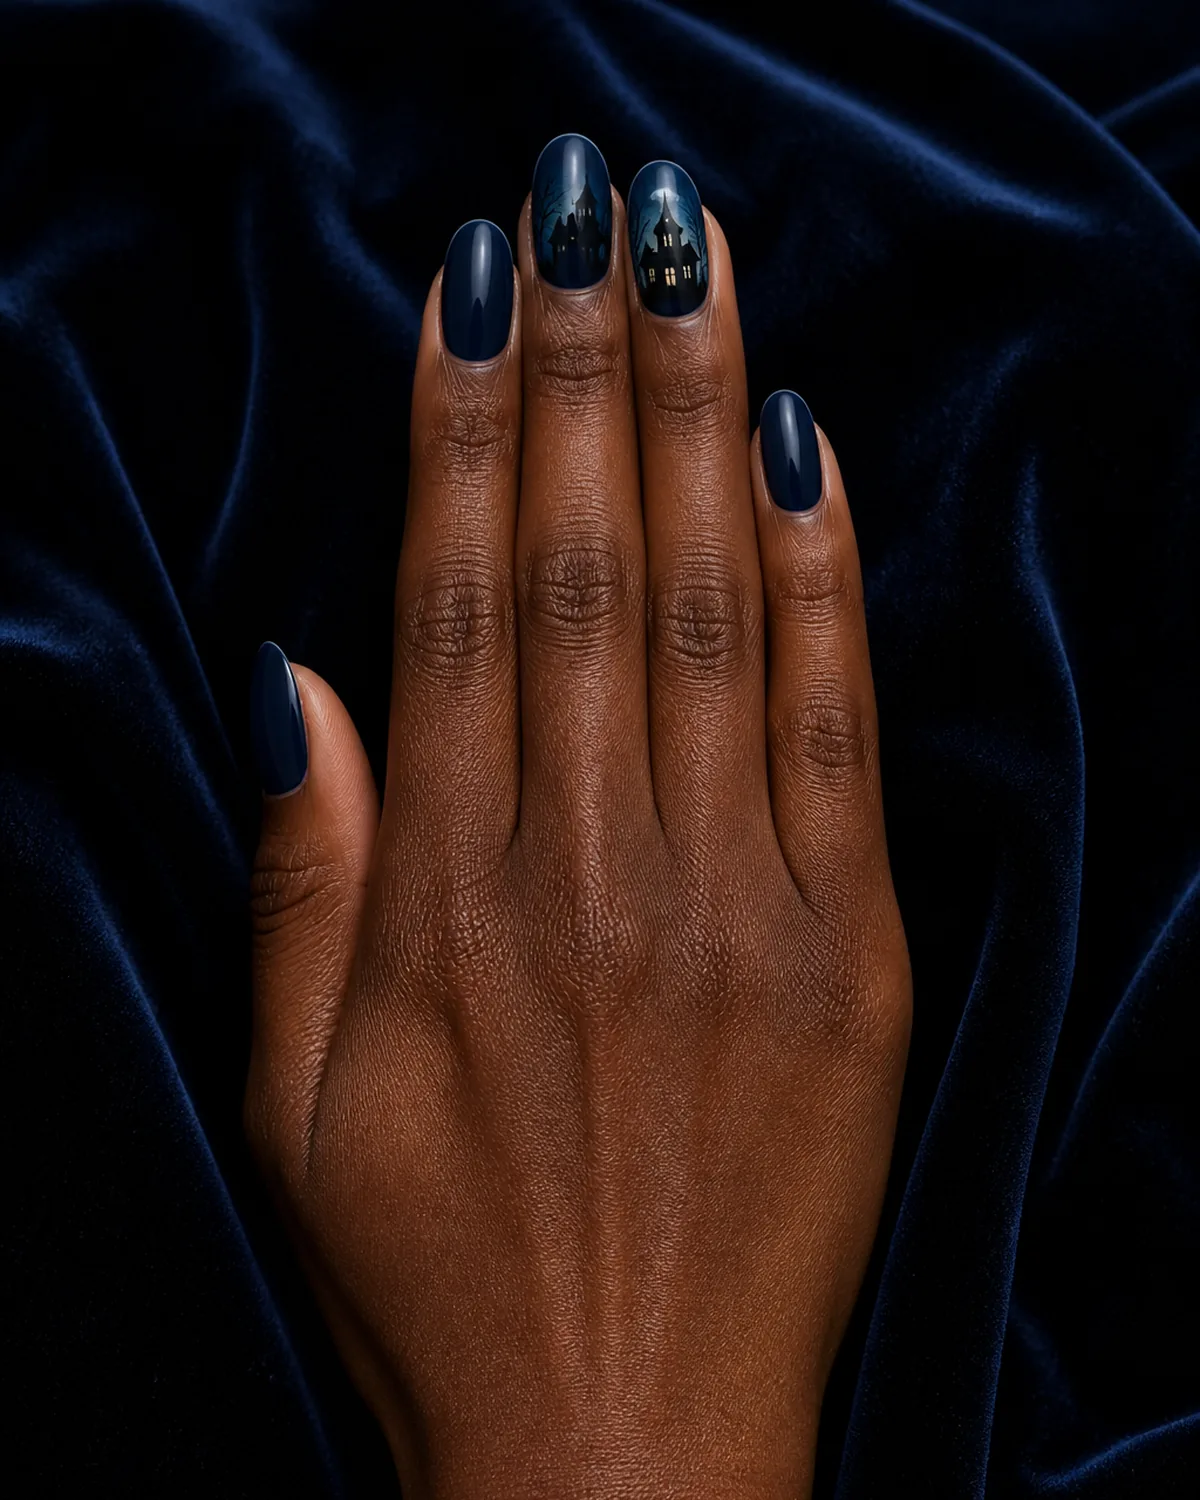
A black silhouette of a spooky mansion and a bare twisted tree painted across two adjacent nails creates a continuous scene — a miniature landscape on your hand. The deep midnight blue base reads as a night sky behind the silhouette.
Oval nails soften the scene so it reads more like an illustration than a graphic stamp. The scene spans from the ring finger (tree) to the middle finger (house), creating a diorama effect when the fingers are held together.
- Plan the scene so it connects across two nails when the fingers are side by side
- Keep the silhouettes simple — a pointed rooftop, a crooked chimney, angular windows, and a tree with bare branches are enough to sell the haunted house concept
- A tiny yellow dot in one window suggests a light inside, which adds a storytelling detail
15. Black and Orange Half-Moon on Medium Almond
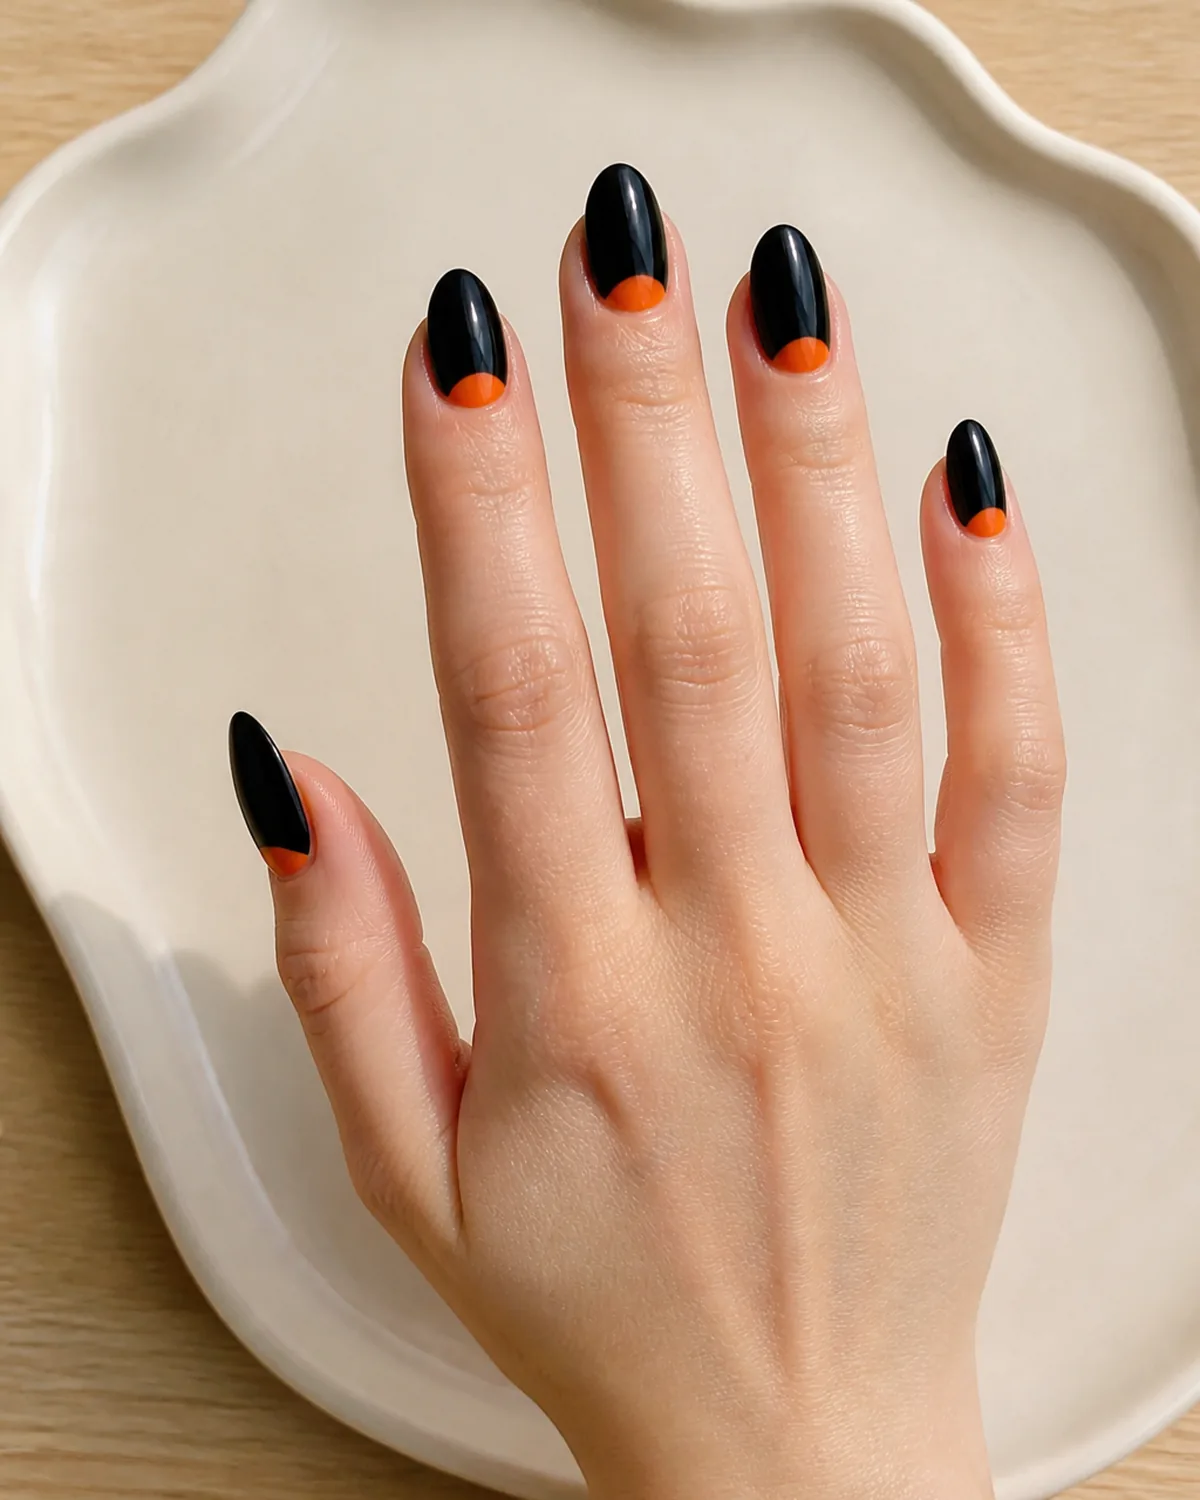
Black crème polish with a bright orange half-moon at the cuticle is halloween reduced to its two signature colors without any painted motifs. The half-moon exposes an orange crescent at the base of each nail, creating a retro manicure shape with halloween coloring.
Medium almond keeps the two-tone effect balanced. The tapered shape makes the half-moon crescent visible without eating into the black field too much.
- Paint the orange first, let it dry completely, then apply a half-moon reinforcement sticker at the cuticle before painting the black over it
- Peel the sticker while the black is still wet for the crispest edge
- This is the fastest halloween design on the list — no nail art skills required, just sticker placement
16. Glow-in-the-Dark Accent on Matte Black Coffin
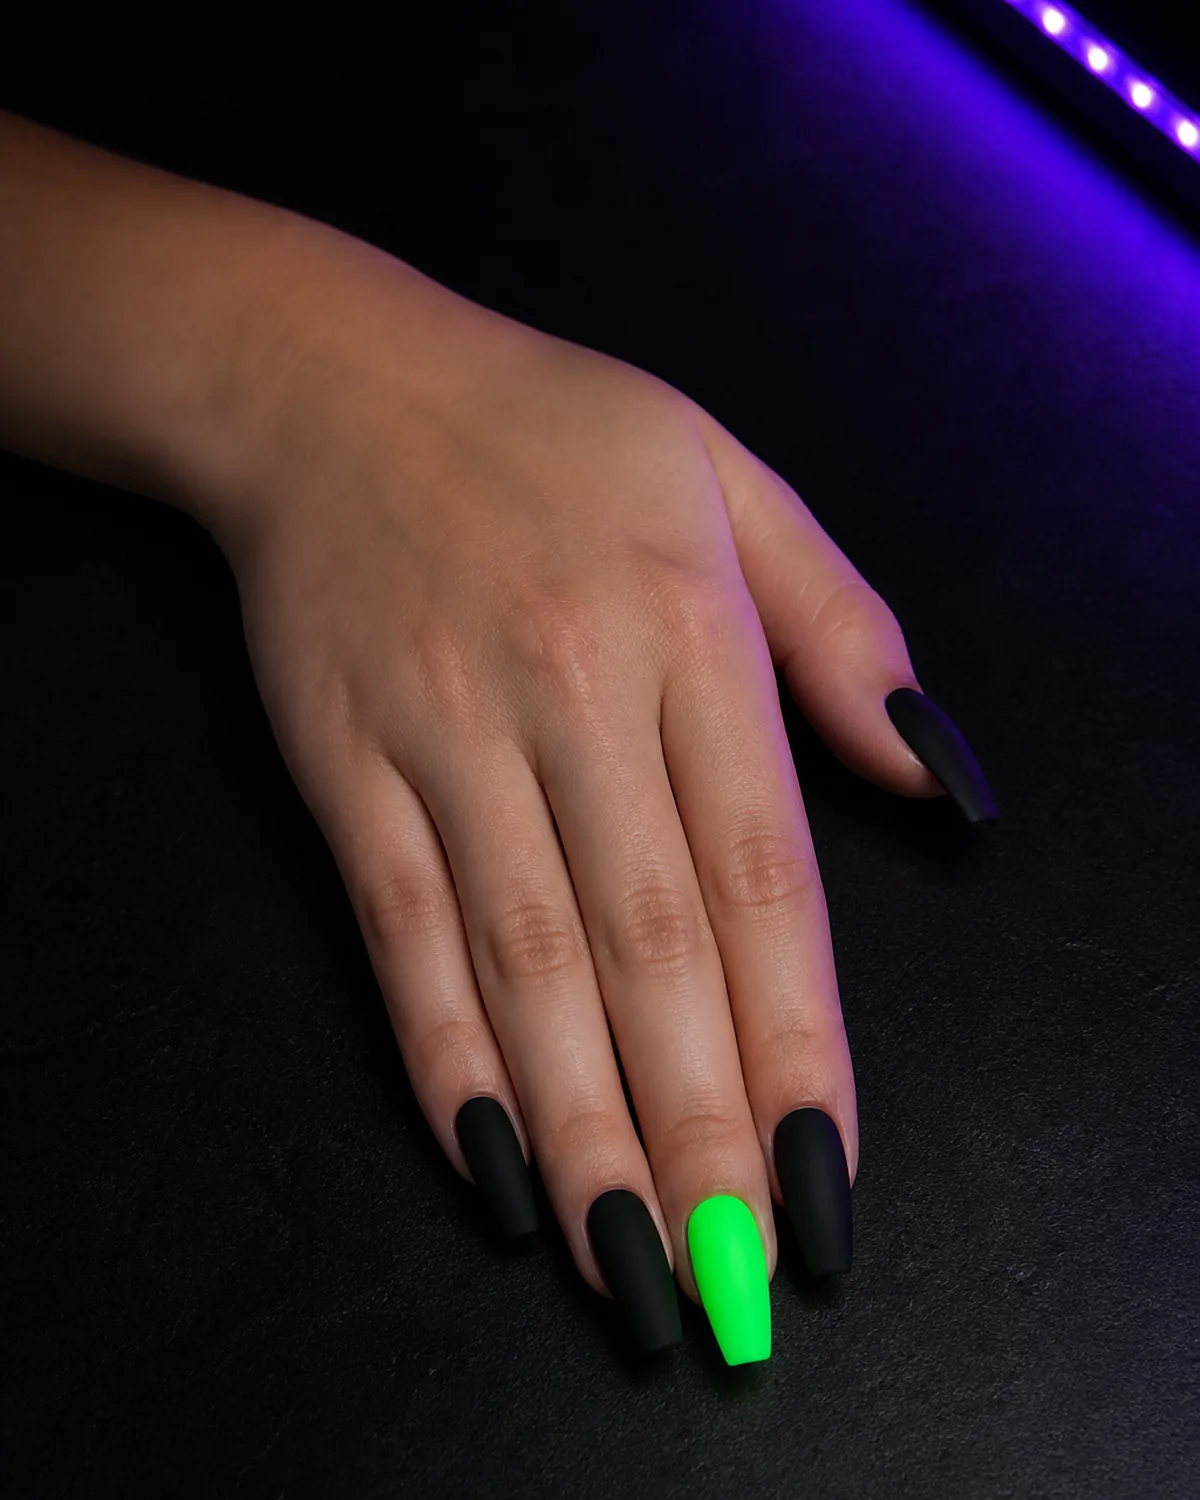
Matte black on most nails with one or two accent nails coated in glow-in-the-dark neon green polish creates a look that transforms after dark. In normal lighting, the green accents read as a simple color pop. Under UV or in darkness, those nails light up.
Coffin nails give the glowing accent maximum surface area. The flat tip reflects UV light more evenly than pointed shapes, which concentrates the glow instead of scattering it.
- Glow-in-the-dark polishes need UV exposure to "charge" — spending a few minutes under direct sunlight or a UV lamp before the party activates the glow
- Apply two or three coats of the glow polish for maximum brightness; thin applications glow weakly
- The glow effect works with the party environment — most halloween events use some black light, which makes this design a built-in accessory
Frequently Asked Questions
Can I do halloween nails at home without nail art tools? Most of these designs need at minimum a thin brush and a dotting tool, which cost a few dollars for a set. Simpler options like the candy corn gradient (sponge technique), black-and-orange half-moon (sticker method), or glow-in-the-dark accent (just painting two nails a different color) require no specialized tools at all.
How early should I start wearing halloween nails? Late September is when seasonal nails start appearing. Most people wear halloween-specific designs for two to three weeks before the holiday. If you get a salon set, plan your appointment for mid-October to hit the fall social calendar and the holiday itself.
Do halloween nails work on short nails? Every design on this list works on short nails with minor adjustments:
- Scale down the art elements proportionally
- Reduce the number of details per nail — one small ghost instead of two, a simpler spider web with fewer cross-lines
- Designs like candy corn gradient, black-and-orange half-moon, and mummy wrap look equally strong on any length
How do I make nail art last longer on halloween nails? The four rules above cover the technique side. Beyond that:
- Avoid hot water on your nails for the first few hours after painting — heat softens polish and weakens adhesion
- Wear gloves for cleaning or dish washing during the week before halloween
- Re-apply top coat every two days over the art to reinforce the seal
What is the easiest halloween nail design for beginners? Ranked from simplest to most complex:
- Black-and-orange half-moon — sticker placement, no freehand
- Glow-in-the-dark accent — paint two nails a different color
- Ghost French tips — white blobs with dot eyes, imperfections are fine
- Candy corn gradient — sponge three colors, no precision needed
- Spider web accent — steady hand for fine lines, but only one nail

Sloane Avery edits Styvea, where she shares nail design ideas, shapes, colors, and at-home manicure how-tos for anyone who loves a good manicure. Every guide is reviewed for clarity, usefulness, image accuracy, and Pinterest-to-page alignment before publication. Visit the About page.